Introduction
Microsoft Dynamics 365 Customer Service is an enterprise-grade solution designed to manage and streamline customer support operations. It provides tools for case management, omnichannel engagement, and service analytics to enhance customer interactions. This integration connects to MoEngage via Microsoft Power Automate, allowing real-time service data (like case creation or resolution) to flow from D365 to MoEngage. The primary benefit is the ability to trigger highly contextual, personalized campaigns from MoEngage based on live customer service activities.Key Features/Functionality
With this integration, you can:- Synchronize contacts and accounts from D365 Customer Service to MoEngage.
- Import service activities like case creation, resolution, and SLA updates as behavioral events.
- Capture CSAT, NPS, and other feedback data as events for segmentation.
- Trigger contextual campaigns based on support interactions and case lifecycle events.
Sync Modules
The following table outlines the data sync for each D365 Customer Service module:| Module | MoEngage Sync Type |
|---|---|
| Contacts | Users |
| Cases | Events |
| CSAT/SLA | Events |
| Onboarding (Custom) | Events (custom) |
| Custom Entities | Events (custom) |
Use Cases
- Case-Based Engagement: When a new case is created in D365, instantly push the data to MoEngage to trigger a confirmation email with the case number and expected resolution time.
- Resolution & Feedback: Once a case is marked “Resolved” in D365, trigger a CSAT or NPS survey via a MoEngage campaign to capture immediate feedback.
- SLA & Escalation: Monitor SLA status updates. If an SLA is “Nearing Breach,” trigger a proactive update campaign to the customer and an internal alert to the support manager.
- Feedback-Driven Journeys: When a low CSAT score is received from a survey, automatically add the user to a specific re-engagement journey in MoEngage and create a follow-up task in D365.
Step-by-Step Integration Guide
PrerequisitesAdmin access to Power Platform and D365 Customer Service environment.
Step 1: Get Your MoEngage Endpoint
- Contact the MoEngage Support Team and raise a request for a dedicated integration endpoint.
- In your request, specify: The common identifier you’ll use to link profiles (email address, external_id, or D365 GUID).
- MoEngage will provide you with:
- Dedicated Webhook URL (format:
https://api-0X.moengage.com/v1/partner/d365-service/{events/users}/?configName={config_name}) - Configuration name for your integration.
- Dedicated Webhook URL (format:
Step 2: Create Power Automate Flow
All flows for this integration use the Microsoft Dataverse connector. For a detailed overview of how this connector works, see the official Microsoft Dataverse documentation.- Open Power Automate.
- Click Create > Automated Cloud Flow.
- Name the flow:
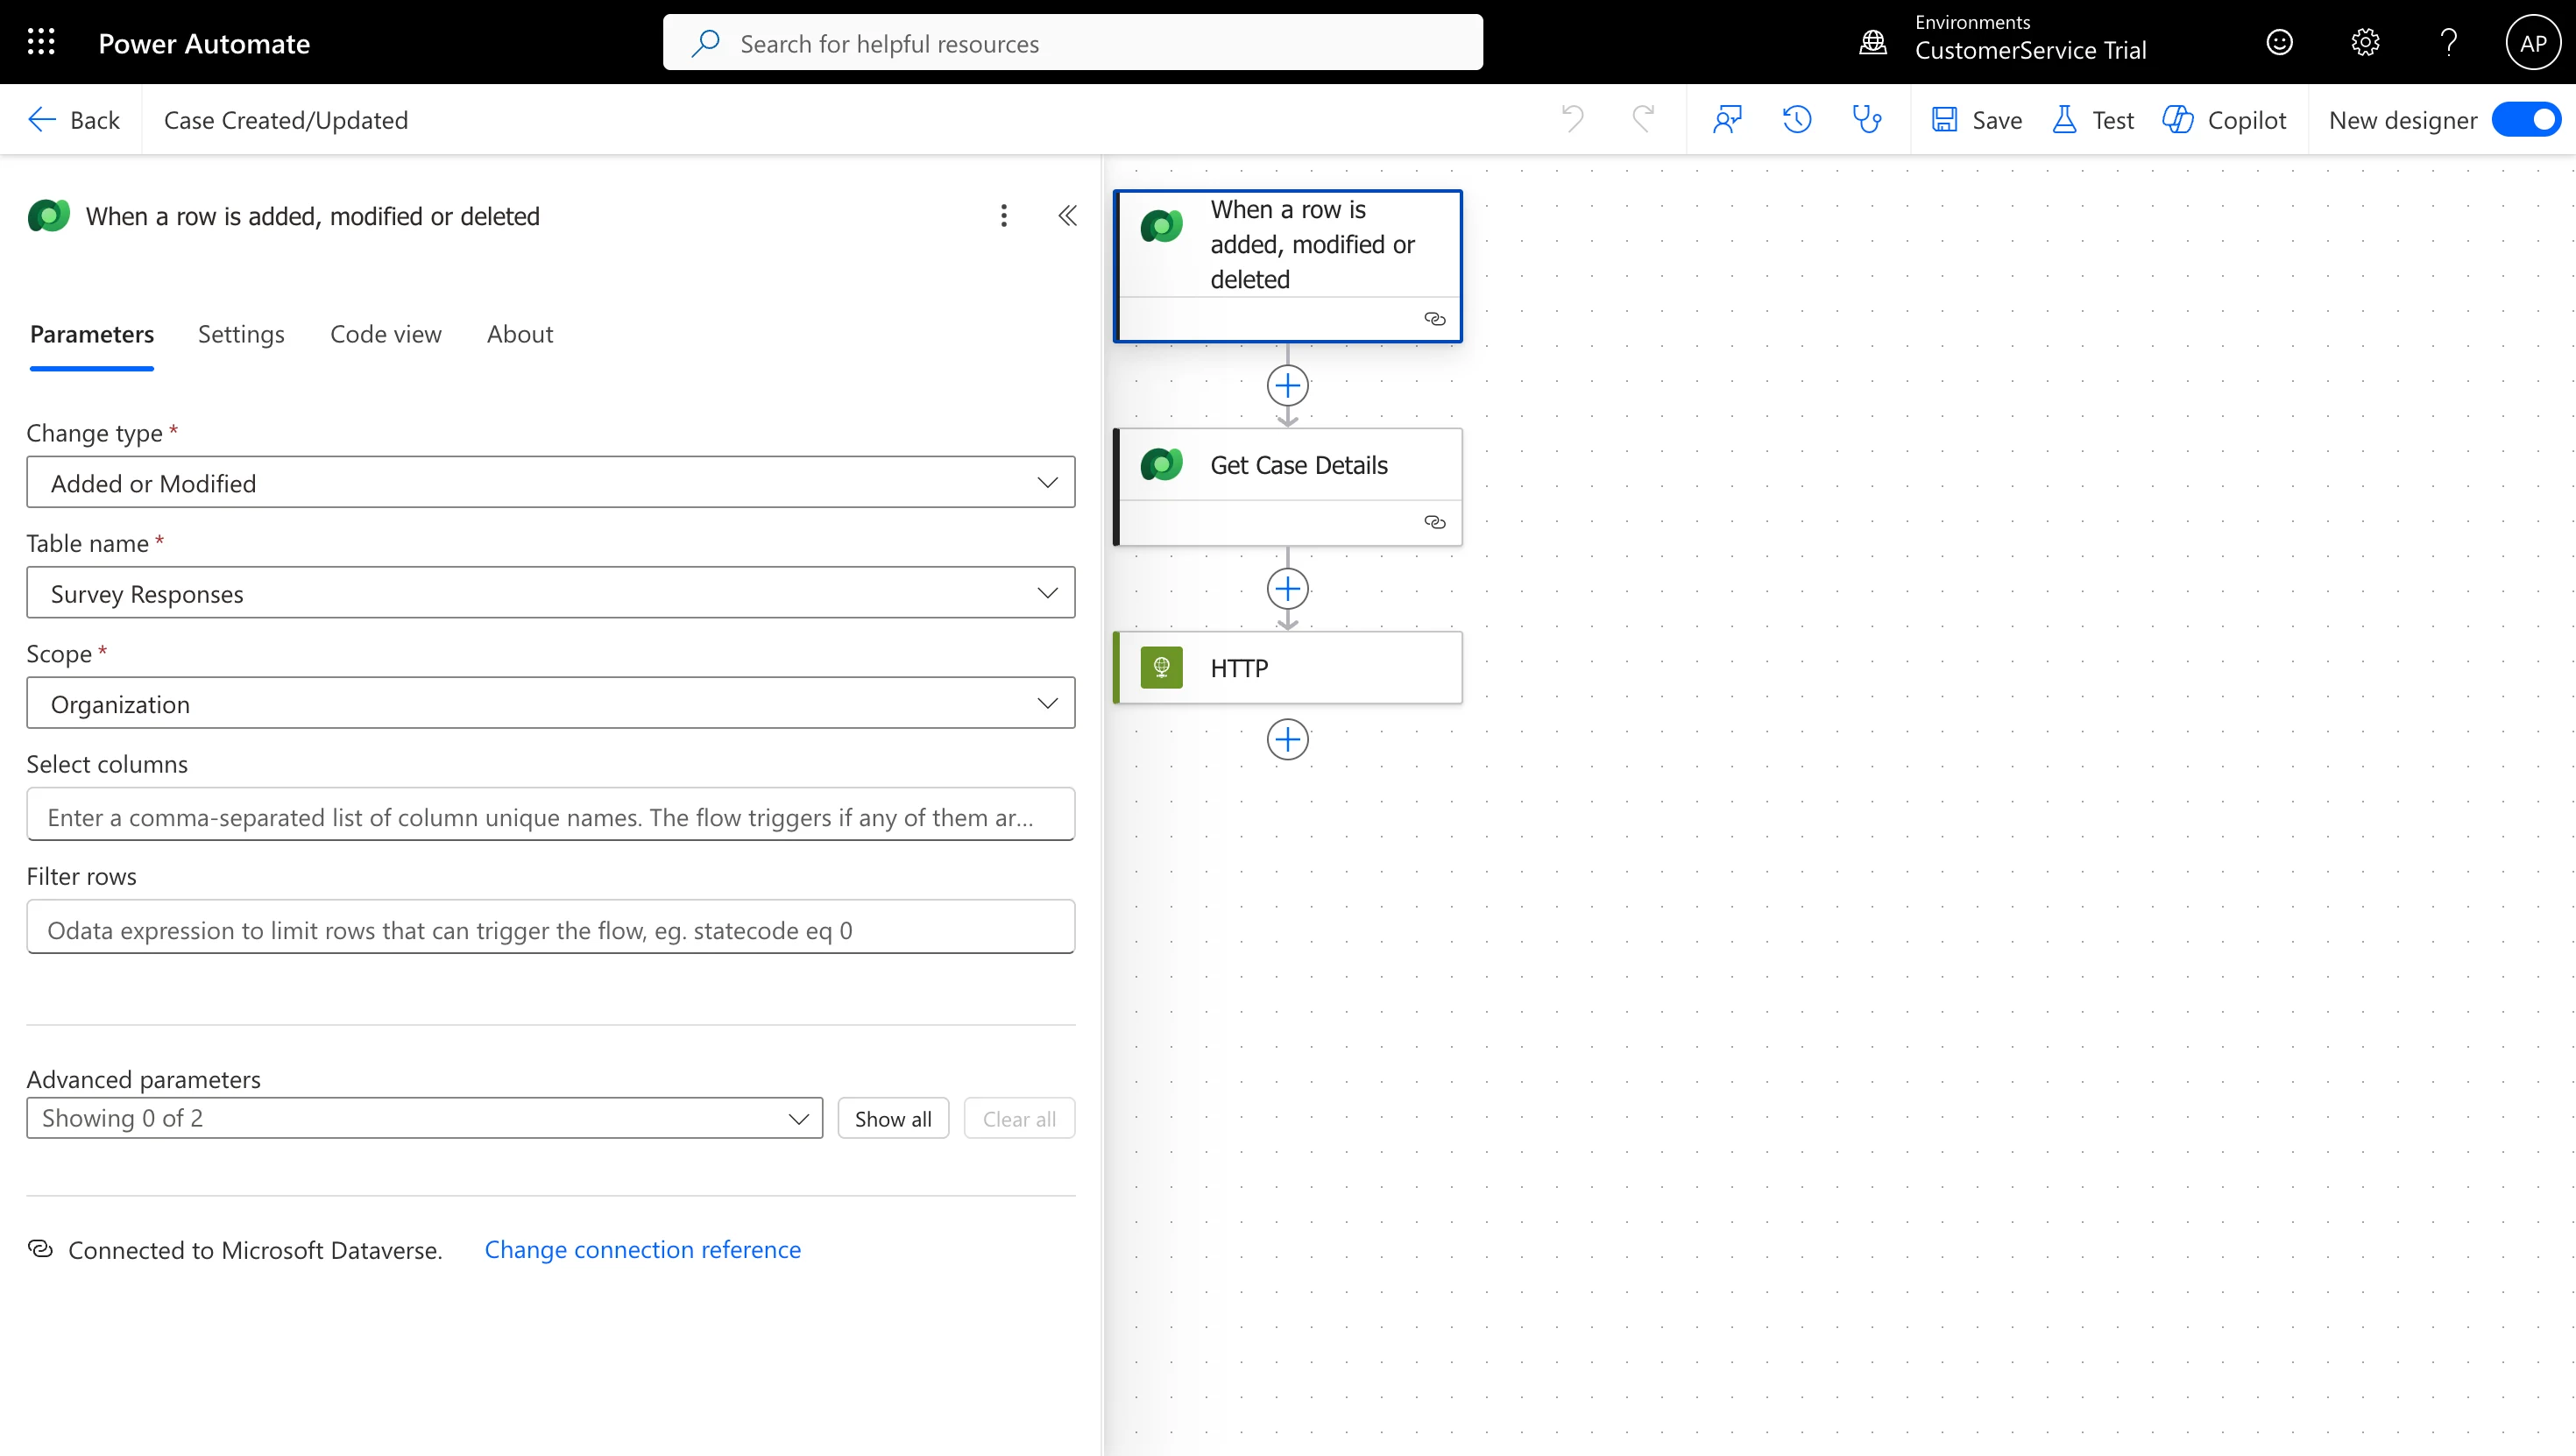
D365 - Sync [Entity] to MoEngage(e.g.,D365 - Sync Case Created to MoEngage). - Select trigger: When a row is added, modified or deleted (Dataverse).
- Configure trigger details:
- Change type: Select Added, Modified, or Added or Modified based on the payload.
- Table name: Select the entity (e.g., Cases, Contacts, SLA KPI Instances).
- Scope: Organization.
Which Trigger to Use and When (Your Scenarios)
You will use the same trigger (When a row is added, modified or deleted) for all your scenarios, but you will configure it differently each time.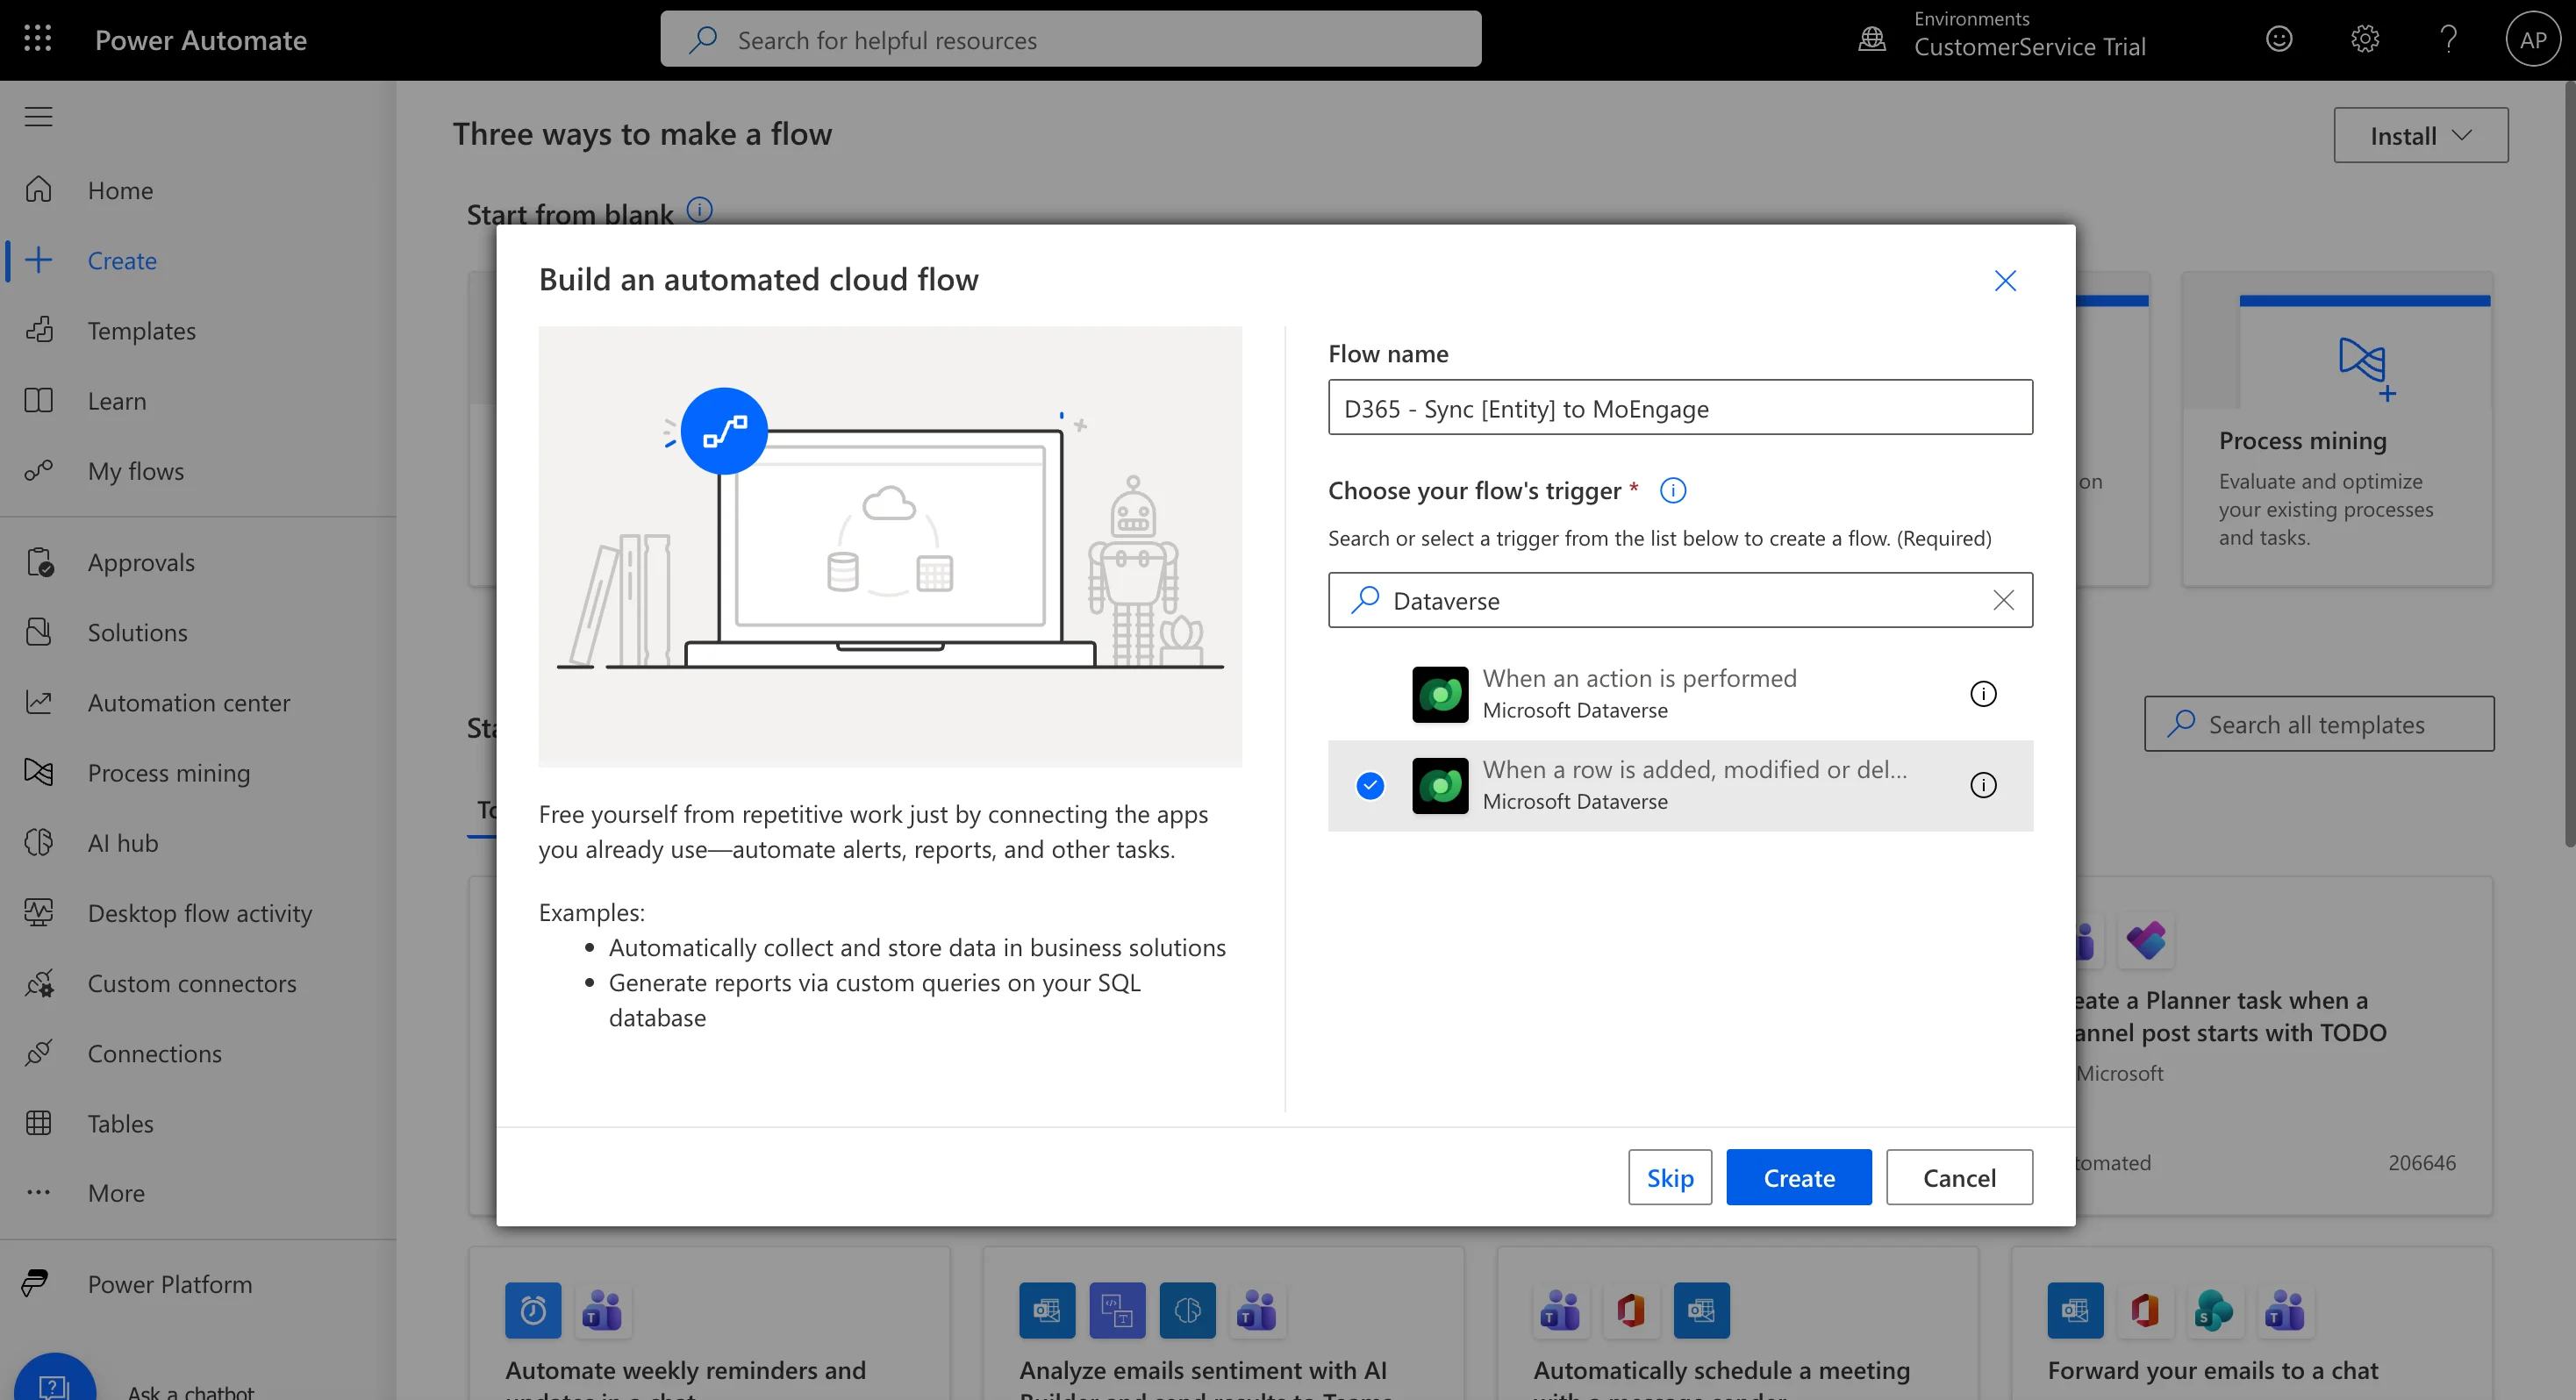
1. Case Created/Updated (and User Profile Sync)
Goal: Send an event and the customer’s details when a new case is logged/updated. Trigger Configuration:- Change type: Added
- Table name: Cases (or incident)
2. SLA Breach / Warning
Goal: Send an event when an SLA status changes to “Nearing Noncompliance” or “Noncompliant.” Trigger Configuration:- Change type: Added or Modified
- Table name: SLA KPI Instances
3. CSAT Survey Submitted
Goal: Send the customer’s score and feedback after they submit the survey. Trigger Configuration:- Change type: Added
- Table name: Survey Responses
Step 3: Configure HTTP Webhook Action
- Click New Step > Select HTTP.
- Fill in the following:
Field Value Method POST URI Enter the Dedicated Webhook URL provided by MoEngage. Headers Authorization: Basic [Base64(Workspace_ID:API_Key)]Content-Type: application/jsonBody Use sample payloads below.
Generating the Basic Authentication Token
- Get your Basic Token by using an online Basic Auth Header Generator tool.
- Username: Your MoEngage Workspace ID (found in MoEngage Dashboard >> Settings >> APIs).
- Password: Your MoEngage Data API Key (found in MoEngage Dashboard >> Settings >> APIs).
- The tool will generate the
Basic {base64_encoded_credentials}value, which you will paste into the Authorization header.
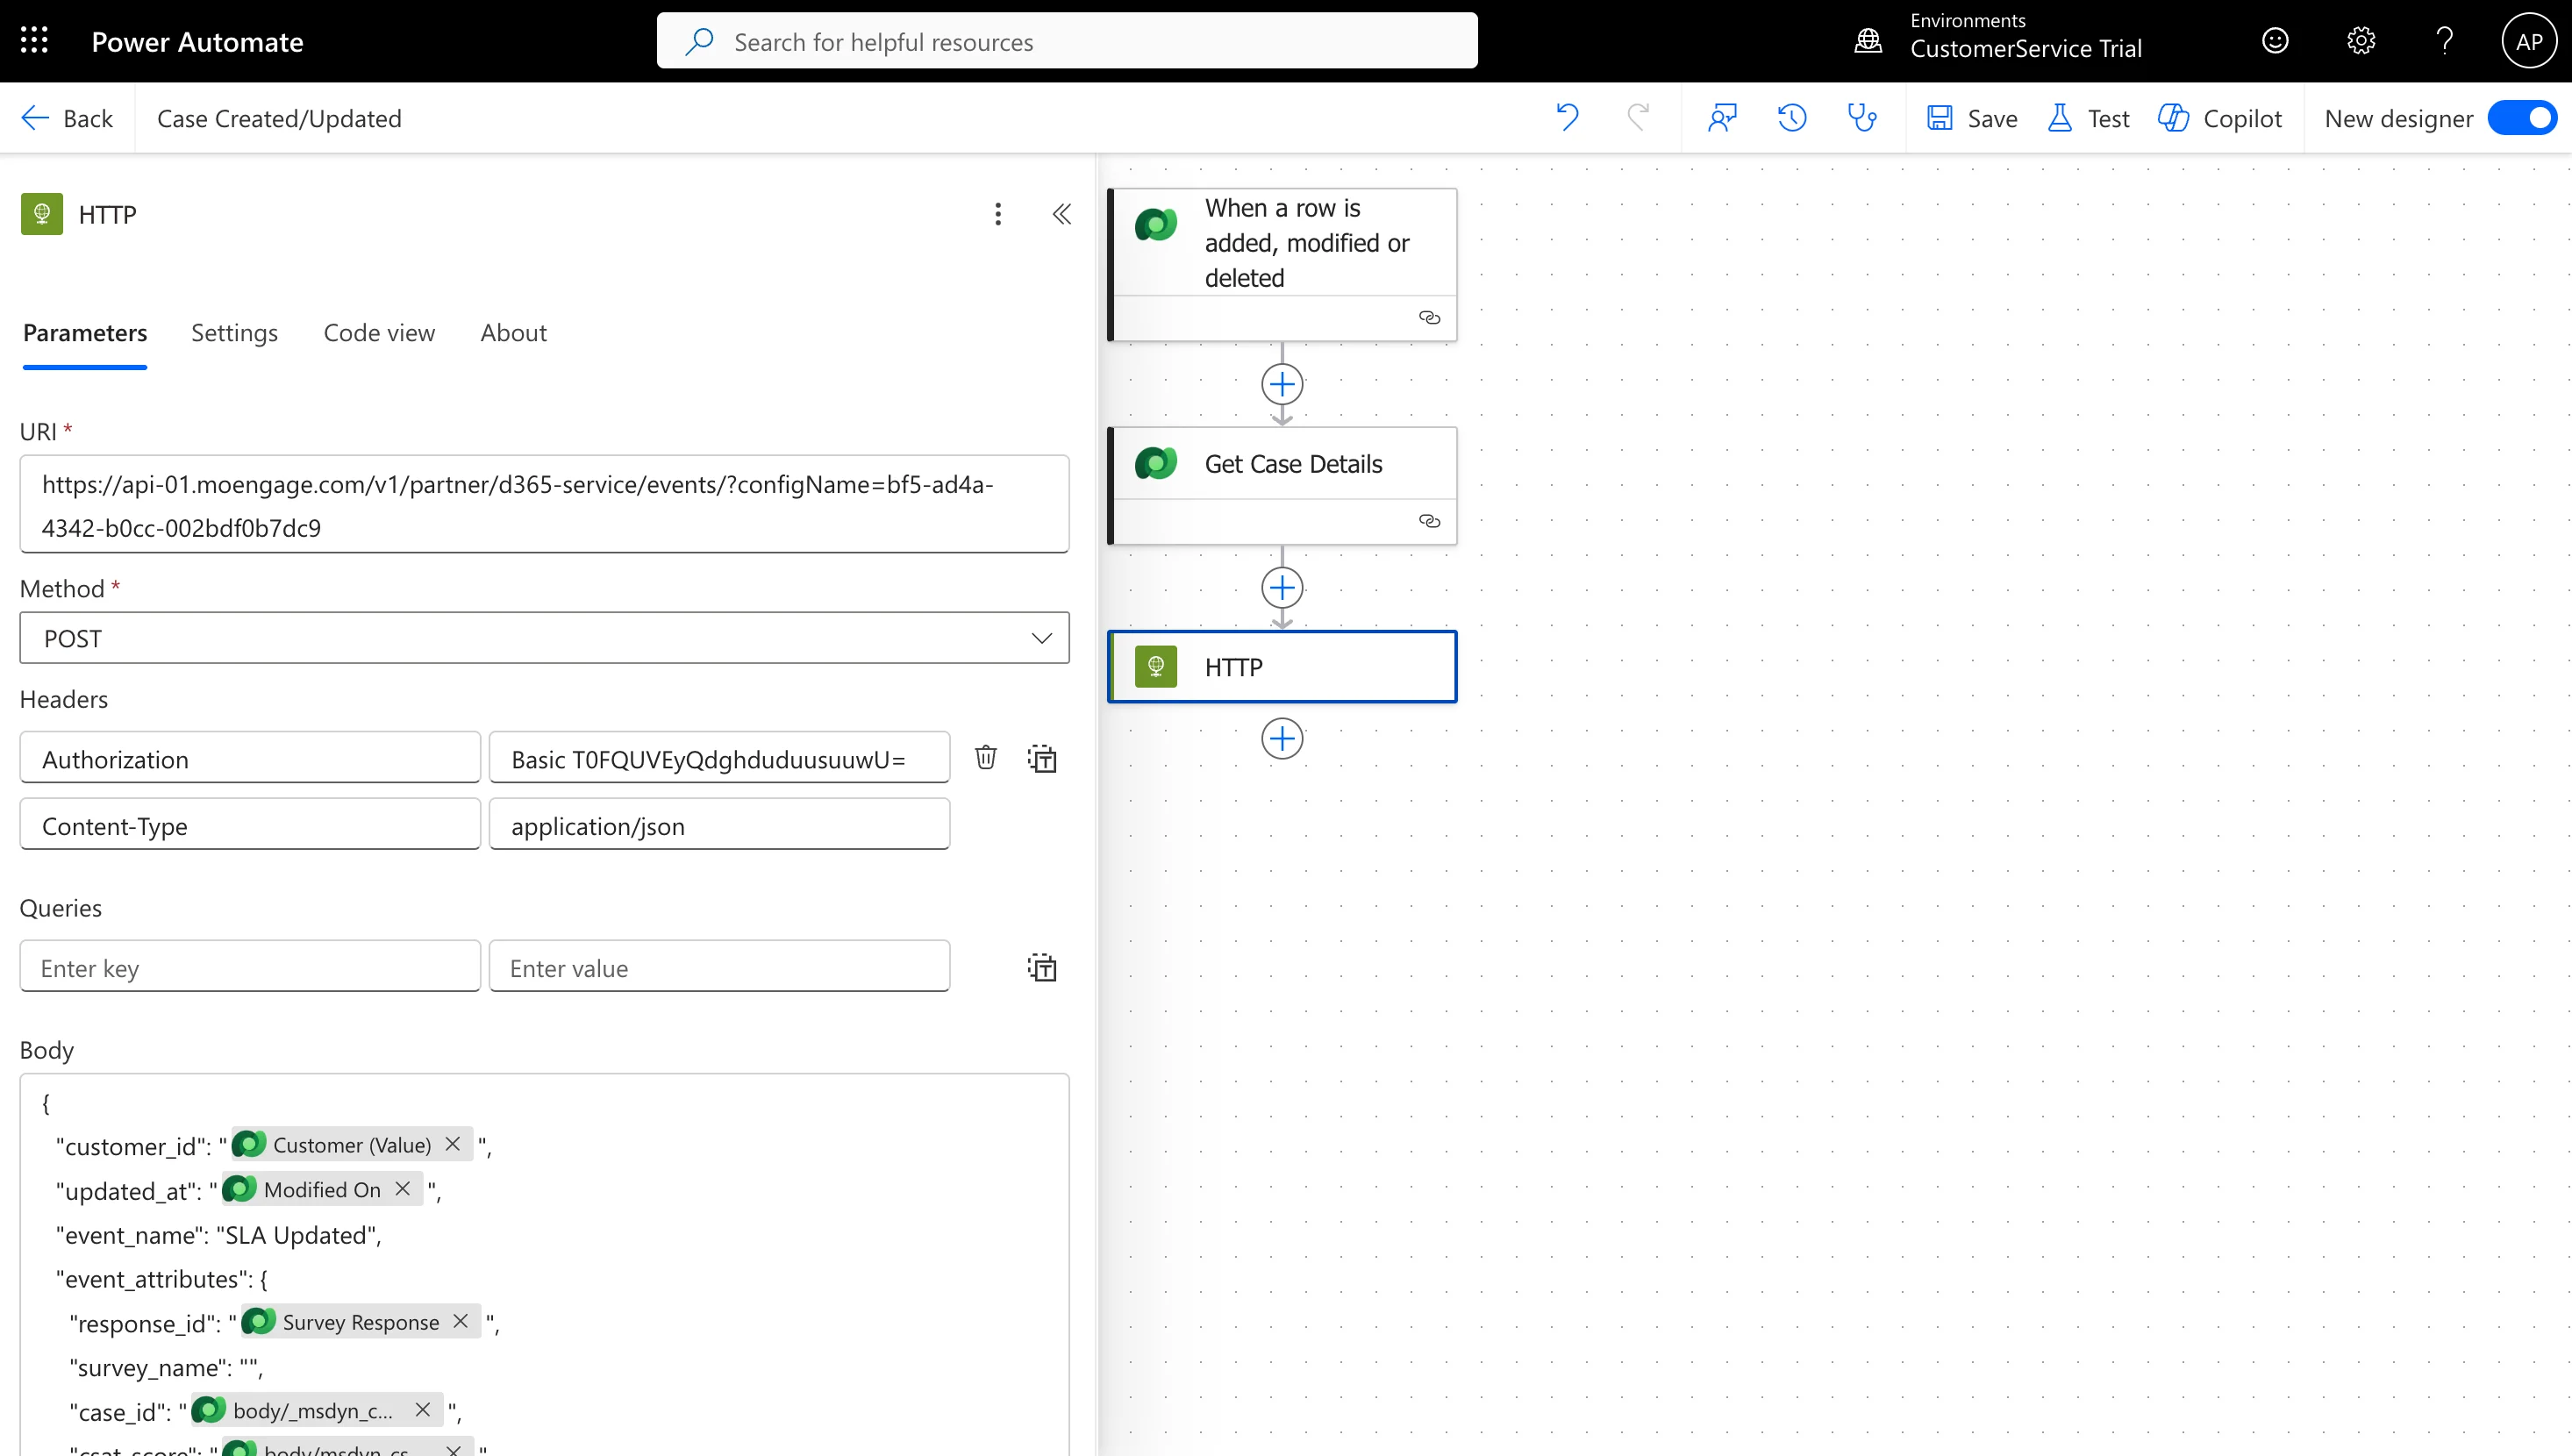
Step 4: Add Request Body Payload
Copy the appropriate payload template below and paste into the HTTP action Body field. Replace placeholder values with dynamic fields from D365 using Power Automate expressions. To add dynamic fields, click on the Body field and select Dynamic content > browse available D365 fields.Sample Payloads
Case Created/Updated (with User Upsert)
Use this payload to create an event and create/update the user’s profile in MoEngage. This is the only payload that needs to send the fulluser_attributes.
Trigger Configuration:
- Change type: Added or Modified
- Table name: Cases
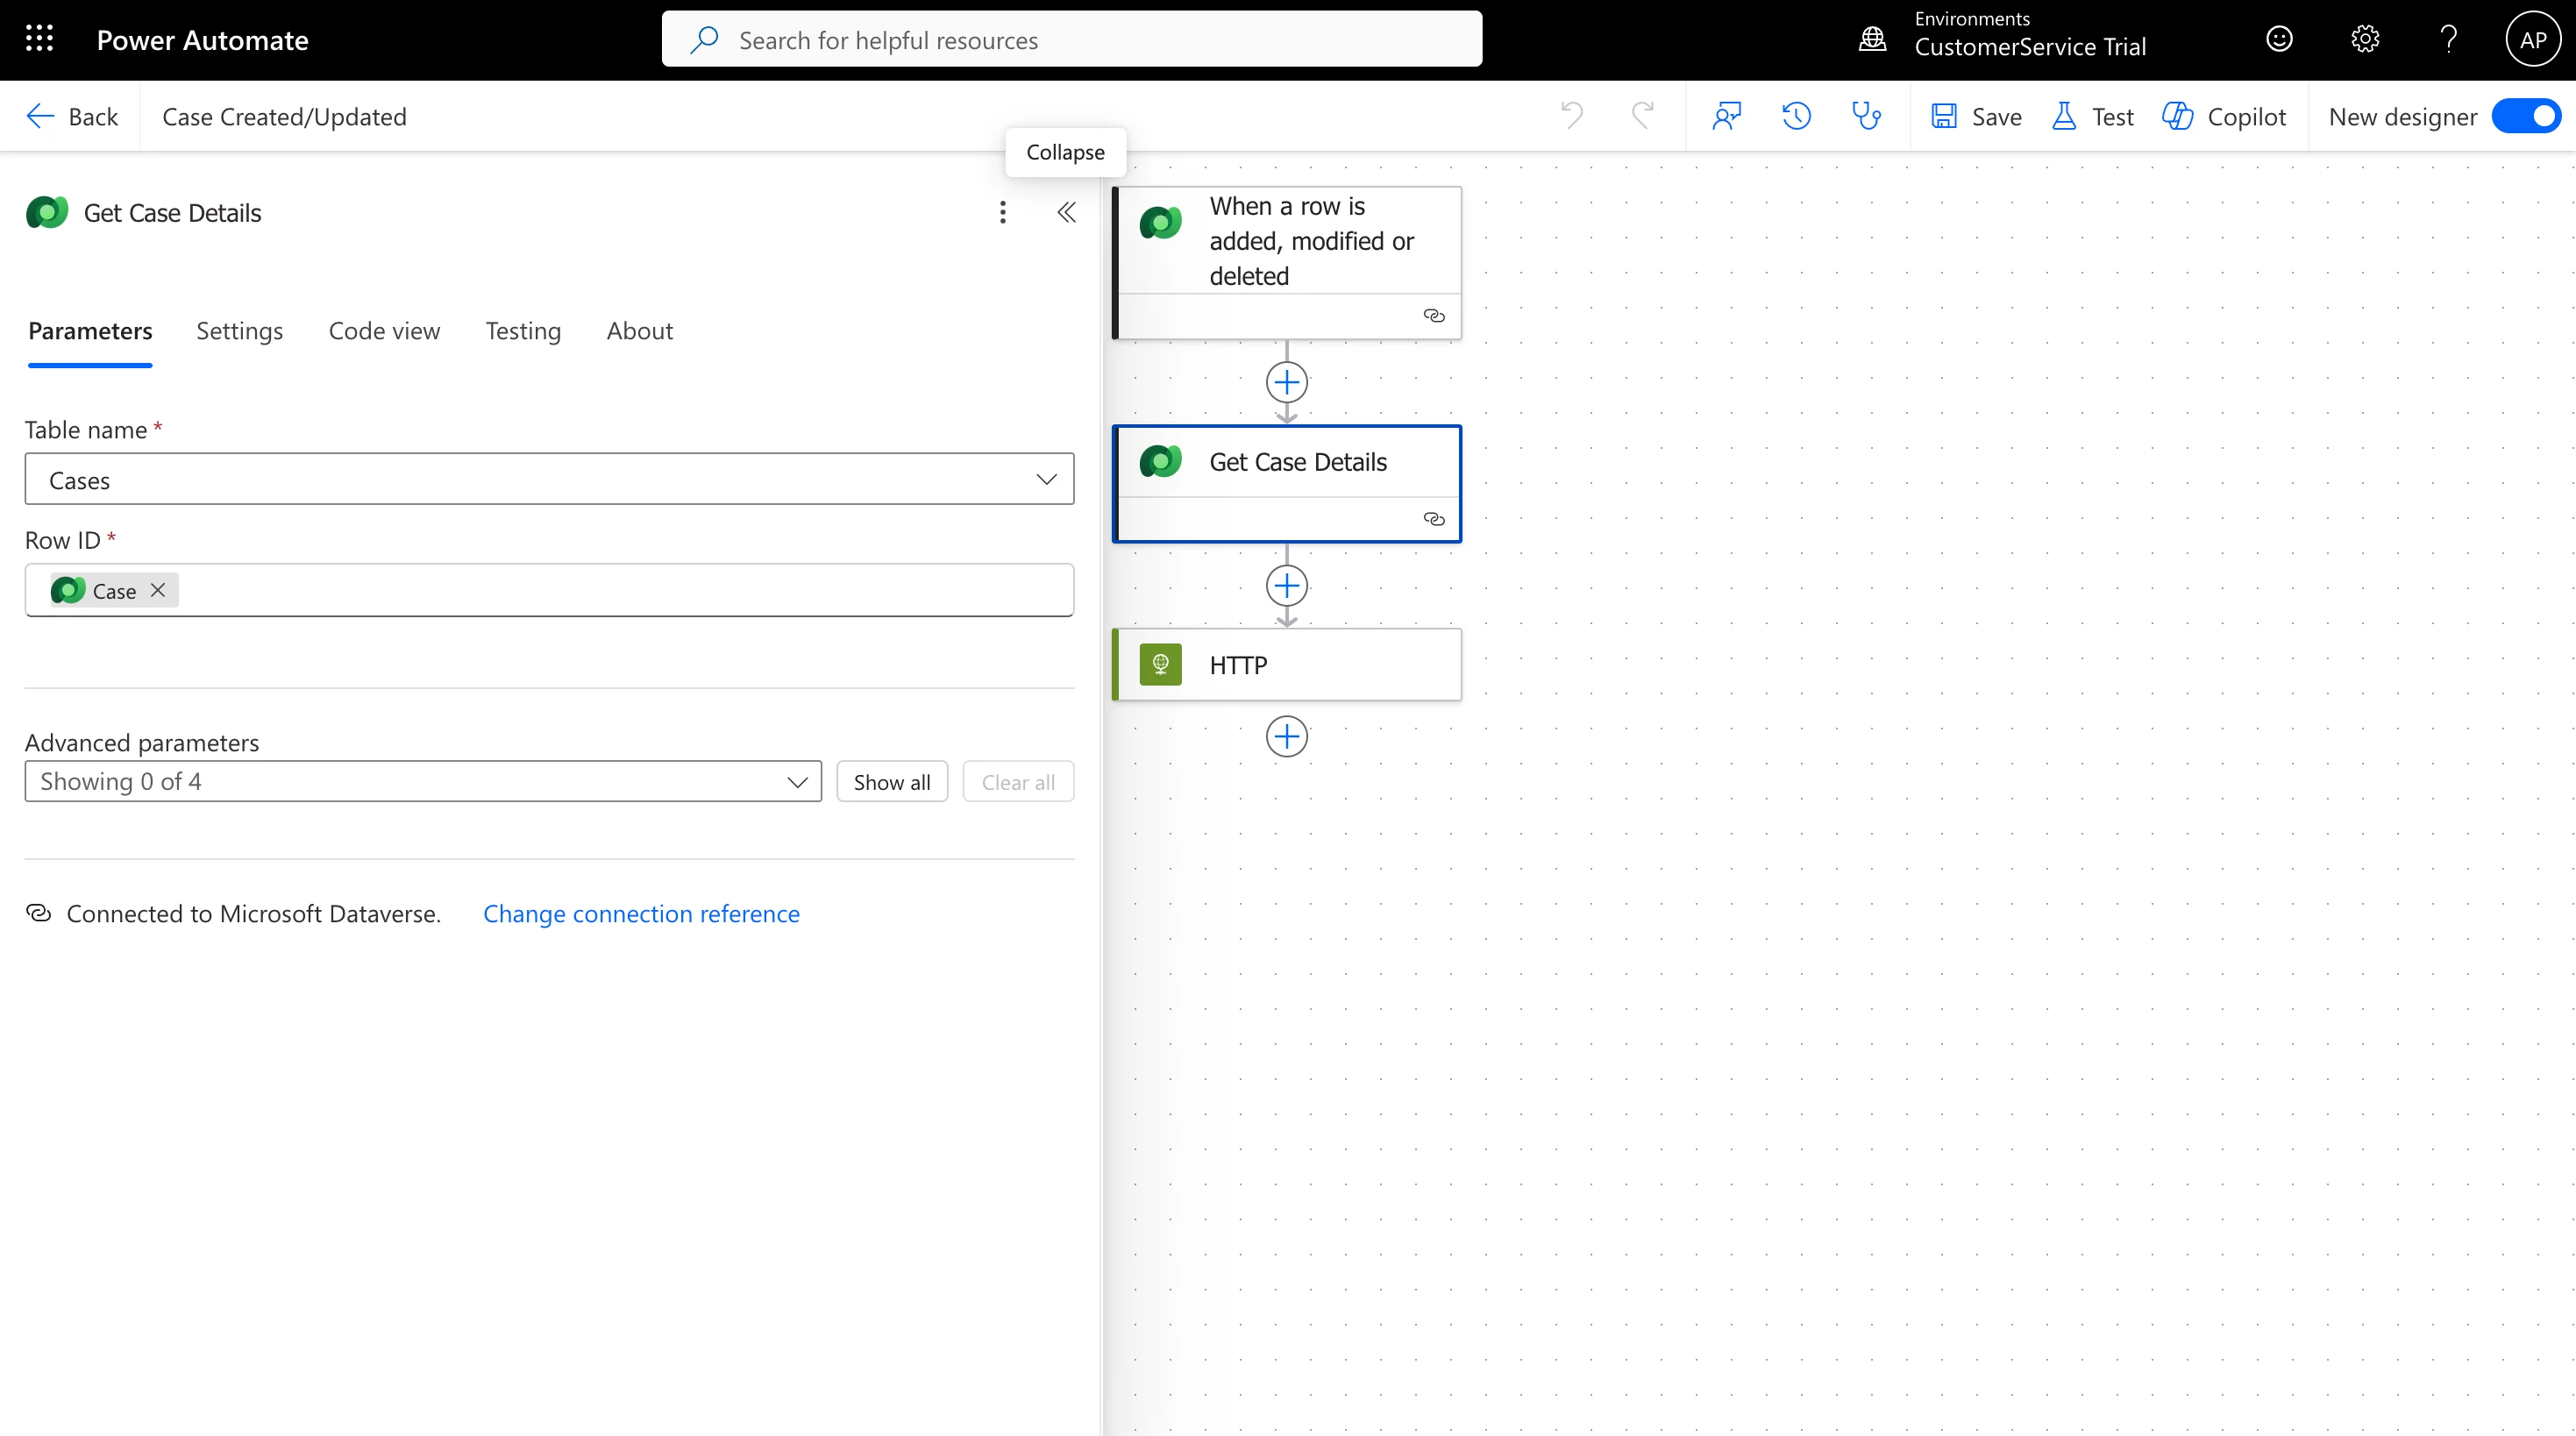
NoteThis payload requires a “Get row by ID” (Dataverse) step. Add this step before the HTTP action to fetch the Contact’s details (email, phone, etc.) using the
_customerid_value from the Case trigger. Name this step Get_Customer_Details.Case Created/Updated (Without User Upsert)
Use this payload to send an event without updating the user’s profile in MoEngage. Trigger Configuration:- Change type: Added or Modified
- Table name: Cases
NoteThis payload does not require any additional Dataverse steps since it only sends event data without user attributes.
SLA Status Updated (Event)
Use this payload to send an event when an SLA status changes (e.g., to “Nearing Noncompliance” or “Noncompliant”). Trigger Configuration:- Change type: Added or Modified
- Table name: SLA KPI Instances
NoteThis payload requires a “Get row by ID” (Dataverse) step. Add this step before the HTTP action to get the parent Case (using
_regarding_value as the Row ID) and retrieve its _customerid_value. Name this step Get_Case_Details.Survey Response Received (Event)
Use this payload to send CSAT/NPS scores and feedback comments as an event. Trigger Configuration:- Change type: Added
- Table name: Survey Responses (or
msdyn_surveyresponse/ Customer Voice entity)
Custom Onboarding Status Updated (Event)
Use this payload for a custom entity (e.g.,cr123_onboarding). This sends an event when a customer’s onboarding status changes.
Trigger Configuration:
- Change type: Modified
- Table name: Onboardings (or your custom entity schema name)
- Select columns:
cr123_statuscode(This ensures the flow only runs when the status field changes, saving flow runs).
Required Fields
All payloads must include these fields (keys) for proper data processing in MoEngage:| Field | Description | Required |
|---|---|---|
customer_id | Unique identifier to link the user profile. | Yes |
updated_at | Timestamp of the event. | Yes |
event_name | Event type (e.g., “Case Created”, “SLA Updated”). | Yes (for all events) |
event_attributes | Event-specific details (case ID, status, etc.). | Yes (for all events) |
user_attributes | Custom key-value pairs (email, name, etc.). | Yes (for User Upsert), No (for other events) |
Data Mapping Guidelines
- Unique Identifier (
customer_id): Use a consistent, immutable identifier to link user profiles between D365 and MoEngage. This is critical for data merging and preventing duplicate user profiles. Common options:- Email address (if unique)
- D365 record GUID (
contactid,leadid, etc.) - External ID (if configured in D365)
- Event Name: Always include a descriptive
event_nameto identify and categorize actions in MoEngage for analysis and segmentation.
Step 5: Test the Integration
- In Power Automate, click Test > Manually.
- Create or modify a test record in D365 to fire your trigger (e.g., create a new Case, update an SLA).
- Monitor the flow execution:
- Check for a successful HTTP 200/201 response.
- Review flow run details for any errors.
- Verify in MoEngage:
- Go to MoEngage Dashboard > Users or Events.
- Search for the test user/event.
- Confirm data appears correctly within 1-5 minutes.