Drive More Push Opt-ins Using Our New Android 13 SDK
Reading Time: 7 minutes
| Bonus reads: |
Late last year, we saw the public release of Android 13. As with all Android versions, Google added many new features and functionalities to the OS. Many of the updates were focused on safeguarding their customers’ privacy.
Since the release, we’ve seen the adoption number gradually increase. Reports suggest that the adoption for Android 13 is just over 5%. Many apps also have started targeting the new OS.
One of the significant changes Android 13 introduced was that apps now have to ask their customers to opt-in to receive any push notifications. For Android versions 12 and before, customers were opted-in by default and had to manually disable notifications in the settings if they wished not to receive them. This step from Google is to cut down on notification spam and improve customer privacy.
To tackle the new changes and empower mobile marketers, we’re excited to announce the new Android 13 SDK. Our new SDK has been built to help you seamlessly drive more push opt-ins while keeping your engagement rates high. Before diving deep into how MoEngage can help, let’s understand how push opt-ins work and its default behavior.
How Do Push Opt-ins Work?
Mobile marketers heavily rely on push notifications as an engagement channel. Data shows that about 85-90% of Android customers opt-in for push notifications.
However, like iOS and web browsers, Android 13 will now require apps to seek permission from their customers to send notifications.
Default Behavior of Android 13 Push Opt-in Prompt
For applications targeting Android 12 or lower, the push opt-in prompt is triggered whenever a notification channel is created. You can configure when the first channel is created.
However, this may not be the best time to show the opt-in prompt for maximum conversions, as customers might first need to spend enough time understanding the value of the app and the various benefits of push notifications. Also, the prompt cannot be triggered again if the user clicks on “Don’t allow”.
For apps targeting Android 13, you can control when and where to trigger the opt-in prompt. You can trigger the prompt multiple times until the customer clicks on “Don’t allow” twice. After this, the only way left for them to opt-in is by enabling notifications from the app settings.
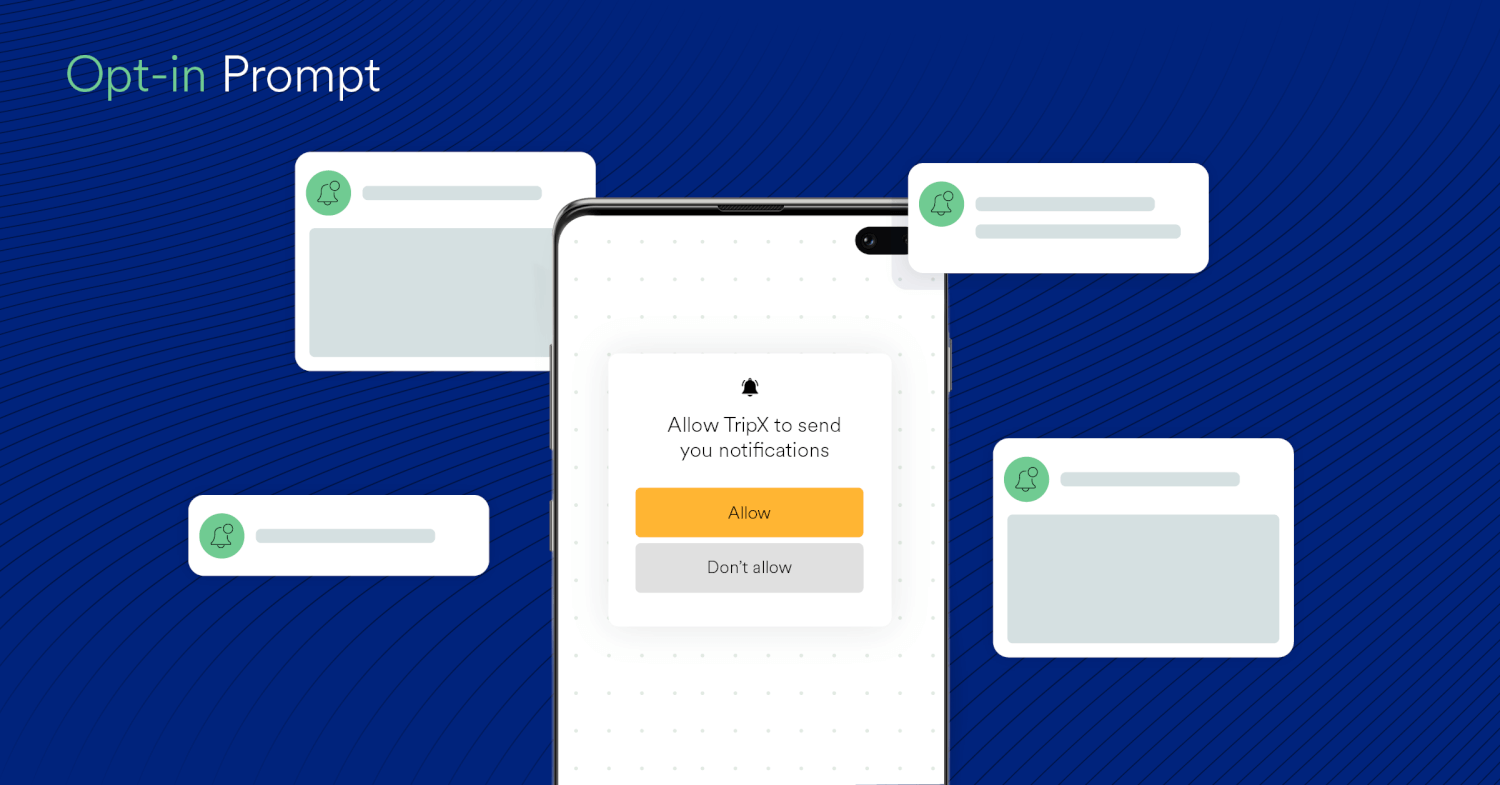 Also, apps can show the opt-in prompt for a maximum of two times. In case a customer opts-out, brands cannot trigger the opt-in prompt again. The only way left for customers to opt-in is by enabling notifications from the app settings.
Best Practices to Improve Opt-in Rates
Let’s look at some strategies that can help you improve opt-in rates –
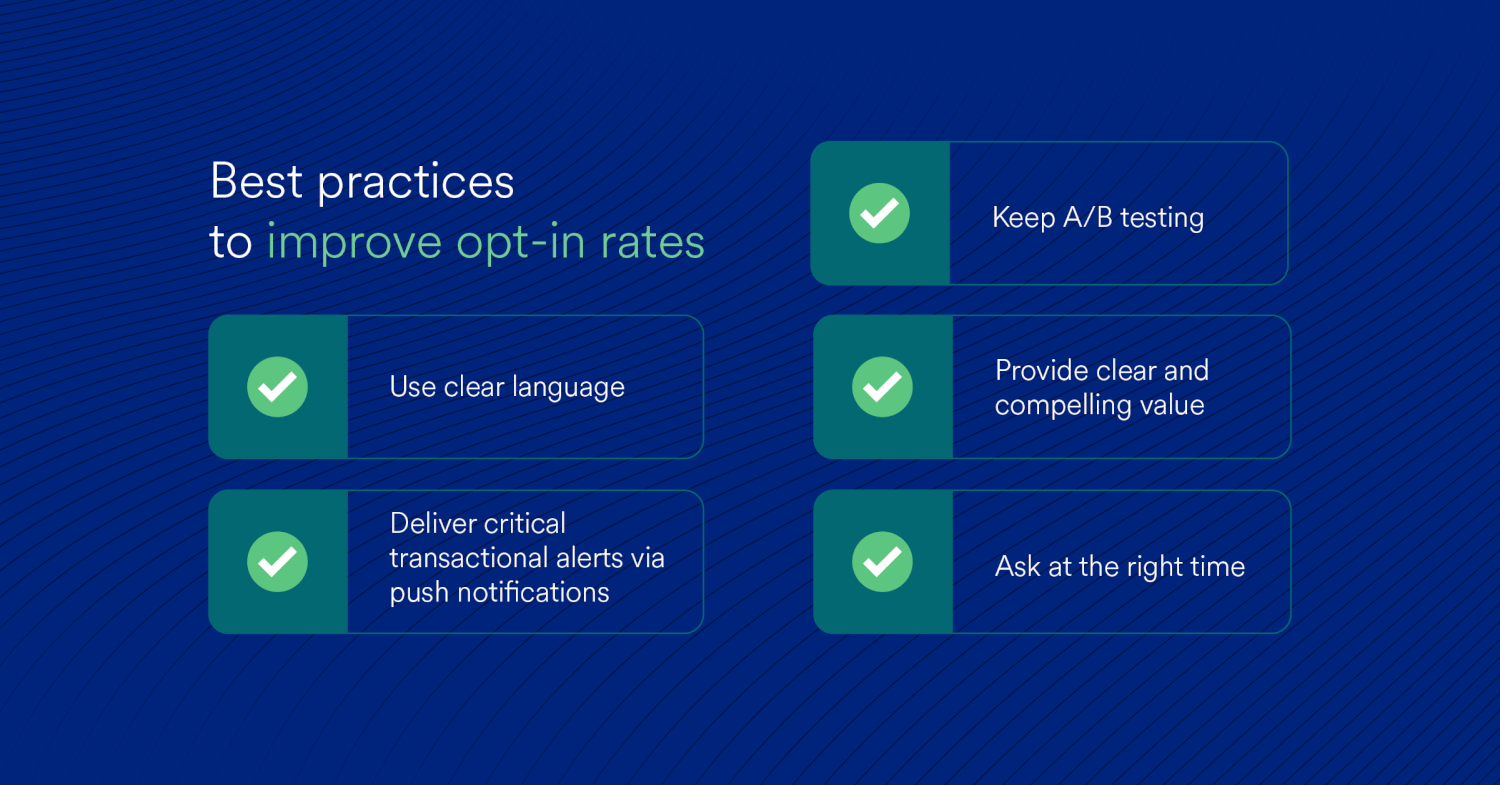
- Ask at the right time – Depending on your app use case and industry, customers might easily accept permission without much convincing. In this scenario, it’s better to trigger the opt-in prompt on the first app open. In any other case, it’s better to delay the trigger.
- Deliver critical transactional alerts via push notifications – Consumers want essential updates like shipping updates, renewal reminders, and more via push notifications. Since consumers have a high preference for push notifications as a critical information delivery channel, marketers can use this opportunity to convince customers to opt-in to receive push notifications.
- Provide clear and compelling value – Most customers opt-out of push notifications in fear of receiving spam. Hence, it’s important to illustrate what notifications they’d receive and their benefits. Setting the expectations right is critical here.
For example, E-commerce apps can call out that they will only trigger notifications about shipping updates, offers, and personalized recommendations. - Use clear language – Try to use simple and straightforward language when explaining why customers should opt-in. Try to include visuals, such as illustrations, to help customers understand the benefits of opting-in.
- Keep testing – Try to monitor reachability continuously and test your opt-in strategies to know which ones are working well and which aren’t.
How Can MoEngage Help in Driving More Push Opt-ins?
Mobile marketers heavily rely on push notifications to drive conversions and revenue. One less subscriber is one less chance to engage and convert them.
So, how does MoEngage help you drive more push opt-ins?
Firstly, it helps you analyze how many of your customers have opted-in and receive notifications and those who don’t.
Tracking and Reachability Monitoring
The first step to drive more push opt-ins is knowing the percentage of opted-in customers. Tracking these metrics is critical to understand whether your opt-in rate is increasing or decreasing.
Further, you don’t want to show push opt-ins to customers who’ve already opted-in and confuse them.
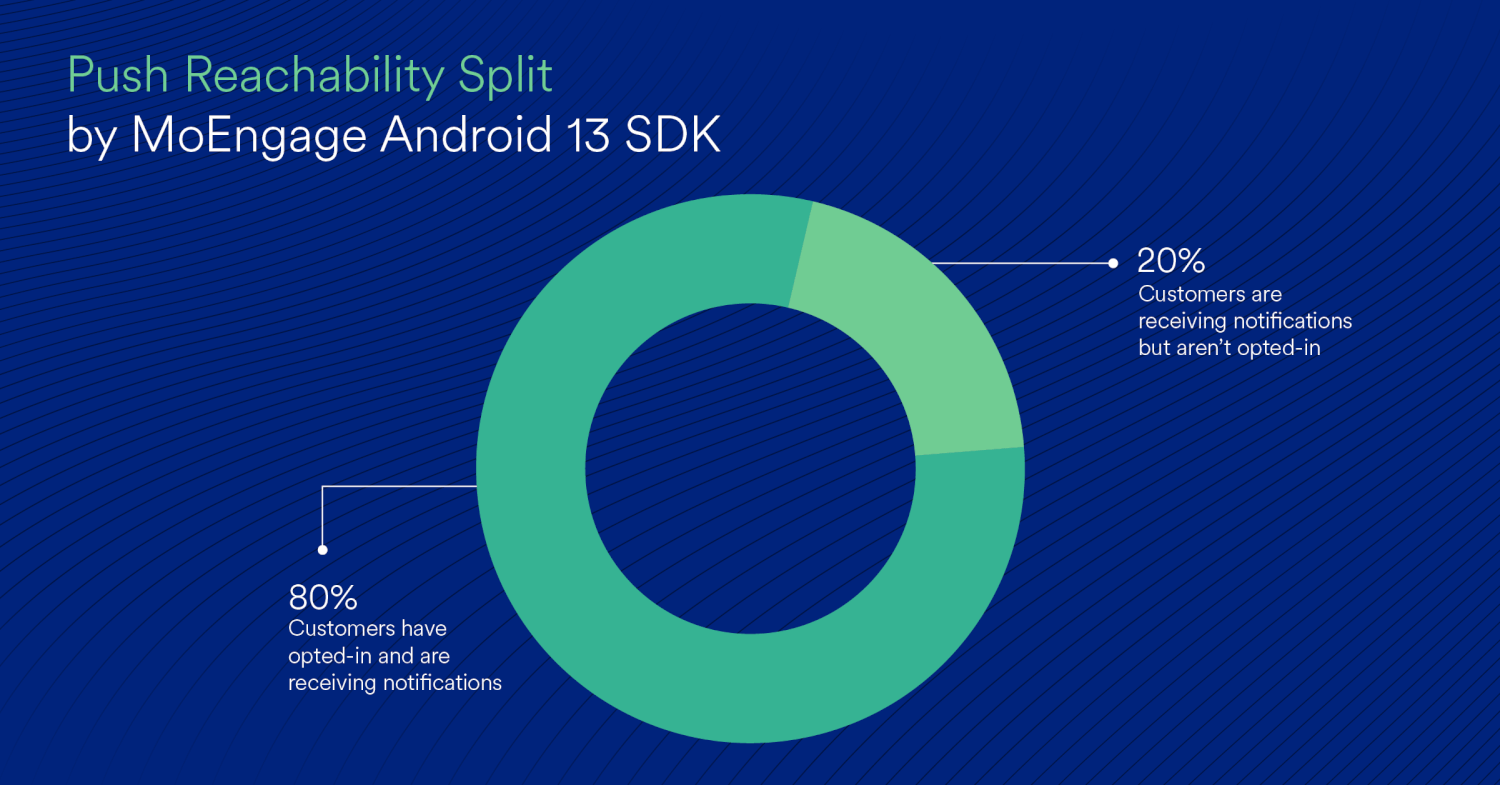
MoEngage SDK solves this by giving you an exact split of customers who have opted-in and opted-out. By monitoring this split, you can quickly identify which strategies are working for you and which aren’t.
Drive More Push Opt-ins by Controlling the Timing and Content
The next step to driving more push opt-ins by controlling the timing of your push opt-in request. Just showing the push opt-in after critical events such as a purchase or on certain pages like “Order tracking” can significantly increase the chances of customers opting-in.
Another way can be using an in-app opt-in prompt. Let’s learn more about both of them –
Control the timing with Self-handled opt-in
Customers are more likely to opt-in on certain pages and after certain events. For example, E-commerce apps can trigger more opt-ins when the customer lands on the “Orders” page. By opting-in, they can receive timely updates about the shipment.
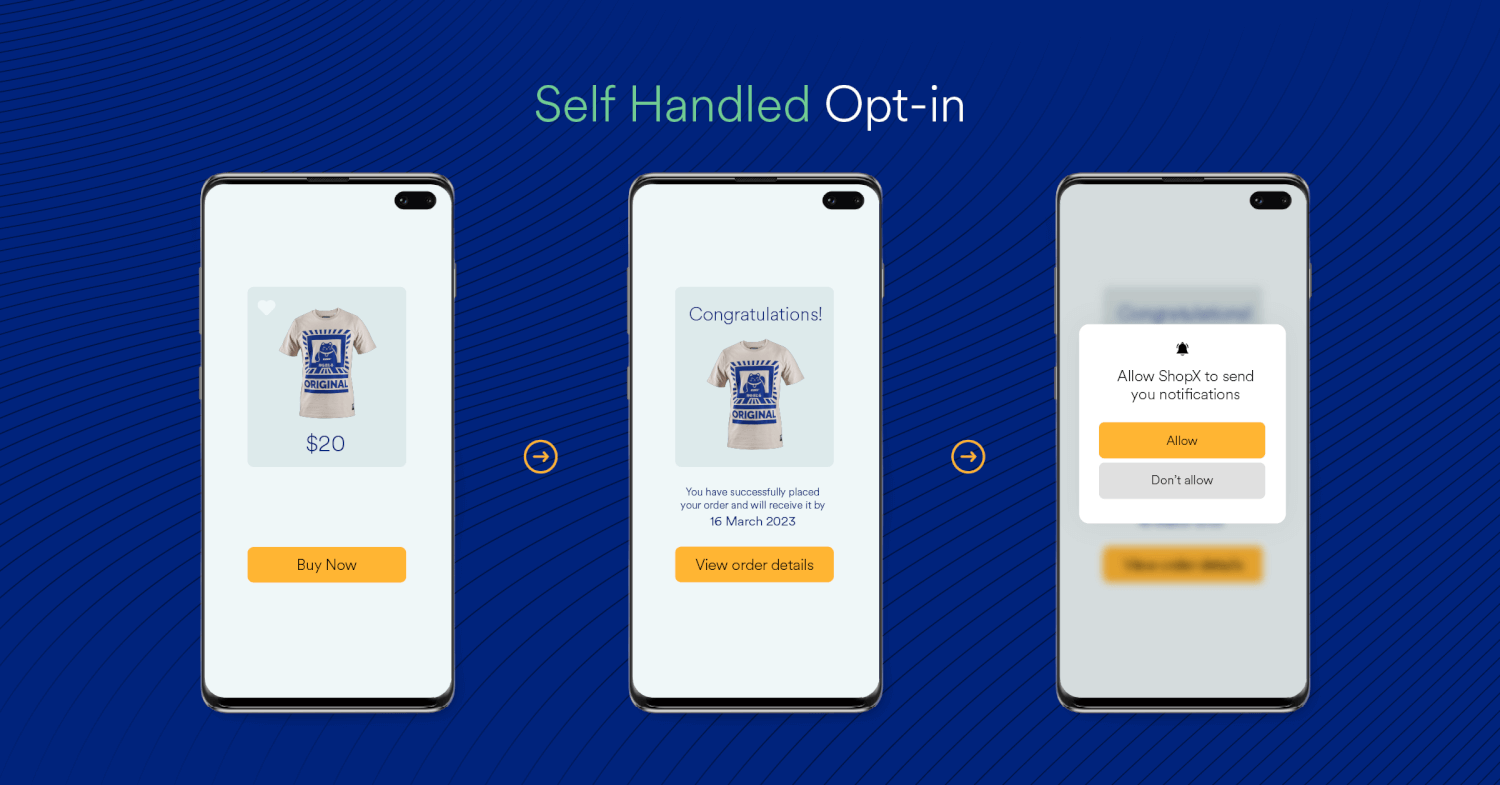 Similarly, stock trading apps can trigger the opt-in when a customer sets a price alert for a particular stock.
The best part is that MoEngage SDK automatically filters out opted-in customers, and opt-ins are shown only to customers who’re yet to opt-in. If customers have opted out, they’ll not be shown the opt-in.
Keep in mind you’re only allowed to display the opt-in prompt to the customer twice. If the customer has rejected or ignored the permission more than twice, you should direct them to the notification permission setting page instead.
Communicate value with Two step opt-in
Android 13 has limitations when it comes to customizing the opt-in prompt. You can’t tweak the copy or add images to the opt-in prompt. In addition, you can show the opt-in prompt only a maximum of two times. Hence, marketers need to be smart about when they ask customers’ permission to send notifications.
Also, wouldn’t it be better to show a in-app prompt illustrating the benefits of opting-in and understanding customers’ preferences first before showing the opt-in prompt? Using MoEngage SDK, you can easily create two-step opt-ins using in-apps like the one showcased below. You can also set it up so that the opt-in prompt is shown only when the customer selects “Yes” in the in-app prompt. Similar to self-handled opt-in, you can control the timing of these prompts. They can be triggered based on the –
- Page views
- Events
- Flows
- Time-based periodic campaigns
For example, when a customer finishes their KYC process, send them a nudge to permit them to receive push notifications so they can get an update as soon as the KYC documents have been verified.
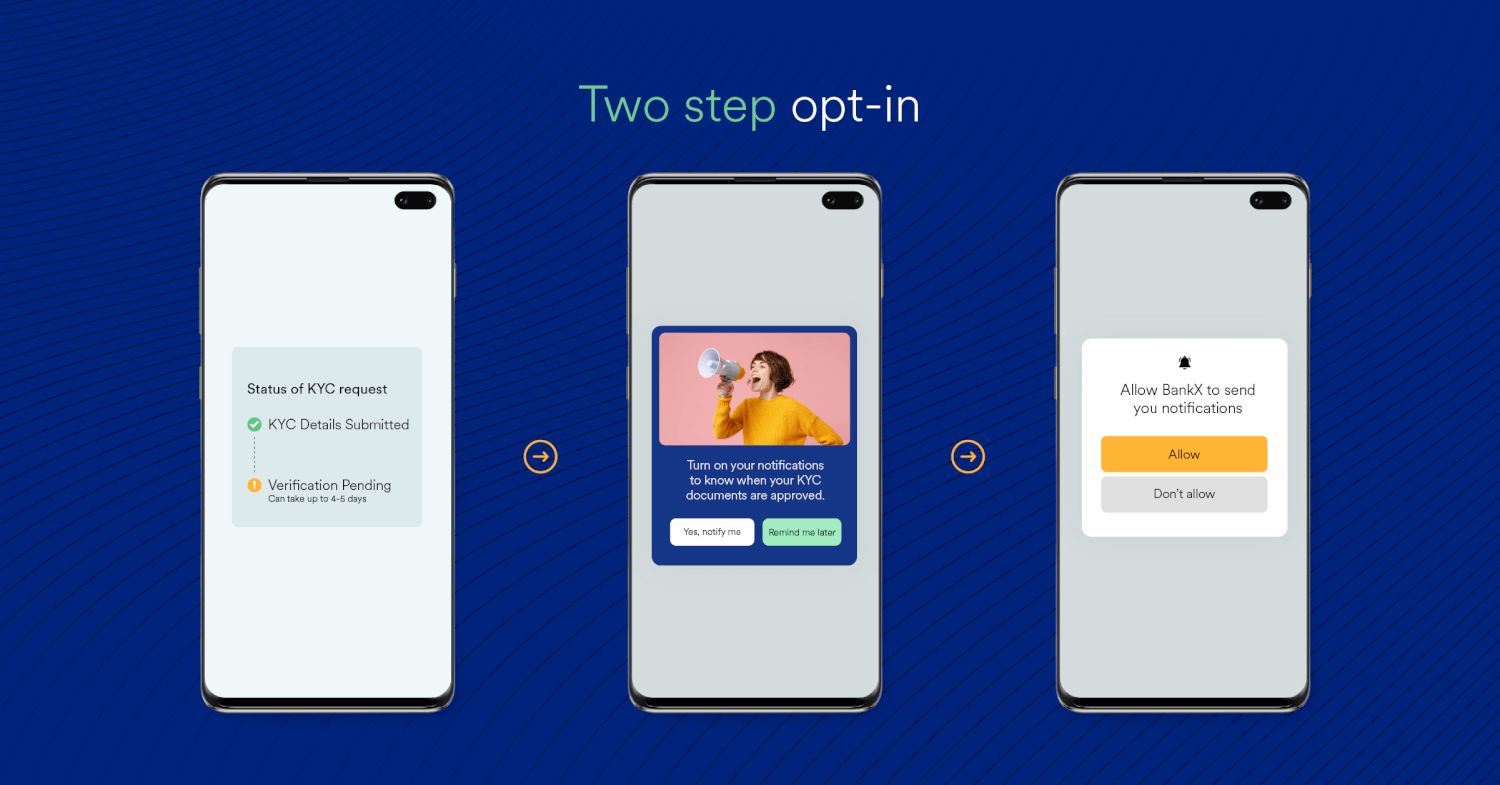
Again, MoEngage SDK automatically filters out opted-in customers, and the prompts would be shown only to those who’re yet to opt-in.
Create your own custom strategy for the best result
Depending on your industry and brand affinity, you can follow certain flows to maintain a high opt-in rate.
For example, if you’re in a niche like Banking, you can trigger a self-handled opt-in on the first app open. Further, for those who don’t convert, you can trigger a two-step opt-in prompt after a delightful moment, like when a customer has placed an order or after the app has been opened a few times. To ensure customers aren’t overwhelmed, you can limit the number of times the opt-in prompt is triggered.
Alternatively, if you think the customer needs time to understand the true value of the app and the benefits of notifications, you can trigger a two-step opt-in prompt in place of a self-handled opt-in prompt on the first app open.
You can also create an opt-in toggle for customers who are opted-in on an internal settings page.
We recommend using self-handled opt-in and two-step opt-in strategies in conjunction. By controlling the timing of the opt-in prompt and by communicating value through the two step opt-in, you have a higher chance of increasing the opt-in rate. These are key factors that influence customers’ decision to opt-in or opt-out.
Final Thoughts – A Challenge and An Opportunity
While moving into a permission-first landscape and reducing the opt-in rate might seem daunting, it also brings in a new opportunity for marketers.
Mobile marketers can effectively communicate the benefits of push notifications from the beginning. This will help build a strong relationship and deliver a superior customer experience. When done right, you’ll see the difference in engagement and conversion rates.
Are you still confused and want to learn more about Android 13 and the changes? We’re here to help. If you are an existing MoEngage customer, please contact your Account Manager.
Next Steps
Our latest Global Customer Engagement Report shows that customers prefer to get shipping updates, subscription renewal reminders, sports updates, and more via push notifications. Since push notifications are a critical channel for mobile marketers, they should work towards improving the opt-in rate as customers upgrade to the new OS.
With MoEngage Inform, you can trigger transactional notifications to your customers and drive opt-ins from them in real-time. These include alerting customers when a package arrives, sending OTPs for approving transactions or logging in securely, cab arrival updates, or password reset requests.
MoEngage Inform saves time, is reliable, can scale with minimum effort, and gives meaningful insights to help you grow your North Star Metrics. Learn more about it here.

