Notification Content Extension allows you to customize the appearance of the notification in expanded mode. For info on how to create campaigns with templates in the dashboard refer to this link. Pushtemp1
PrerequisitesMake sure you have completed the App Target and Notification Service Extension Implementation for supporting Rich Push in your project before proceeding with the below steps.

STEPS:

To support these custom push templates, your project needs to have a Notification Content Extension. Follow the below steps to create a Content Extension and to set it up to support MoEngage templates:

1. Create a Notification Content Extension

Pushtemp2 After the target is created, Activate the scheme for Extension when prompted for the same. Pushtemp3 After this, your extension will be added to the project you will see a class with the extension name provided by you while creating and an .plist file associated with it.

2. Set deployment target

Set the deployment target same as the main app target.

3. Add required Capabilities

In the Capabilities Section add App Groups and select the same app group id that you have configured in your App target and Notification Service Extension target. Pushtemp4 Refer to the Set AppGroup ID section of the doc for more information on setting the app group ID on the main target

4. Info.plist changes

Pushtemp5 Make the changes in the Info.plist of your Notification Content Extension, as shown above, set NSExtensionAttributes as following:
AttributeAttribute Value
UNNotificationExtensionCategoryMOE_PUSH_TEMPLATE
UNNotificationExtensionInitialContentSizeRatio1.2
UNNotificationExtensionDefaultContentHiddenYES
UNNotificationExtensionUserInteractionEnabledYES
NoteUpdate the UNNotificationExtensionCategory with the necessary values according to the categories that you have declared.

5. Storyboard changes

Select MainInterface.storyboard in your Content extension and remove the default label which is placed there and set the background color of the view to clear color, as shown: Pushtemp6

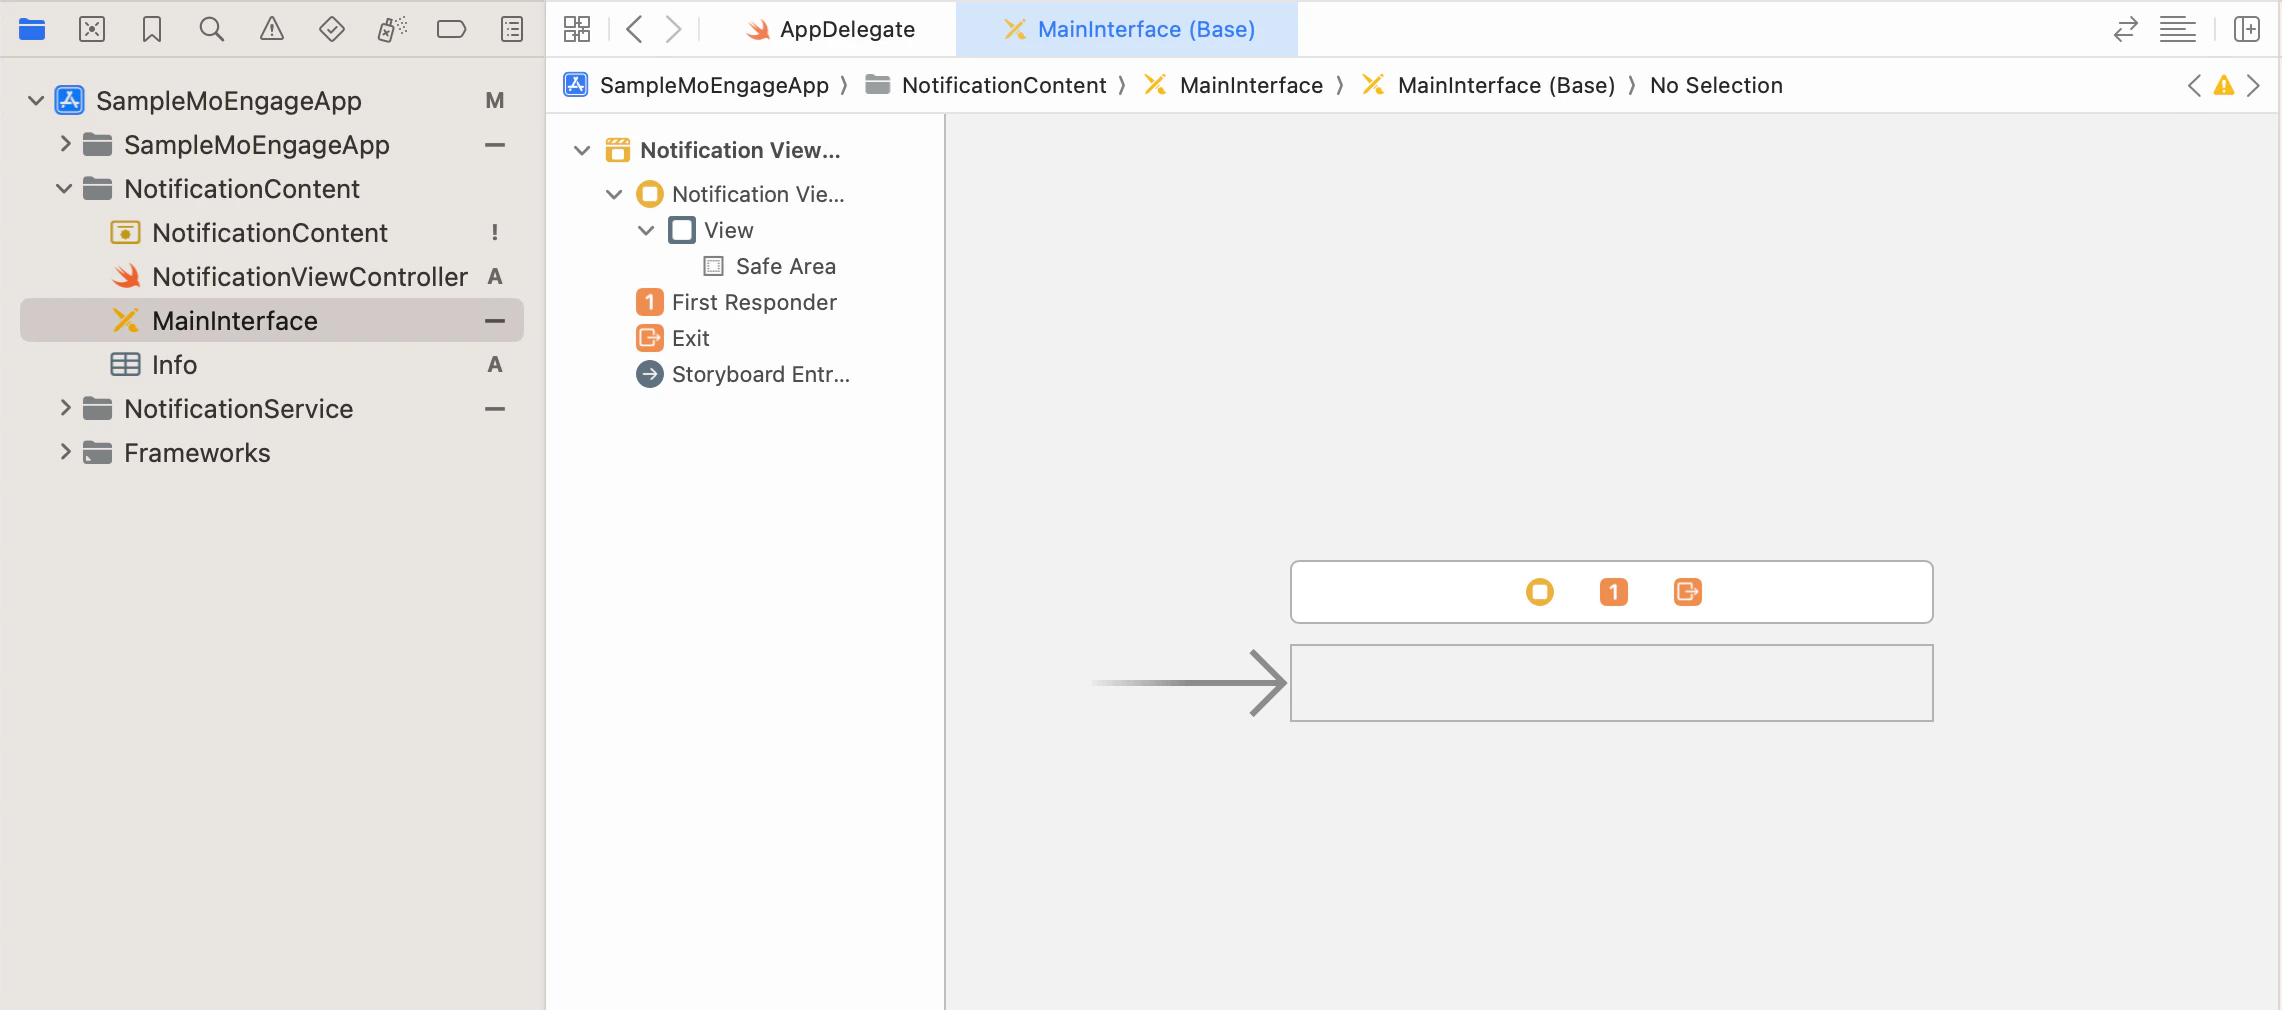
6. MoEngageRichNotification Integration

To integrate via SPM, use the GitHub url https://github.com/moengage/apple-sdk.git for SDK versions equal and above 9.23.0, or https://github.com/moengage/MoEngage-iOS-SDK.git for other SDK versions link and set the branch as master or required version.

Integration via CocoaPod

InformationCocoaPods is being deprecated. MoEngage recommends using Swift Package Manager for all new integrations. For more info on CocoaPods, refer to CocoaPods Integration Guide.
For integrating through CocoaPod, include MoEngageRichNotification pod for your Notification Content Extension as shown below, and run the pod update / install command:
target "NotificationContent" do
	pod 'MoEngage-iOS-SDK/RichNotification',
end
Manual Integration
  • To integrate the MoEngageRichNotification SDK manually to your project follow this doc.
  • Add MoEngageRichNotification to embed binaries in the App target, and ensure it is linked to your Notification Content Extension target.

7. Code Changes in Content Extension:

import UIKit
import UserNotifications
import UserNotificationsUI
import MoEngageRichNotification
  
class NotificationViewController: UIViewController, UNNotificationContentExtension {
    override func viewDidLoad() {
        super.viewDidLoad()
        // Set App Group ID
        MoEngageSDKRichNotification.setAppGroupID("Your App Group ID")
    }
  
    
    func didReceive(_ notification: UNNotification) {
        // Method to add template to UI
        MoEngageSDKRichNotification.addPushTemplate(toController: self, withNotification: notification)
    }
}
As shown above, make these changes in your NotificationViewController class:
  1. Set the same App Group ID in viewDidLoad() method which was enabled in Capabilities.
  2. Call addPushTemplate(toController:withNotification:) method to add template in didReceiveNotification() callback.

8. Notification Click callback in App:

In the case of Simple Image Carousel notification, to know which slide was clicked by the user, make use of MOMessagingDelegate to get notificationClicked(withScreenName: andKVPairs:) callback to get key-value pairs and screen name if set for the clicked slide. Refer to the example below, here we are registering for the callback in AppDelegate:
class AppDelegate: UIResponder, UIApplicationDelegate, UNUserNotificationCenterDelegate, MOMessagingDelegate{
    
func application(_ application: UIApplication, didFinishLaunchingWithOptions launchOptions: [UIApplication.LaunchOptionsKey: Any]?) -> Bool {
      // Set the delegate 
      MOMessaging.sharedInstance.setMessagingDelegate(self)
 
      //Rest of the implementation
}
 
// Notification Clicked Callback
func notificationClicked(withScreenName screenName: String?, andKVPairs kvPairs: [AnyHashable : Any]?) {
        if let screenName = screenName {
            print("Navigate to Screen:\(screenName)")
        }
        
        if let actionKVPairs = kvPairs {
            print("Selected Action KVPair:\(actionKVPairs)")
        }
}
  
// Notification Clicked Callback with Push Payload
func notificationClicked(withScreenName screenName: String?, kvPairs: [AnyHashable : Any]?, andPushPayload userInfo: [AnyHashable : Any]) {
        
        print("Push Payload: \(userInfo)")
        
        if let screenName = screenName {
            print("Navigate to Screen:\(screenName)")
        }
        
        if let actionKVPairs = kvPairs {
            print("Selected Action KVPair:\(actionKVPairs)")
        }
}
}