Introduction
Google Tag Manager is a free tool that enables marketers to install, store, and manage marketing tags without modifying website code, and instantly deploy tags on your website or mobile app from an easy-to-use web-based interface.MoEngage and Google Tag Manager Integration
With the MoEngage and Google Tag Manager integration, you can deploy the MoEngage Web SDK and leverage all its capabilities without writing any code on your website.Integration via Web SDK
Ensure you have a Google Tag Manager account with permission to import templates and add new tags.
Import the templates into your GTM Workspace
Step 1: Download and import the two tags: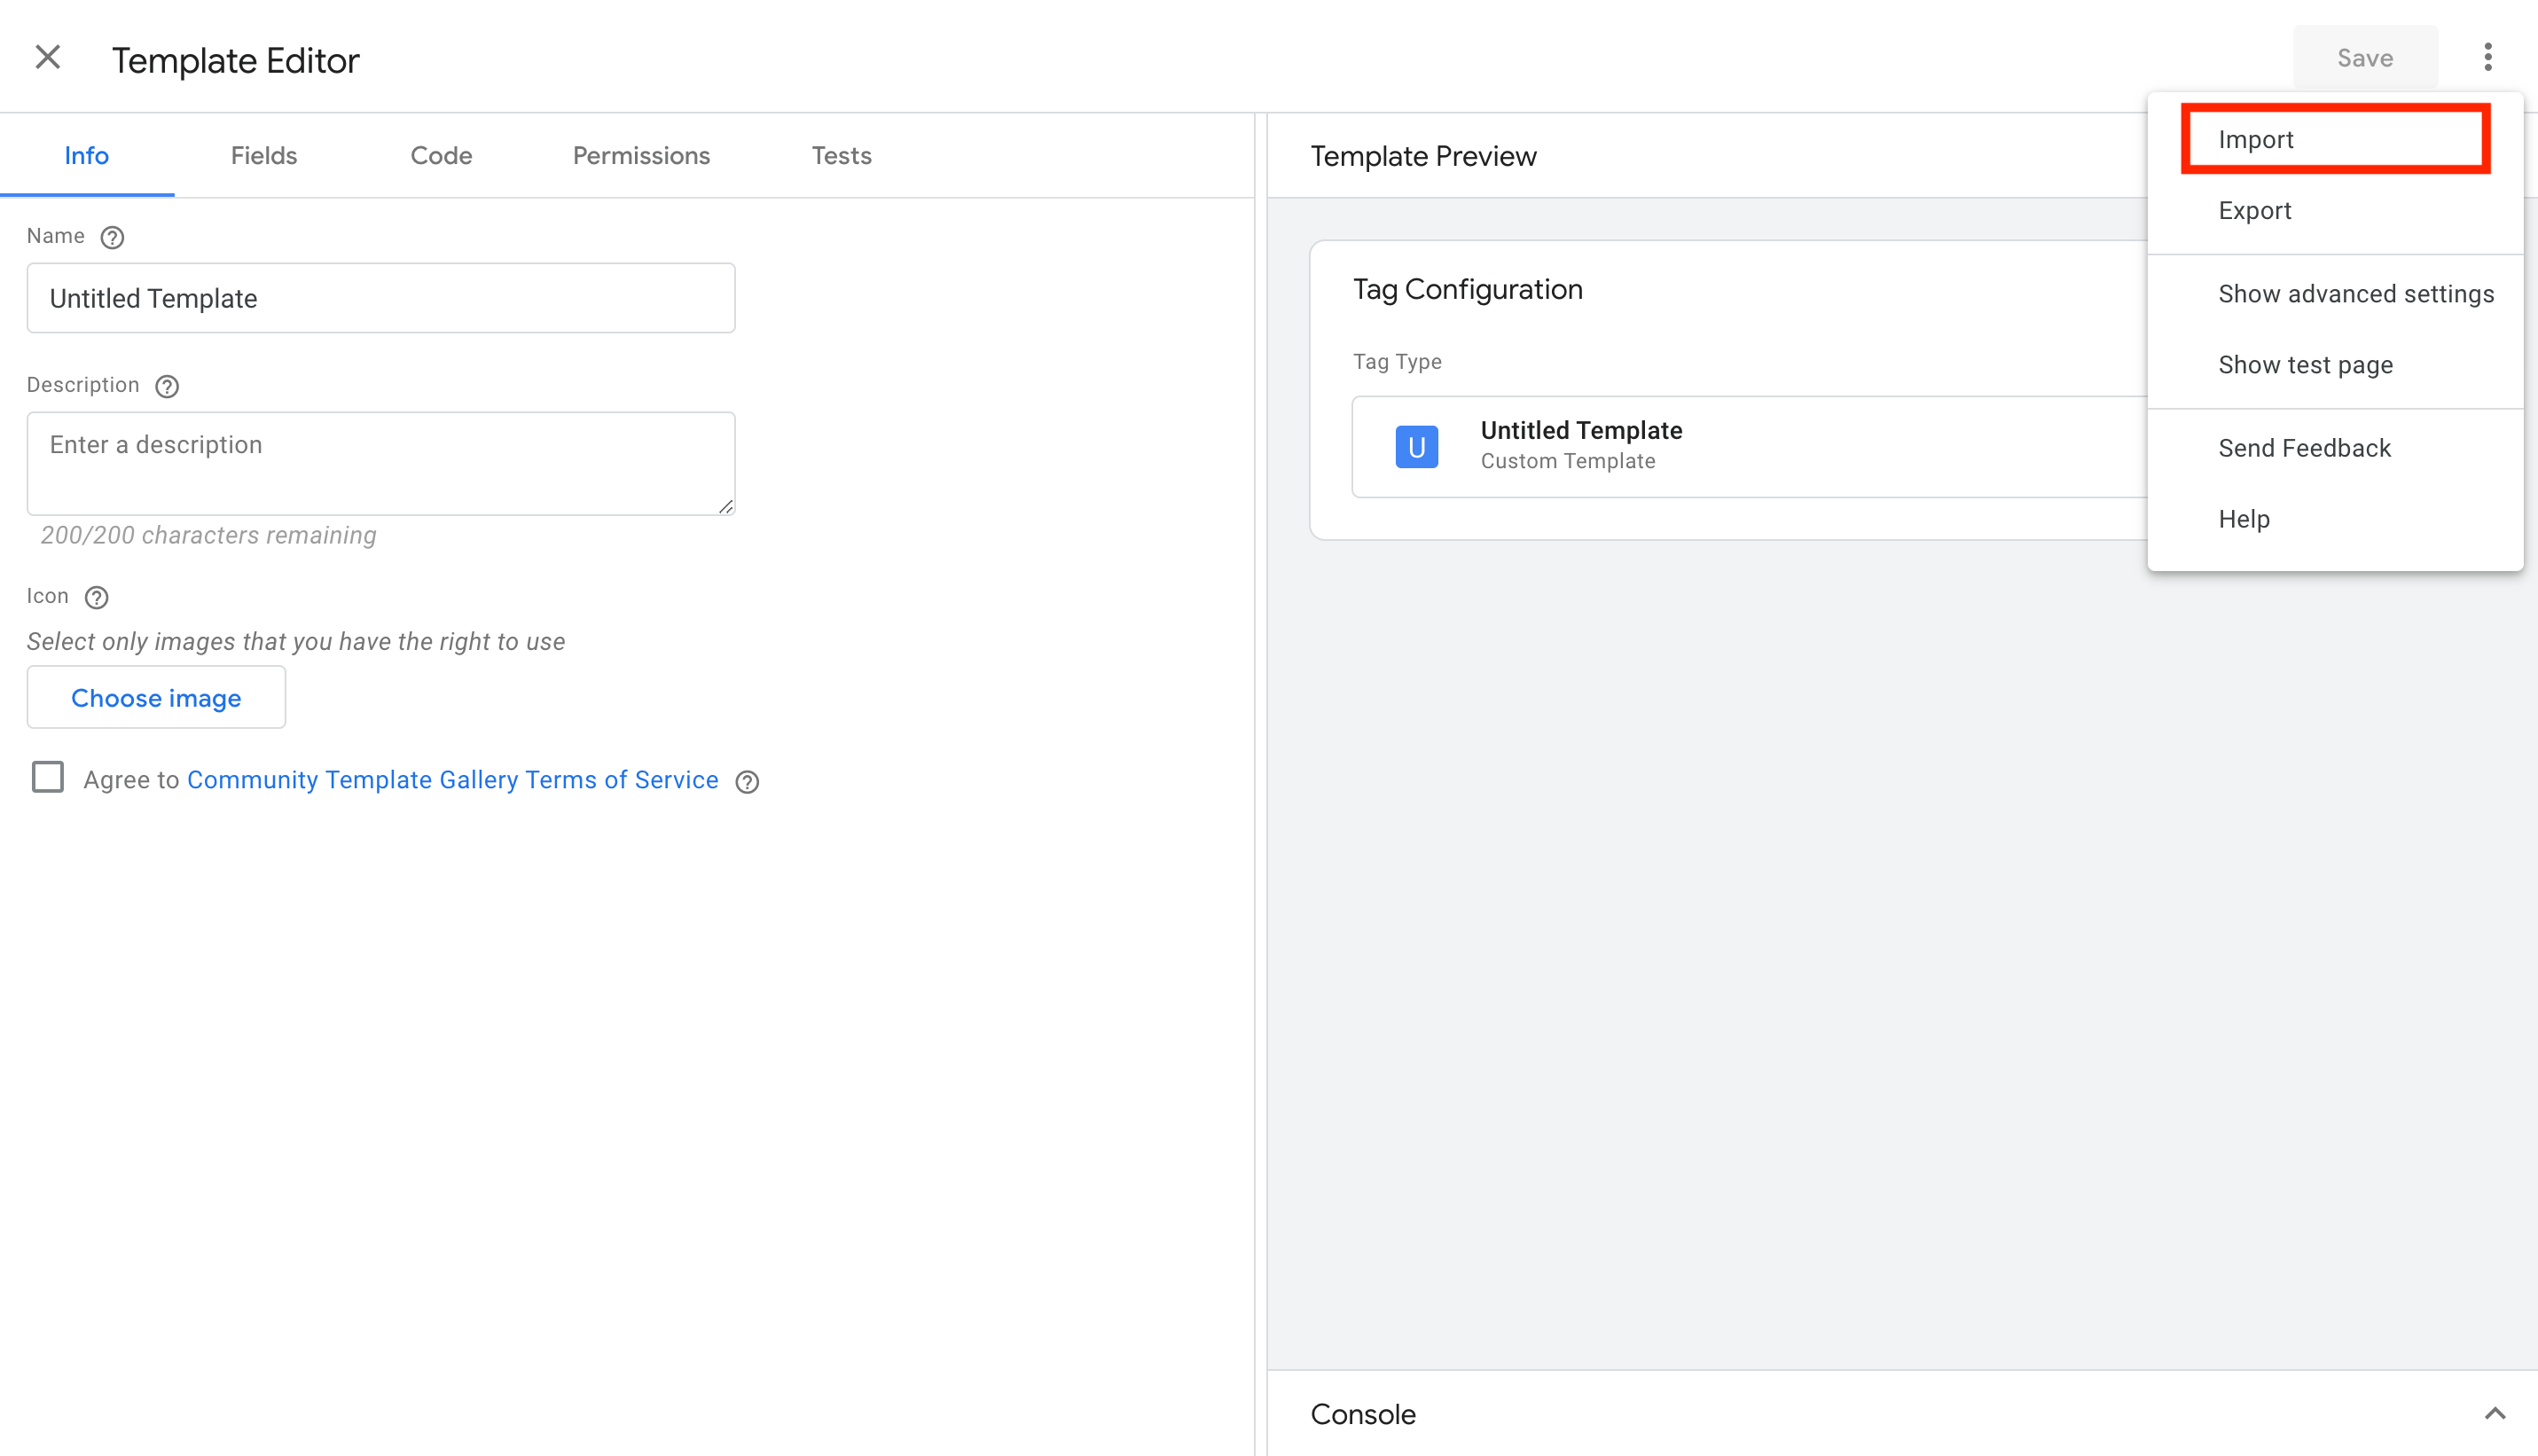
- Download the Initialization Tag and the Actions Tag (right-click and Save).
- To import the tag into your GTM workspace, go to the Templates screen from the left side menu.
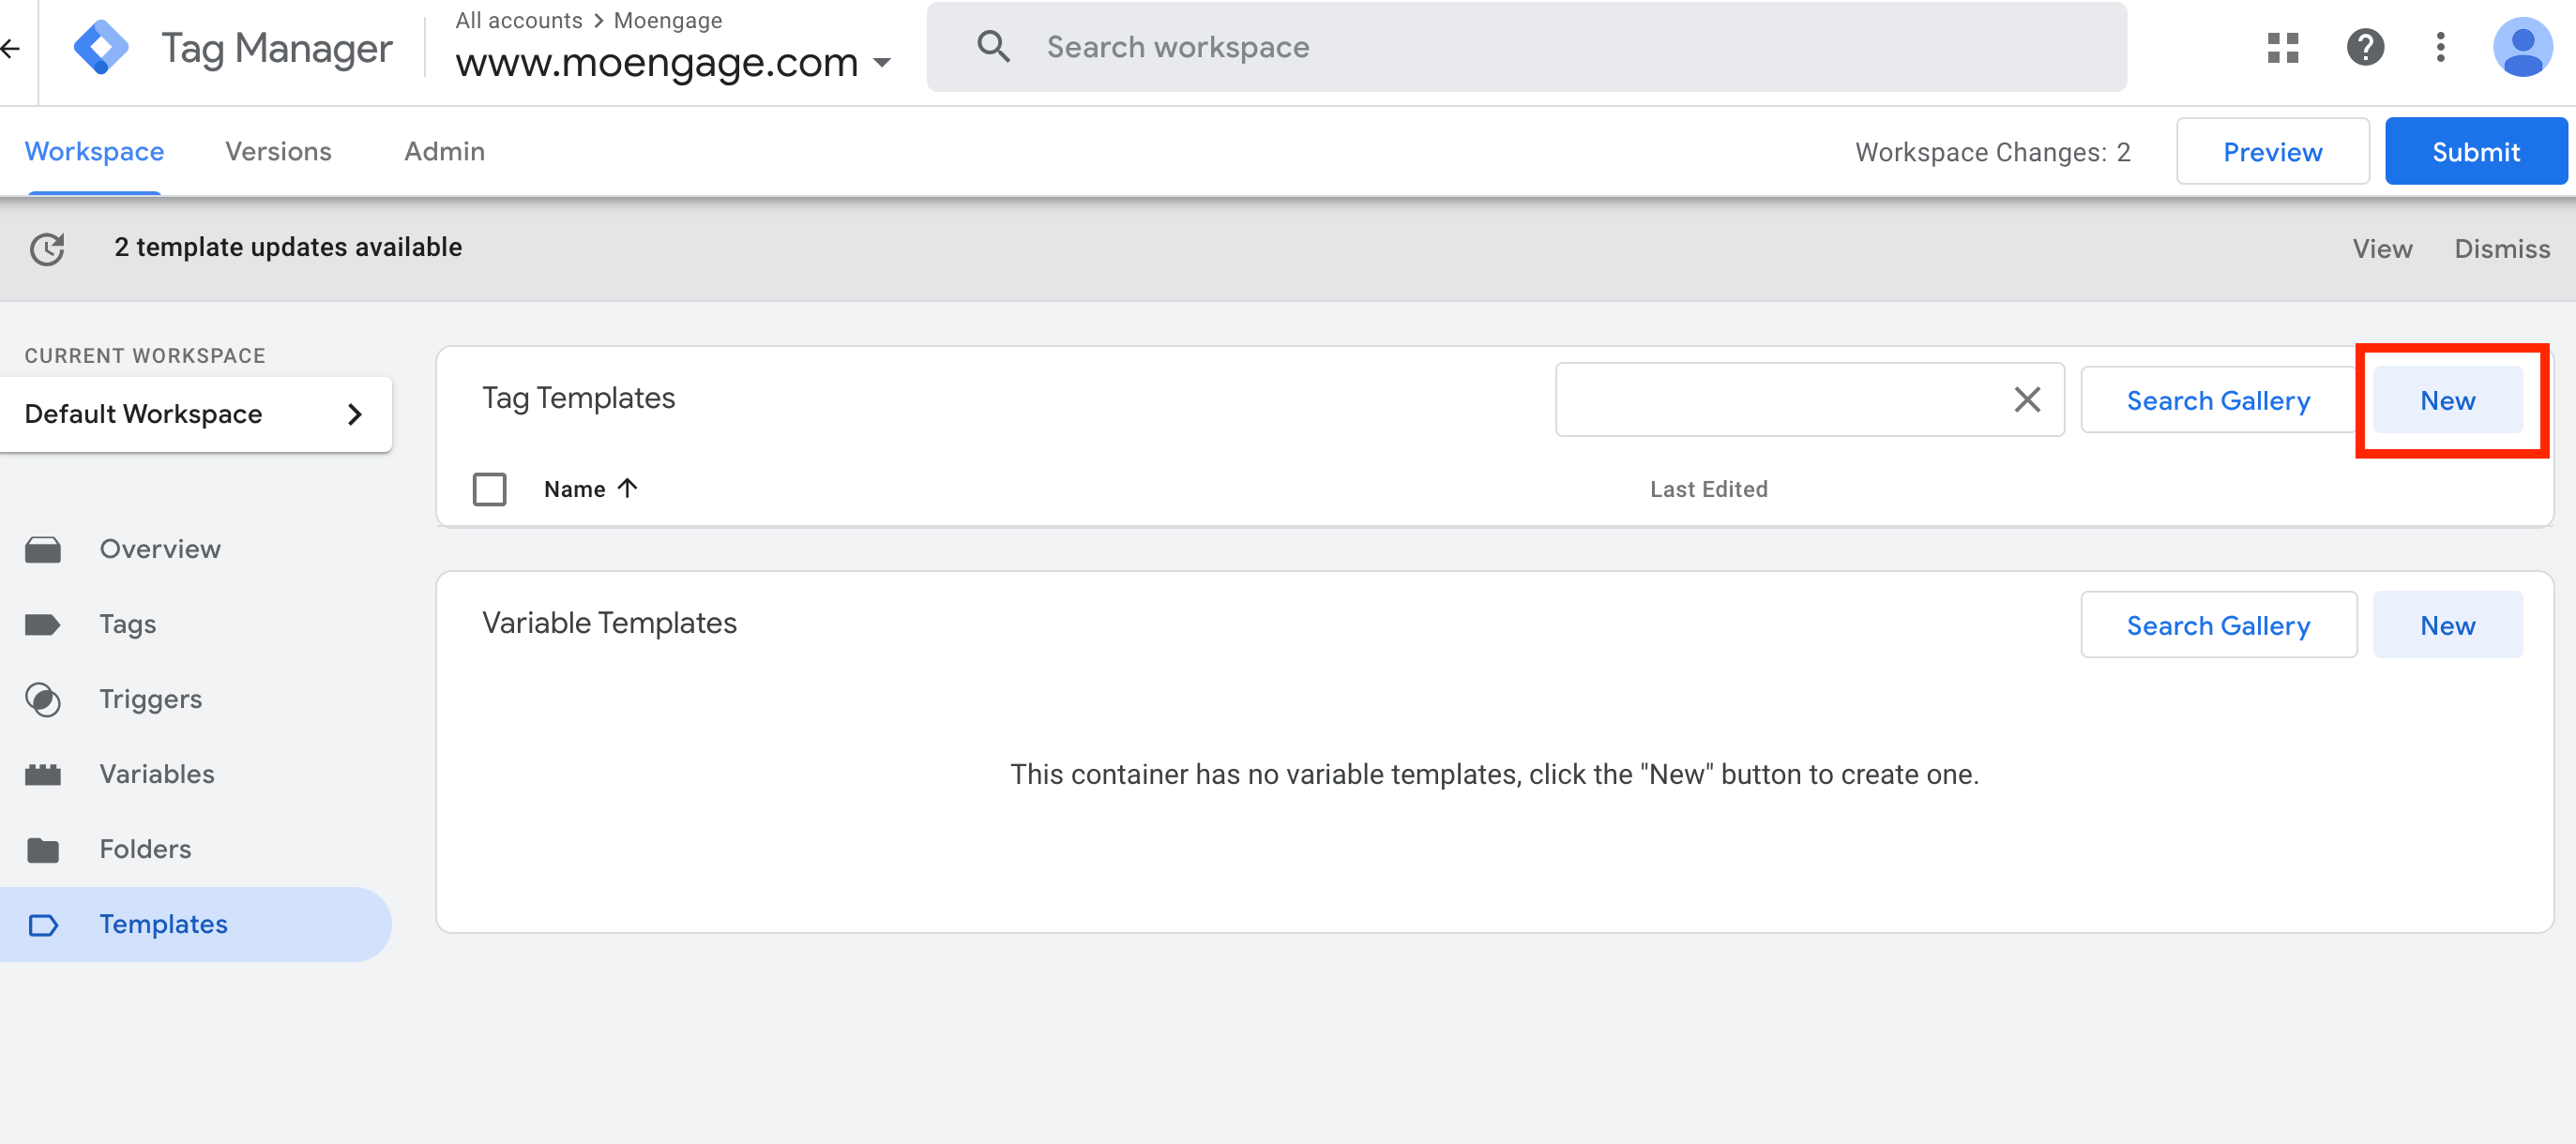
- Under Tag Templates, click the “New” button >> Actions menu (top-right) >> Import. Select the Initialization tag file you just downloaded.
- Click save when you see the MoEngage logo on the left.
- Do the same for the Actions tag as well.
Initialization tag
The Initialization tag is used to add the MoEngage Web SDK to your website. This will enable you to take full advantage of the MoEngage native setup. Step 1: Select and configure the Initialisation Tag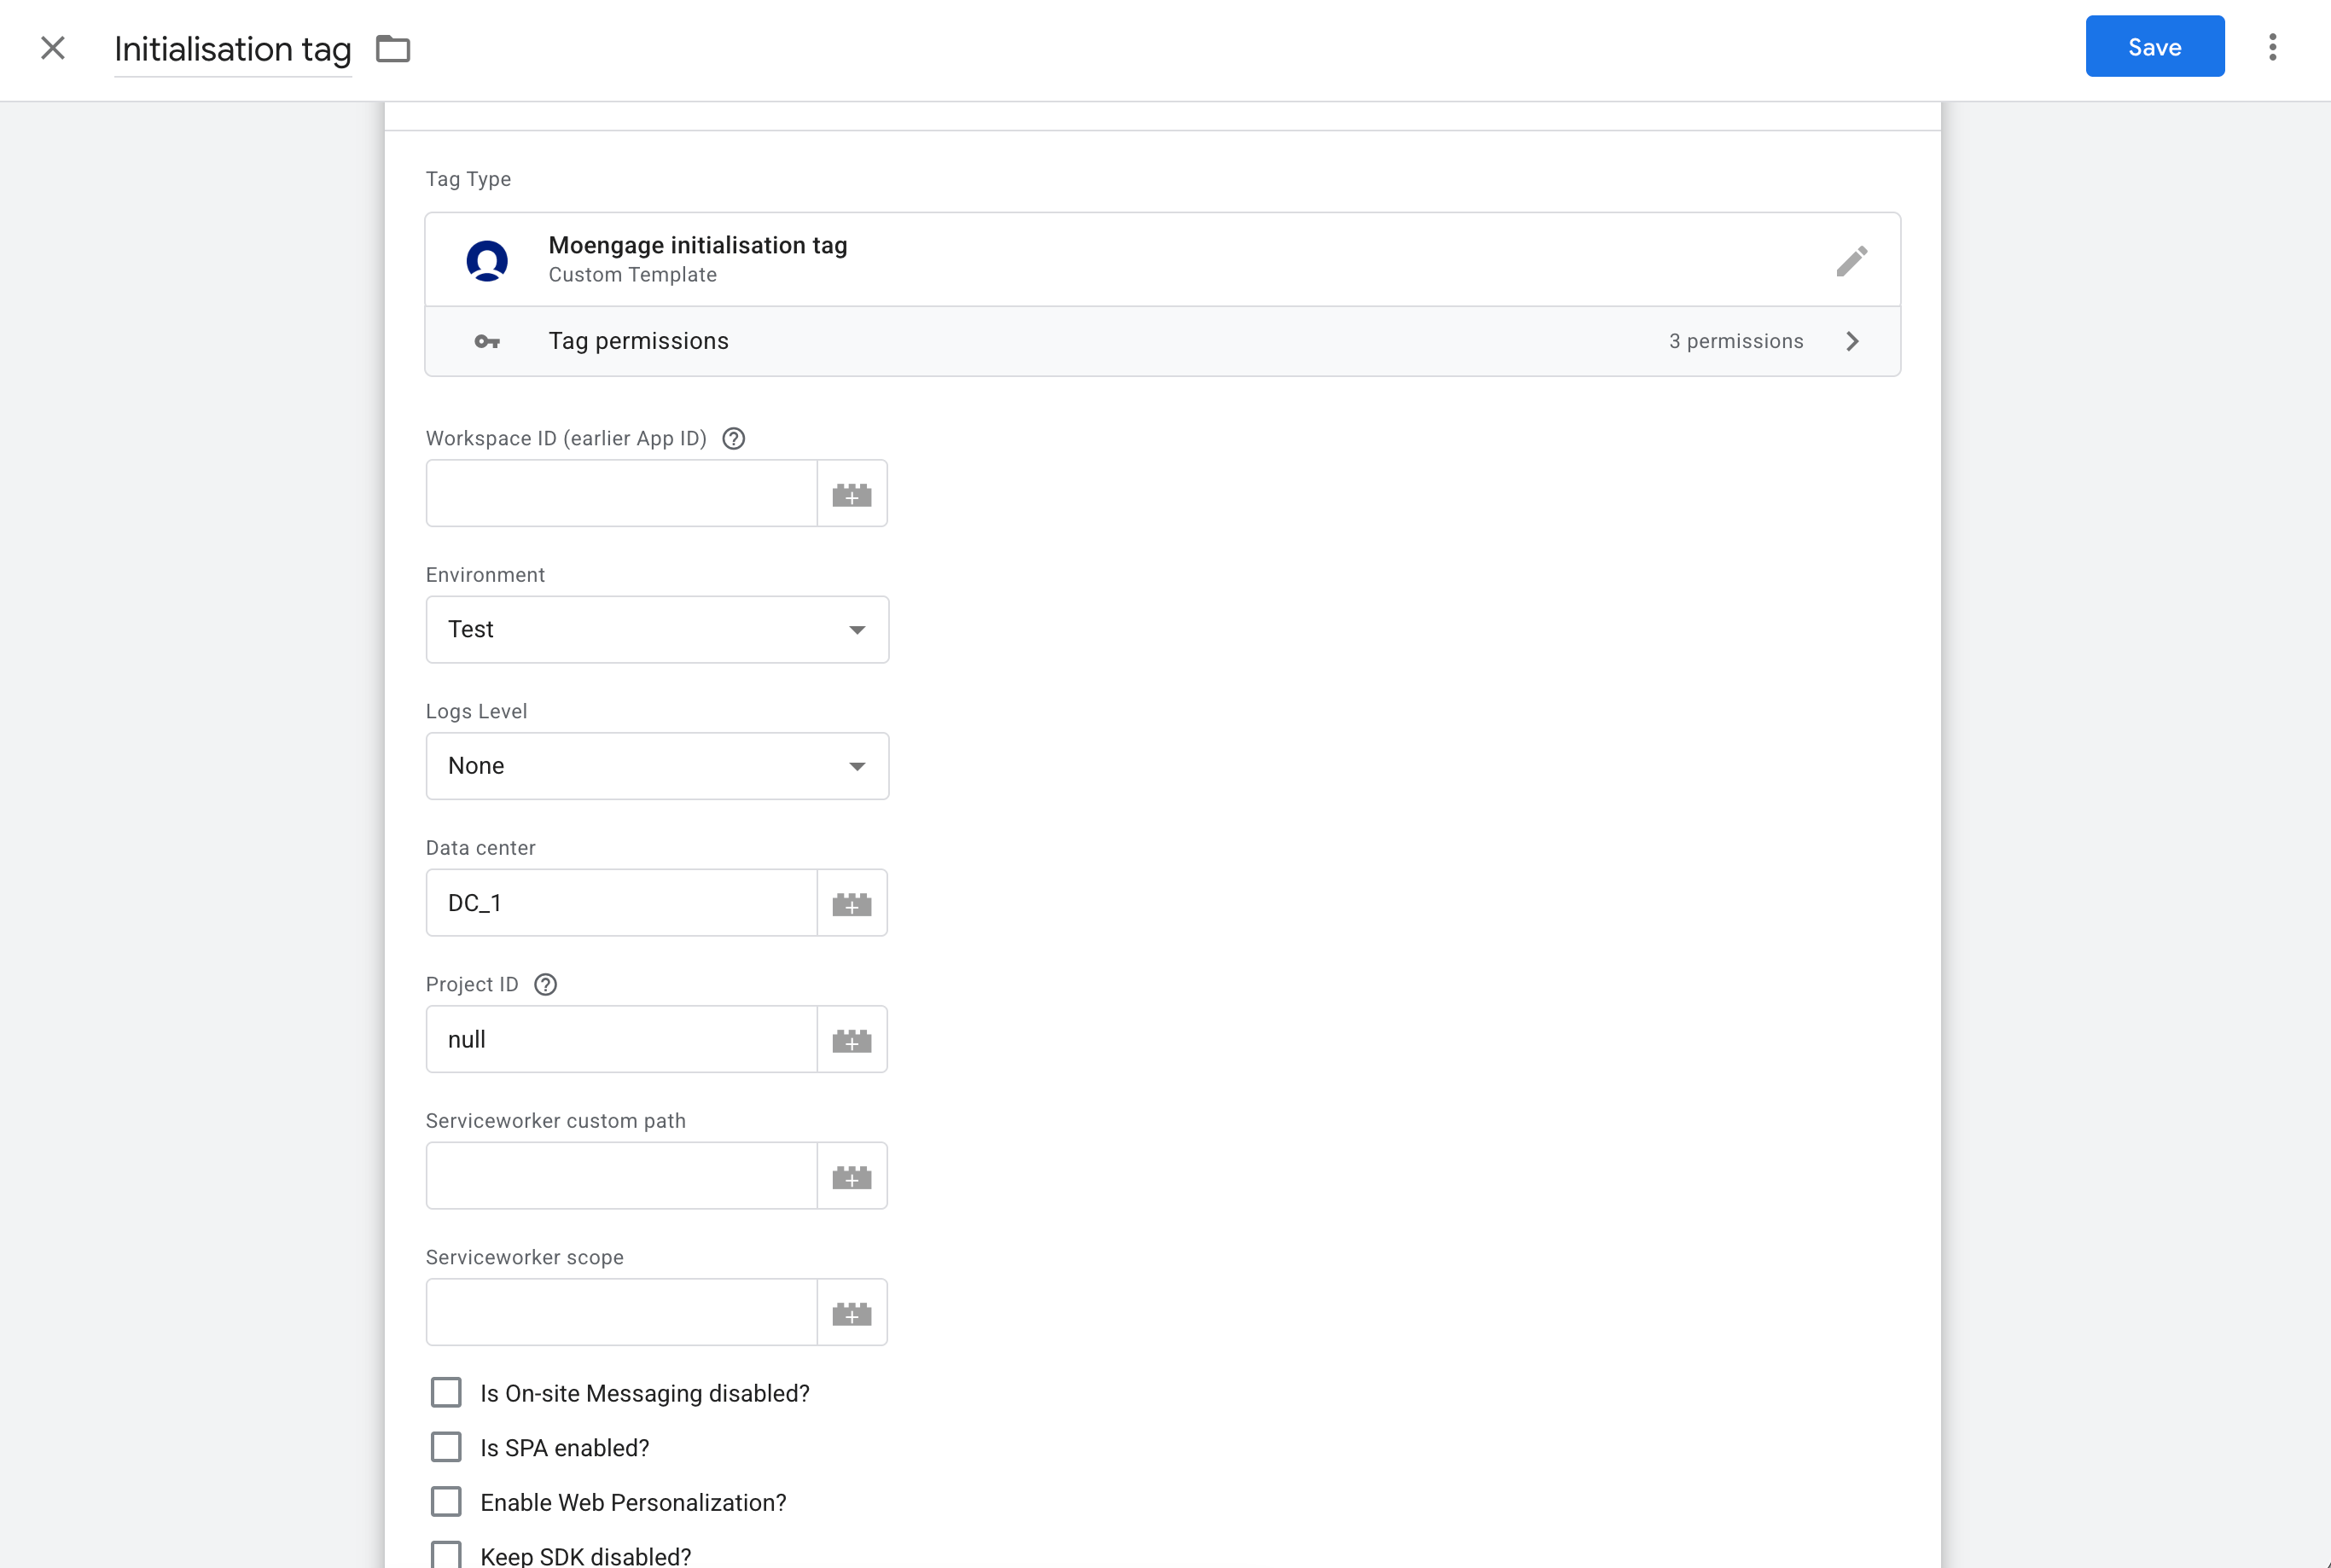

- On your GTM dashboard, click Tags >> New.
- Click Tag Configuration, and under “Custom” look for the MoEngage initialization tag.
- Setup the tag according to your needs:
Step 2 (Optional): Enabling Web Push notification
Optionally, if you want to be able to send push through the Google Tag Manager, first follow the push integration guidelines and place serviceworker file at the root directory of your project.
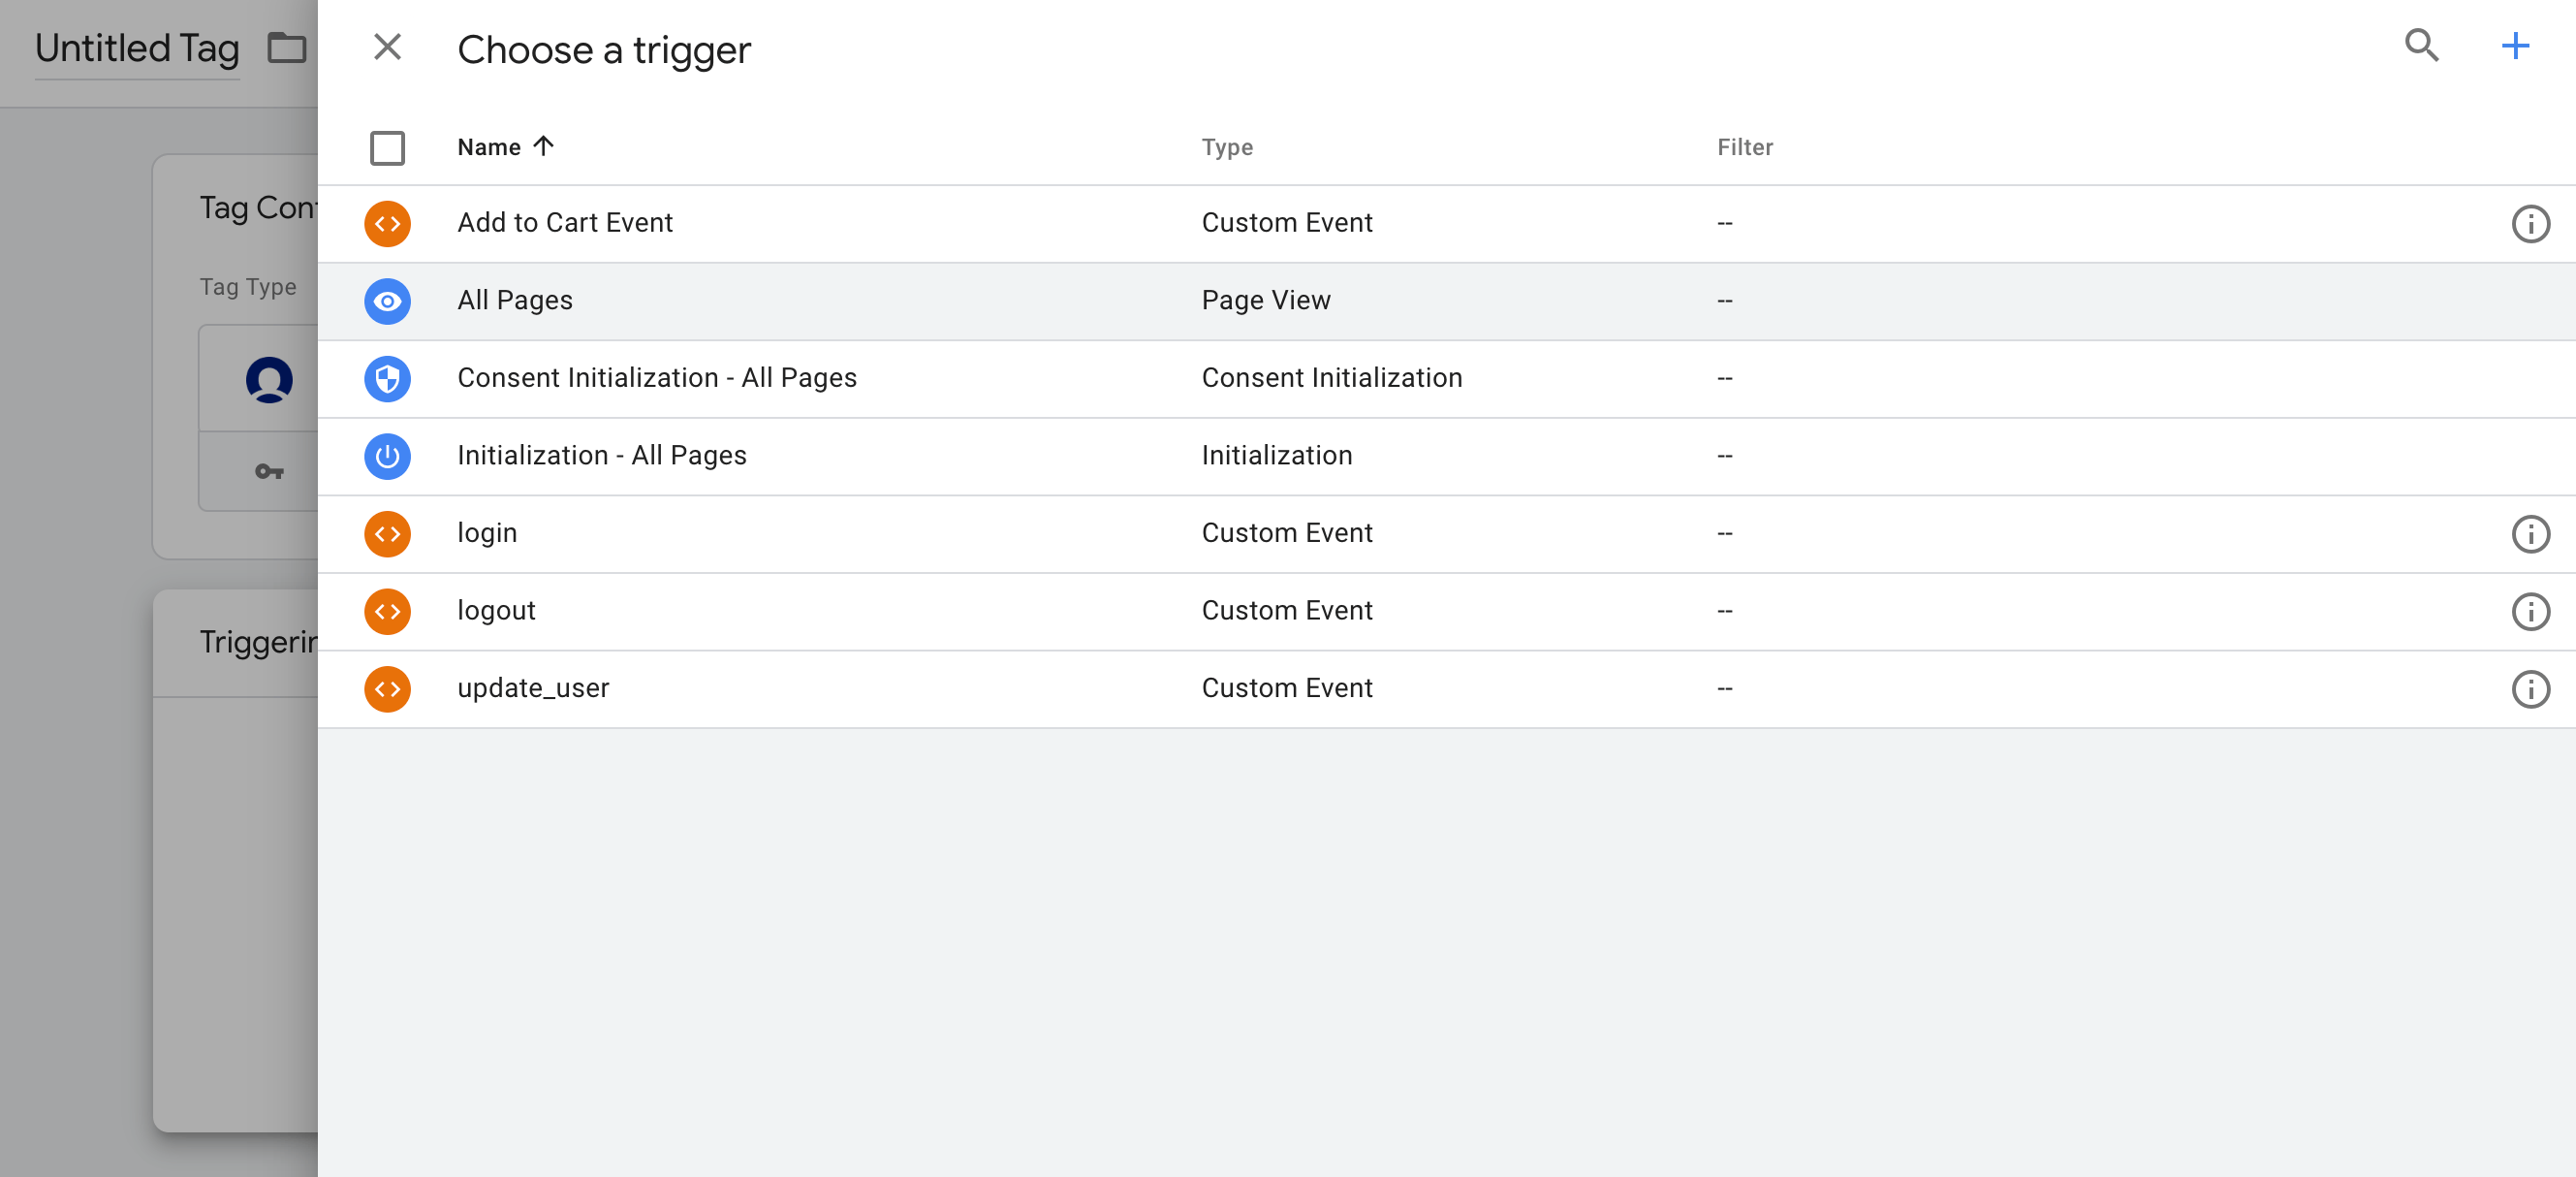
Step 3: Triggering
After configuring the tag, trigger it at every page view of your site:
Actions tag
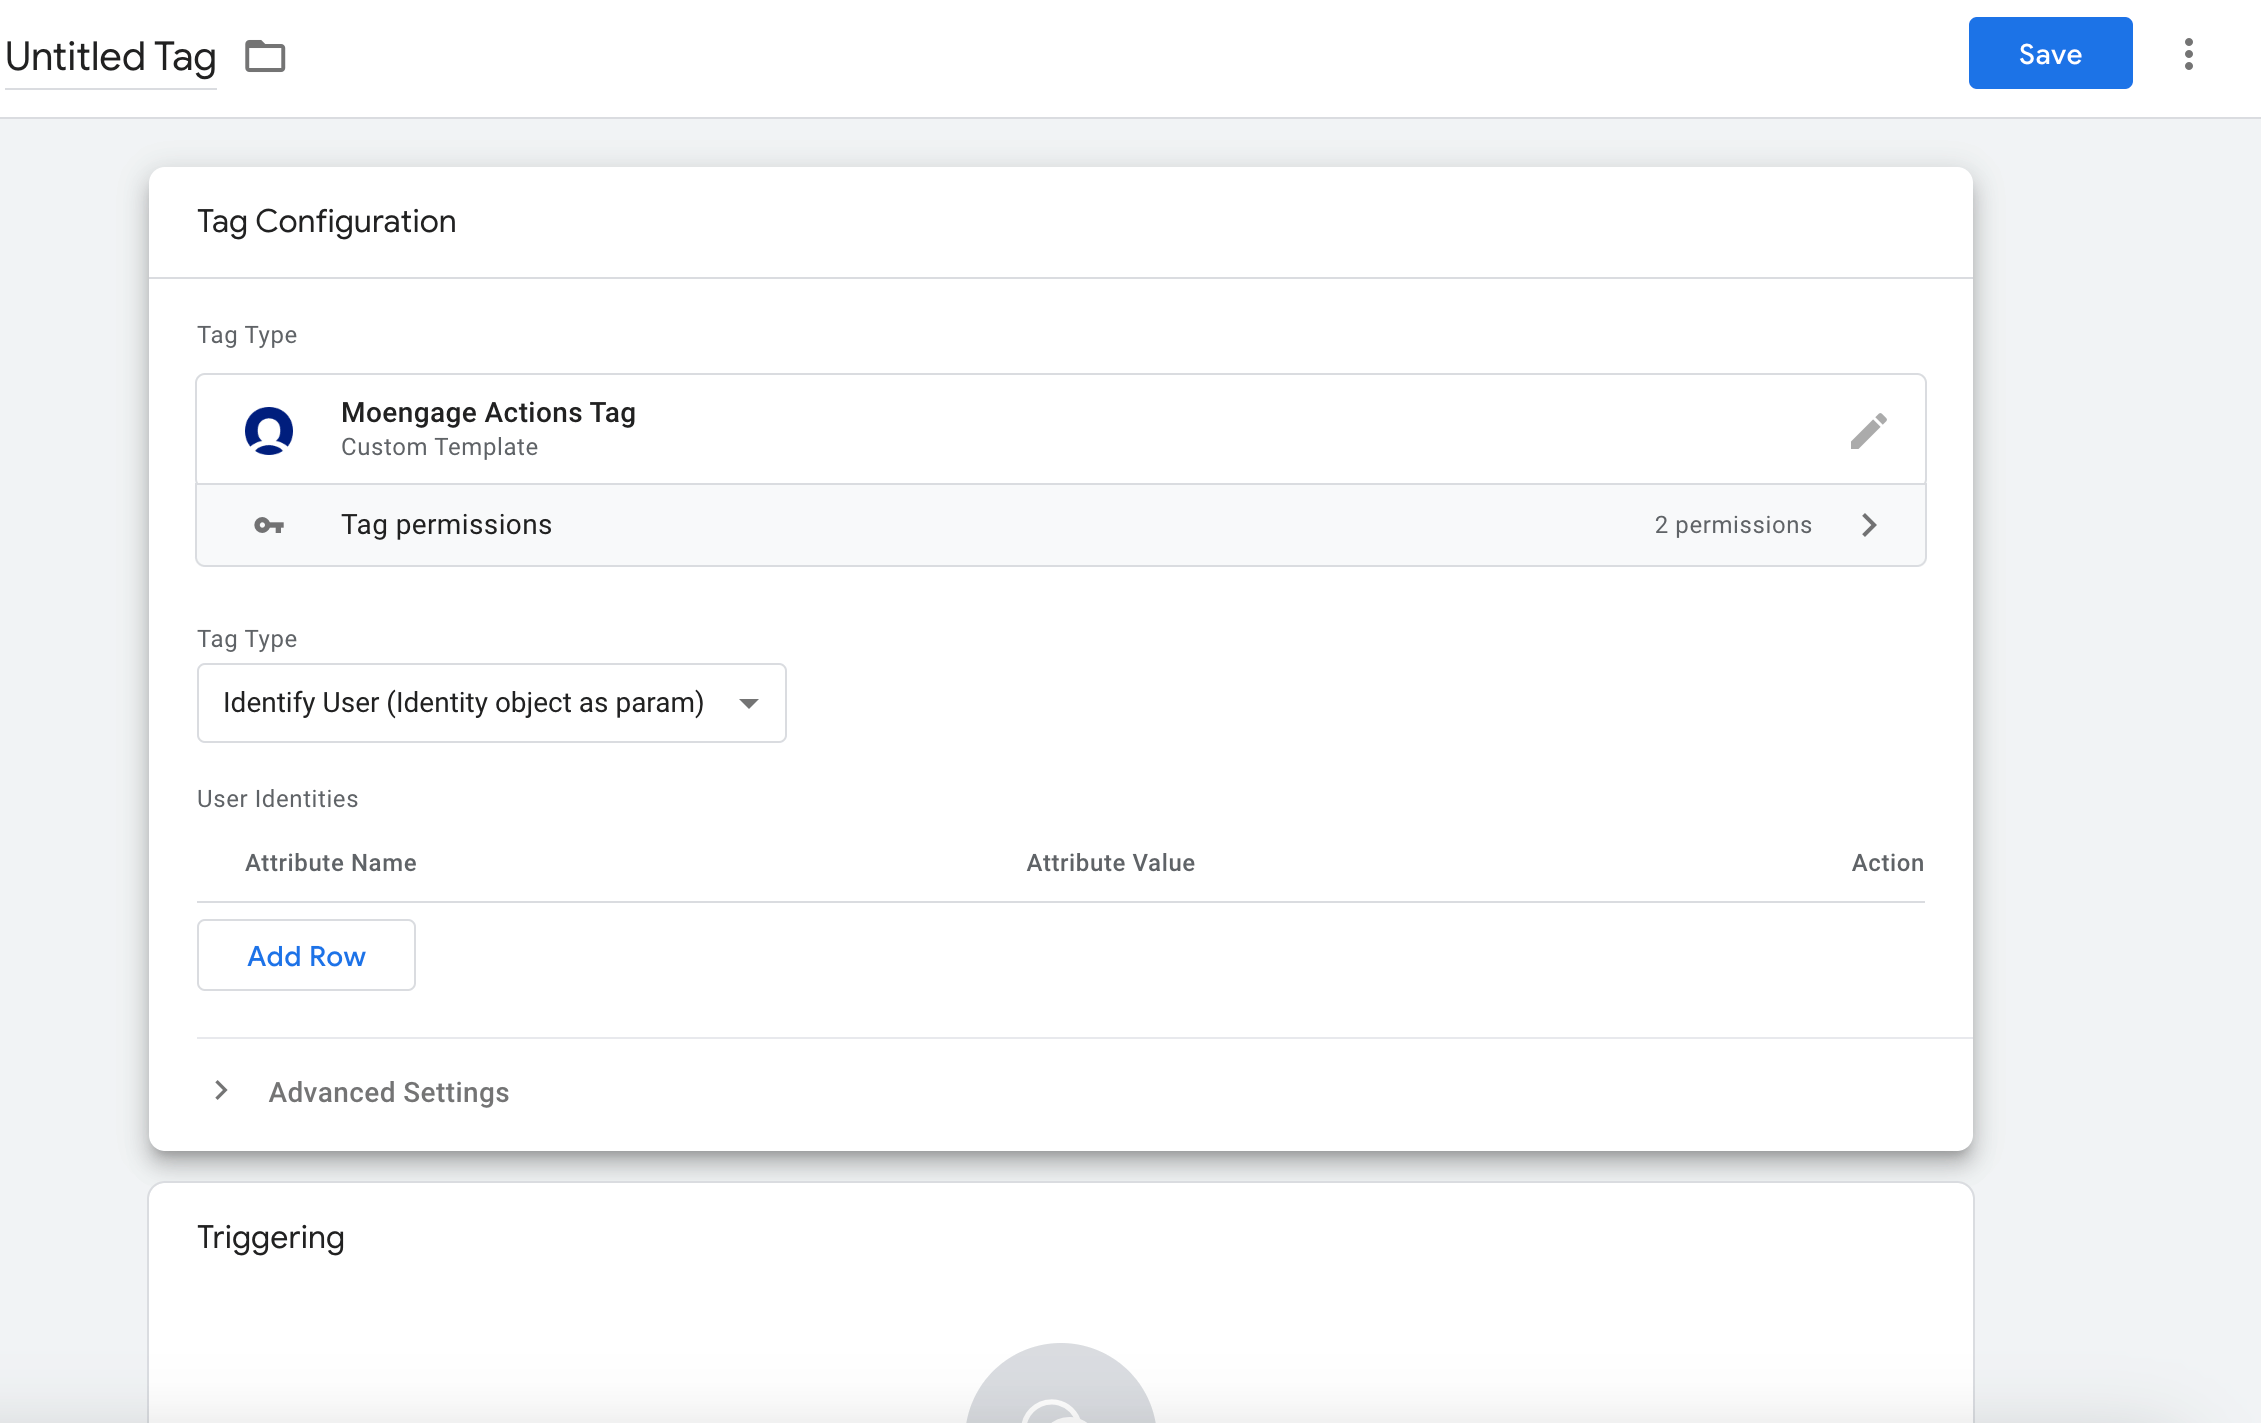
The MoEngage Actions Tag template lets you trigger custom events, update custom as well as standard user attributes, and add or update user IDs. Step 1: Select and configure the Actions Tag: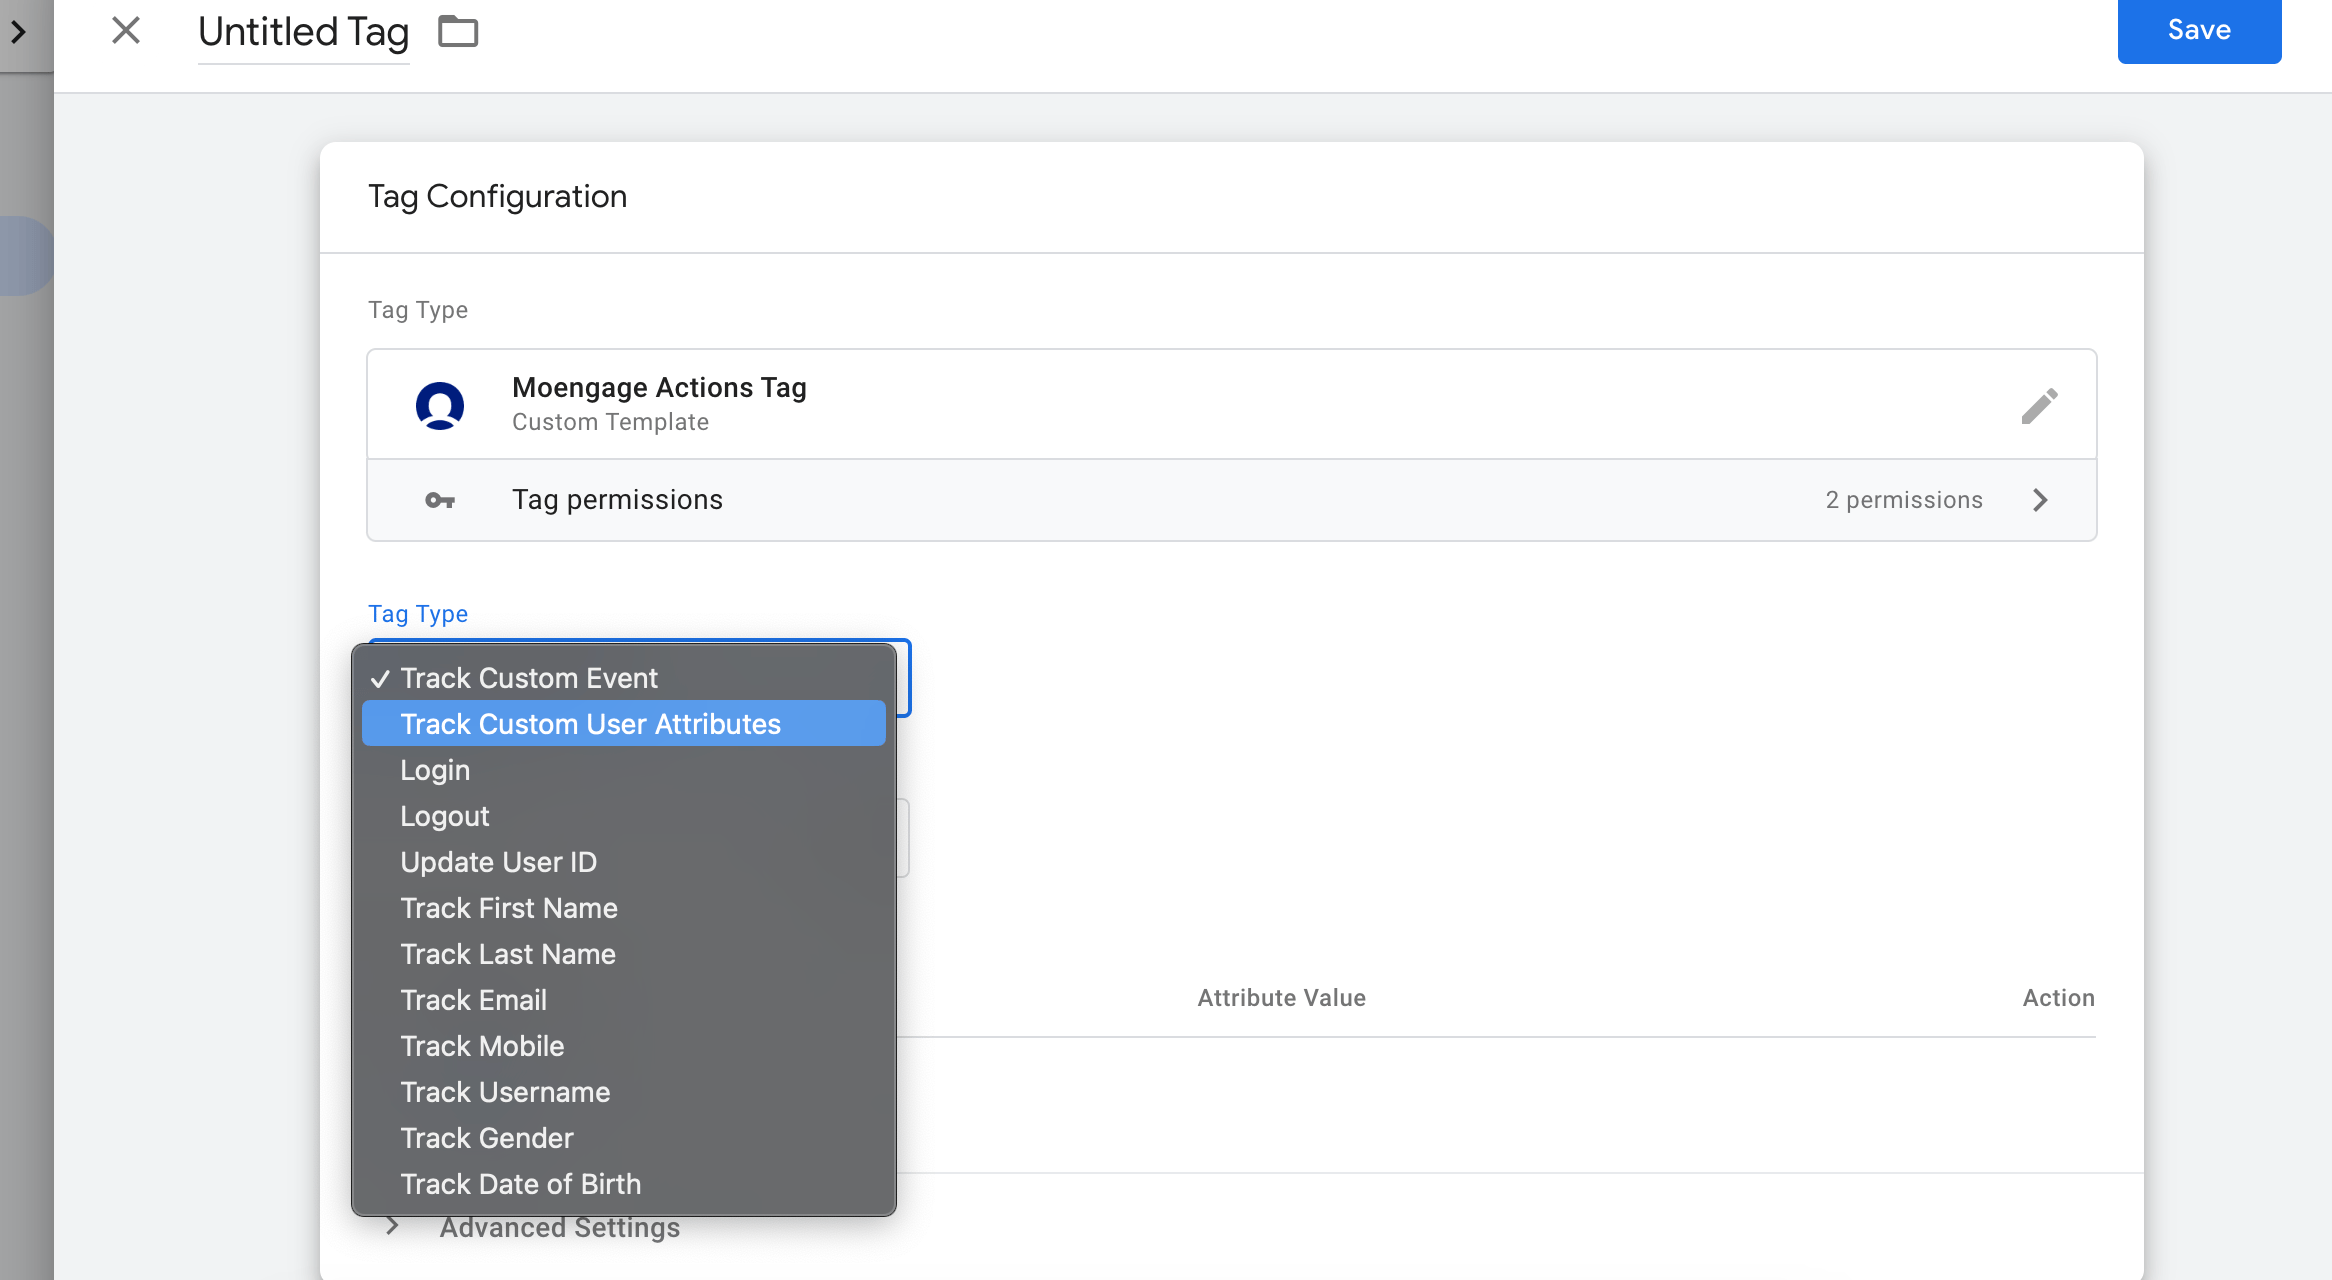
- On your GTM dashboard, click Tags >> New.
- Click Tag Configuration, and under “Custom” look for the MoEngage Actions Tag.
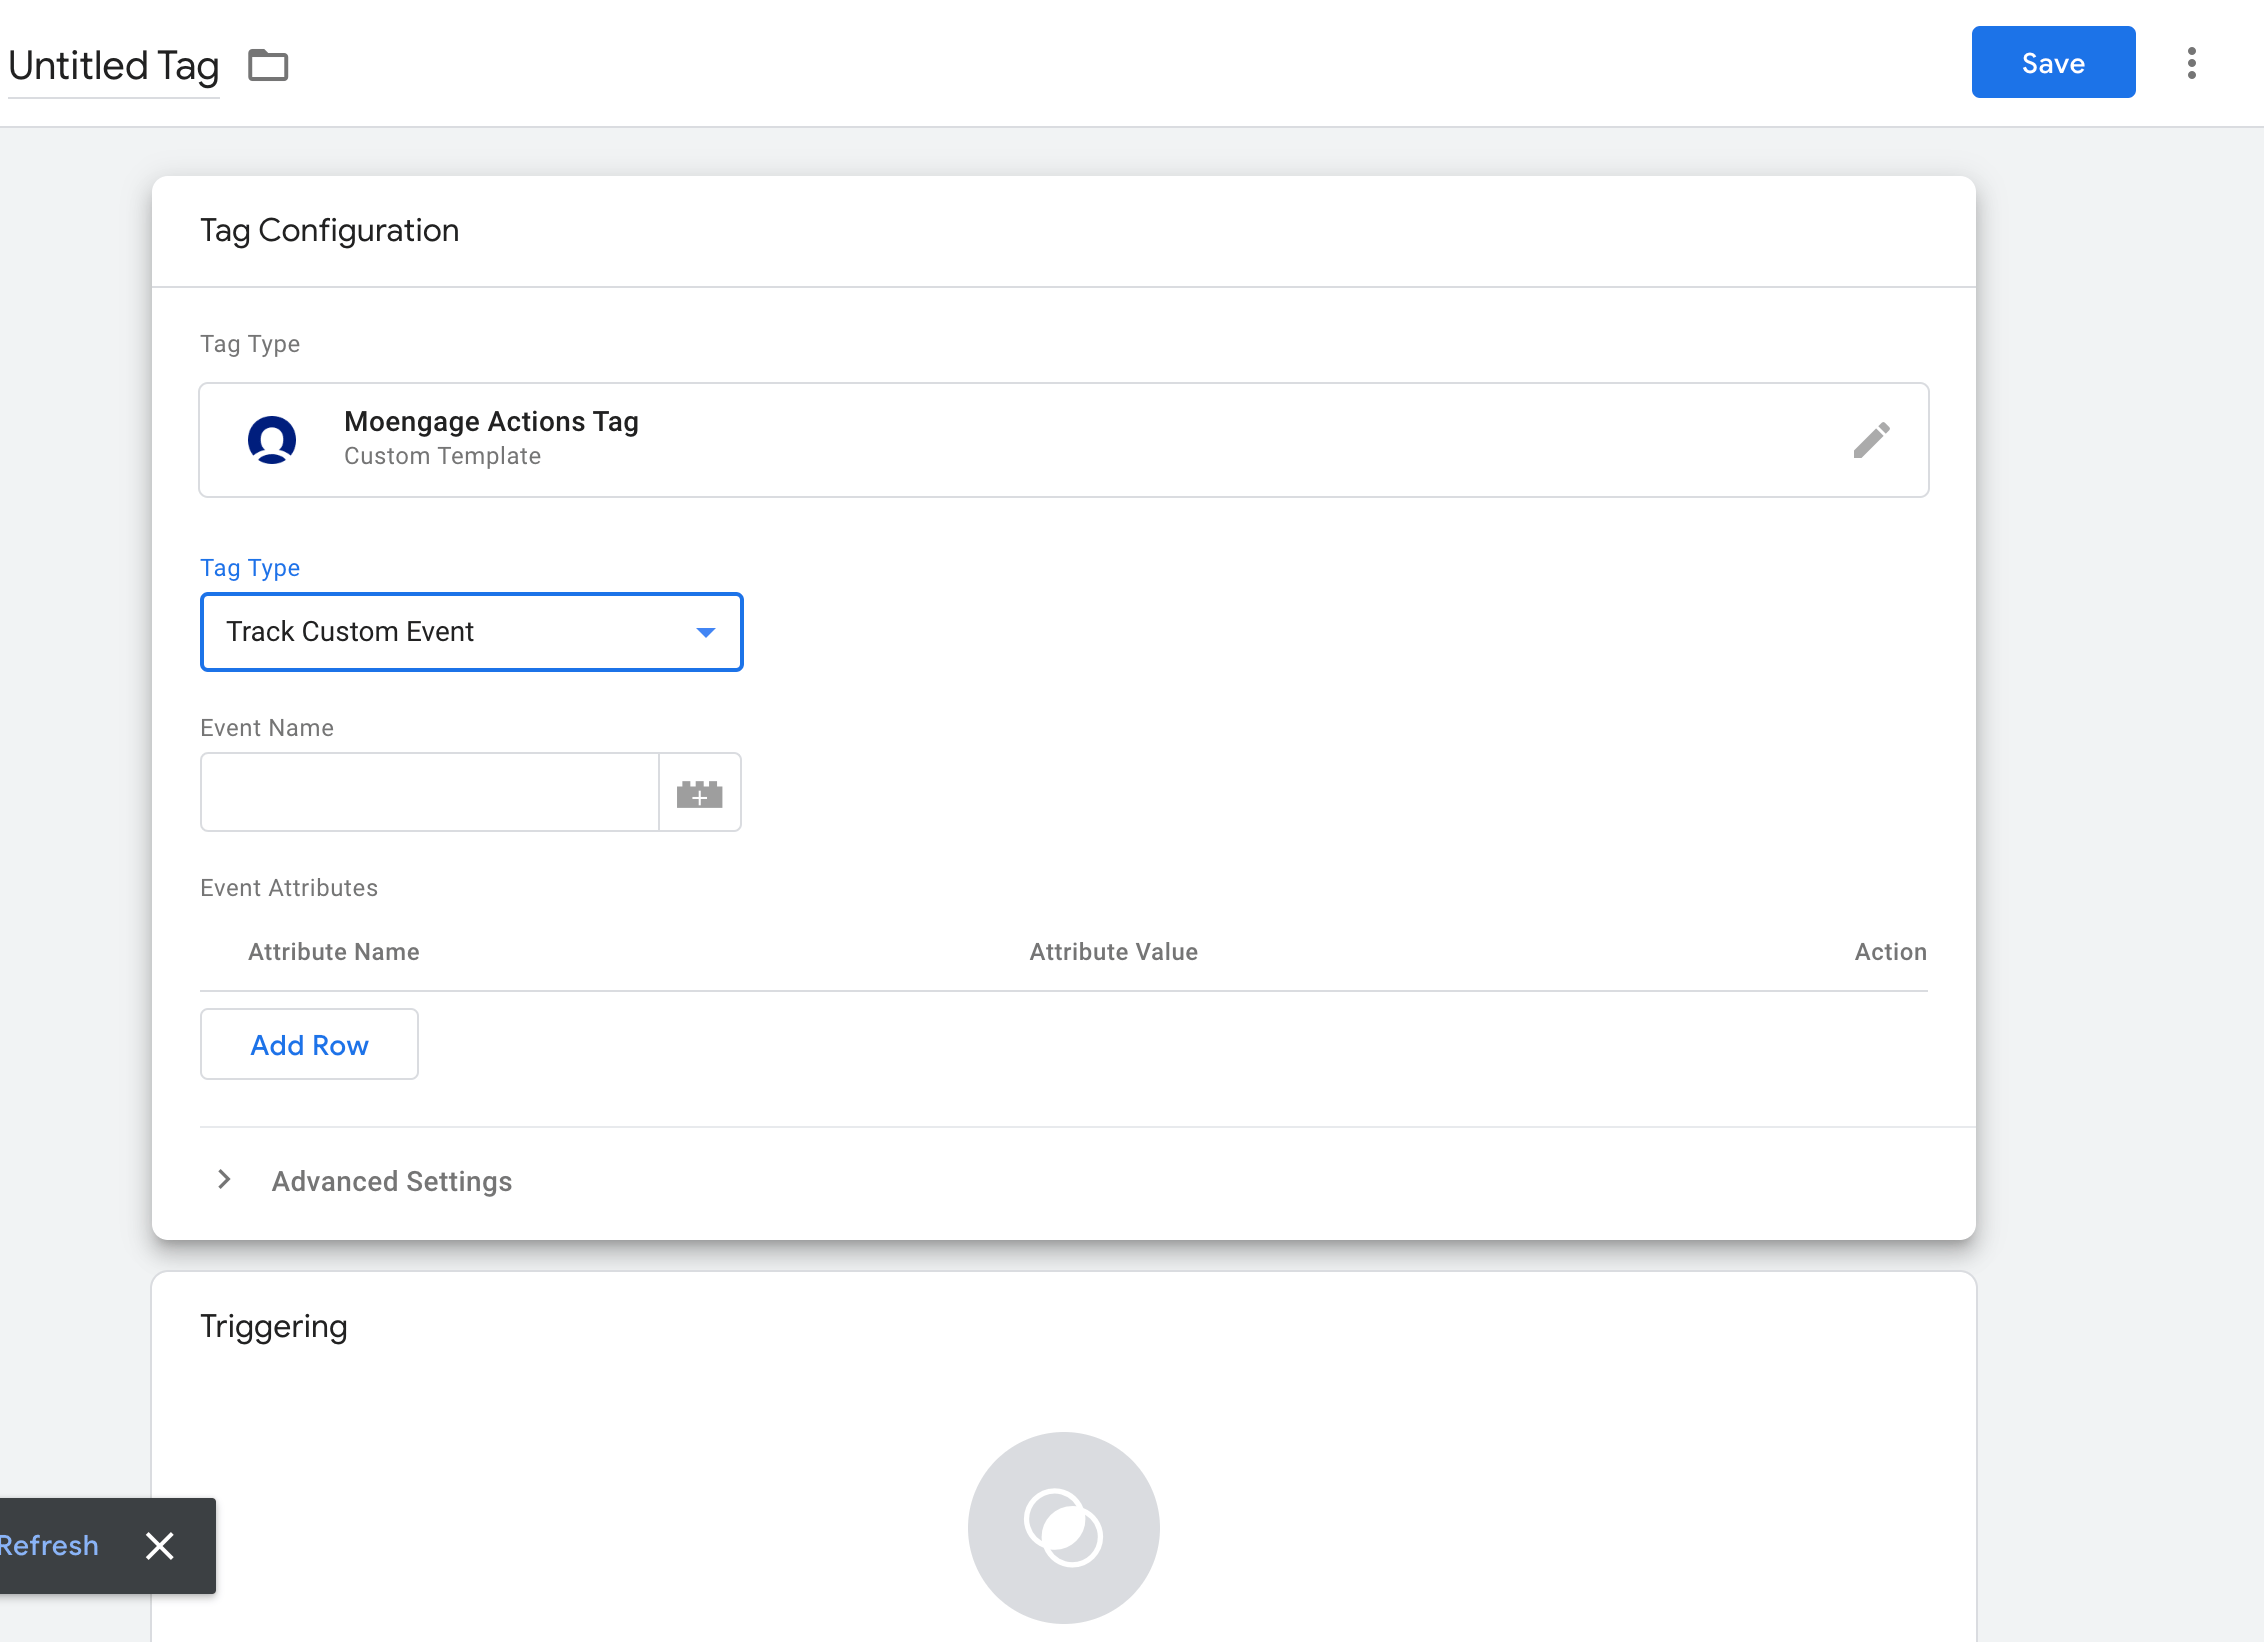
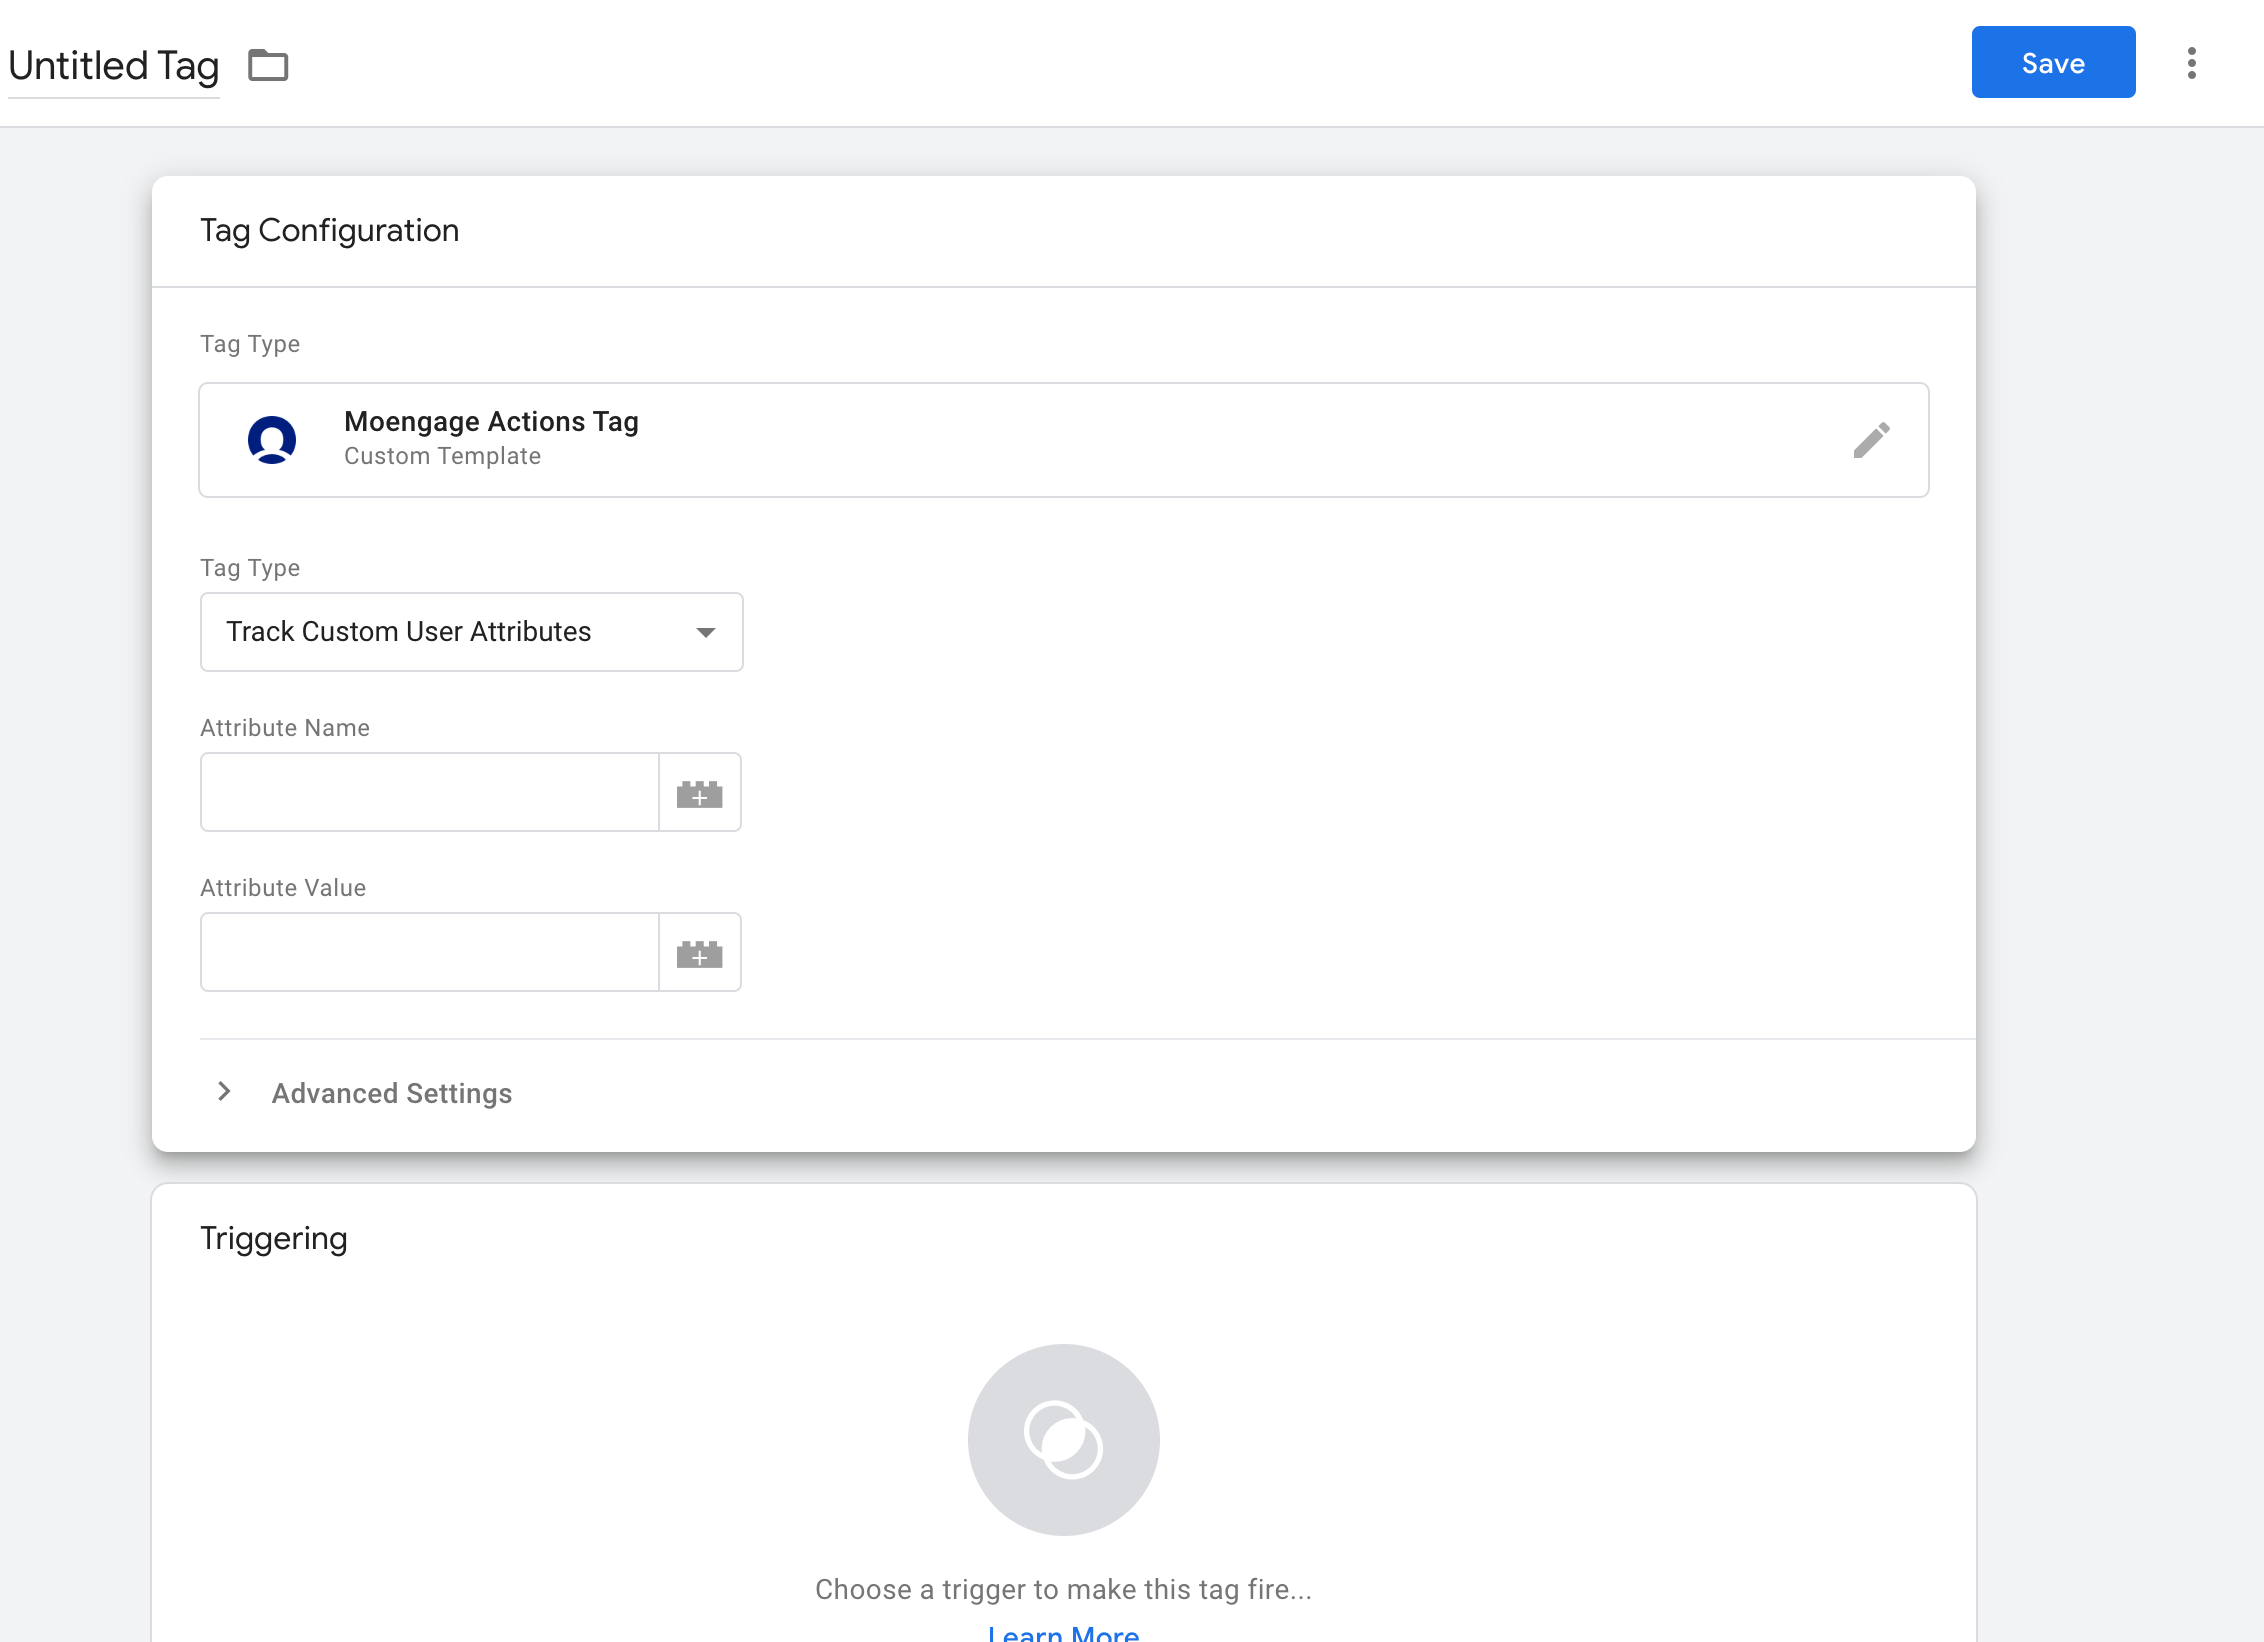
- Setup the tag according to your needs.
Track Custom Event
Track Custom User Attributes
Login
Please download and use the latest initialisation and action templates. If you are using “Login” tag type to login users, please switch to the below tag type.
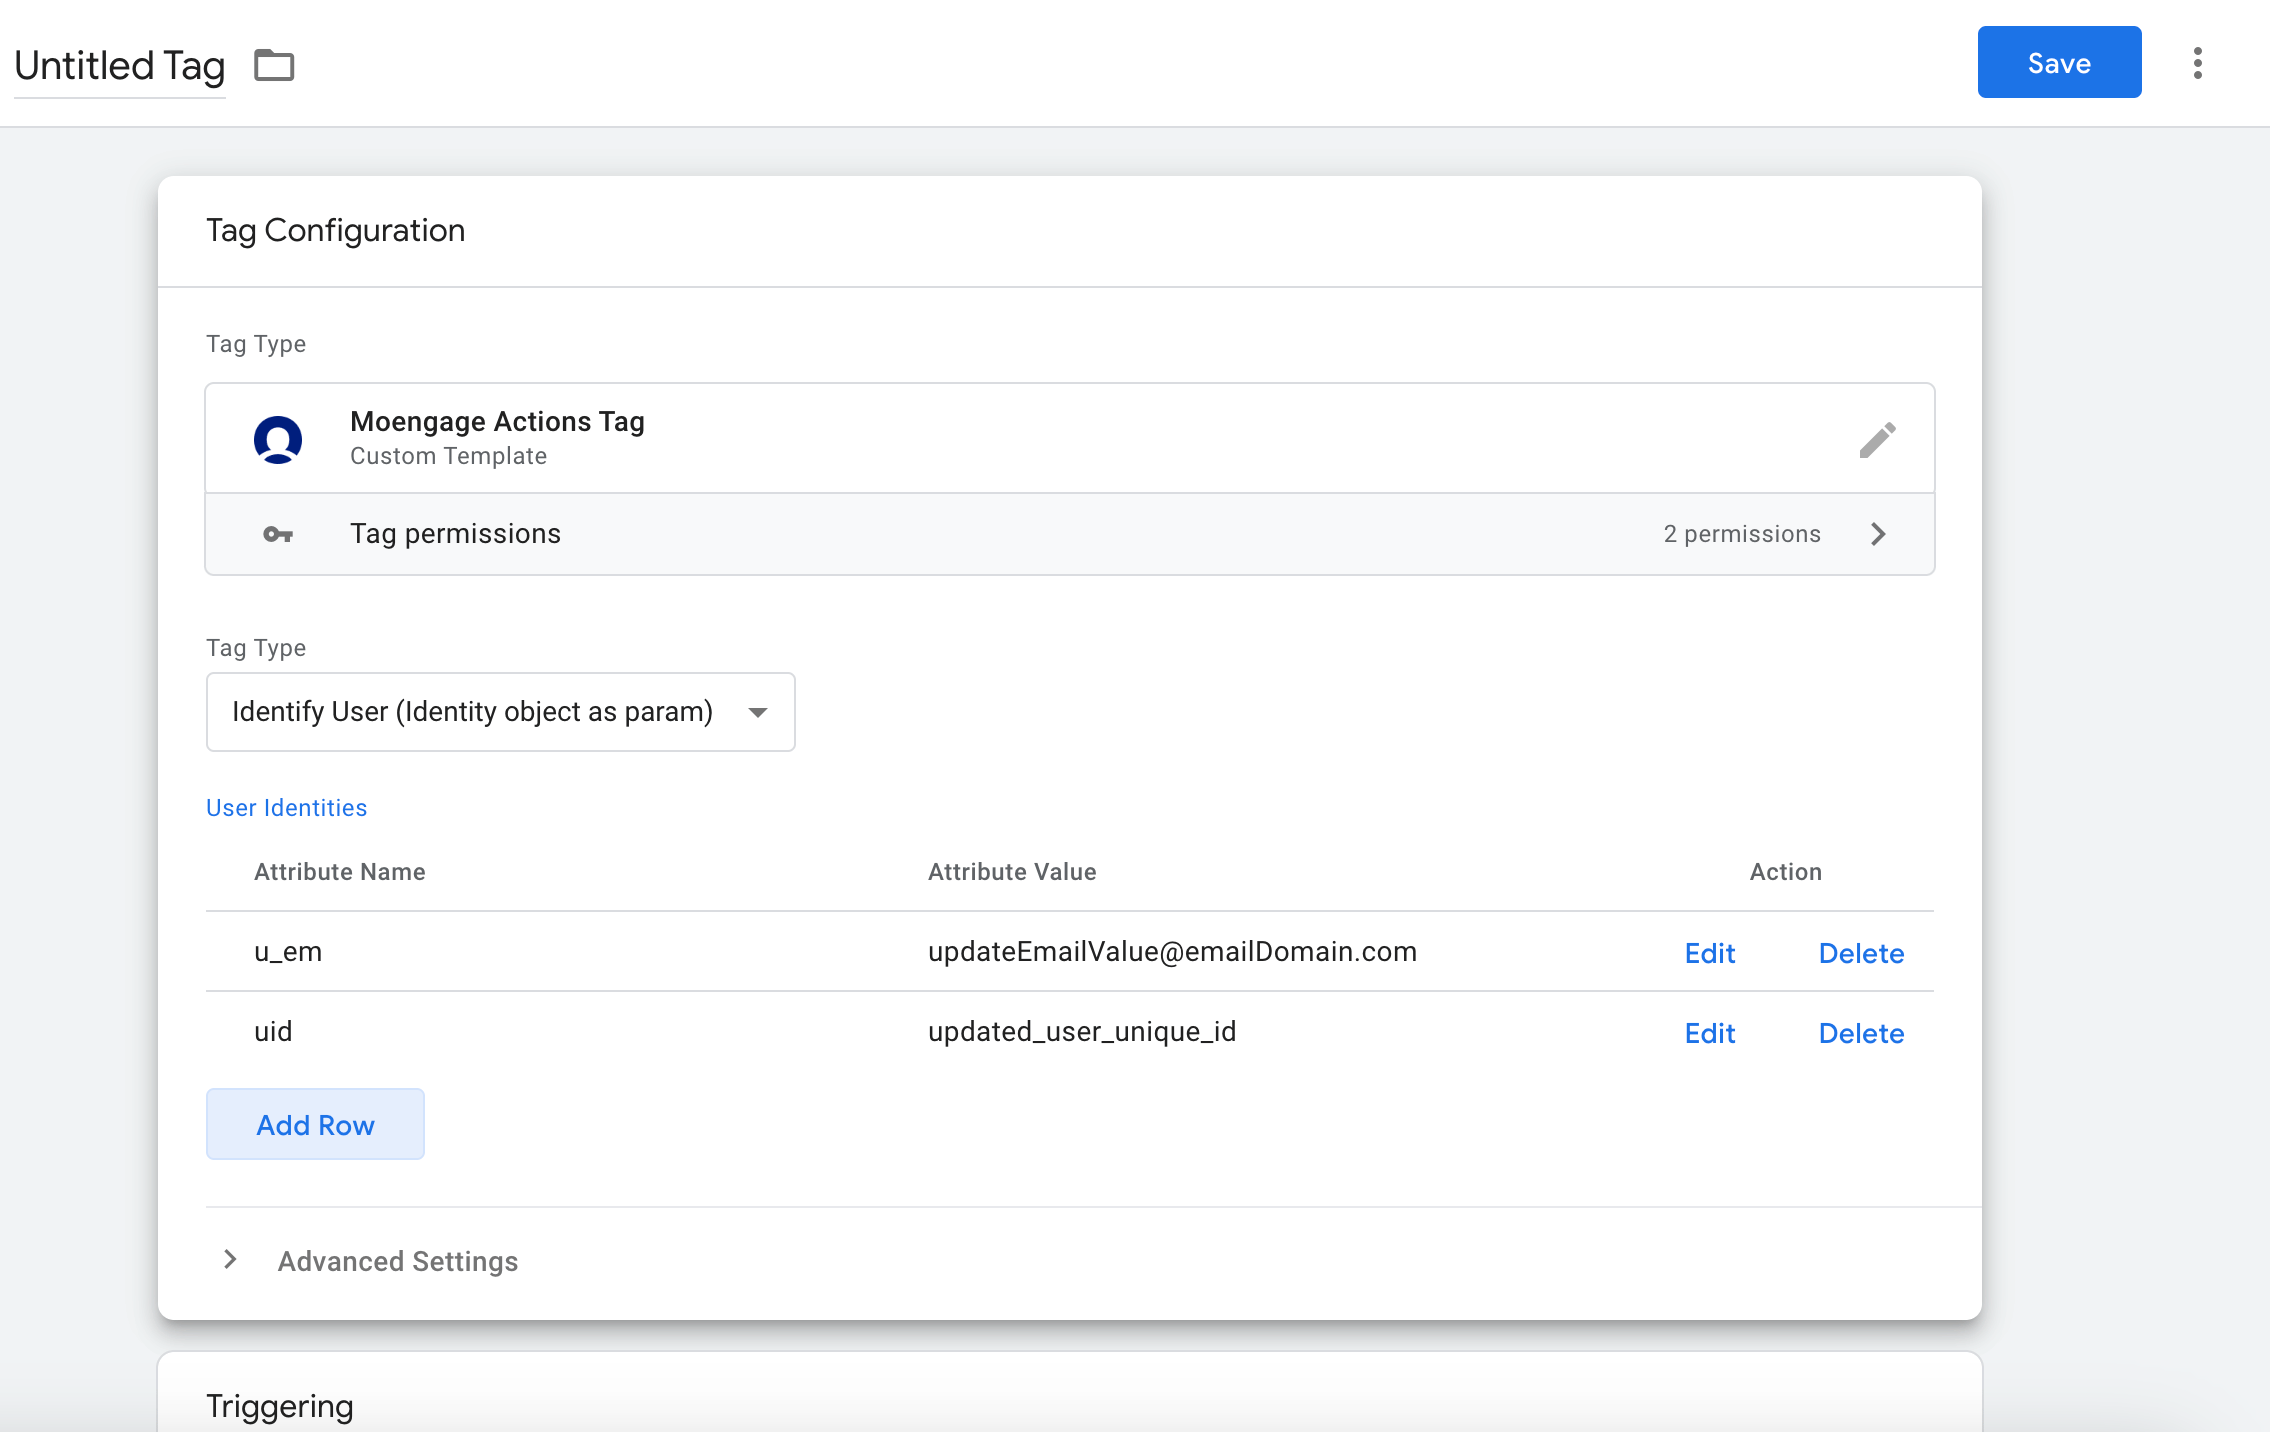
Use the below names as the “Attribute Name” if you want to track the standard user attributes. Custom user attribute names can be used as is.
For example, if Email (Standard), Mobile Number (Standard) and ID are configured as User Indentities for your account, then you can login the user with these three attributes like it is done below. You can use variables to dynamically set the attribute values for the user; we have given static values just for the example.

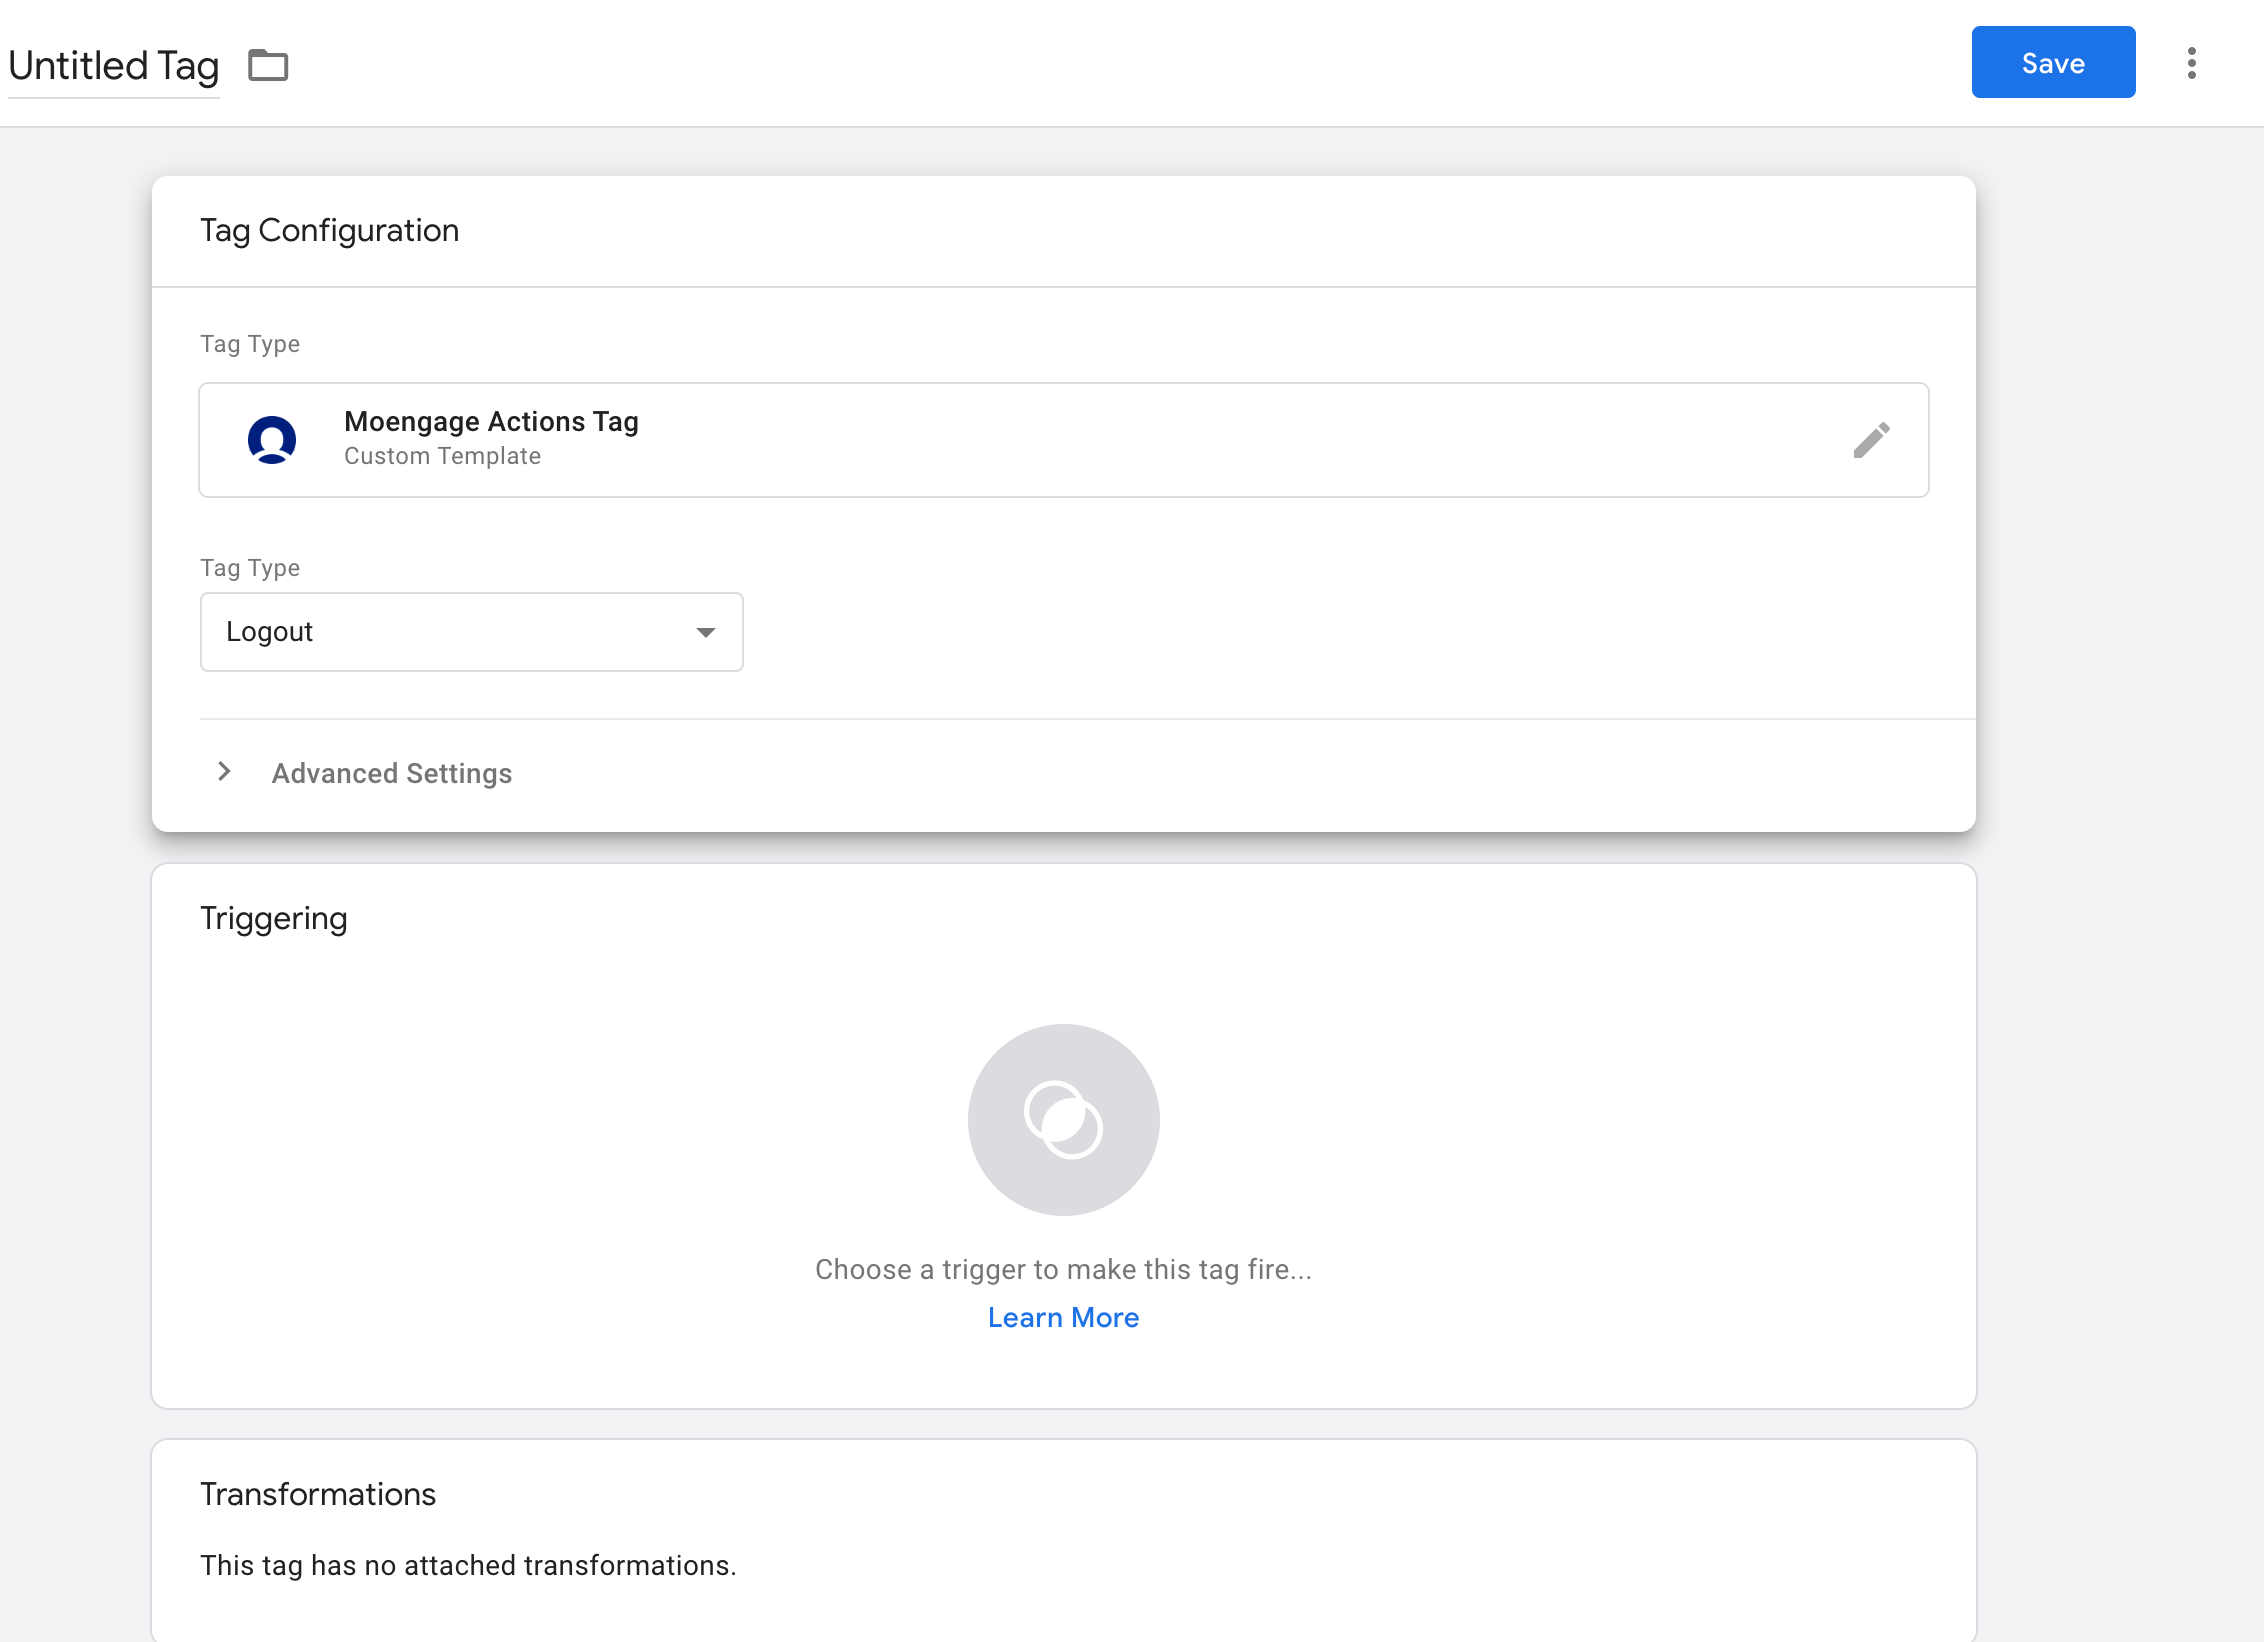
Logout
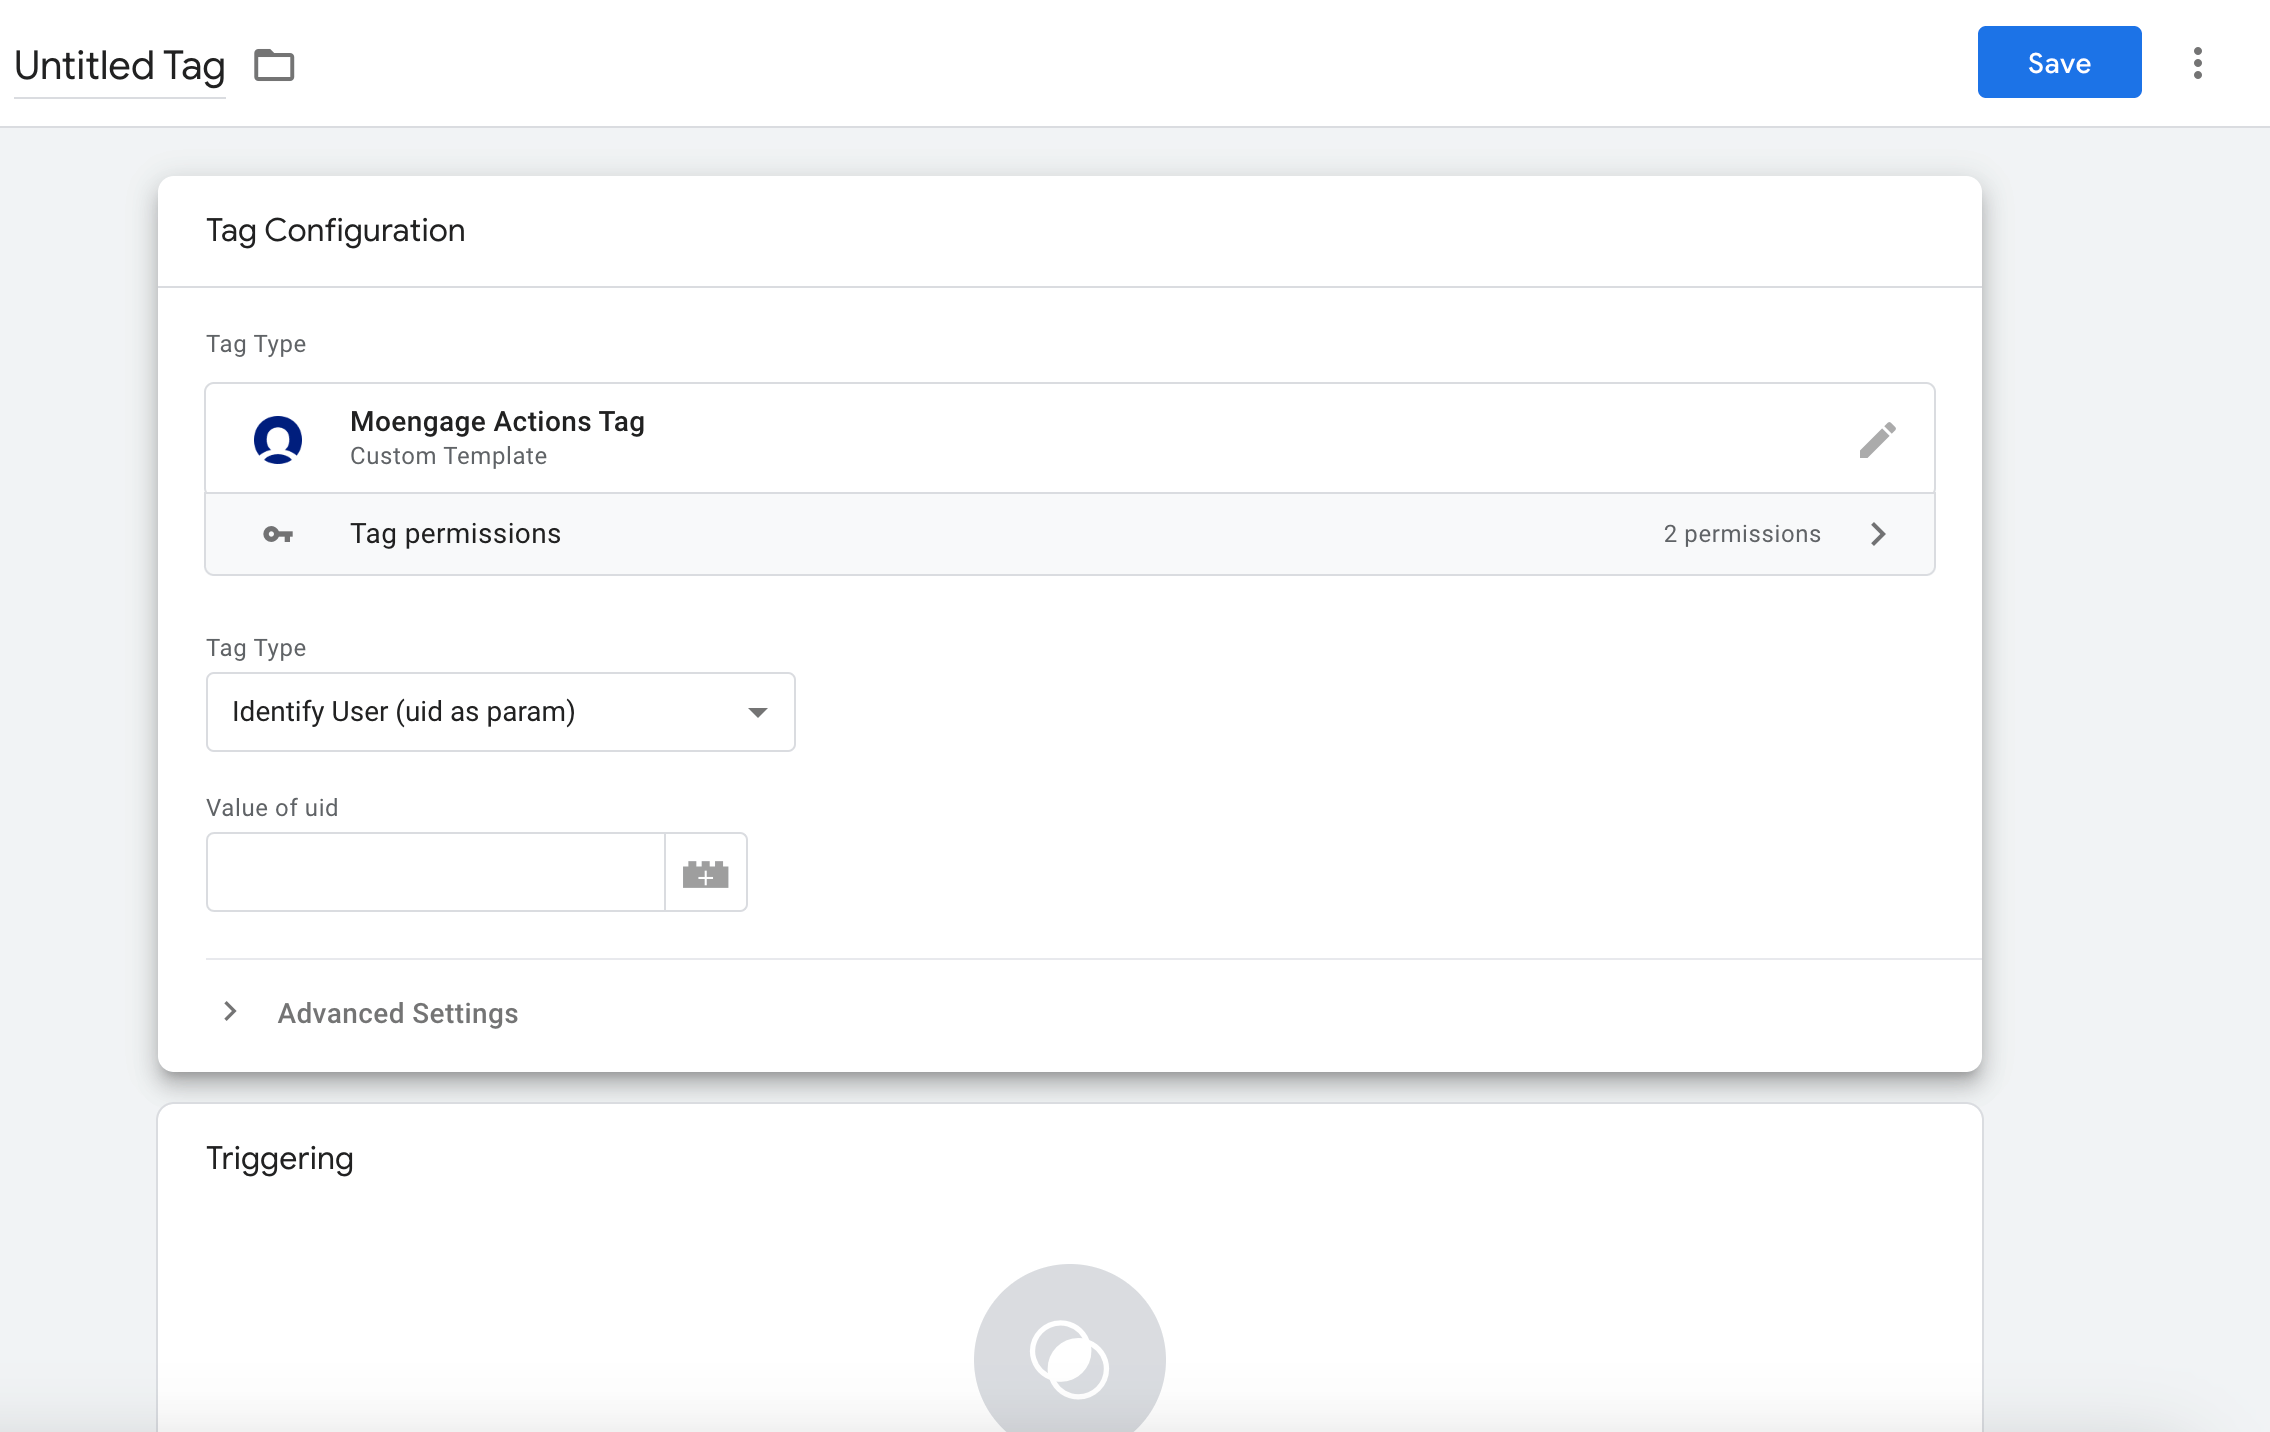
Update User Identities
Please download and use the latest initialisation and action templates. If you are using “Update User ID” tag type to update user ID, please switch to the below tag type.
Track Standard Attribute
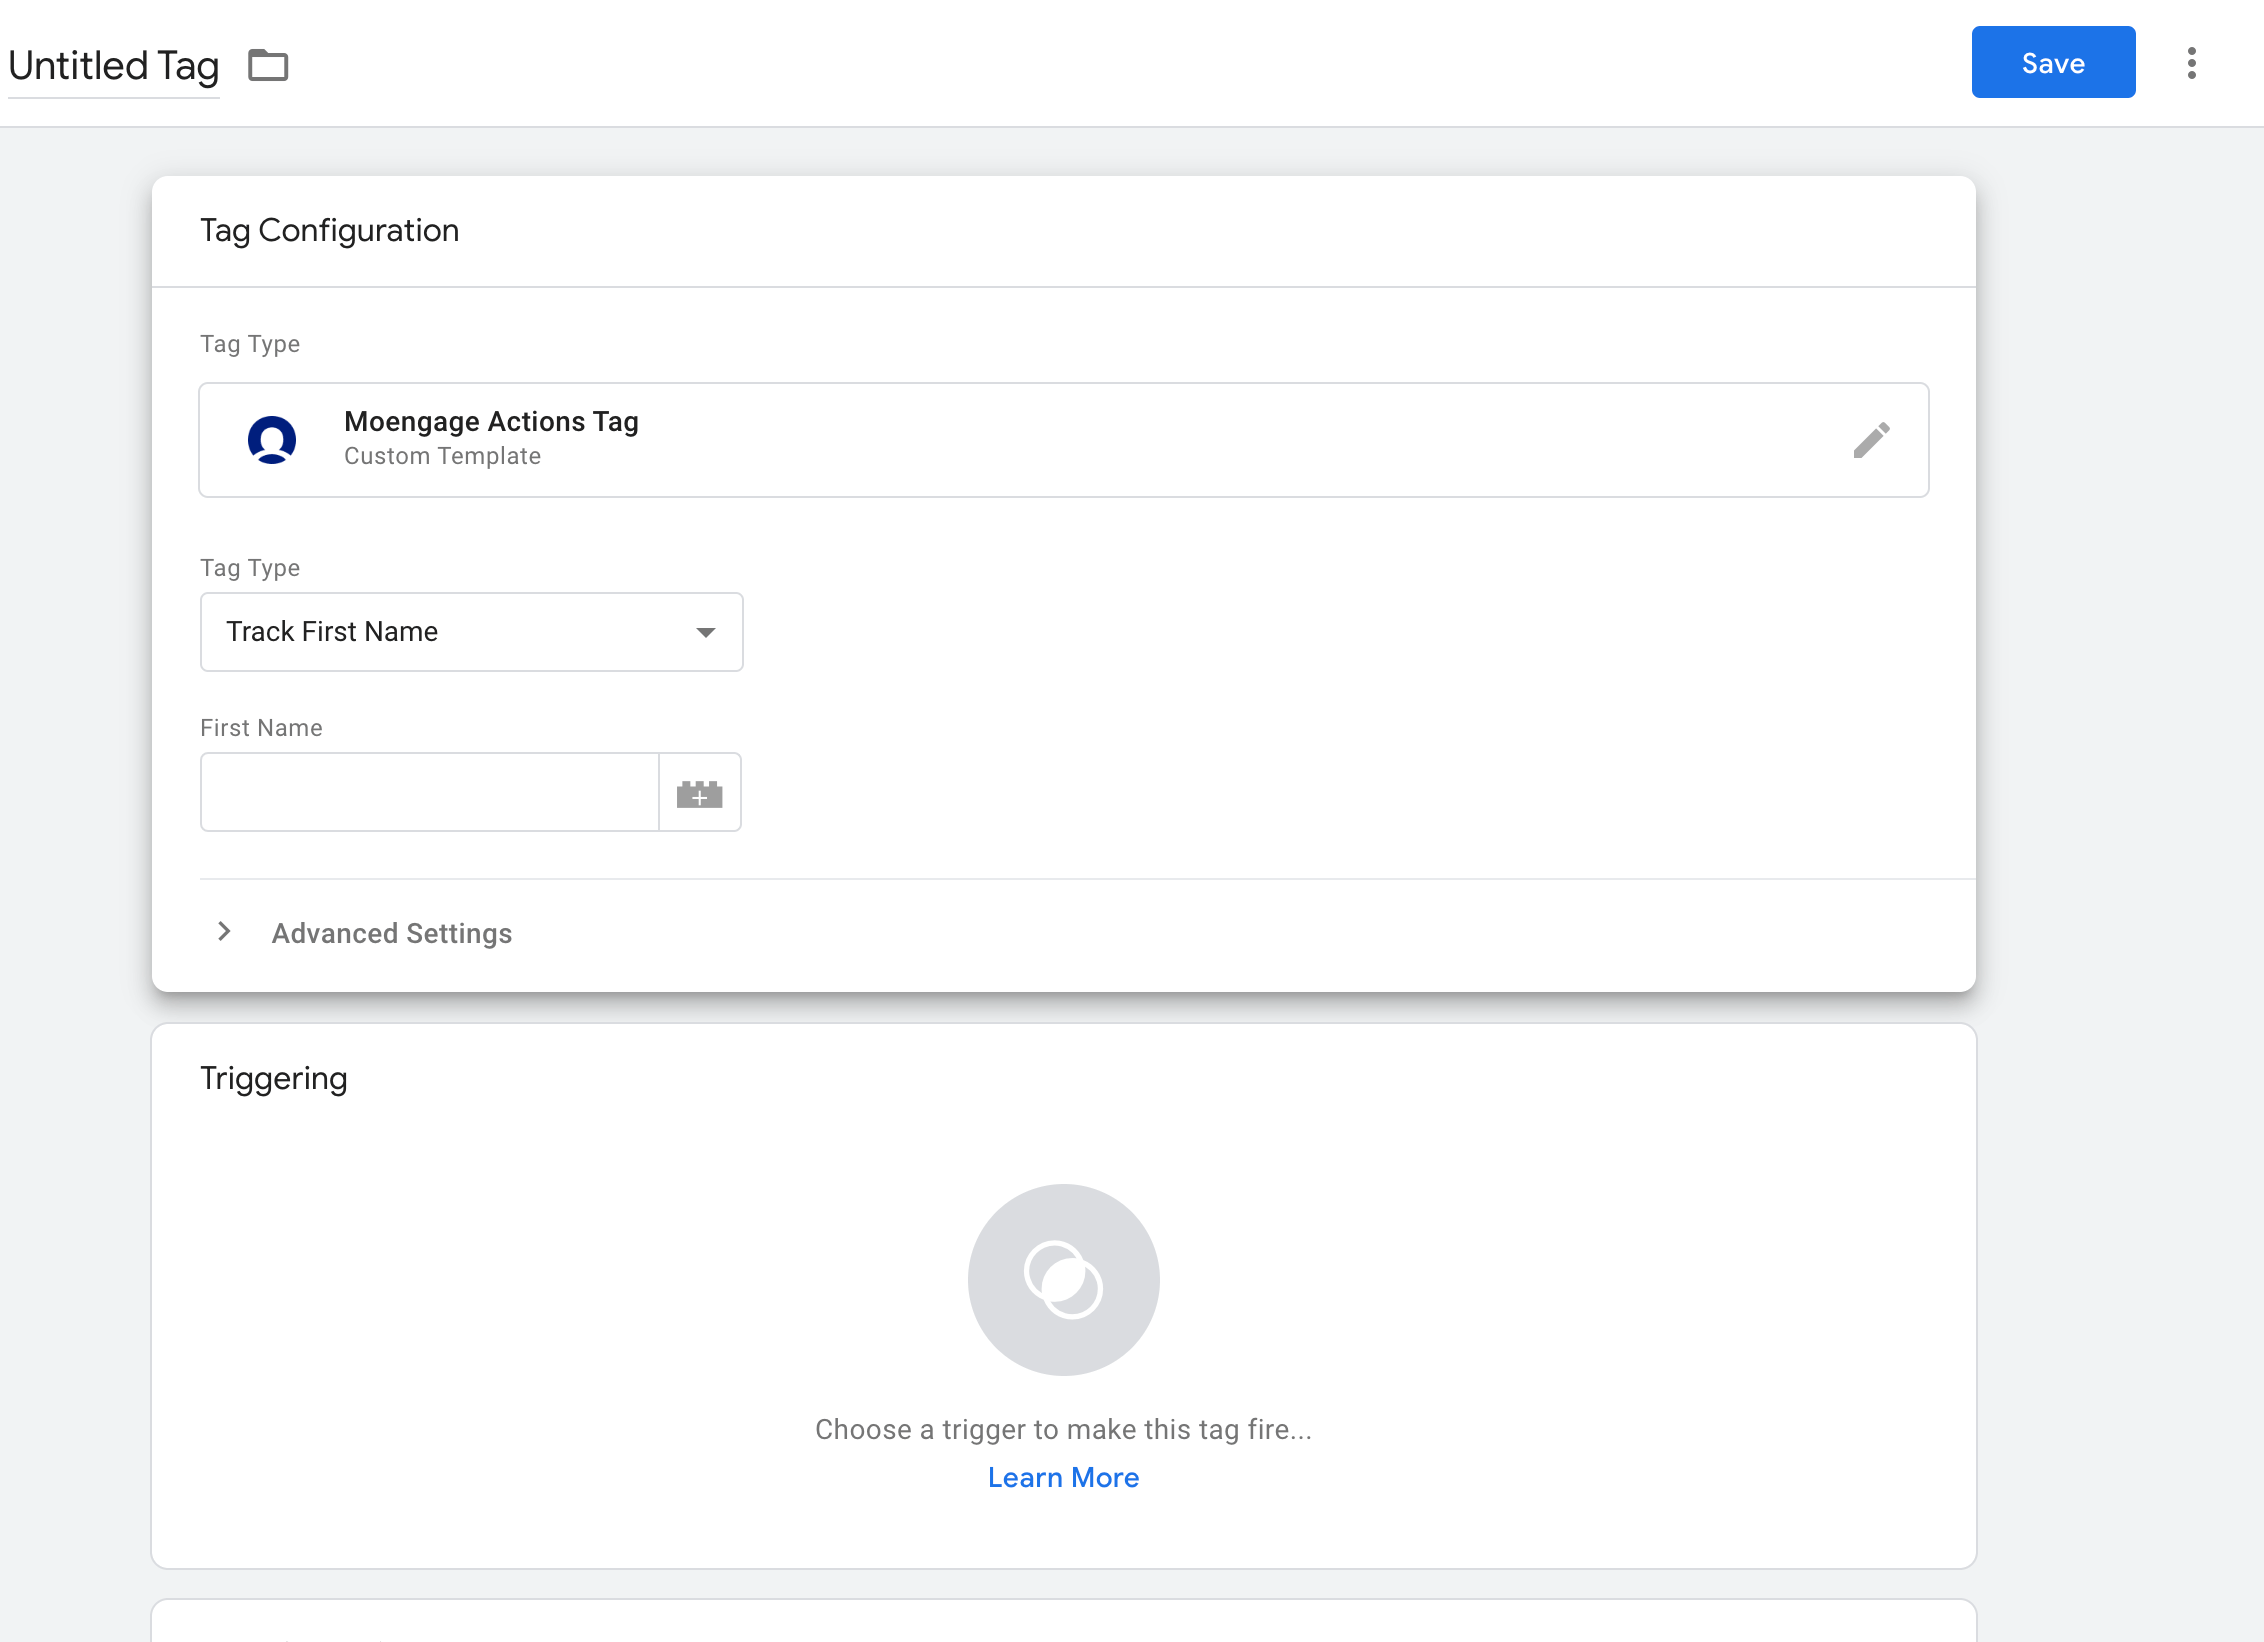
- Track First Name
- Track Last Name
- Track Email
- Track Mobile
- Track Username
- Track Gender
- Track Date of Birth
Read more about updating the standard attributes of a user in MoEngage.
Enable SDK
You can use this tag to enable the SDK. For more information, refer here.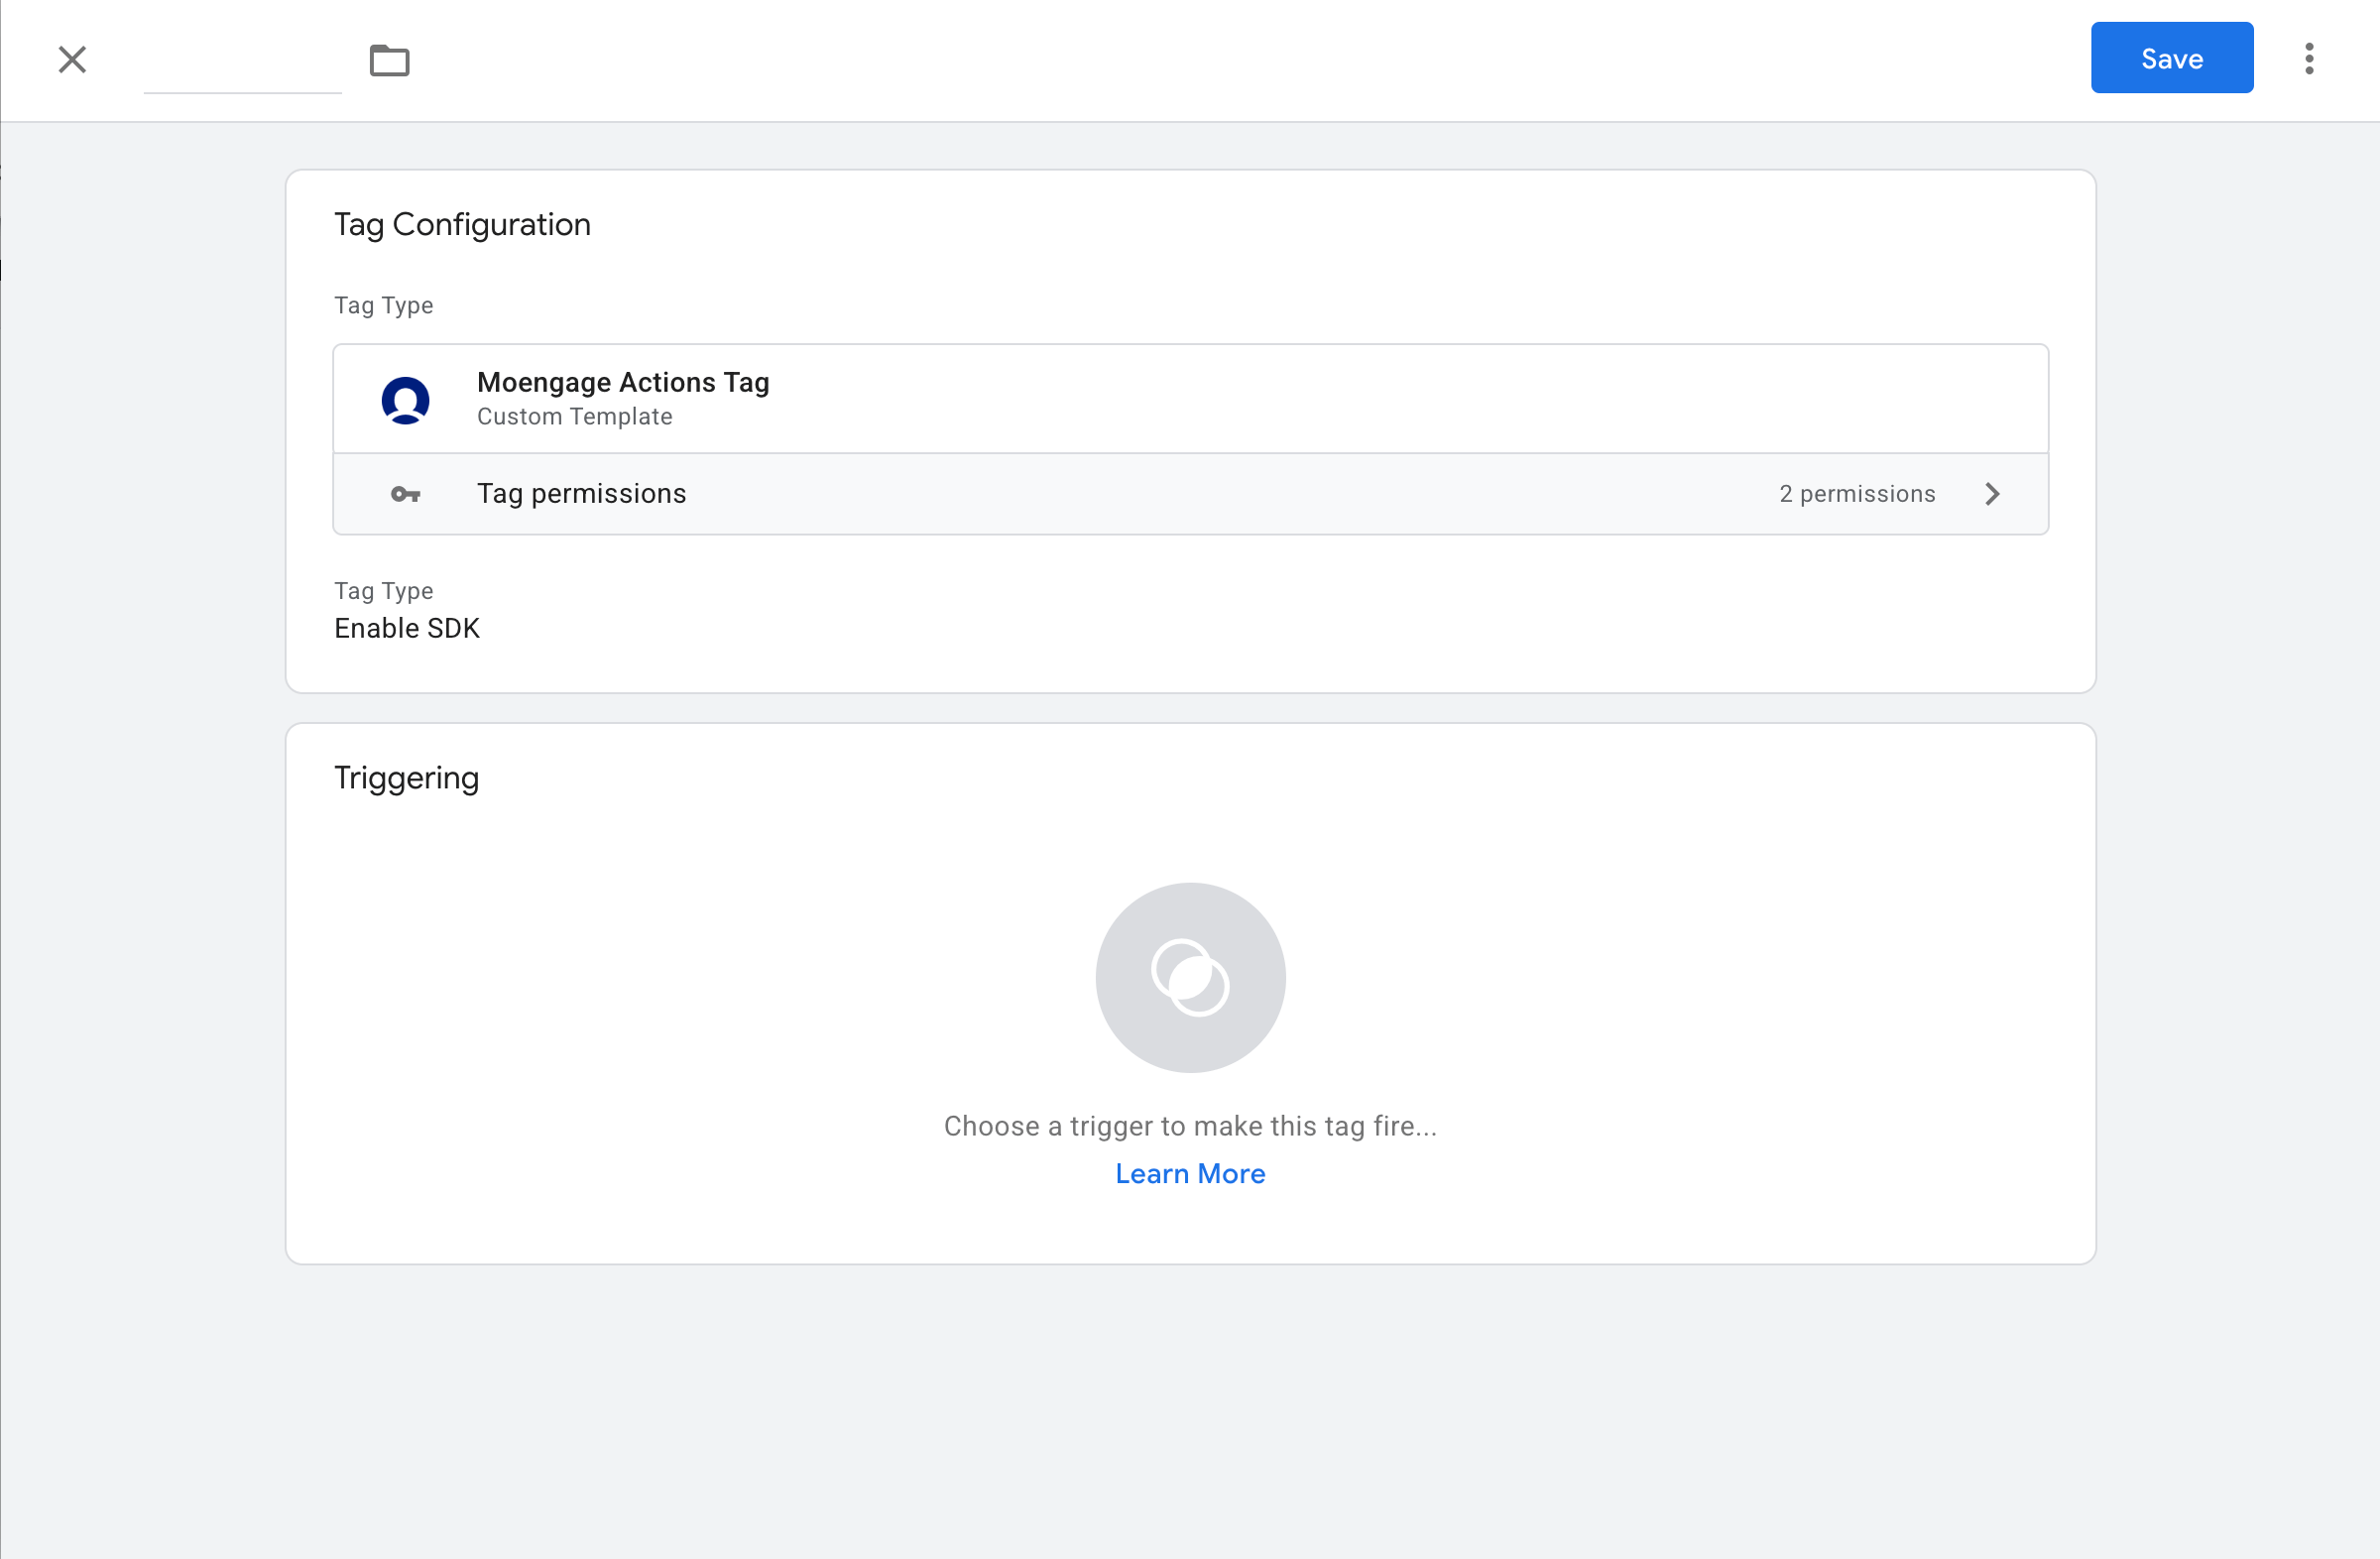
Disable SDK
You can use this tag to disable the SDK. For more information, refer here.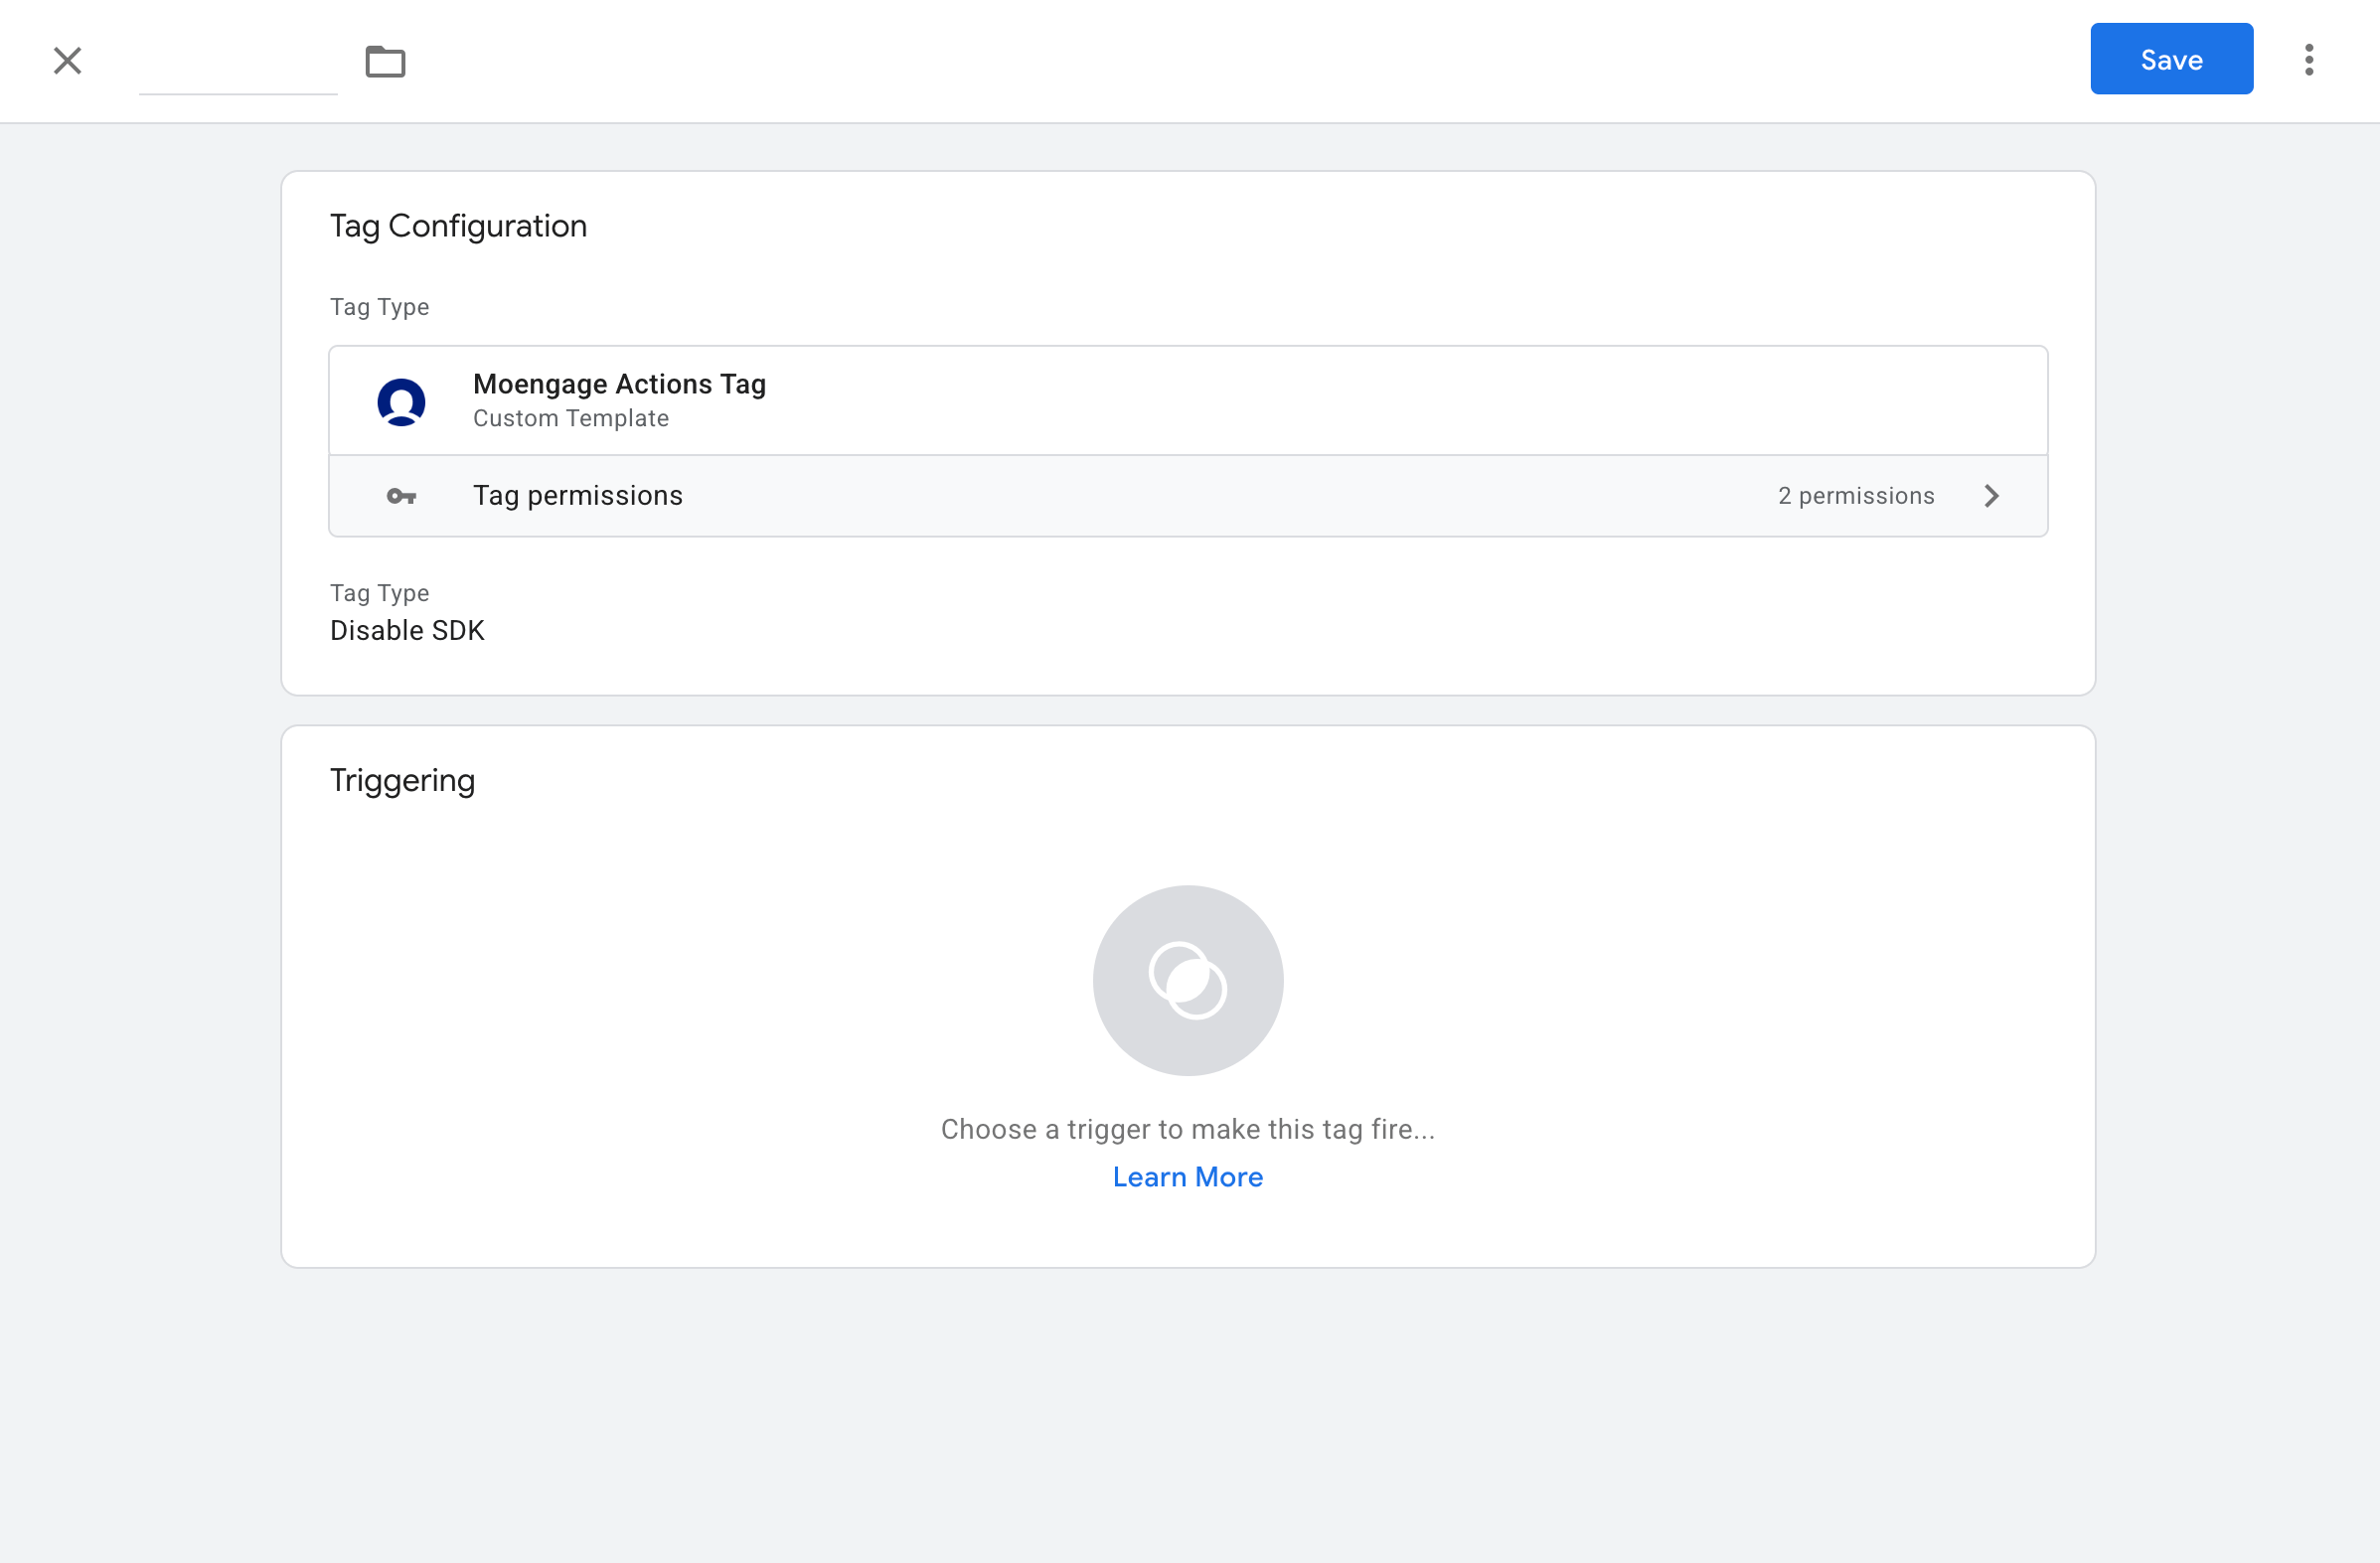
Enable Data Tracking
You can use this track to enable data tracking. For more information, refer here.Disable Data Tracking
You can use this track to disable data tracking. For more information, refer here.
Step 2: Triggering
After configuring the tag, trigger it at the appropriate point on your website. This will depend on whether you want to track a custom event, or login/logout a user.
Tags sequencing
Please ensure that the Initialisation Tag has been executed before any Action Tag is executed. If you have Actions that need to be executed on page load or immediately after the Initialisation tag, the Action tag may execute before the SDK is even initialised. To prevent this undesired behavior, add Tag Sequencing and only fire the Action tag after the Initialisation Tag.- Go to your Action Tag -> Advanced Settings -> Tag Sequencing -> Fire a tag before Moengage Actions Tag fires
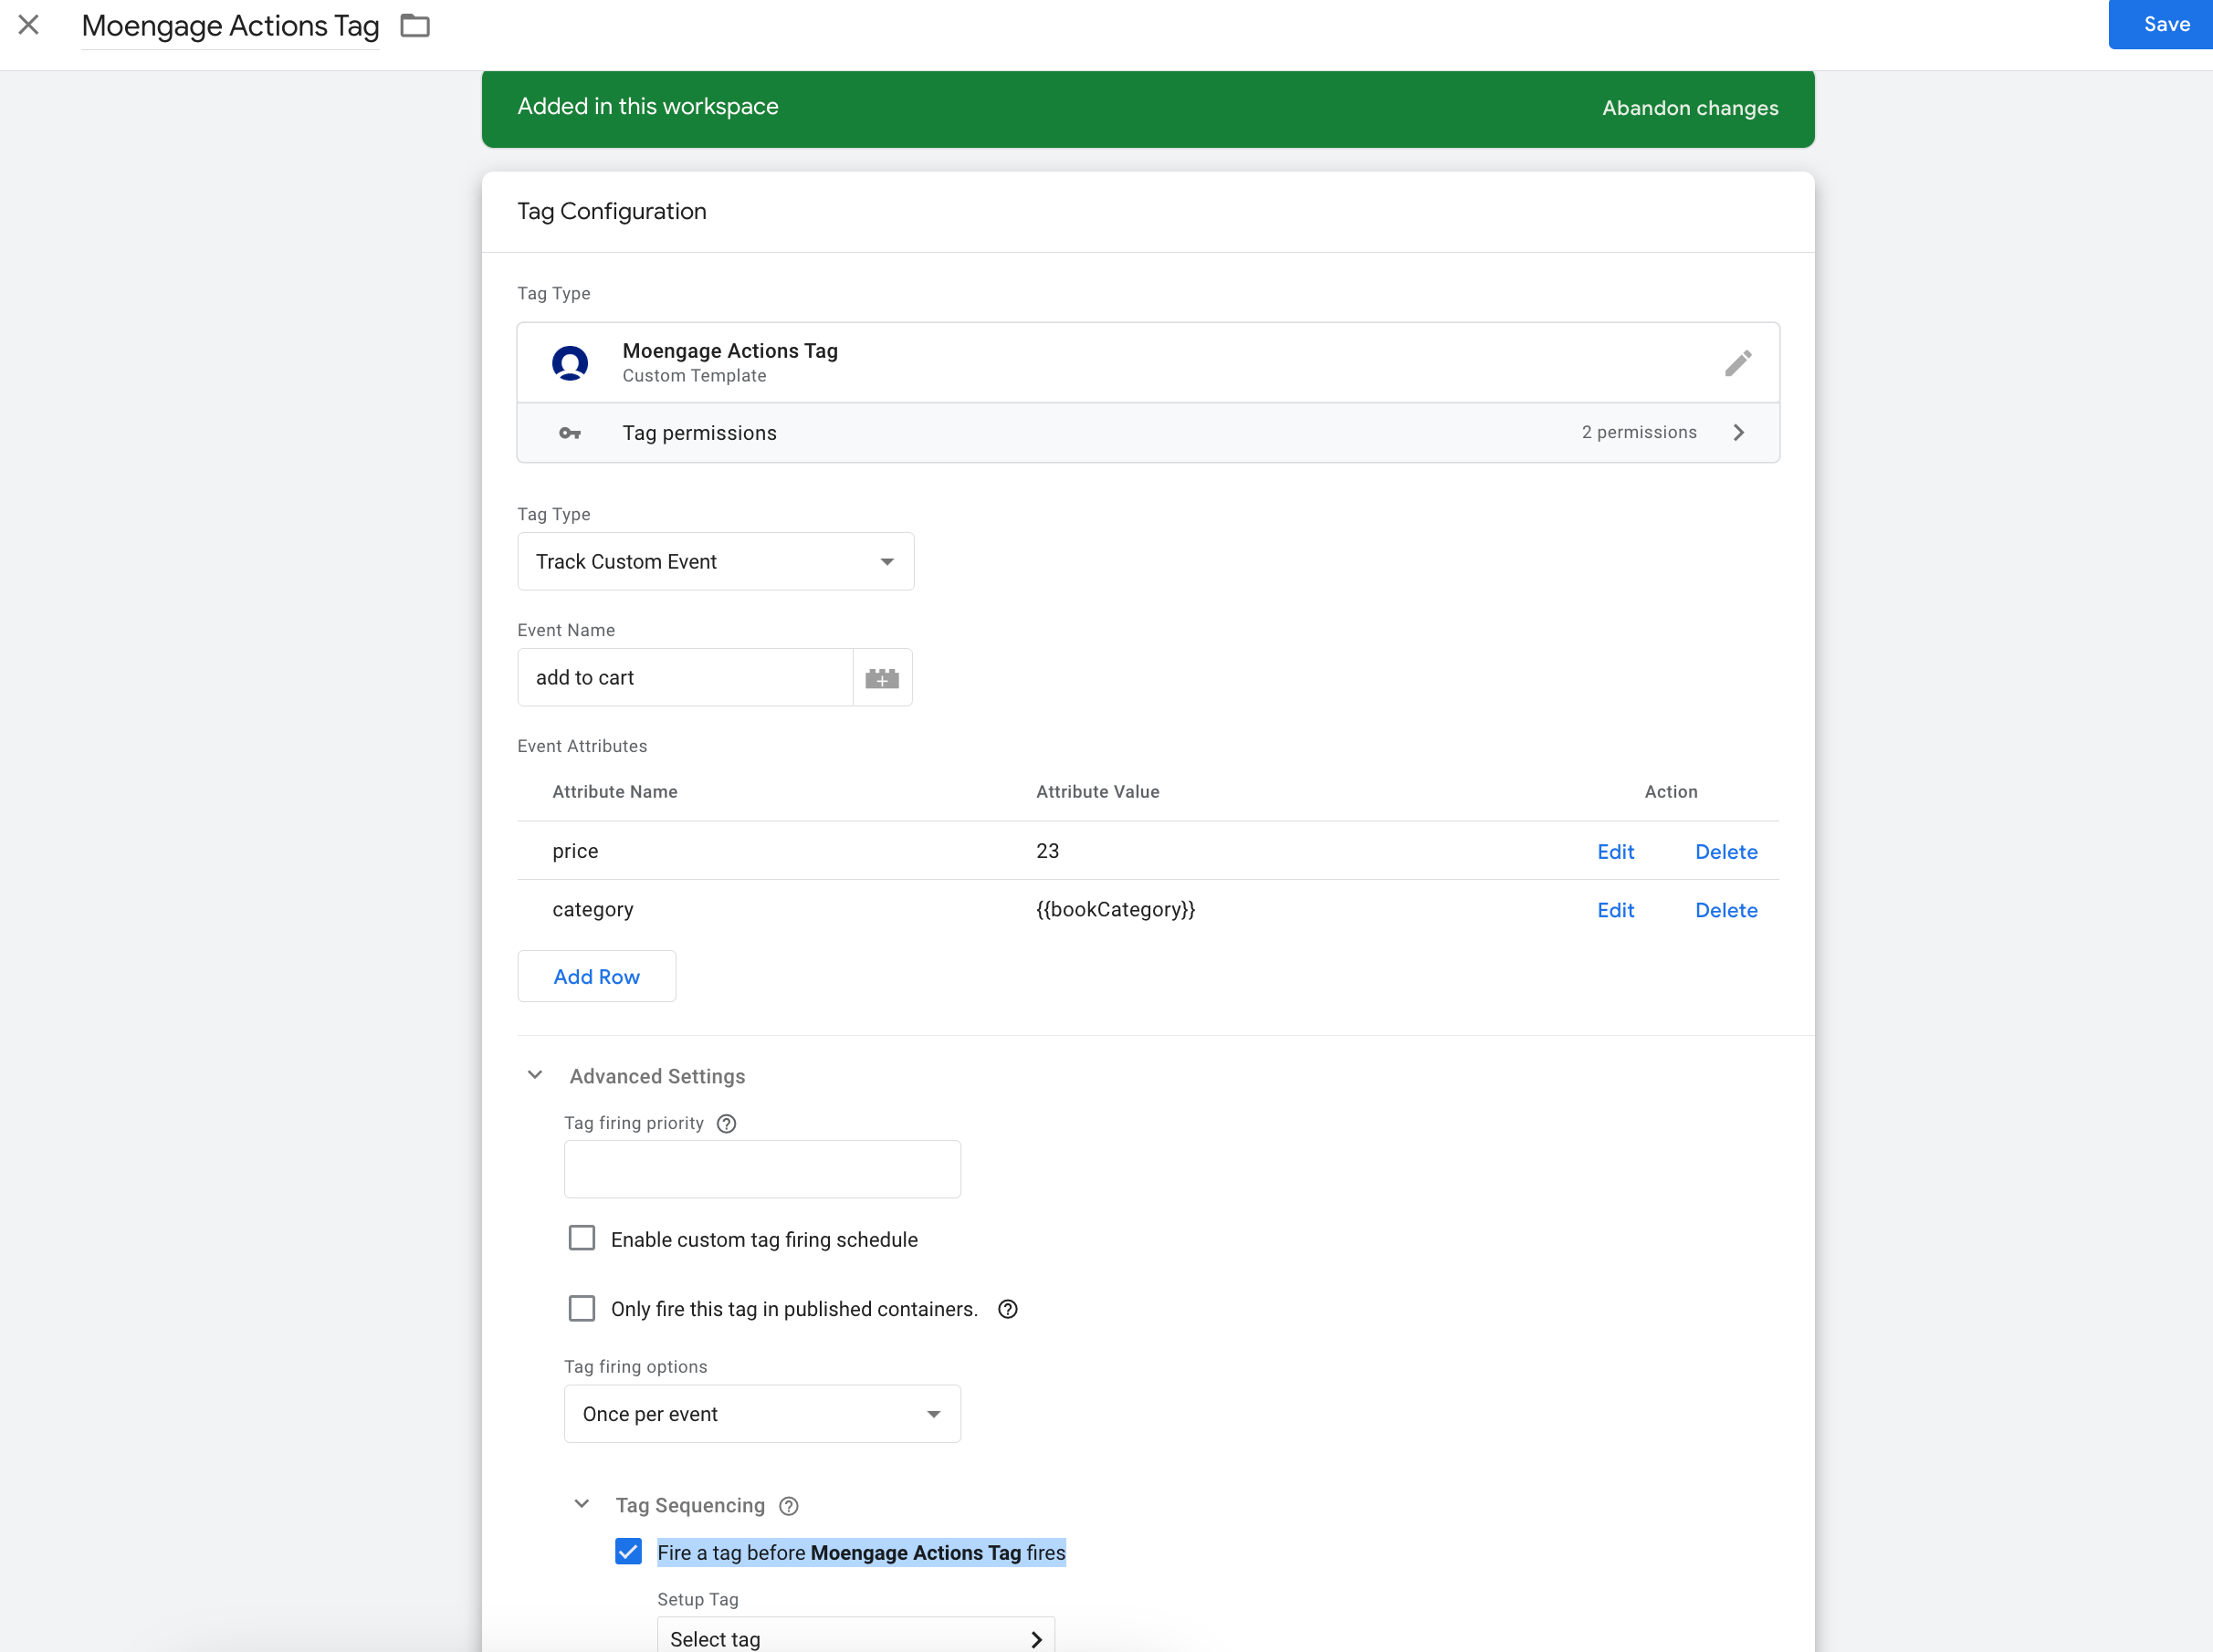
- Select the Initialisation Tag.
Integration via GTM Server Side
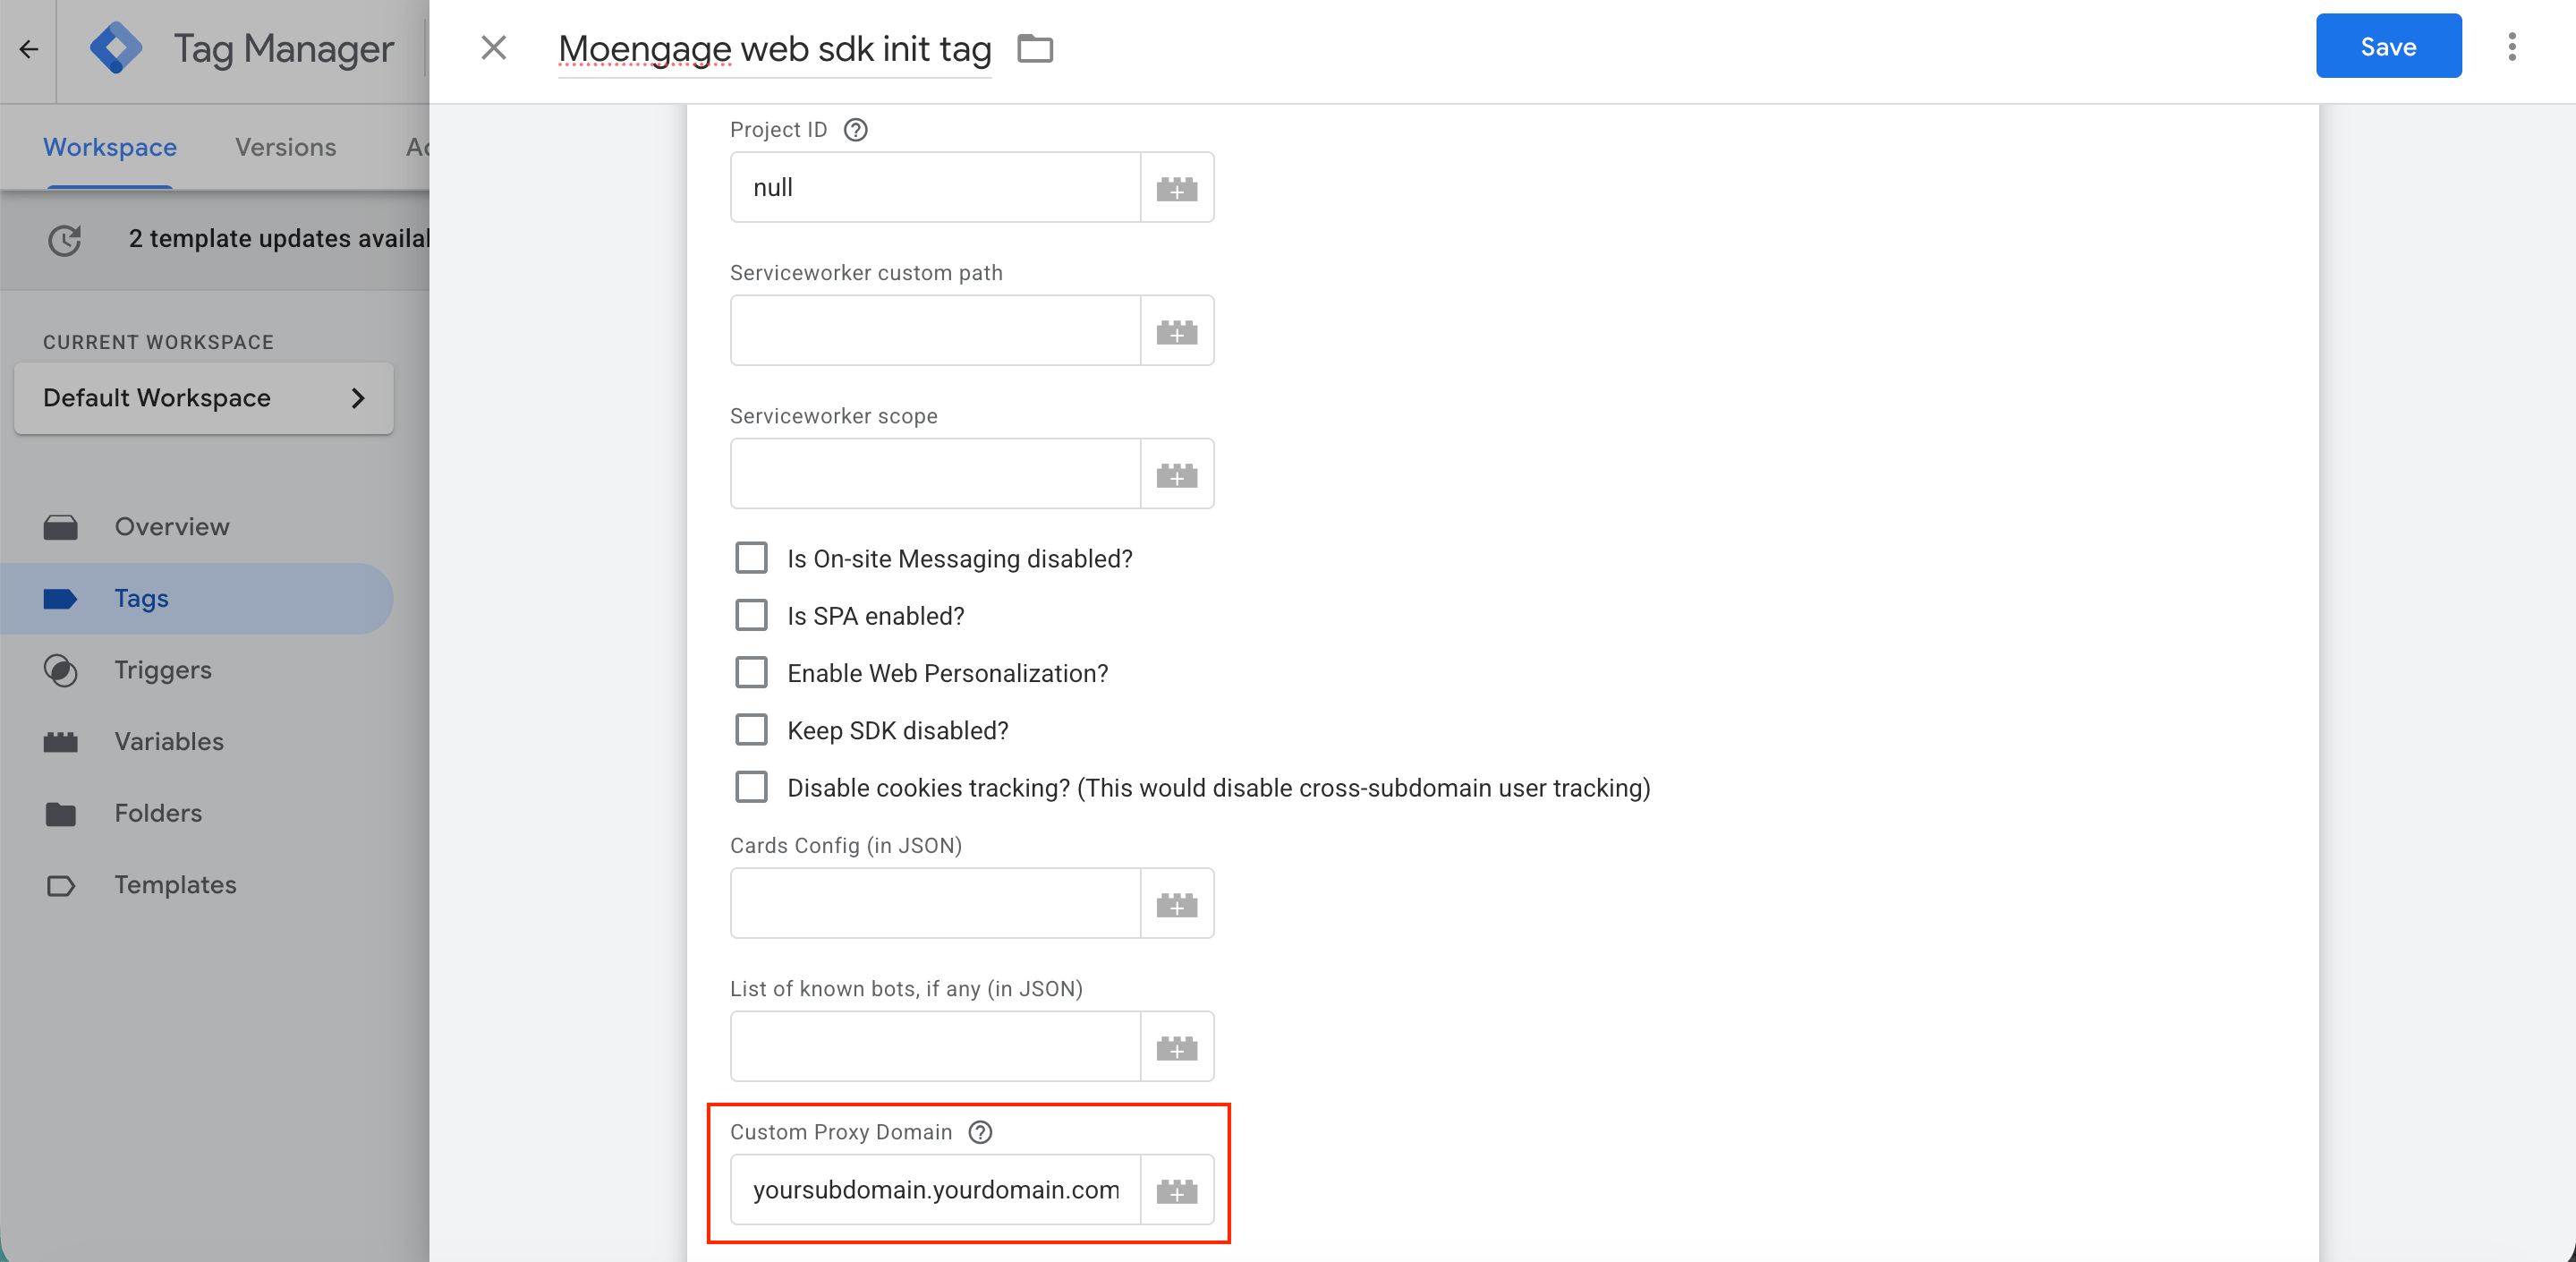
You can also forward the events captured on your GTM server to MoEngage without writing any code on your website. Read more about how to set up the integration with GTM Server and MoEngage on our help docs.Handle Ad Blockers (Custom Proxy Domain)
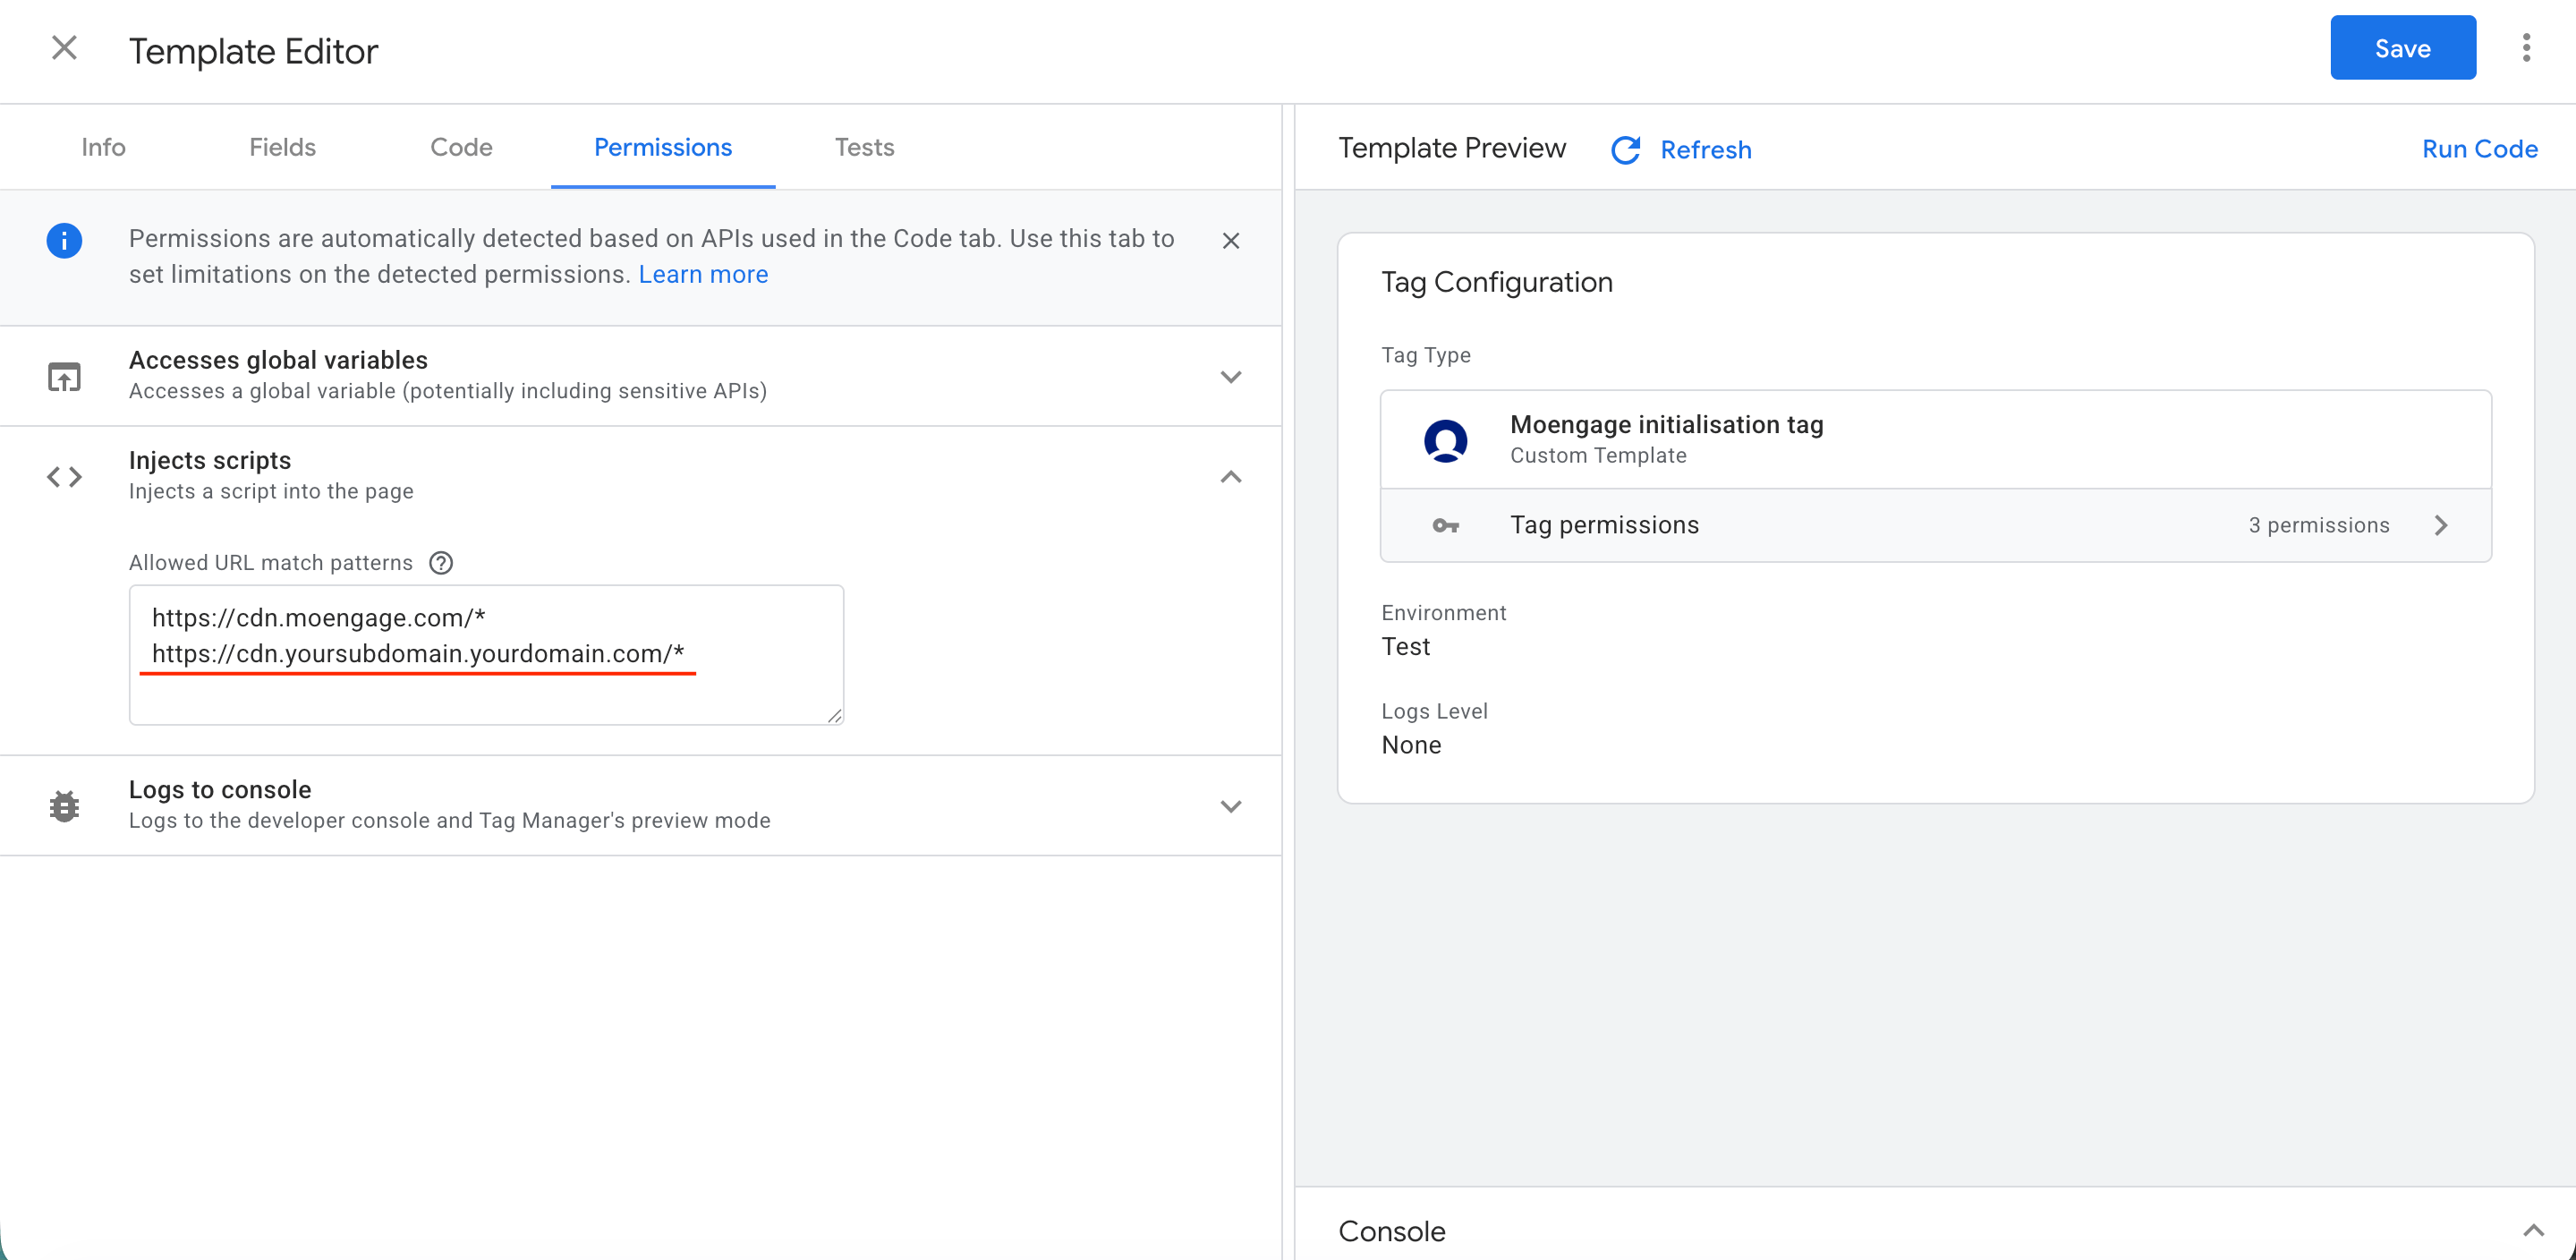
To ensure ad blockers do not interrupt MoEngage SDK traffic, you can route requests through a custom proxy domain. For more information, refer to Handle Ad Blockers. Follow these steps to update your GTM configuration. 1. Update Template Permissions: You must authorize the MoEngage SDK to load scripts from your custom domain by updating the script injection permissions in the GTM template. Follow these steps:- In the MoEngage initialization tag template, select the Permissions tab and expand the Inject scripts section.
- Add your custom domain to the allowed URL match patterns. Use the format
https://cdn.yoursubdomain.yourdomain.com, replacing the placeholder with your actual customProxyDomain.
- In the Custom Proxy Domain field, enter your configured subdomain hostname, for example, yoursubdomain.yourdomain.com.