MoEngage × LeadsSquared
The integration of MoEngage and LeadsSquared empowers businesses to enhance their marketing and sales initiatives through seamless data synchronization. With this integration, you can:- Synchronize leads, deals, and more from LeadsSquared to MoEngage.
- Import sales activities like calls and meetings as behavioral events.
- Capture custom fields for comprehensive user profiling.
Use Cases
Integrating LeadsSquared with MoEngage helps you solve the following use case:- Nurture qualified leads: Send personalized nurturing campaigns based on lead creation and stage progression in LeadsSquared.
- Accelerate the sales pipeline: Trigger deal acceleration campaigns based on opportunity stage changes.
- Re-engage lost opportunities: Send targeted win-back campaigns when opportunities are marked as lost, to re-engage prospects.
Sync Modules
The following table outlines the default sync type for each module:| Module | MoEngage Sync Type |
|---|---|
| Contacts | Users |
| Opportunities | Events |
| Company | Users |
| Calls | Events |
| Meetings | Events |
| Tasks | Events |
| Custom Activities | Events (custom) |
Company Information: The Company module is also supported. To ensure your data is always current, the associated company information is synced with your Lead and Opportunity records, respectively.
Integration
PrerequisitesEnsure you have a LeadsSquared account with the necessary permissions to access and configure the Workflow Automation feature.
Step 1: Get Your MoEngage Endpoint
To get a dedicated endpoint for your integration, please contact the MoEngage Support team. In your request, you must specify the common identifier used to link user profiles between MoEngage and the partner platform.Step 2: Create the Automation Rule
To set up an automation rule, perform the following steps:- On the LeadsSquared dashboard, navigate to Workflow > Automation.
- Click Create Automation.
- Select Build from Scratch to start with a new workflow.
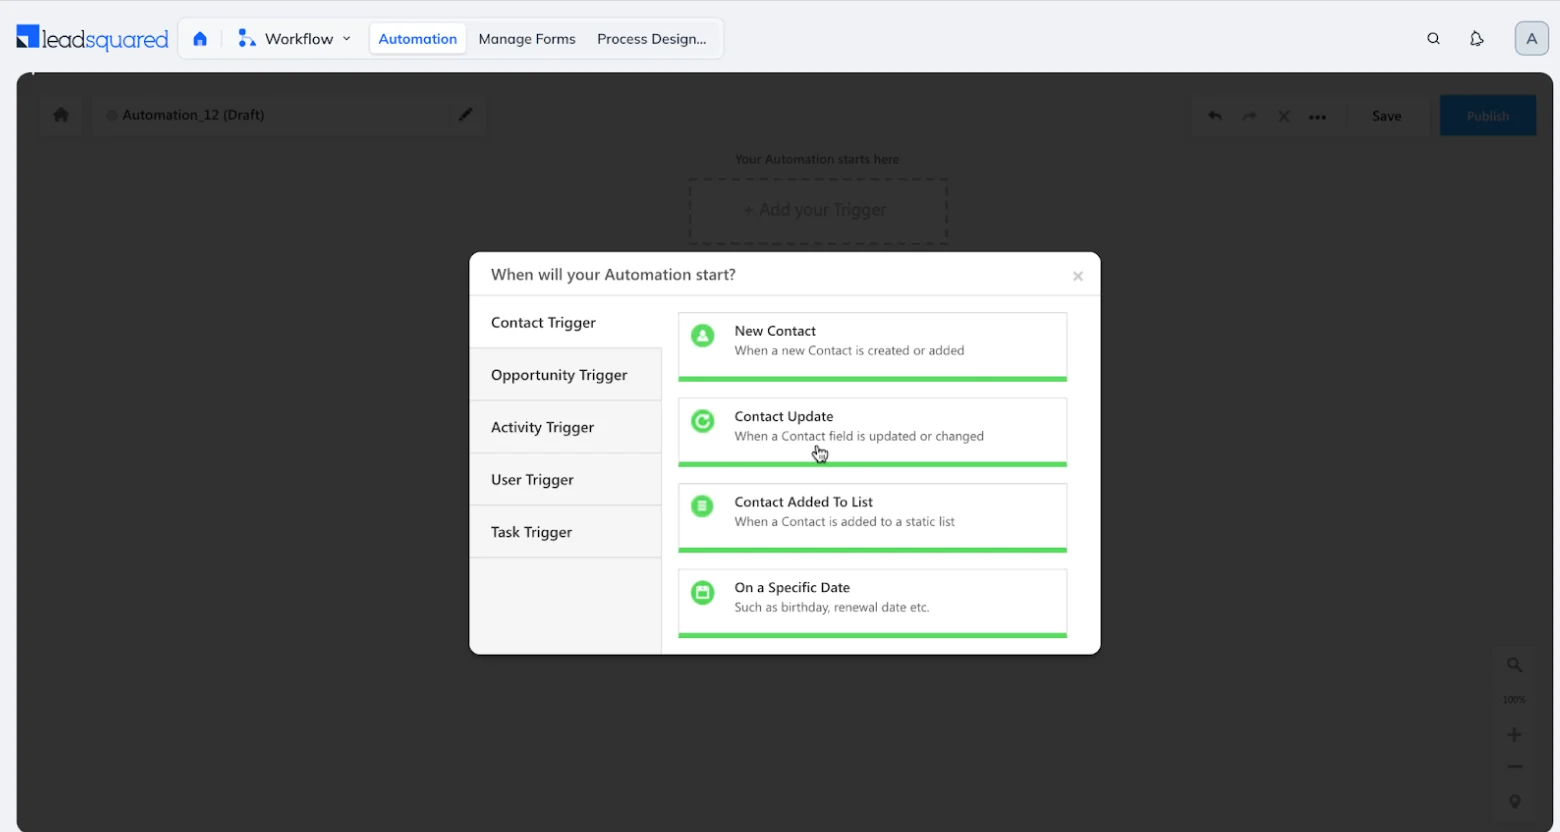
- Select the automation trigger based on the following use cases:
- Lead Create and Update: Triggers when a lead is created or updated.
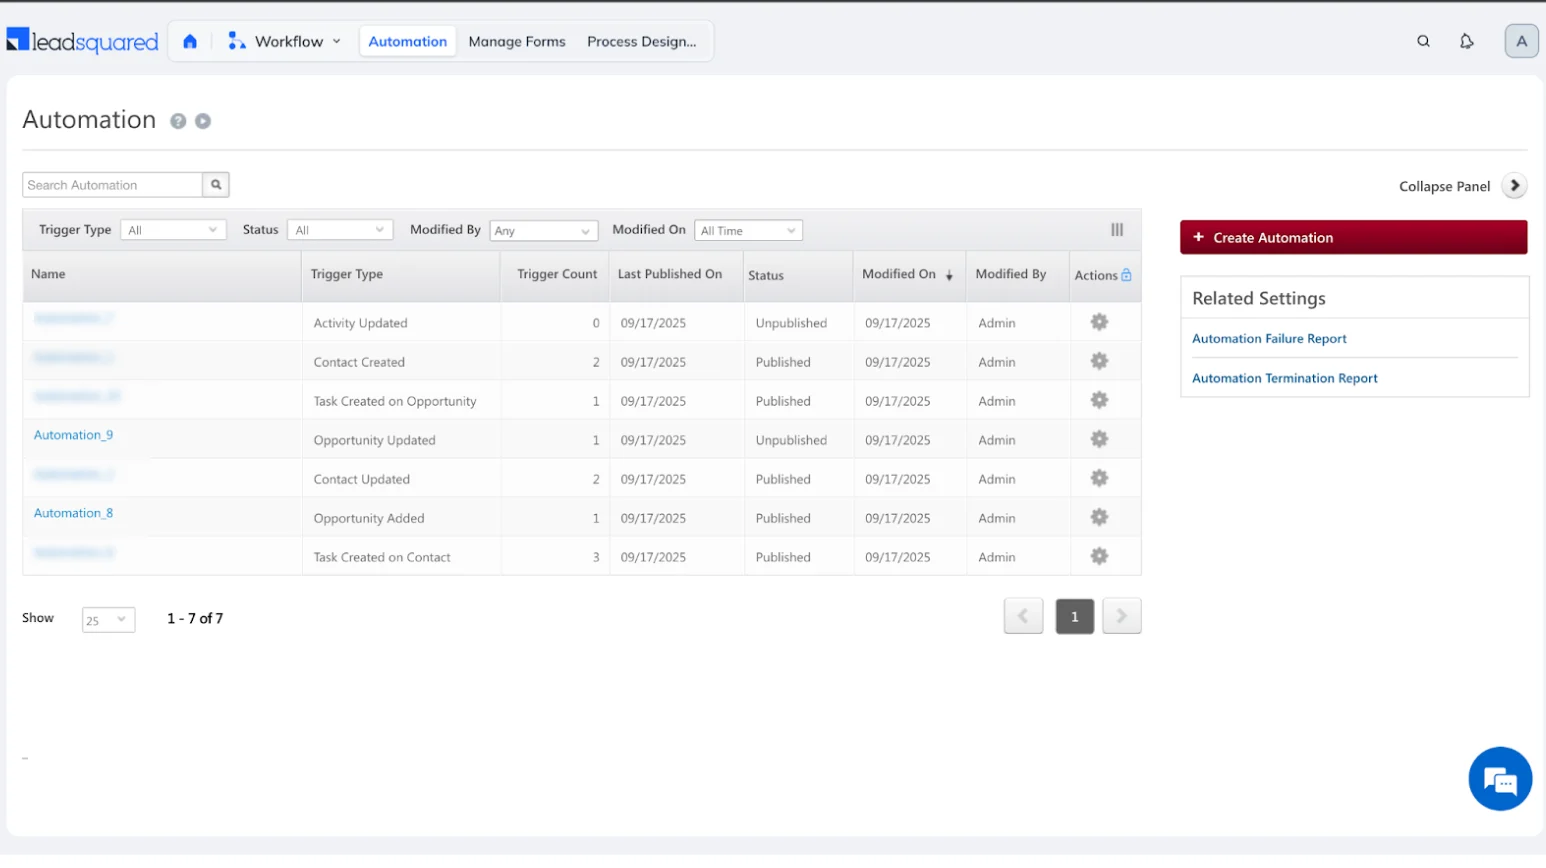
- Opportunity Create and Update: Triggers when an opportunity is created or updated.

- Activity Update on Lead/Opportunity: Triggers when an activity on a lead or opportunity is modified.
- Lead Create and Update: Triggers when a lead is created or updated.
Step 3: Configure the Webhook Action
To configure a Webhook action, perform the following steps:- On your automation workflow, click the + icon
 to add an action.
 - The Choose Condition or Action menu appears.
- Scroll to the Action section, click the Custom category to expand its options.
- Click Webhook.

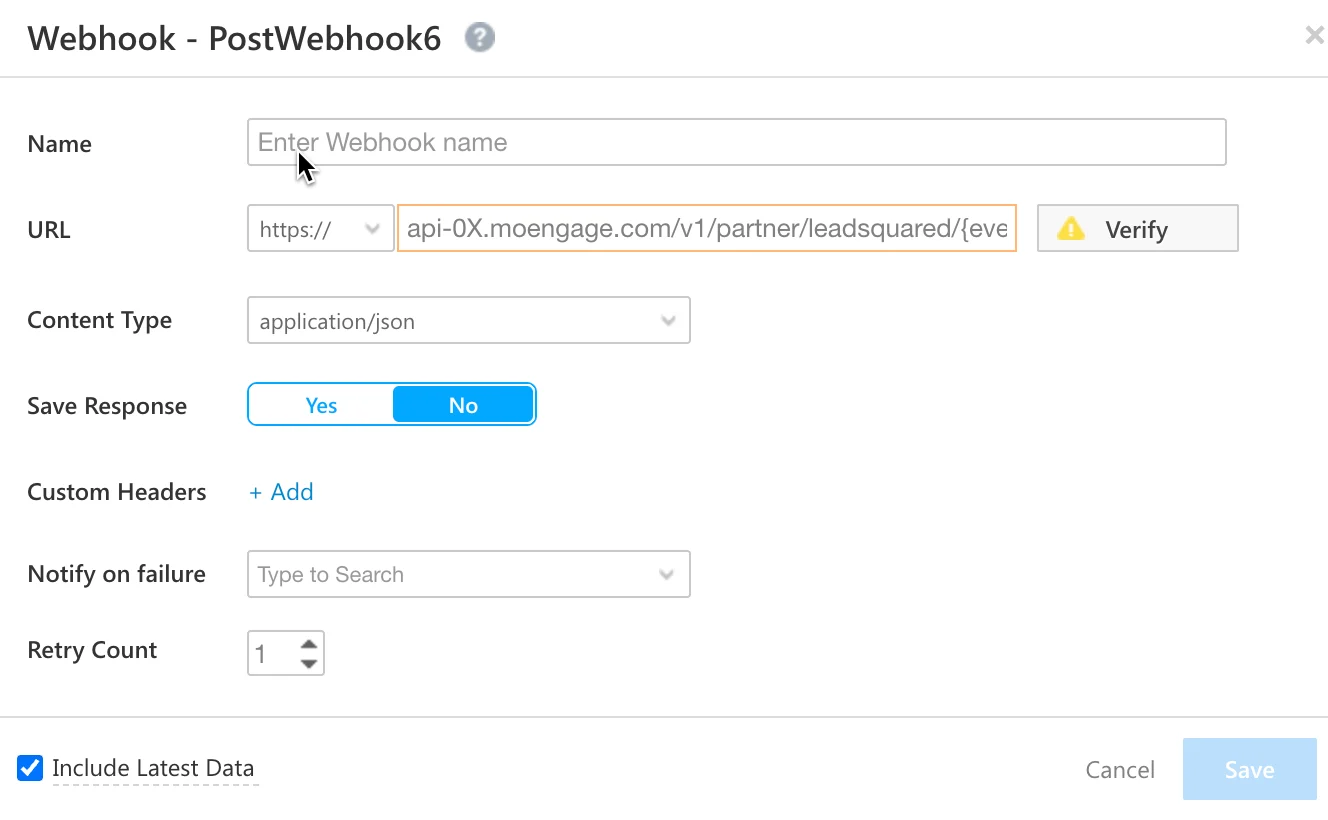
The Webhook dialog box appears. - Provide the following details:
| Webhook Section | Description |
|---|---|
| Method | POST |
| URL | Enter the dedicated Webhook URL provided by MoEngage in the following format:https://api-0X.moengage.com/v1/partner/leadsquared/{events/users}/?configName={config_name} |
| Custom Headers | Content-Type: application/jsonHeaders: 1. Click + Add next to Custom Headers. 2. The Add Custom Header dialog box appears. 3. In the Name * box, type Authorization. 4. In the Value * box, type the basic token you generated. For more information, refer to the Authorization section. 5. Click Add to save the custom header. 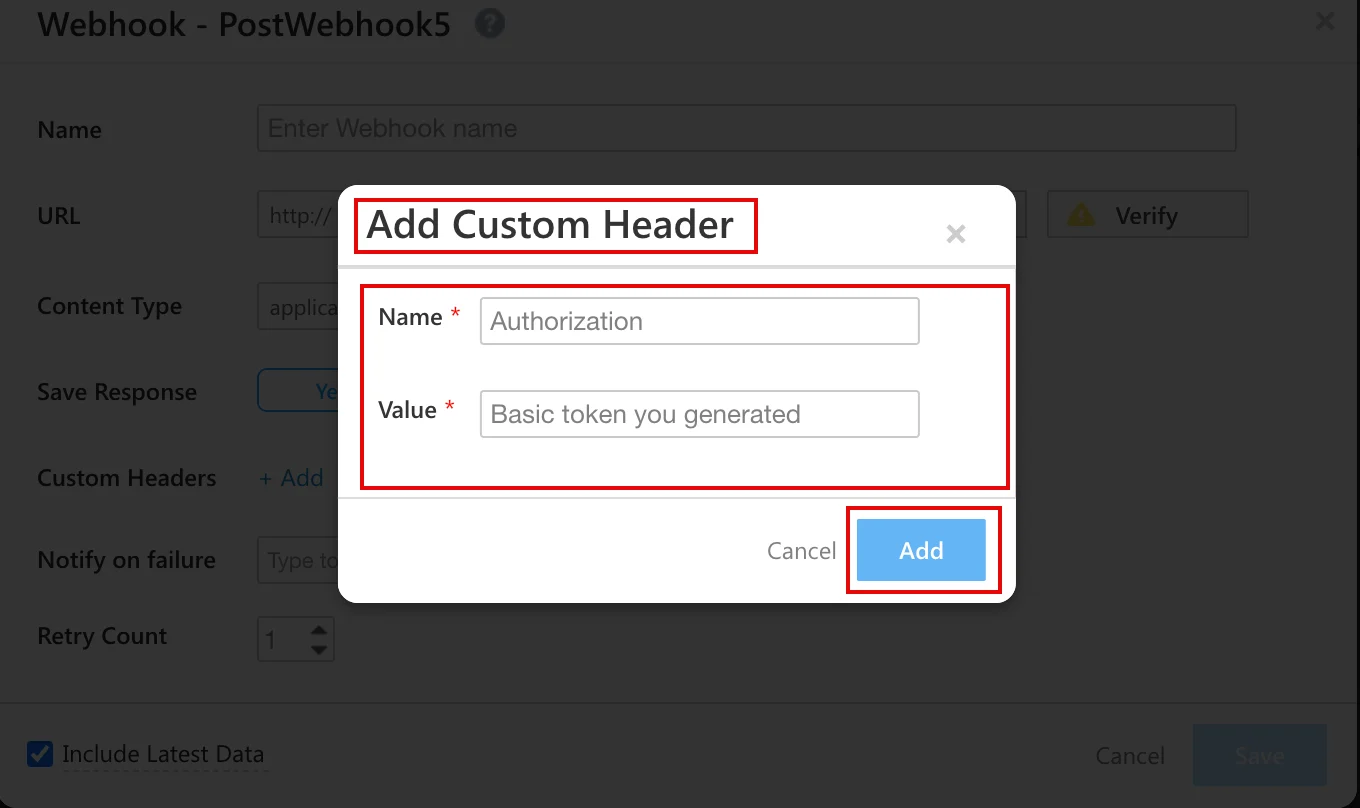 Authorization: Generate a Basic Authentication Token using an online Basic Auth Header Generator tool. You must enter your Workspace ID as username and Data API Key as password. To find your credentials, perform the following steps: 1. On the MoEngage UI, navigate to Settings > Account > APIs. 2. Copy the ID under Workspace ID (earlier app id). 3. Copy the Data under API keys. Your Basic Authentication Token is a combination of Workspace ID and Data. For example, paste the following value as your Basic Authentication Token: Basic Qk5CR1NNNUR4eHh4eHhWQ1hSRFJEWTdSOlFsWHVoTHVaeHh4eHh4QWQrQnBYUEotNw==Note: Ensure the token is copied completely without extra space. |
- Real-time updates: To ensure MoEngage always receives the most current information, enable the Evaluate on latest data option in your automation settings.
- Payload standards: The Webhook payload’s structure is determined by the trigger you use. For more information, refer to the official LeadSquared Automation Trigger Documentation.
- Preventing data errors: MoEngage highly recommends sharing your specific LeadSquared setup, requirements, and sample data with the MoEngage support team before activating the integration. This helps prevent the creation of incorrect or duplicate data.