

Introduction
Statsig is a feature management and experimentation platform that teams use to run feature gates, dynamic configurations, and A/B tests in production. Statsig sends real-time event webhooks for exposures and config changes, so you can react to feature and experiment activity as it happens.MoEngage × Statsig
The MoEngage and Statsig integration uses real-time feature and experiment data to enrich user profiles and power personalized engagement. When Statsig forwards exposure events to MoEngage, you can segment users by feature eligibility, run experiment-driven campaigns, and keep feature state consistent across your marketing stack.Use Cases
Integrating Statsig with MoEngage helps you address the following use cases:- Experiment-driven personalization: Trigger personalized campaigns based on the experiment group a user falls into, so your messaging varies with the data.
- Feature-gated segmentation: Build dynamic segments of users exposed to specific feature gates, for targeted onboarding, beta testing, or early-access campaigns.
- Config-driven journeys: Use dynamic config exposures to trigger different journey flows based on rules that Statsig evaluates, so messaging matches feature availability.
- Real-time feature state sync: Keep MoEngage user profiles in step with feature gate status, so campaigns respond immediately to feature rollouts and rollbacks.
Key Features
The Statsig integration provides the following capabilities in MoEngage:- Real-time event sync: Statsig syncs gate, config, and experiment exposures to MoEngage as they occur, so you can trigger timely, feature-aware campaigns.
- User profile enrichment: MoEngage updates user profiles with the exposure metadata that Statsig sends, which you can then use for segmentation and journey orchestration.
- Flexible event filtering: Choose which event types to forward, so you control the data volume and its relevance.
Integration
PrerequisitesBefore you begin, ensure you have the following access:
- Admin access to your Statsig workspace.
- Admin access to your MoEngage workspace.
- Generate Authentication Credentials and Request the Integration Endpoint
- Configure the Event Webhook in Statsig
- Verify Events in MoEngage
Step 1: Generate Authentication Credentials and Request the Integration Endpoint
Before you contact MoEngage Support, decide which Statsig user identifier serves as the primary identity that maps to MoEngage profiles. You can useuserID, email, a custom ID, or stableID.
To gather your credentials, perform the following steps:
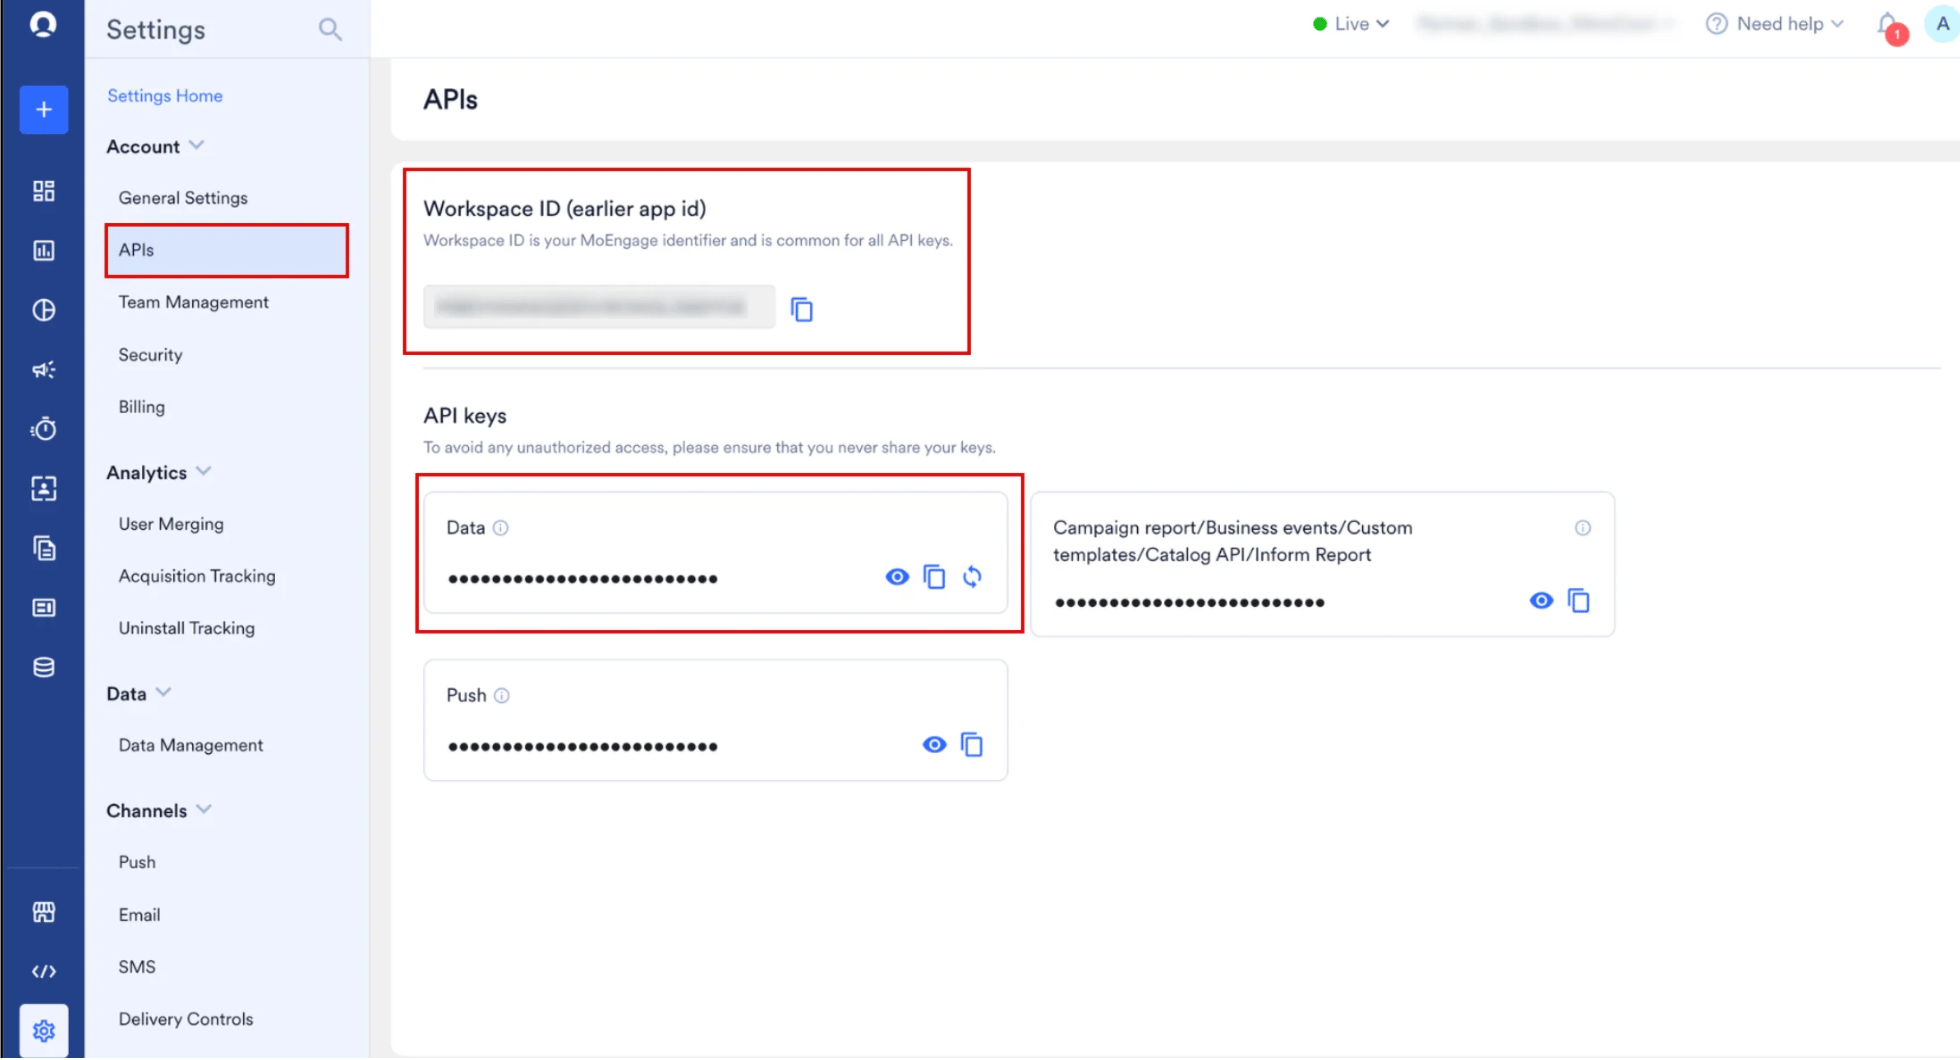
- On the MoEngage UI, navigate to Settings > Account > APIs.
- Copy the ID under Workspace ID (earlier App ID).
-
In the API keys section, copy the API key on the Data tile.
MoEngage Support provisions a unique webhook URL for your Statsig integration and shares it with you.
Step 2: Configure the Event Webhook in Statsig
After MoEngage Support shares your endpoint URL, configure the webhook in Statsig. To configure the webhook, perform the following steps:-
Log in to the Statsig console and navigate to Settings > Product Configuration > Integrations.
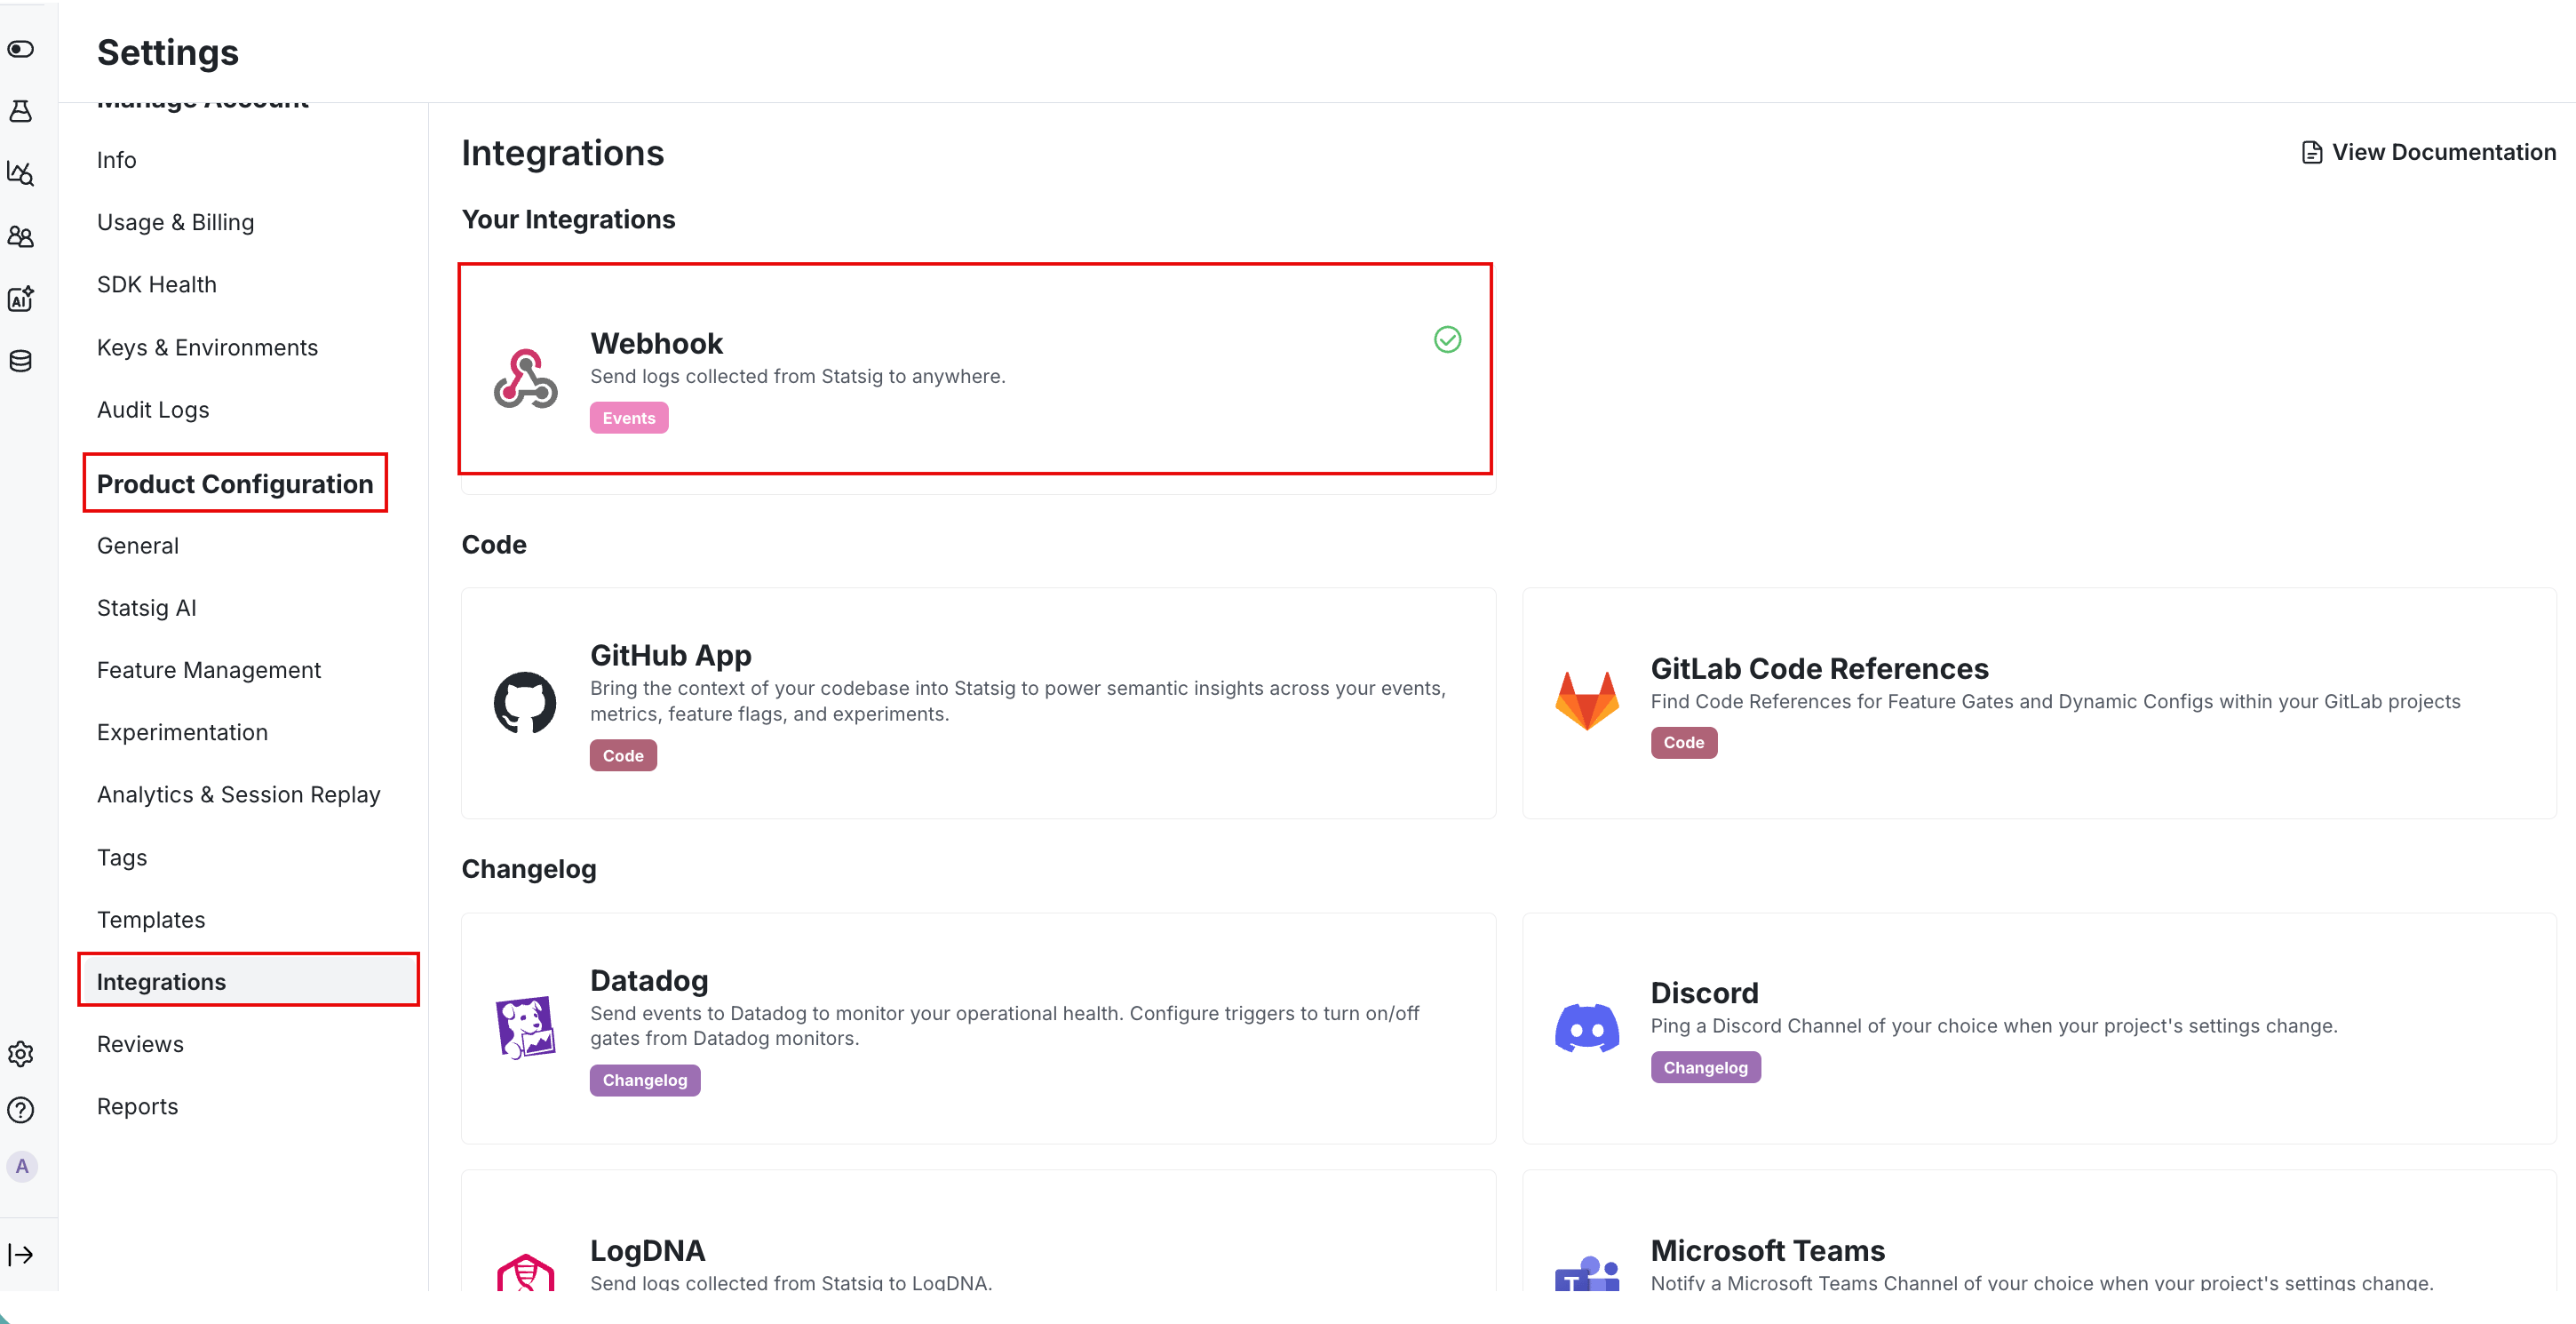
- Under Your Integrations, click the Webhook tile.
-
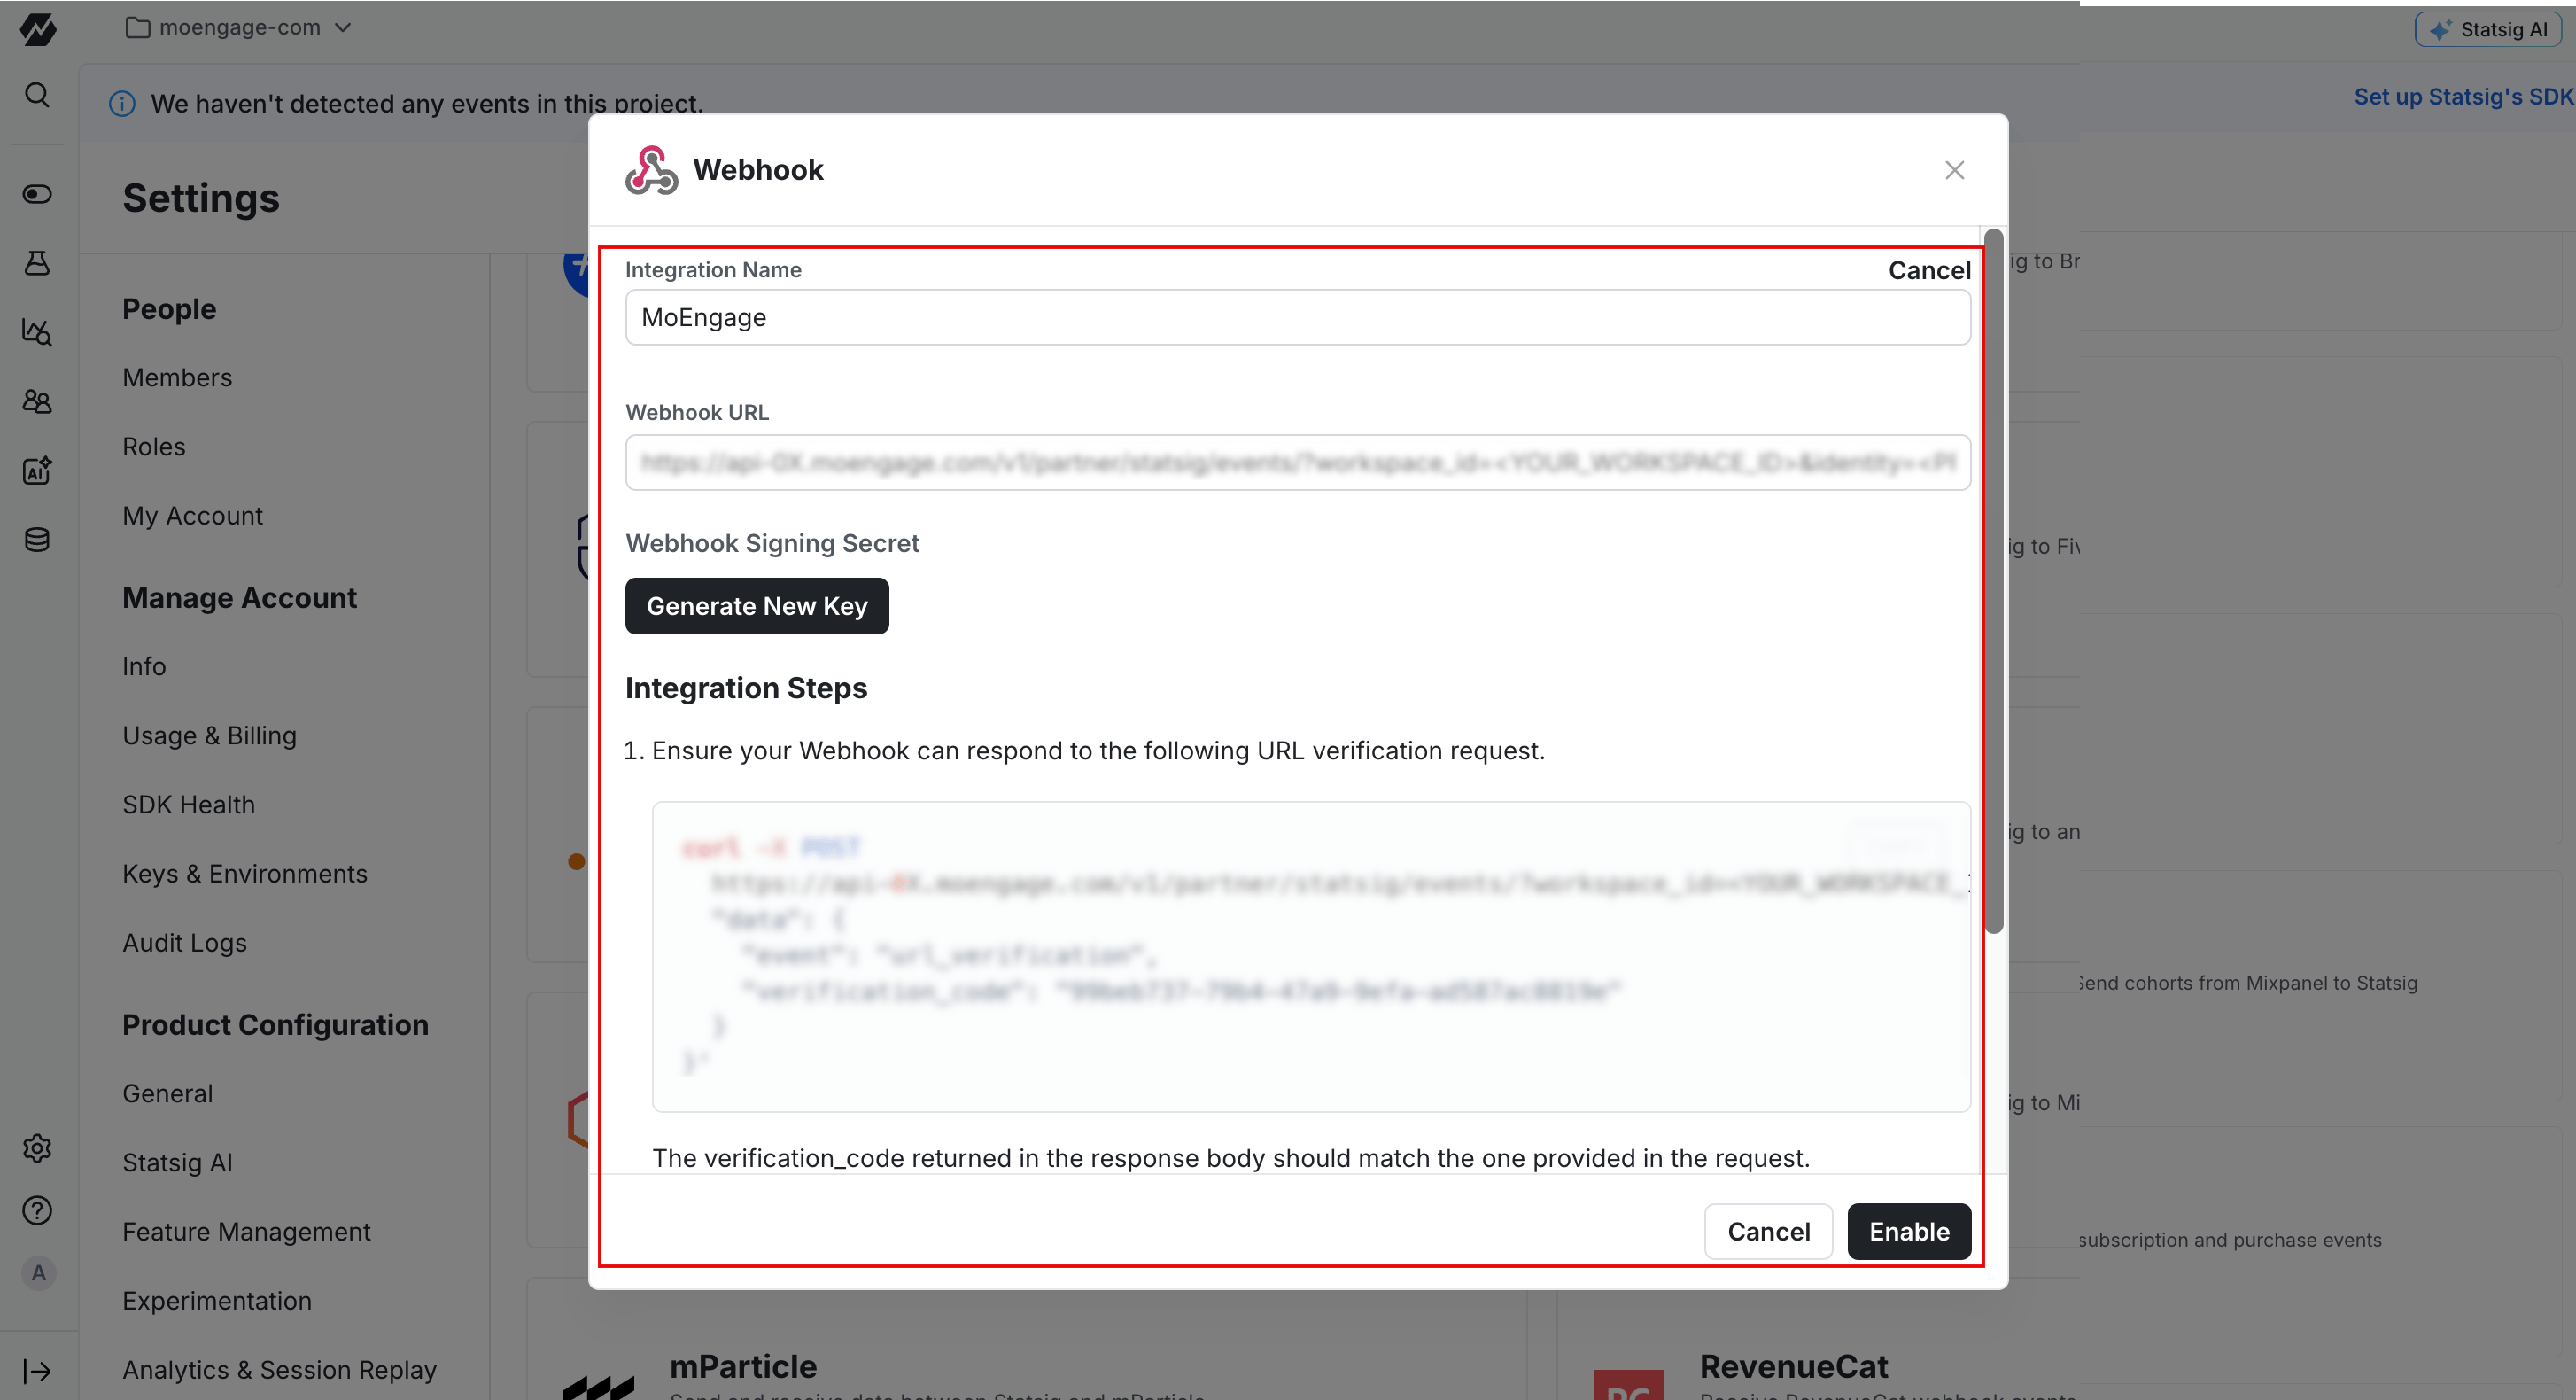
In the Integration Name box, type a name for the integration, such as
MoEngage. - In the Webhook URL box, paste the MoEngage endpoint URL that MoEngage Support provisioned in Step 1.
-
Click Enable.
- Click the Event Filtering tab.
- Under Statsig Events, click the Exposures and Custom Events check boxes.
-
Click Save.
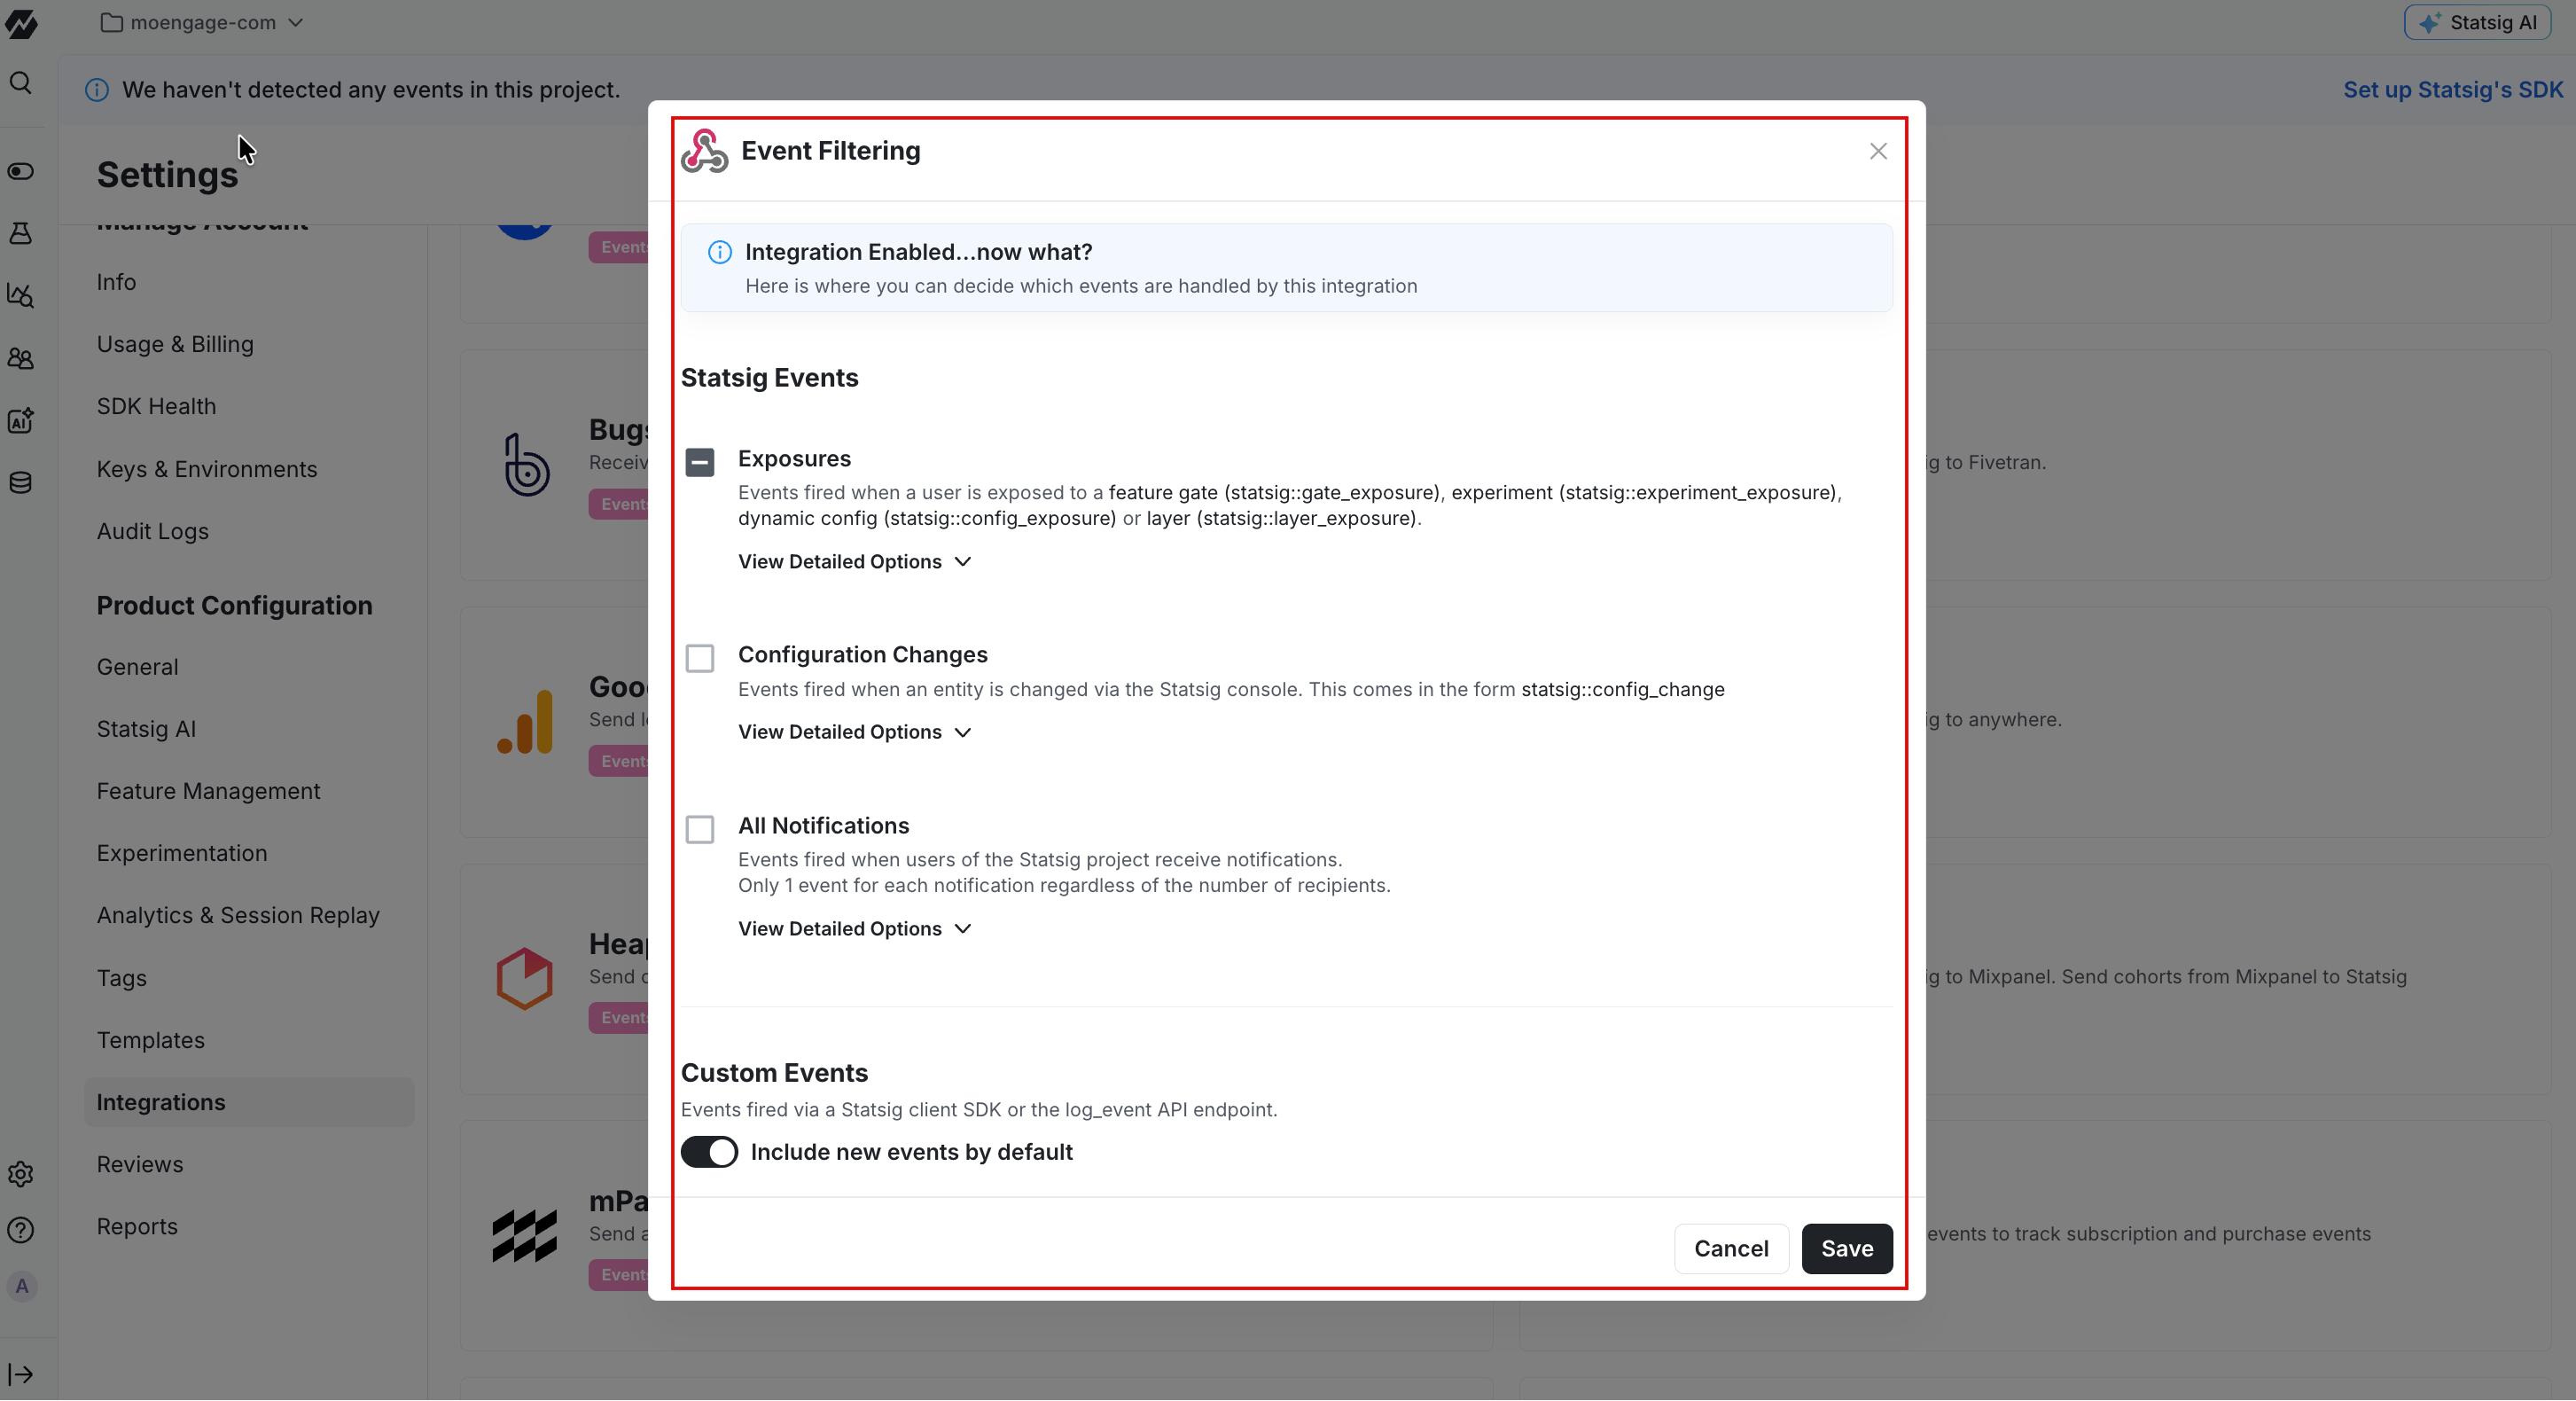
Do not click Configuration Changes. These events record changes made in the Statsig console rather than user exposures, so MoEngage cannot map them to a user profile.
Step 3: Verify Events in MoEngage
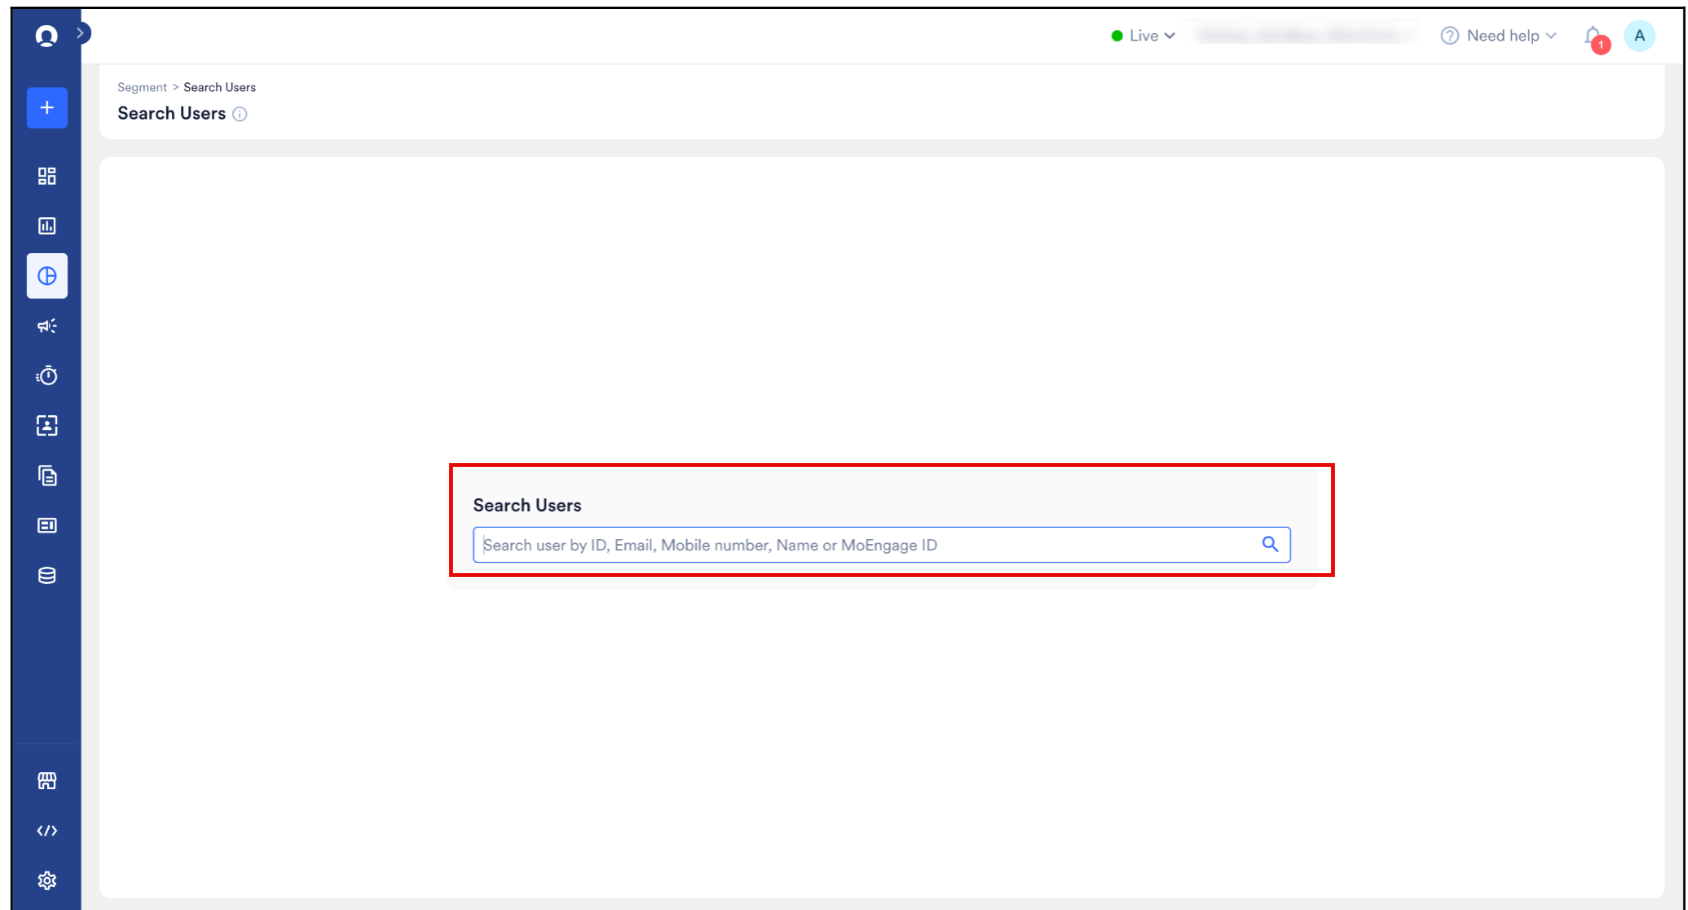
To confirm that events reach MoEngage in real time, perform the following steps:- In the left navigation bar of your MoEngage account, hover over the Segment menu item, and then click Search Users.
-
In the Search Users box, type your test user’s identity, using the identifier you nominated in Step 1.
- Open the user profile and click Event History.
This is not an exhaustive list, because the attributes vary from event to event. For the full payload that Statsig sends, refer to the Statsig event webhook documentation.