

Introduction
The MoEngage and OpenAI Ads Conversions integration establishes a secure, server-to-server (S2S) connection. By bypassing browser-side obstacles such as cookie restrictions, Intelligent Tracking Prevention (ITP), and ad blockers, it captures conversions that client-side tracking often misses. MoEngage provides a single omnichannel connector for OpenAI, available through the OpenAI Ads Conversions app in the MoEngage App Marketplace. It sends conversion events captured across all your environments, including your website, mobile app, and physical store, directly into your OpenAI Ads Manager.Use Cases
Integrating OpenAI Ads Conversions with MoEngage allows you to sync event data to support the following use cases:- Signal resilience: Recover “lost” conversions typically blocked by browser privacy settings and ad blockers.
- Real-time attribution: Send server-side signals directly to OpenAI to improve click-through and view-through attribution accuracy.
- Return on Ad Spend (ROAS) optimization: Send real-time conversion data to OpenAI to improve ad delivery, audience matching, and Cost Per Acquisition (CPA).
- Multi-source tracking: Capture purchases, subscriptions, sign-ups, appointments, and custom events from any channel, and attribute them to your ad clicks.
- Conversion reporting: Report conversion volume and value in OpenAI Ads Manager to measure return on investment.
PrerequisitesBefore setting up the connector, ensure you have the following:
- Access to OpenAI Ads Manager: An account with permission to retrieve the Pixel ID and generate an API key in Step 1: Generate Credentials in OpenAI Ads Manager.
- Connected Channels add-on: OpenAI Ads Conversions is part of the Connected Channels add-on. Contact your dedicated MoEngage CSM (customer success manager) to enable it for your account.
Integration
Step 1: Generate Credentials in OpenAI Ads Manager
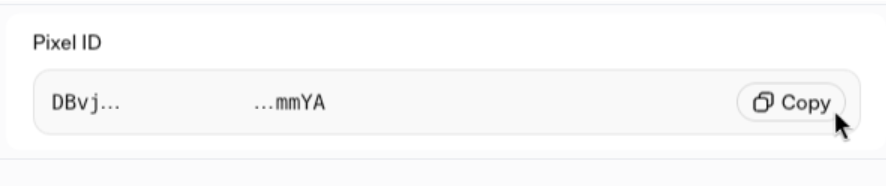
To establish the connection, retrieve your Pixel ID and generate an API key in OpenAI Ads Manager.Step 1.1: Retrieve Your Pixel ID
To retrieve your Pixel ID, perform the following steps:- Log in to your OpenAI Ads Manager account.
- On the left navigation menu, navigate to Settings > General > Manage conversion keys.
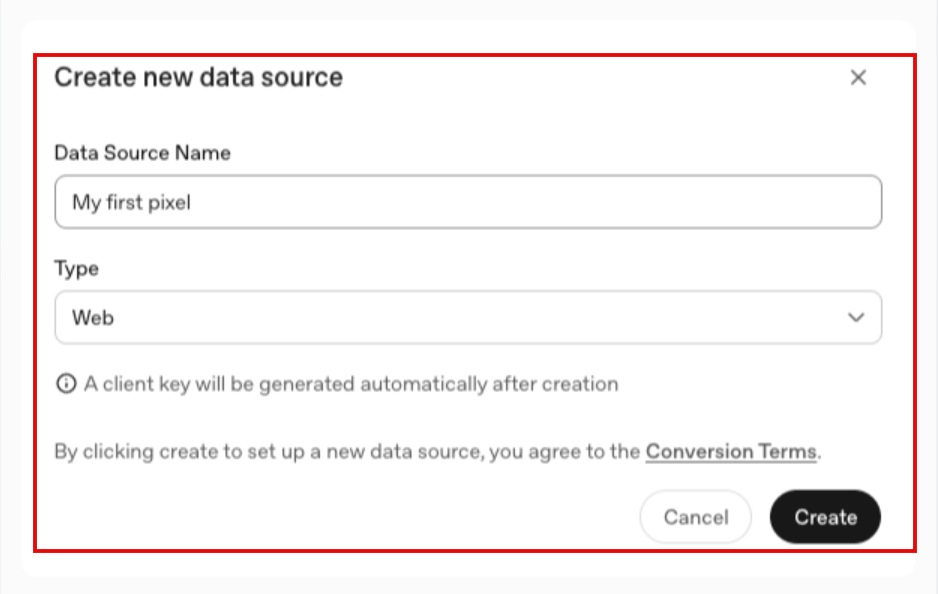
- In the top right corner, click Create, and then select Data Source.
- In the Data Source Name box, enter a name for the data source.
- In the Type list, select Web.
-
Click Create.
Step 1.2: Generate a Conversions API Key
To generate a Conversions API key, perform the following steps:- In OpenAI Ads Manager, navigate to Settings > General > Manage conversion keys.
- In the top right corner, click Conversion keys.
- Click Create new key.
- In the Name box, enter a name for the key.
-
Click Create.
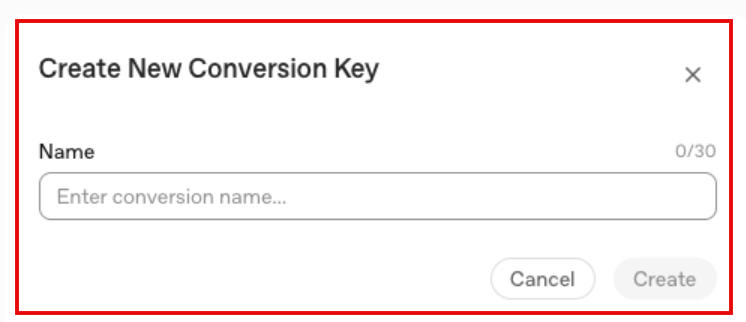
Save the access token in a secure place. It cannot be retrieved after you close the dialog box, so if you lose it, you must generate a new key.
Step 1.3: Create Conversion Events in OpenAI Ads Manager
OpenAI Ads requires you to create each conversion event in Ads Manager before the events MoEngage sends start to populate them. Events can flow correctly from MoEngage, but if the matching conversion event does not exist in OpenAI Ads Manager, it does not appear in your reporting. For each event you want to track, perform the following steps:- Log in to your OpenAI Ads Manager account.
- On the left navigation menu, navigate to Settings > General > Manage conversion keys.
- Click the Conversion Events tab.
- In the top right corner, click Create, and then select Conversion Event.
- In the Base Event list, select the event you want to track.
- Enter a name for the conversion event.
- Under Data source, select the data source you created in the Step 1.1: Retrieve Your Pixel ID section.
- Click Create.
Step 2: Connect OpenAI Ads Conversions in the App Marketplace
To connect OpenAI Ads Conversions in the App Marketplace, perform the following steps:- On the left navigation menu in the MoEngage UI, click App Marketplace.
- In the search box, enter OpenAI Ads Conversions.
- Under Search results, click the OpenAI Ads Conversions tile.
- Click the Integrate tab.
- Click + Add integration.
-
Enter the following details:
-
Click Test to validate and save the connection.
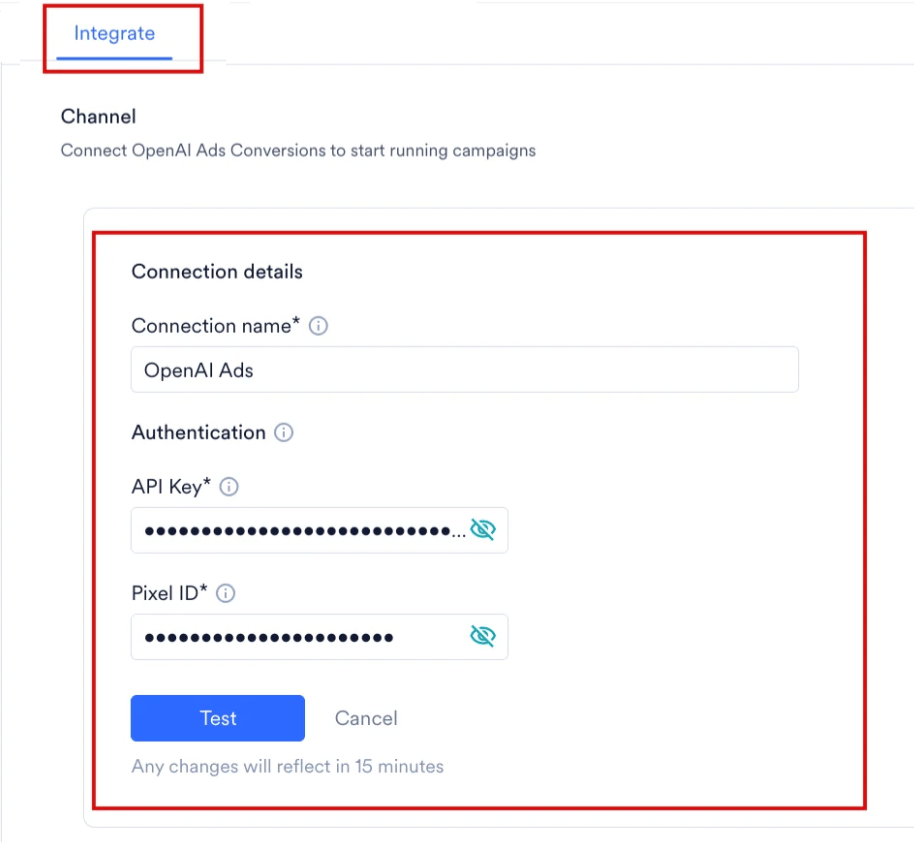
Changes to a connection take up to 15 minutes to reflect in campaigns.
Step 3: Create an OpenAI Ads Conversions Campaign
To create an OpenAI Ads Conversions campaign, perform the following steps:- On the left navigation menu in the MoEngage UI, click + Create New, and then click Campaign.
- Under Connected Apps, click See all.
- In the Connected Apps dialog box, search for OpenAI Ads, and then click the OpenAI Ads Conversions tile.
-
Click the delivery type you need: One Time, Periodic, or Event Triggered.
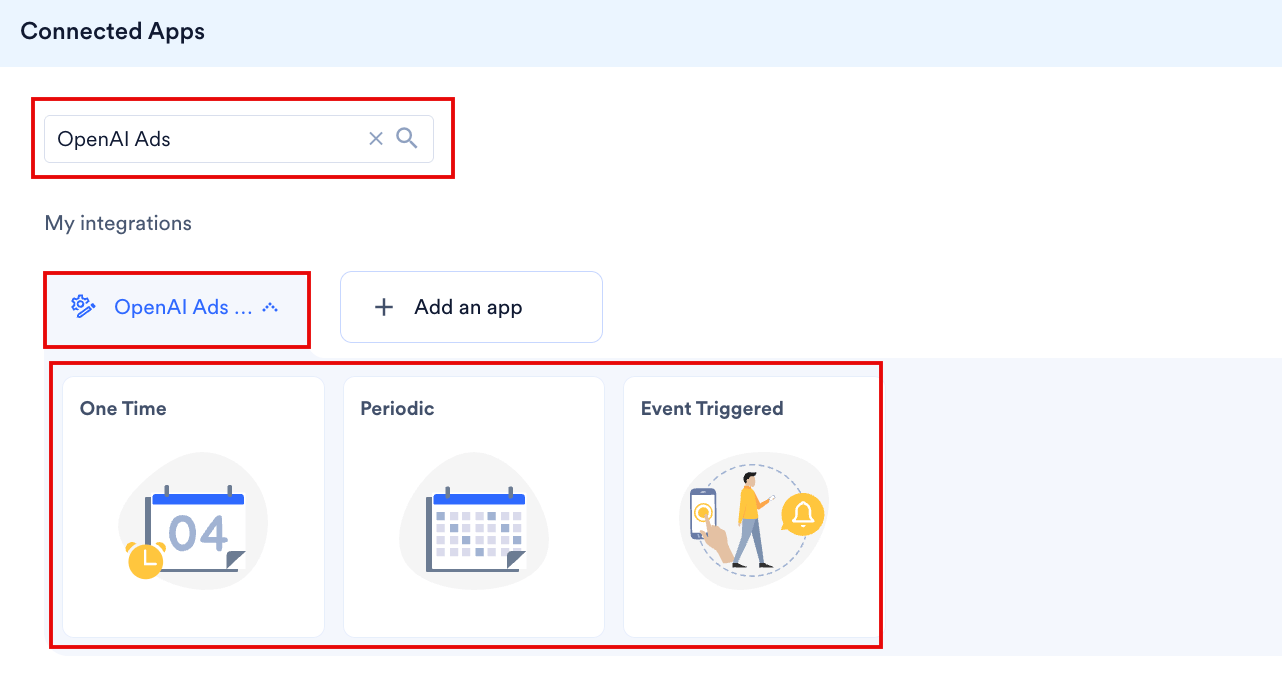
- In Step 1 (Target users), select your audience.
- In Step 2 (Content), under Select connector, select Track OpenAI Ad Conversions in the Connector list, and then select your connection in the Connections list.
-
Under Conversion Goals, enter the following:
The Action Source drives omnichannel tracking, letting you attribute conversions to app interactions, web visits, or physical storefront purchases. Type
@in any text box to personalize its value with a user or event attribute.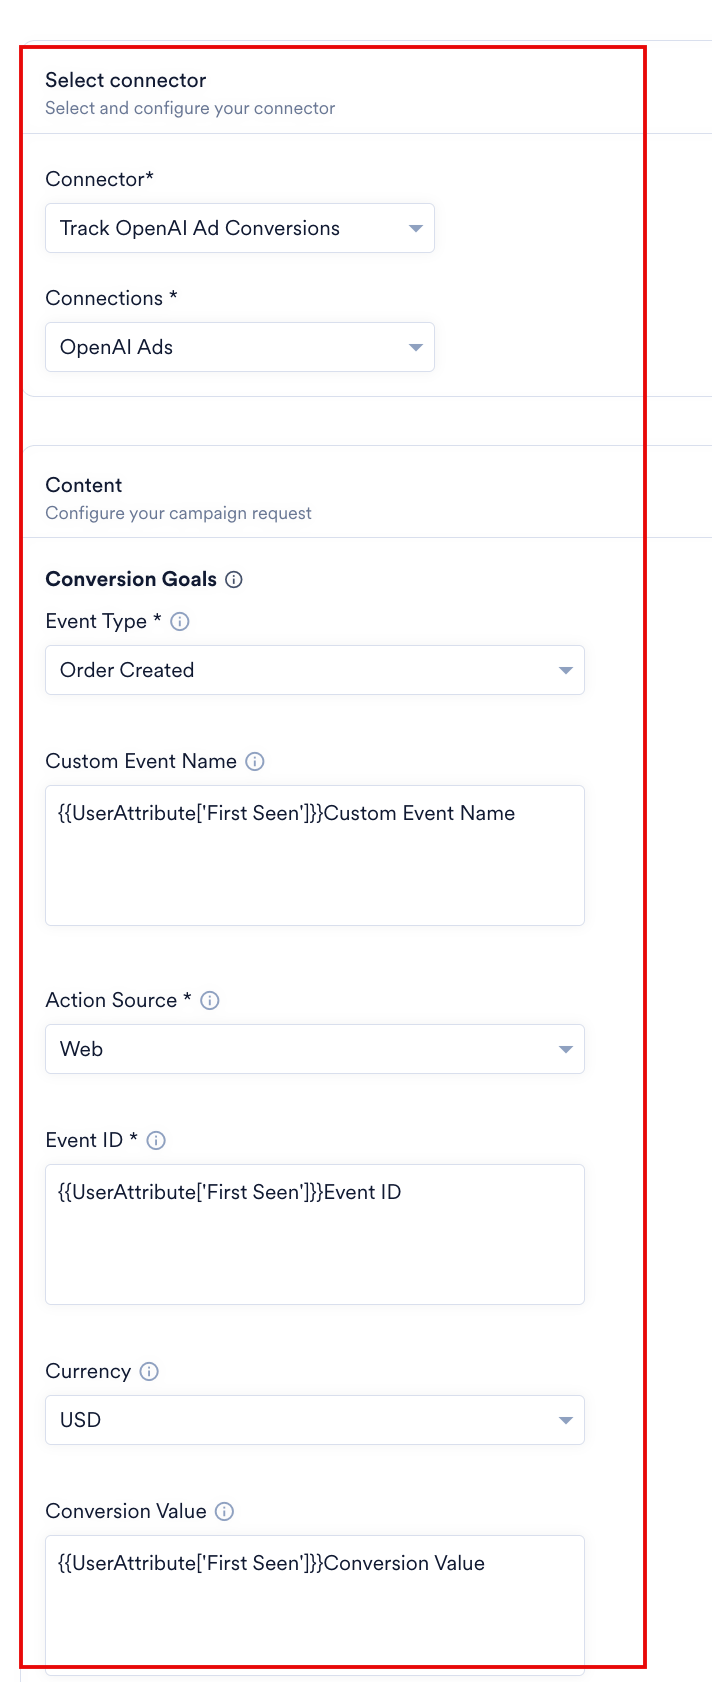
-
Under Attribution, enter the following:
Include the Source URL wherever possible, because it improves click-through attribution accuracy for web conversions.
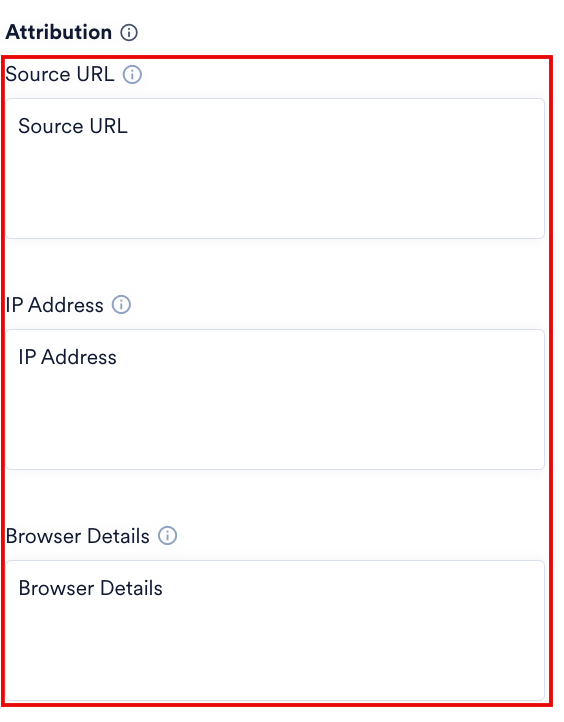
-
Under Advanced Matching, enter the following. These identifiers help OpenAI link conversions to specific users, and MoEngage normalizes and SHA-256 hashes personally identifiable information (PII) before transmission.
MoEngage sends the email address on its own, so map at least one of these identifiers for users who have no email address on file. A conversion with no match signal at all cannot be attributed to your ads.The user’s email address is picked up automatically from the standard attribute, so it does not appear as a field. MoEngage strips aliases and periods, lowercases the string, and applies SHA-256 hashing before sending it.
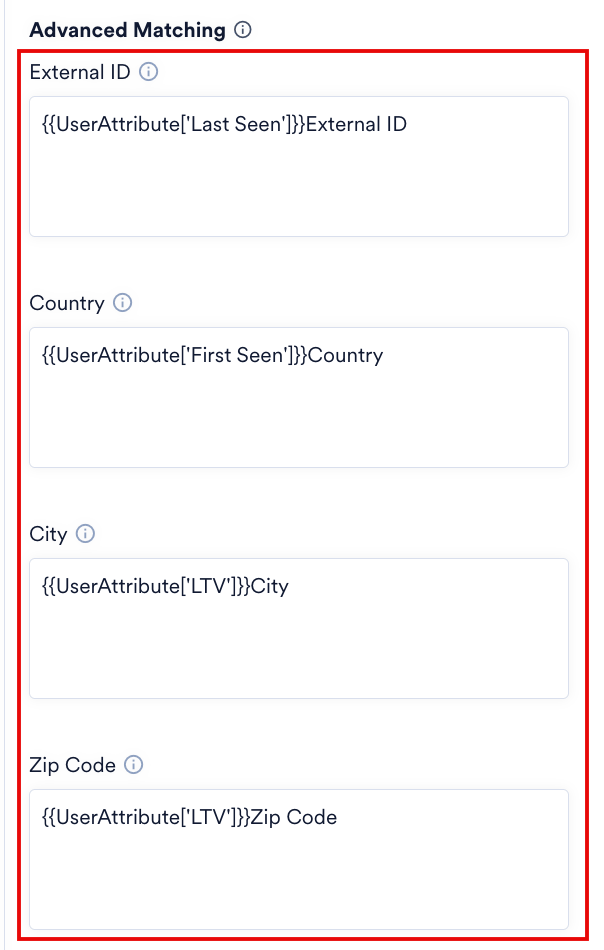
-
Under Event Data, in the Conversion Event Data block, enter a key in the Key box and its value in the adjacent box. Click + New KV Pair to add each further pair.
The
amountandcurrencykeys set the value of the individual items. The Currency and Conversion Value fields under Conversion Goals set the value of the conversion event itself, so the two are separate.
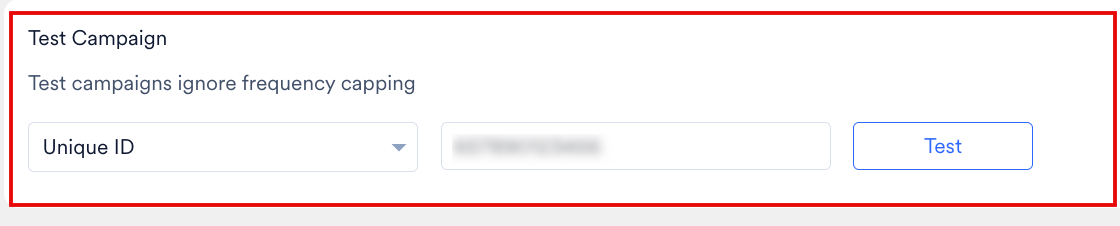
- Under Test Campaign, select an identifier type, enter a test user’s value, and then click Test.
-
Click Next, configure Step 3 (Schedule and Goals), and then publish the campaign.
Custom Events
To track a conversion outside OpenAI’s standard taxonomy, perform the following steps:- Under Conversion Goals, select Custom in the Event Type list.
- In the Custom Event Name box, enter a name of 1–64 characters, using lowercase letters, numbers, underscores, and dashes. Spaces are not supported.
- Under Event Data, map the keys that apply to the event.
video_completed, ebook_downloaded, and webinar_registered.
Supported Conversion Events
MoEngage supports direct mapping to OpenAI’s standard event taxonomy. Select the event you want to track in the Event Type list. For the full list of supported events and the data each one accepts, refer to Supported Events in the OpenAI documentation.Order Created is the default event type. If you are targeting top-of-funnel goals, adjust the Event Type in your campaign settings.
Usage Constraints
- Monetary value format: Send the conversion value as an integer in the currency’s minor units. For example, $42.00 USD is
4200, €29.99 EUR is2999, £1.50 GBP is150, and ¥100 JPY is10000, because JPY has no decimal sub-units. Set the Currency field whenever you send a conversion value. - Deduplication hygiene: Map a unique Event ID, such as a transaction or order ID. OpenAI records only the first occurrence of an Event ID and ignores duplicates, which prevents over-reporting.
- User matching and privacy: Pass raw values directly to the connector, because MoEngage normalizes and SHA-256 hashes personally identifiable information (PII) natively.
- Timestamp accuracy: Event timestamps must fall within the last 7 days and cannot be more than 10 minutes in the future. MoEngage fills in the current timestamp when you omit it.
- Rate limits and batch processing: The OpenAI Conversions API accepts batches of up to 1,000 events per request. If one event in a batch fails schema validation, the entire batch fails, so verify data integrity across all events.
FAQs
Can I send events from multiple channels in the same campaign?
Can I send events from multiple channels in the same campaign?
Yes. Assign the appropriate Action Source for each event, and OpenAI attributes the conversions across channels.
What happens if I send the same Event ID twice?
What happens if I send the same Event ID twice?
OpenAI deduplicates events on the Event ID. Only the first instance it receives is recorded, and subsequent identical IDs are ignored.
Can I track revenue per item?
Can I track revenue per item?
Yes. Set the overall value in Conversion Value, and add the item-specific details in the Conversion Event Data block. Use the
variant_dict keys for item attributes such as size and color.How do I handle multi-item orders?
How do I handle multi-item orders?
Set the total order value in Conversion Value, and use
item_quantity for multi-unit items. For complex multi-product orders, either send individual item events or group them under a single bundle identifier.