Overview
The campaign migration feature allows you to move campaigns from one workspace to another within the same data center (DC). You can use this feature to:- Migrate campaigns from a test workspace to a production workspace without recreating them from scratch. You only see the list of workspaces where you have been added as a user.
- Create one campaign and then migrate it to multiple other workspaces, if you need similar campaigns across them.
- Migrate the same campaign multiple times.
- Ensure that changes made to an imported campaign in the destination workspace do not affect the original campaign in the source workspace.
This feature supports migrating campaigns only (not flows) across all channels except In-app Messaging, On-site Messaging (OSM), Web Personalization, Connected Apps, and Cards.
Import a Campaign
Perform the following steps to migrate a campaign from one workspace to another:- Go to the All campaigns page in your MoEngage dashboard.
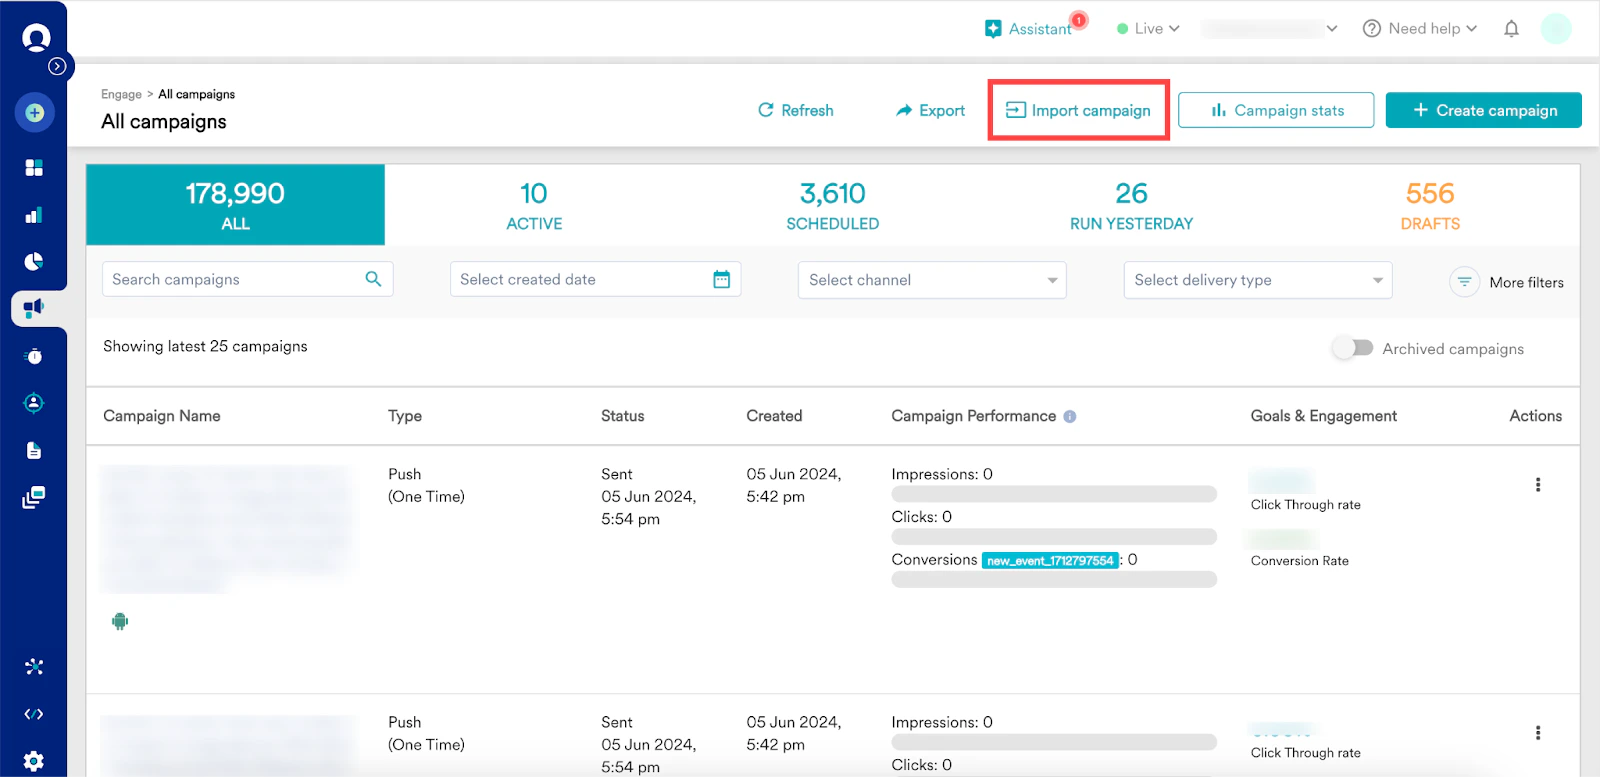
- In the upper-right corner, click Import Campaign. The Import campaign page appears.
Step 1: Select Campaigns
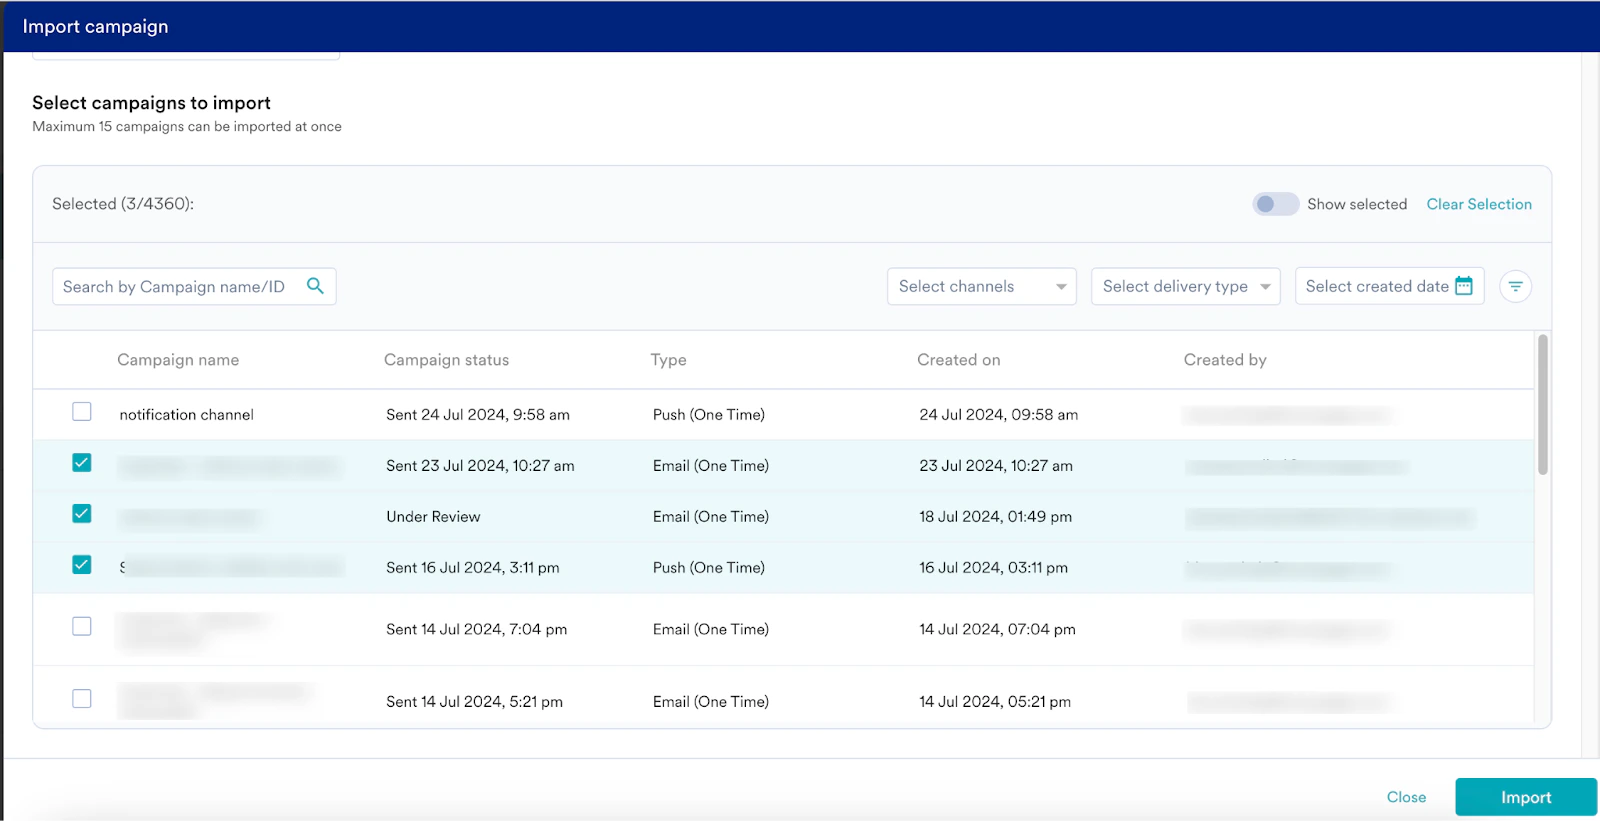
- On the Import campaign page, select the source workspace in the Source workspace list. This is the workspace from which you want to import the campaigns. After you select the source workspace, a list of campaigns in that workspace appears below.
- Search for the required campaigns by their name or ID.
- You can filter the campaigns by channels, delivery type, and created date.
- Click the filter icon. On the Filter campaigns dialog box, you can filter campaigns by their status, campaign tags, platform, and campaign creator.
- Click Import.
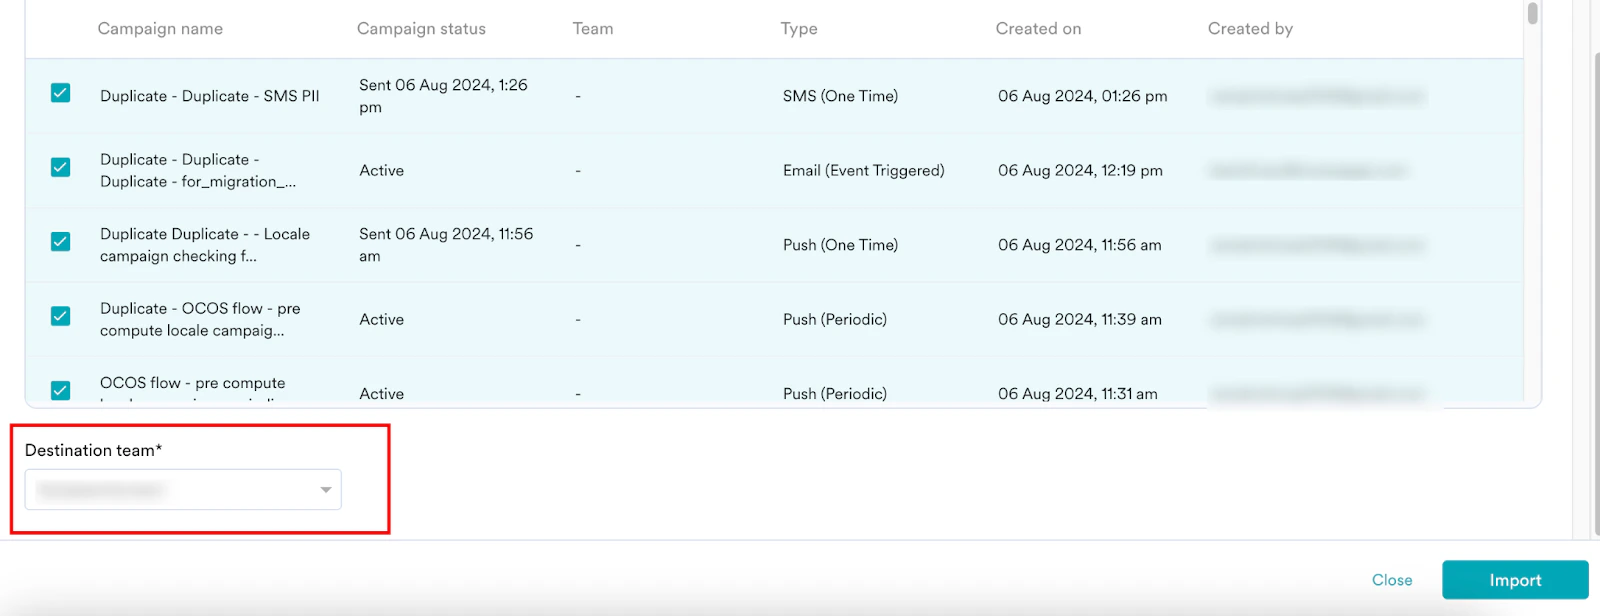
- If the Team feature is enabled for your workspace, select the Destination team to activate the Import option.
You can migrate campaigns in any status other than Draft. You can select a maximum of 15 campaigns for a single import.
Step 2: Imported Campaigns
- After you import a campaign, it is in the Draft status, and an Import Status appears next to it. The following table lists the possible import statuses.
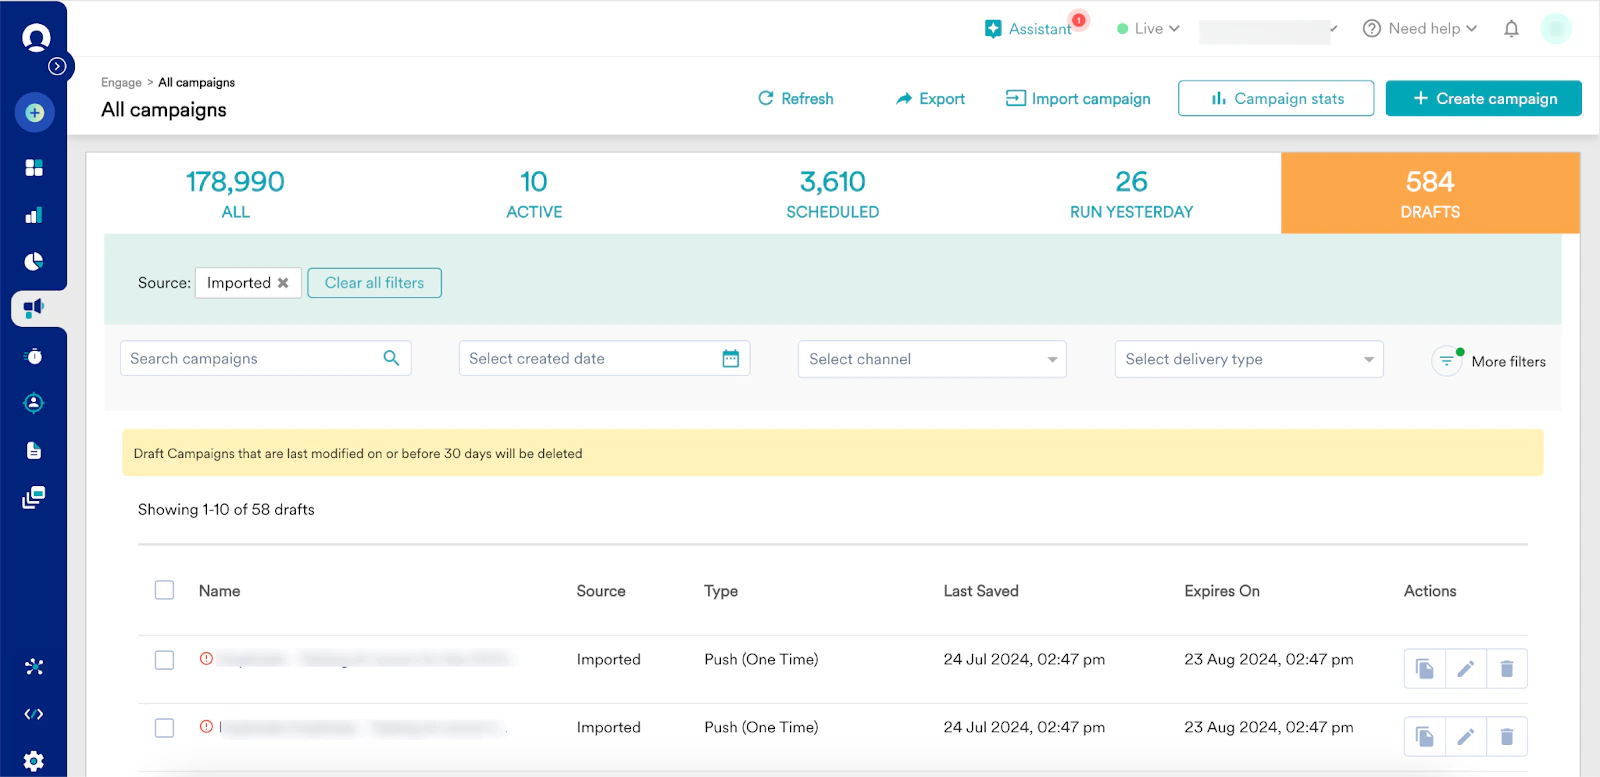
- To view all imported campaigns, click View imported campaigns. This opens the Drafts tab on the All campaigns page. Here, campaigns imported display Imported as their source. Campaigns with errors or warnings have a warning or error symbol next to their name.
Identify and Resolve Errors and Warnings in Imported Campaigns
When you click a campaign name with errors or warnings on the Drafts tab of the All campaigns page, the campaign opens in Draft mode. At the top of each campaign step, you see a section with the following information: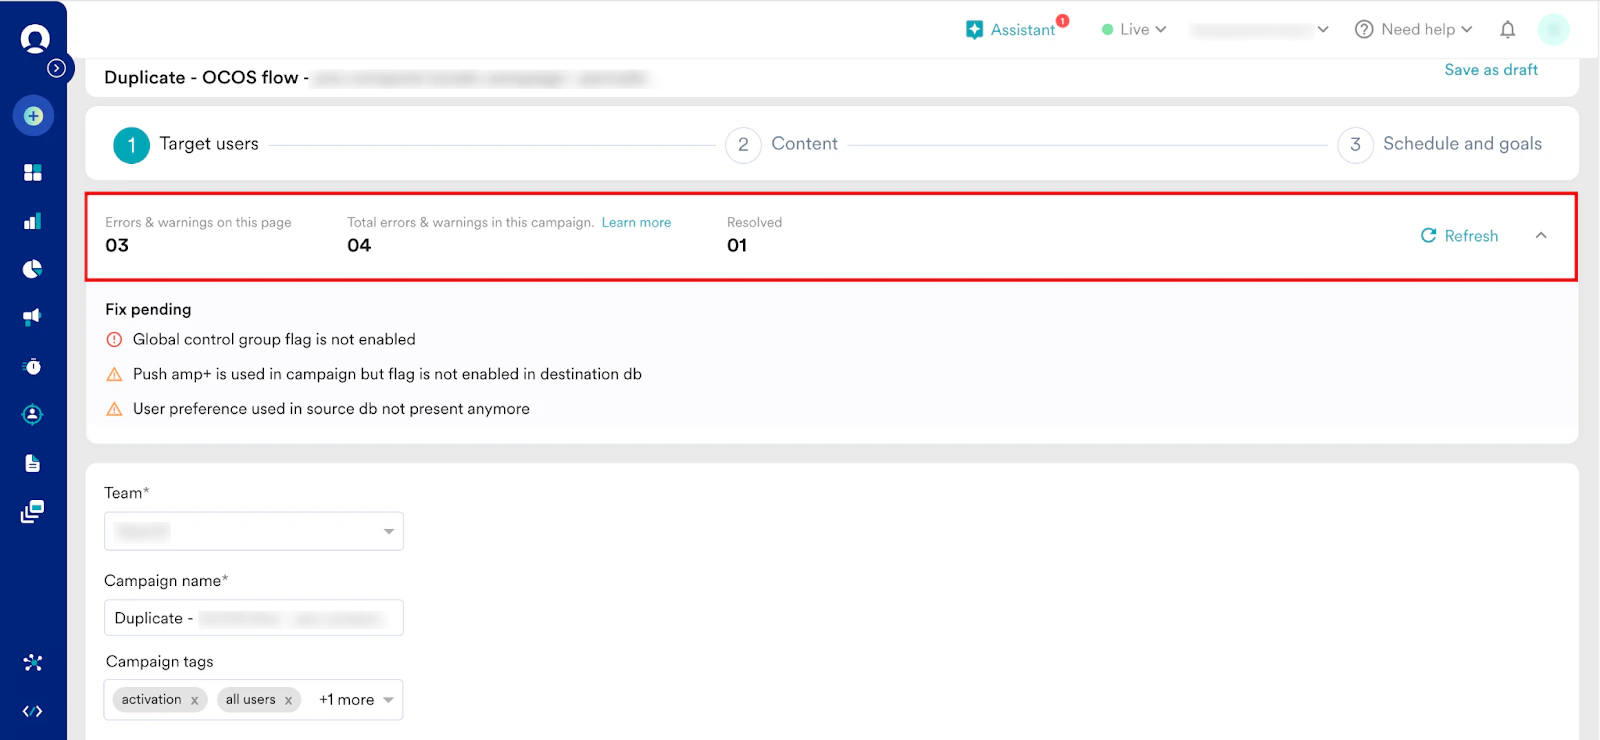
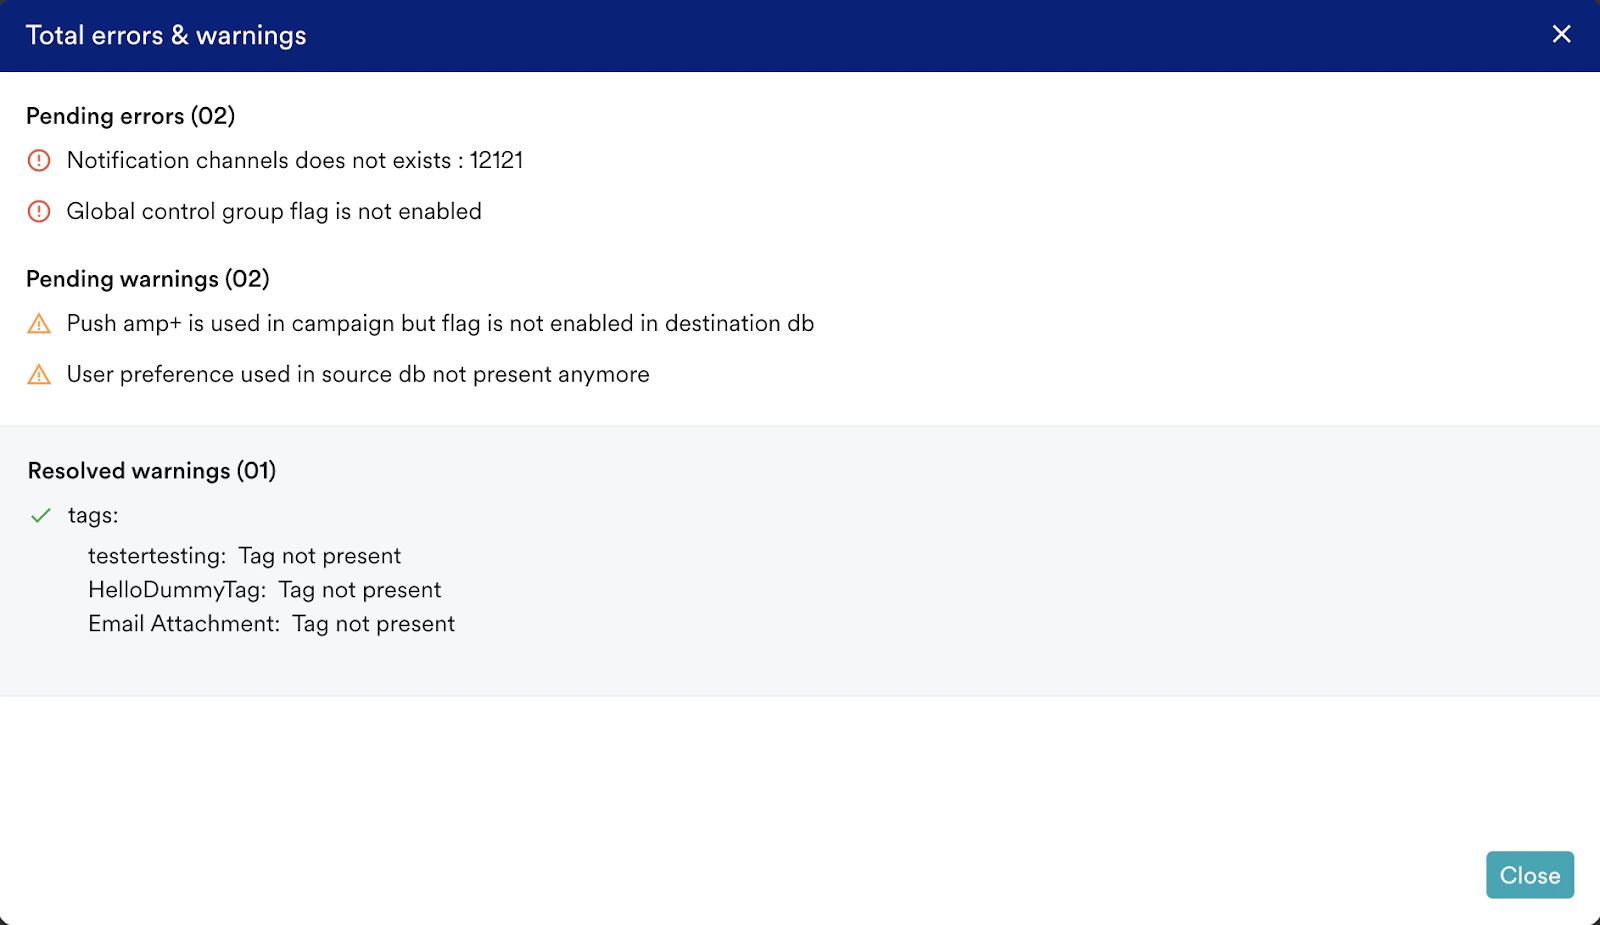
- You can continue to the next steps even if warnings are present, unless an inline error message appears. For example, if an addtocart event is unavailable, you can resolve the issue by using the same event in segmentation or selecting a different, more suitable event in the destination workspace.
- Auto-save functionality is not available for migrated campaigns.
Publish the Imported Campaign
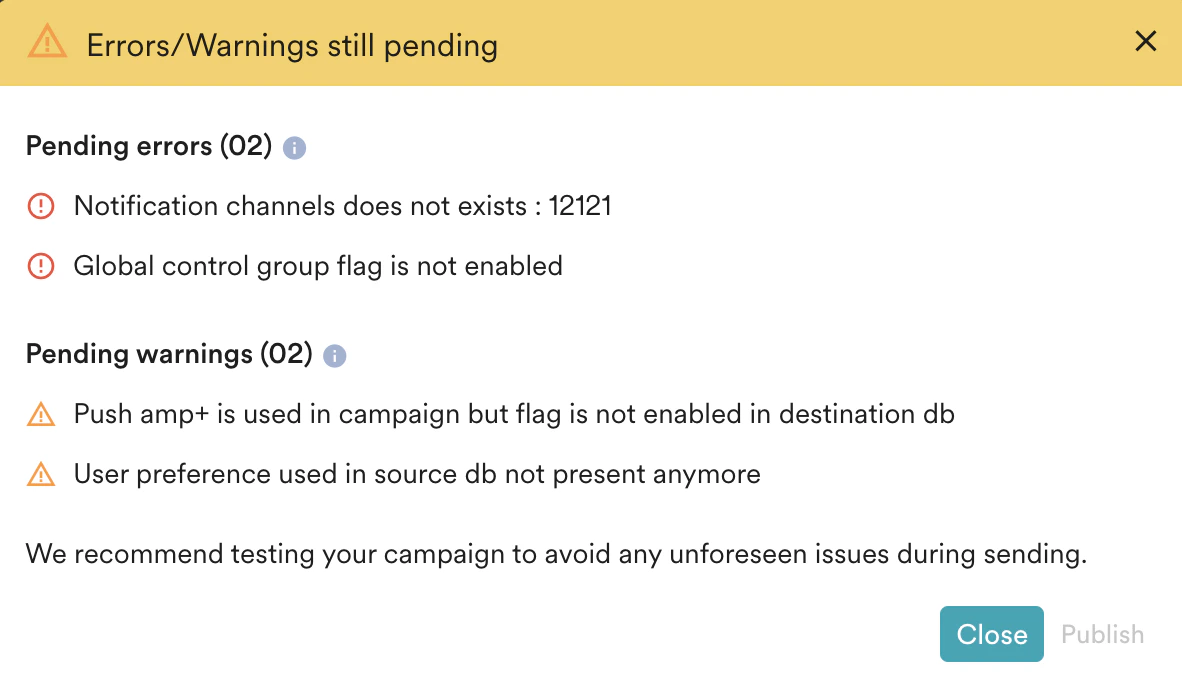
After you resolve the errors and warnings, click Publish to launch the campaign. If you attempt to publish the campaign without fixing all errors, the Errors/Warnings still pending dialog box appears. This dialog box lists all remaining errors and warnings. You must fix all errors to deliver your campaign successfully. You can publish campaigns with warnings, but not with errors.