Introduction
Email Love, one of MoEngage’s technology partners, enables you to create visually rich, production-ready email templates directly within Figma and export them to your MoEngage workspace.MoEngage × Email Love
Integrating the Email Love Figma plugin and MoEngage empowers design and marketing teams to streamline the entire email creation-to-launch workflow. With this integration, you can:- Design high-fidelity, responsive email layouts directly within the collaborative Figma environment.
- Export your final design as clean, production-ready HTML templates optimized for MoEngage delivery.
- Instantly transfer new or updated email templates directly into your MoEngage workspace with a single click.
- Maintain brand consistency and complete design fidelity, eliminating manual coding errors, drastically speeding up template updates, and freeing up development resources.
Use Cases
Integrating Email Love with MoEngage helps you with the following use cases:- Rapid, design-led deployment : Designers can quickly create or iterate on high-fidelity, responsive email layouts in Figma and, with a single click, instantly push clean, production-ready HTML templates directly into MoEngage for immediate campaign launch and A/B testing.
- Guaranteed consistency and efficiency : The integration ensures that all emails deployed on MoEngage maintain perfect brand consistency and design fidelity by eliminating manual coding errors, drastically speeding up template updates, and freeing up development resources.
Integration
Before you begin, ensure you have the following requirements:
- An active Email Love Figma plugin subscription.
- A MoEngage account with API access.
- Admin or appropriate permissions for your MoEngage workspace.
- Find Your Credentials in MoEngage
- Connect the Plugin to MoEngage
- Export Your Email Template
- Access Your Template in MoEngage
Step 1: Find Your Credentials in MoEngage
To find your credentials, perform the following steps:- On the MoEngage UI, navigate to Settings > Account > APIs.
- Copy the ID under Workspace ID (earlier app id).
- In the API keys section, copy the API key on the Data tile.
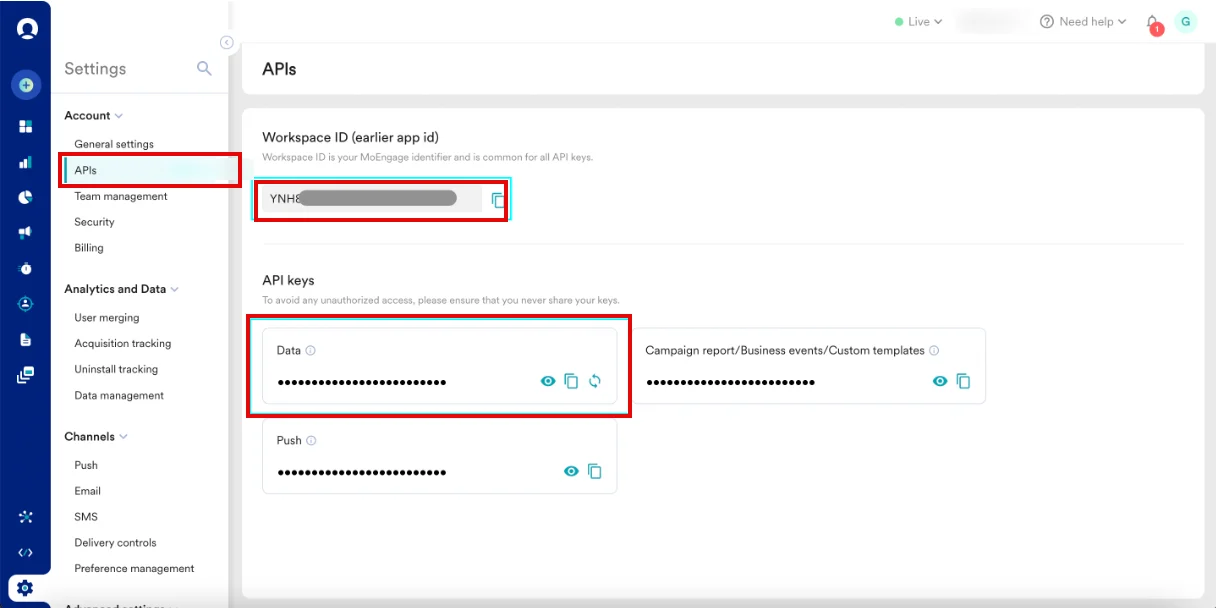
- Your Instance ID is assigned when signing up with MoEngage and can be identified from the dashboard URL. For example, if your dashboard URL is https://dashboard-04.moengage.com/v4/#/auth, your data center is 04, and your Instance ID is DC-04. For more information, refer to Data Centers in MoEngage.
Save these credentials in a secure location for future reference.
Step 2: Connect the Plugin to MoEngage
Step 2.1: Open the Export Menu
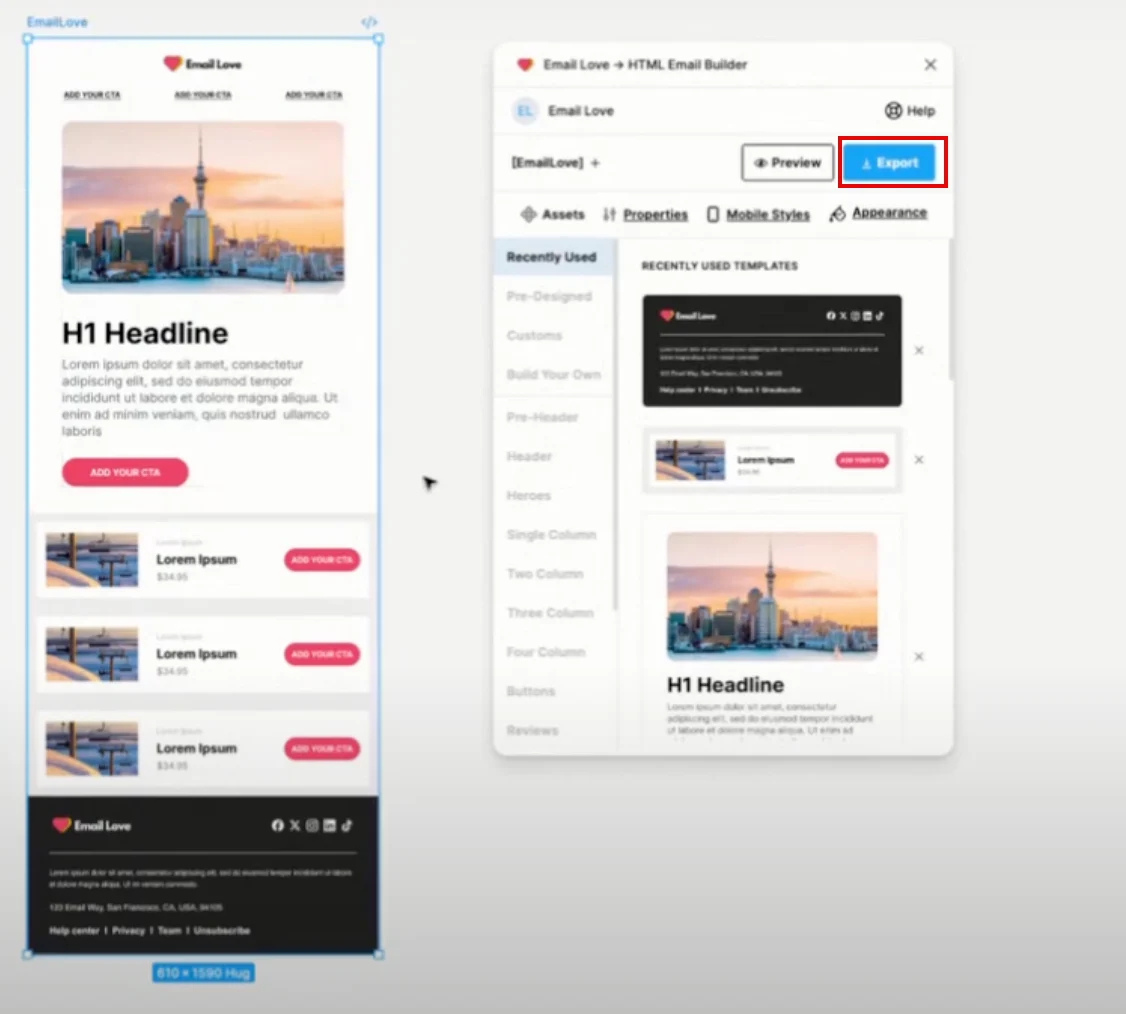
To open the export menu, perform the following steps:- Open your email design in Figma.
- Launch the Email Love plugin.
- Click Export in the upper-right corner.
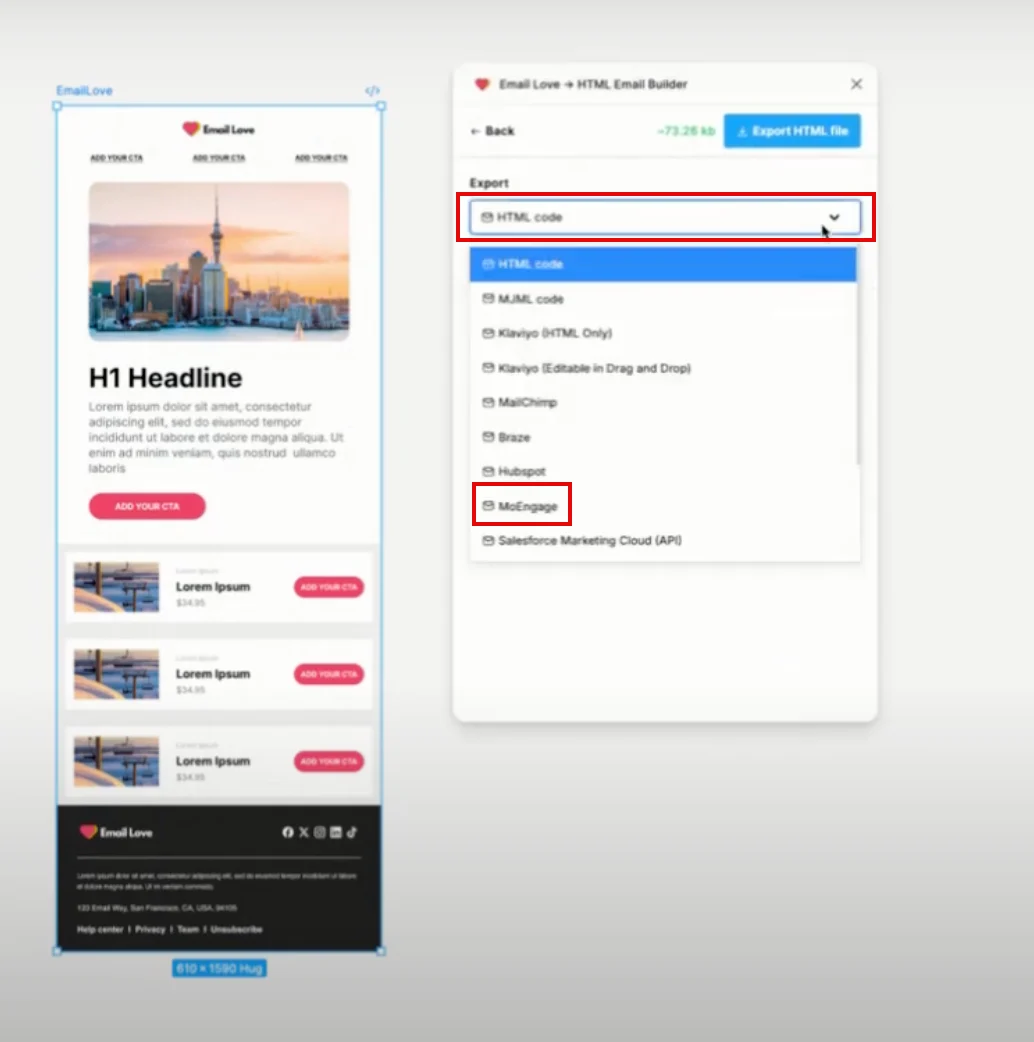
- Under Export , find and clickMoEngage in the HTML code list.
Step 2.2: Configure API Connection
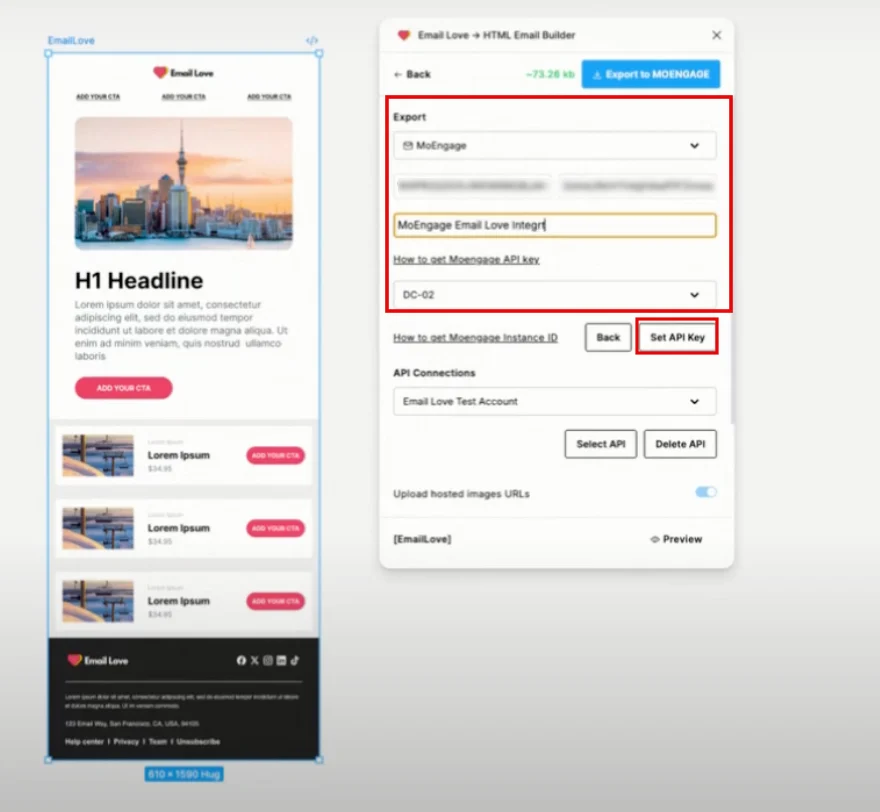
To configure an API connection, perform the following steps:- Click Change API key.
- In the Moengage Workspace ID box, paste the workspace ID (app ID) copied from MoEngage.
- In the Moengage API Key box, paste the Data API Key copied from MoEngage.
- In the Moengage API Key Name box, type the name for your API Key connection.
- Under How to get Moengage API Key , find and click your instance (for example, DC -O4) in the Select Instance id list.
- Click Set API key.
You’re now successfully connected to MoEngage.
Step 3: Export Your Email Template
Now, export your email template using one of the following options:Option A: Direct API Export (Recommended)
- Click Export to MoEngage in the upper-right corner.
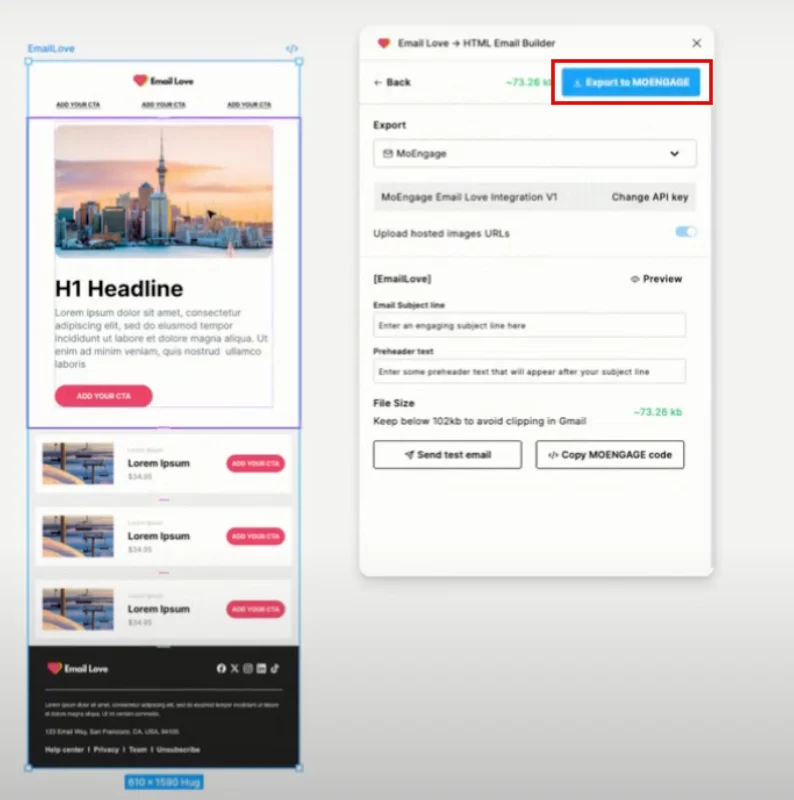
The plugin automatically pushes the HTML to your MoEngage templates library.
Option B: Manual Copy
- In the File Size section, click Copy MoEngage code.
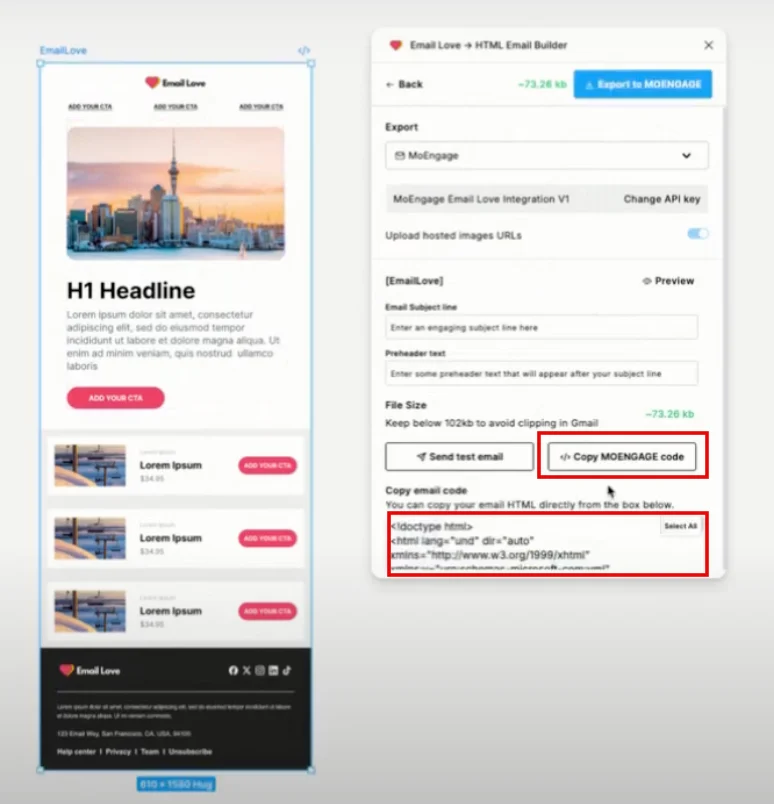
The HTML code will be copied to your clipboard. You can manually paste it when creating a new template in MoEngage.
Step 4: Access Your Template in MoEngage
To access your template in MoEngage, perform the following steps:- On the left navigation of your MoEngage UI, click Content > Templates.
- Click Email.
- Under Folders , click Figma Designs.
- Locate your newly exported template by name.
Use the template in your Email campaigns or Automated flows.
Manage Multiple Connections
The Email Love Figma plugin supports multiple MoEngage connections, making it easy to work across different clients or workspaces. To add additional connections :- Click Change API key in the export menu.
- Enter the new credentials.
- Enter a unique name for the connection.
- Switch between connections using the drop-down list.
Troubleshooting
Connection Issues
Problem : “Unable to connect to MoEngage”- Verify your API credentials are correct.
- Ensure you have the correct Instance ID.
- Check that your API key has the necessary permissions.
- Allow a few moments for the template to sync.
- Refresh your MoEngage dashboard.
- Verify you’re looking in the correct workspace.
Export Errors
Problem : The Export to MoEngage is grayed out.- Ensure your email design is complete.
- Check that all required elements are properly formatted.
- Verify your plugin subscription is active.
Best Practices
- Name connections clearly : Use descriptive names like “Client Name - Production.”
- Test before deploying : Always preview your exported template in MoEngage before using it in live campaigns.
- Keep credentials secure : Store API keys securely and limit access to authorized team members only.
- Use the direct export : The API export method is faster and reduces the chance of copy and paste errors.