

Introduction
Amazon Redshift is a fast and powerful, fully managed, petabyte-scale data warehouse service that forms part of the larger cloud-computing platform Amazon Web Services.MoEngage × Redshift
The MoEngage and Redshift integration exports Campaign Interaction Events data directly to your Amazon Redshift cluster.Integration
- Ensure you have an Amazon Web Services account with permission to create/edit Redshift clusters, roles, and policies.
- Optional: To create a new user, you need to have access to create a new user in your Redshift Cluster.
- Exporting data from MoEngage to Amazon Redshift uses MoEngage Streams, which is a paid add-on. To check what’s available for your plan, refer to Plans and Pricing. To enable it for your account, contact your MoEngage Customer Success Manager (CSM) or the Support team.
Step 1: Make sure your Redshift cluster is publicly accessible
Make sure your Redshift Cluster has the “Publicly Accessible” setting turned on.- When creating a new Redshift Cluster, under the “Network and Security” section, select the “Turn on Publicly accessible” option.
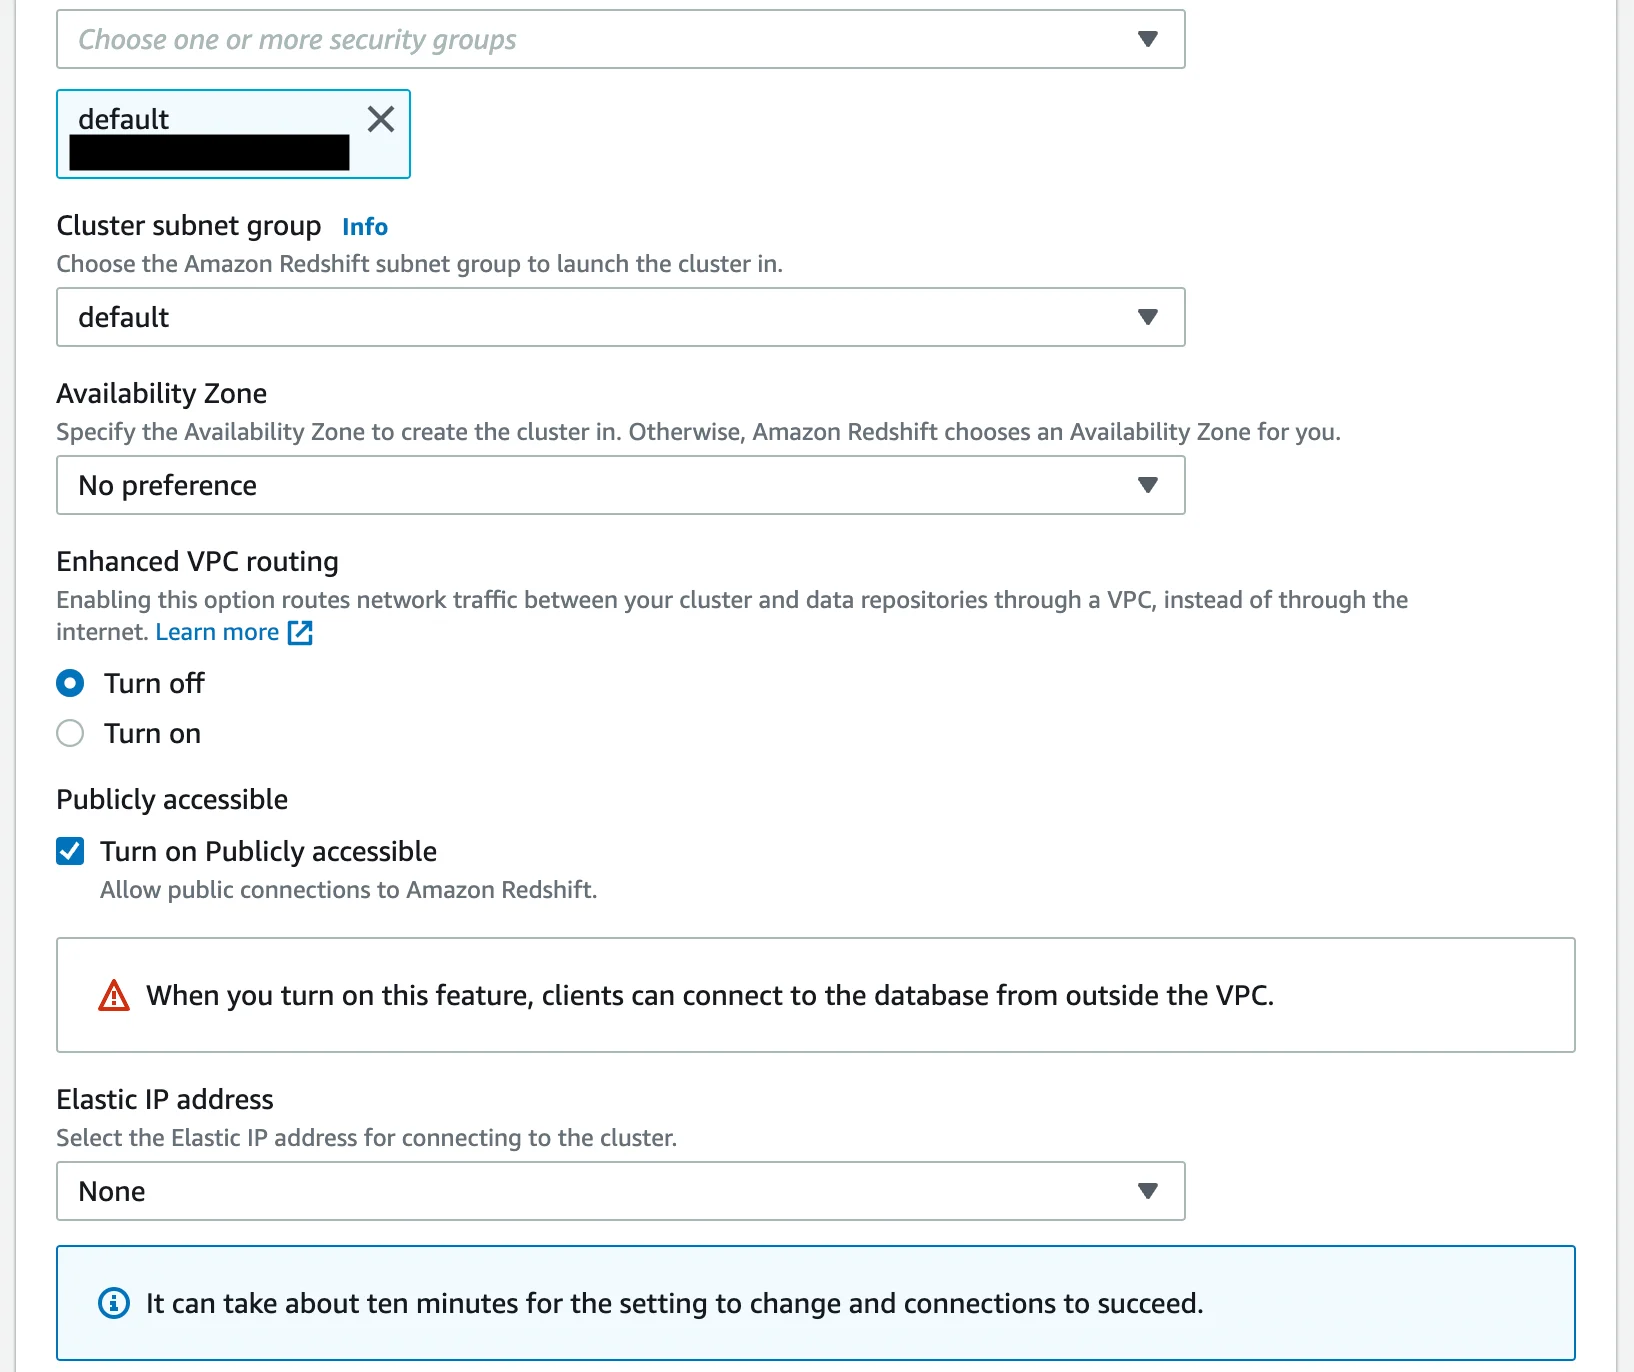
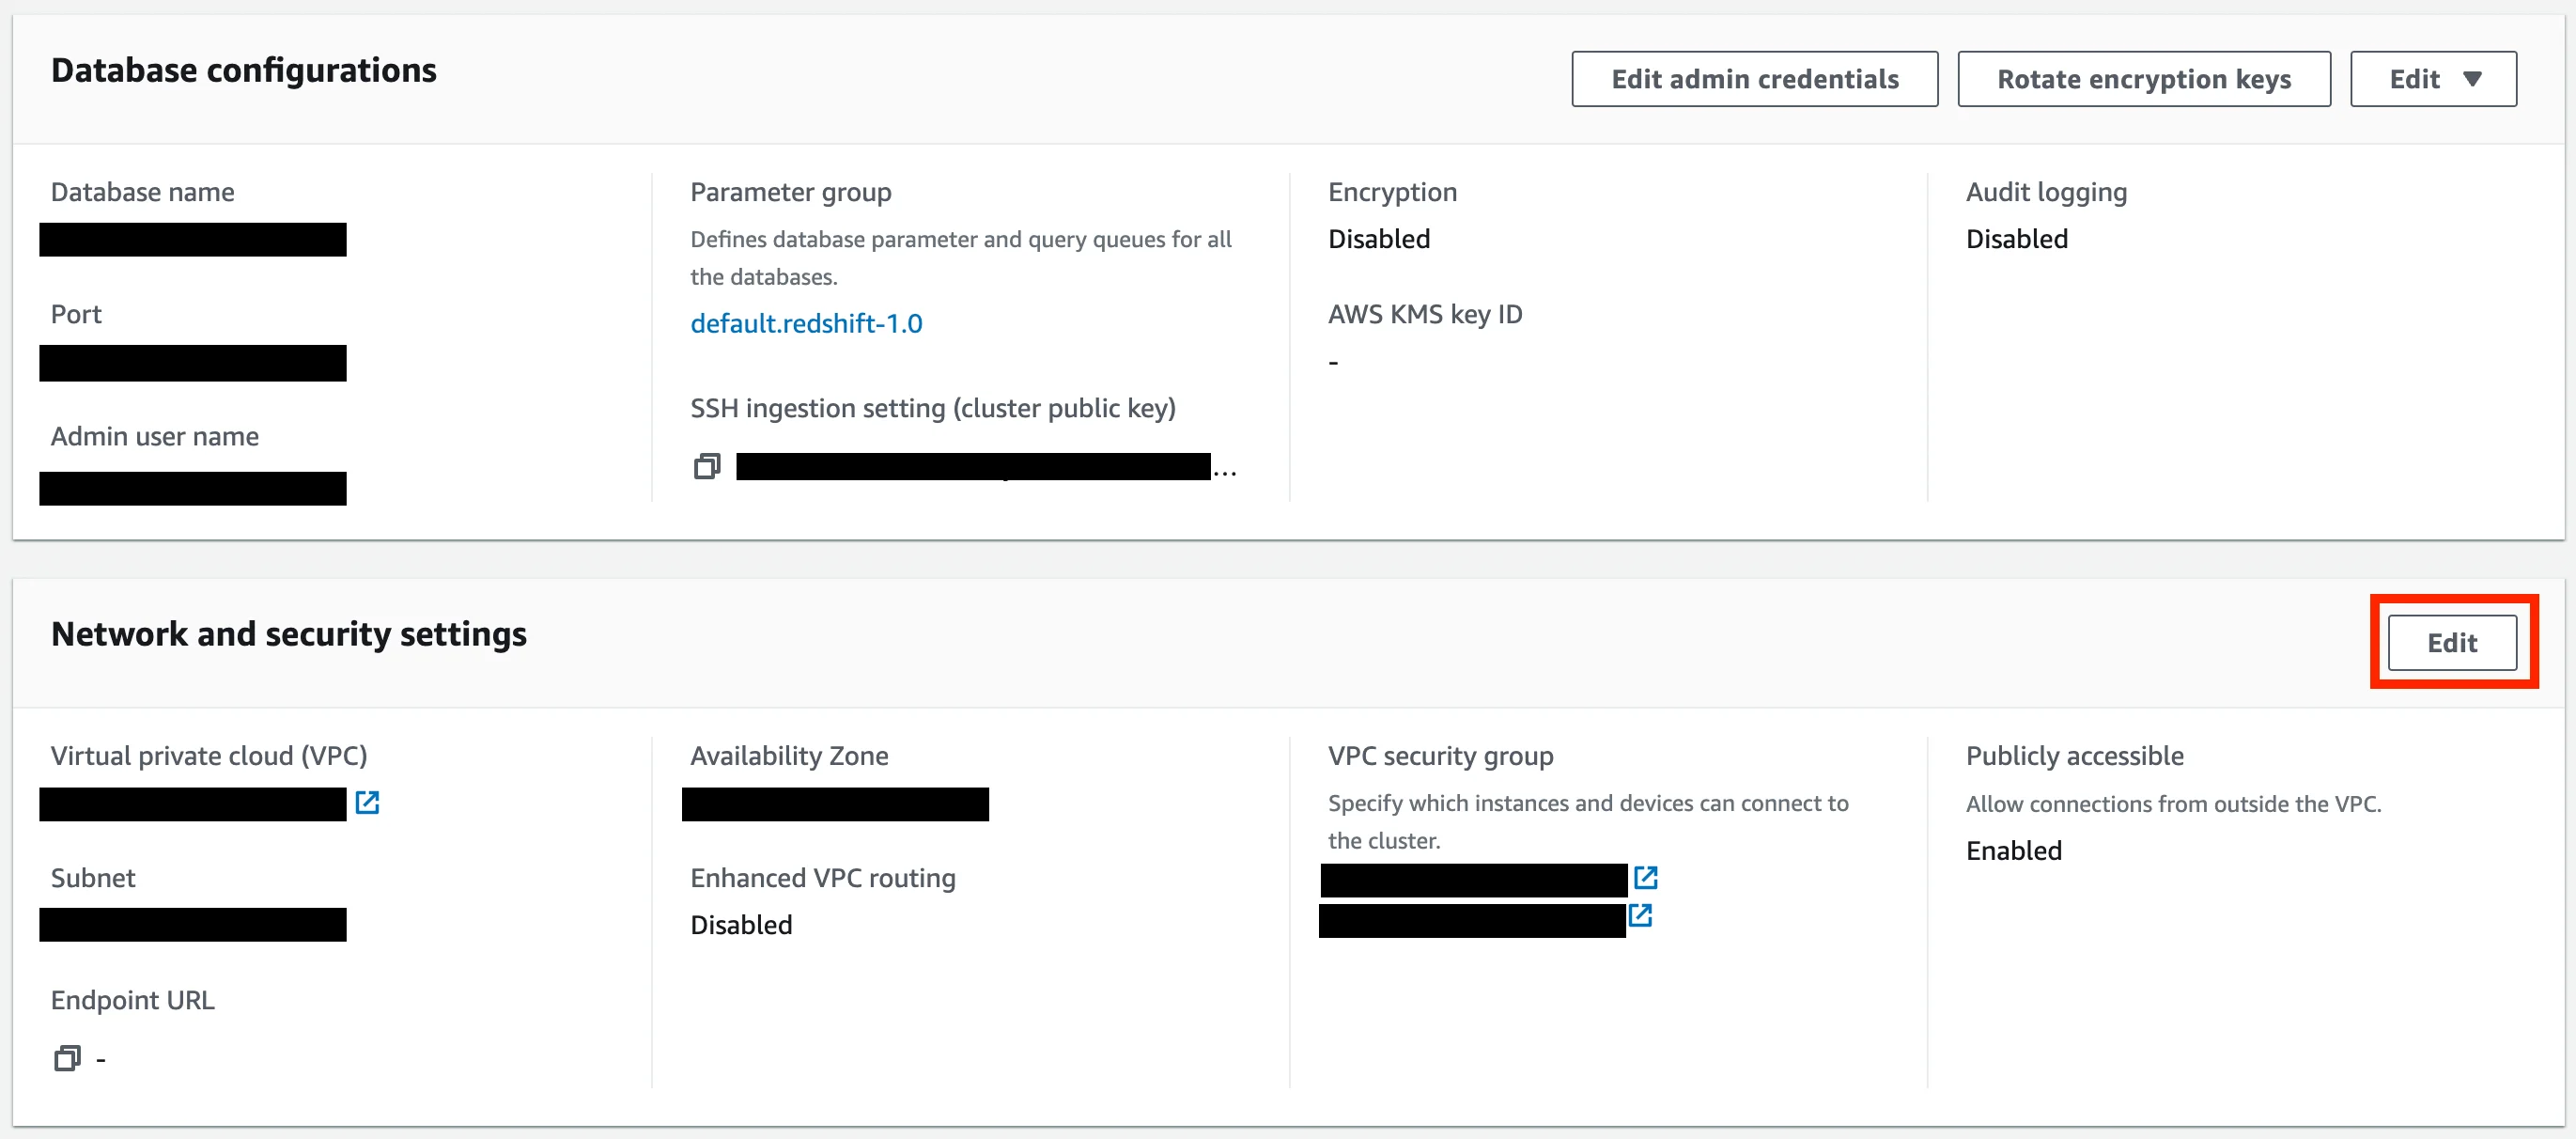
- If you already have a Redshift cluster, under the Properties tab, look for Network and Security section. Click on the “Edit” button.

Step 2: Create a new database user for MoEngage
We will connect to your Redshift cluster using the credentials you provide. It is recommended to create a new user with limited permissions just for MoEngage. You can also provide an existing user’s credentials. To create a new dedicated user, run the below commands in your Redshift cluster:Step 3: Allow MoEngage IPs to access your cluster
You can either choose to create a new security group or edit your existing one.Create a new Security Group
From your EC2 Console, under “Network & Security”, open the Security Groups page. Click on the “Create security group” button.- Give your Security Group a name, and an optional description.
- Select the VPC (by default, it is already selected).
- Add a new inbound rule with the following details:
The correct IP address to enter in the “source” field depends on your MoEngage Data Center region:
You only need to add one inbound rule. For example, if you’re based in MoEngage’s DC-01 servers, you need to add just the first CIDR block:
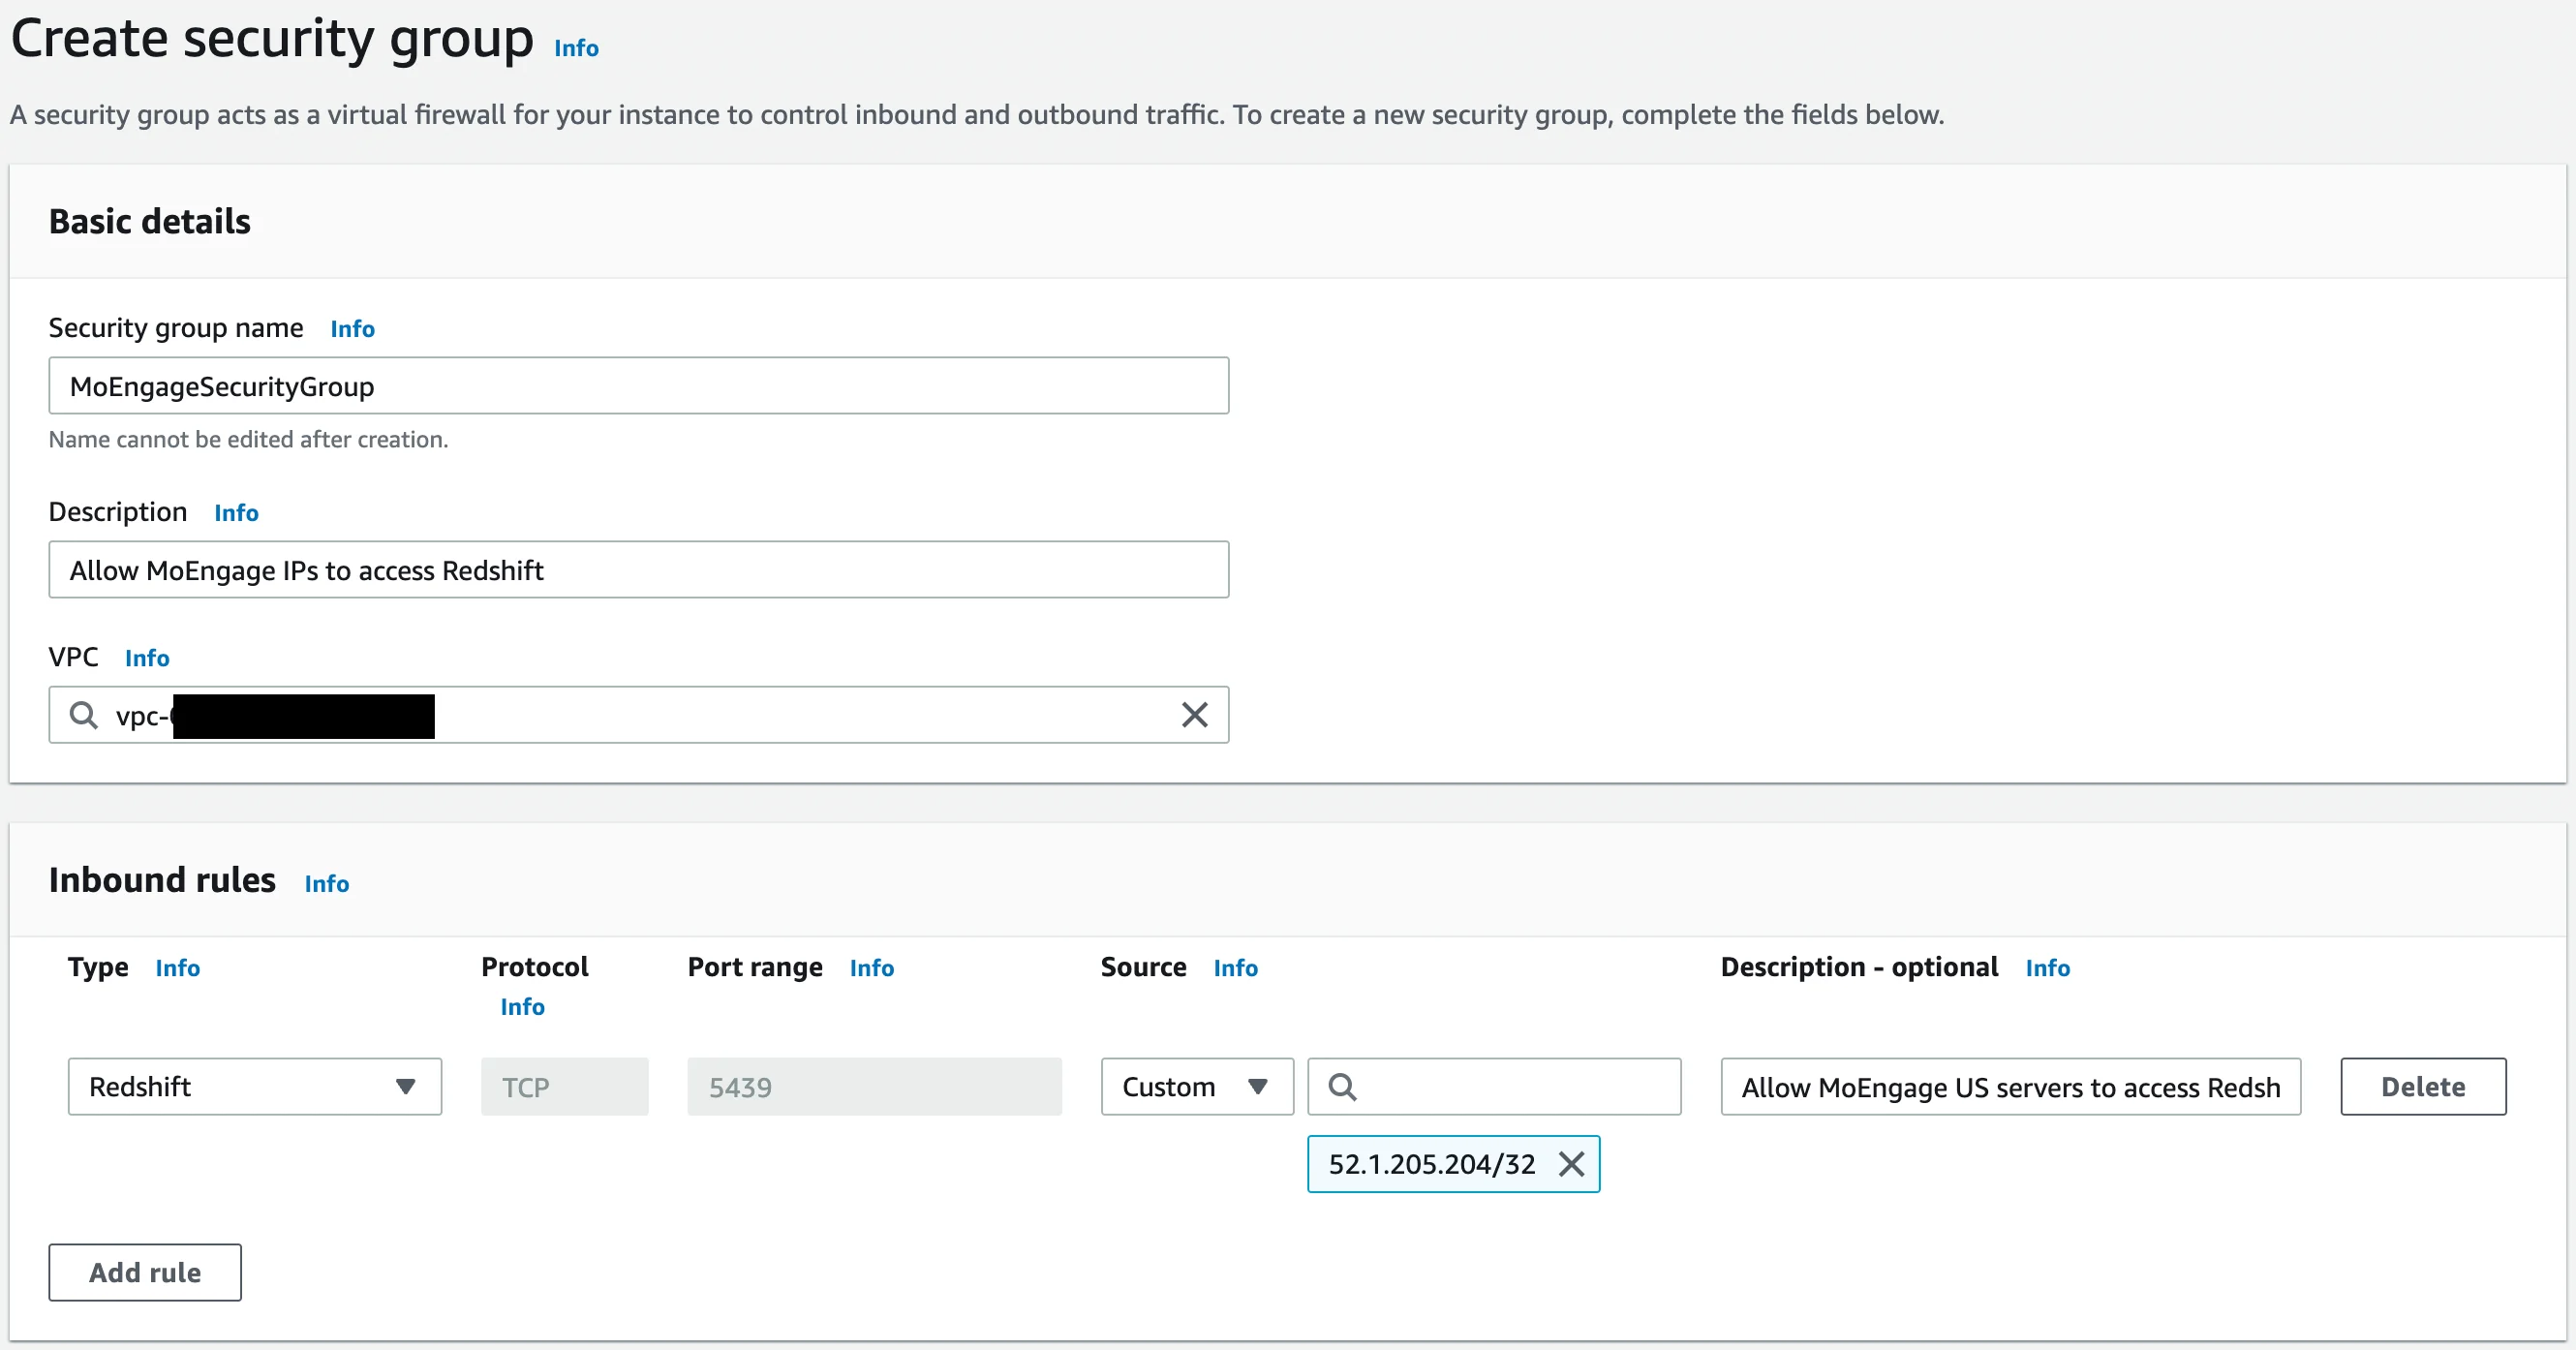
- Leave the outbound rules empty.
- Click on “Create security group” when done.
Edit an existing Security Group
From your EC2 Console, under “Network & Security”, open the Security Groups page. From the list of your Security Groups, open the one you want to edit.- Click on the “Actions” button on the security group page and select “Edit inbound rules”.
- Add a new inbound rule according to the table provided above.
- Click “Save rules” when done.
Attach the Security Group to your Redshift Cluster
- From your Redshift Console, open your Redshift cluster. Go to the Properties tab.
- In the “Network & Security settings” section, click on the “Edit” button.
- Under the VPC security groups, select the Security Group you just created/edited.
- Click “Save changes” when done.
Step 4: Create a new IAM Policy
You need to create a new IAM Policy that will allow us to transfer data from S3 to your Redshift cluster.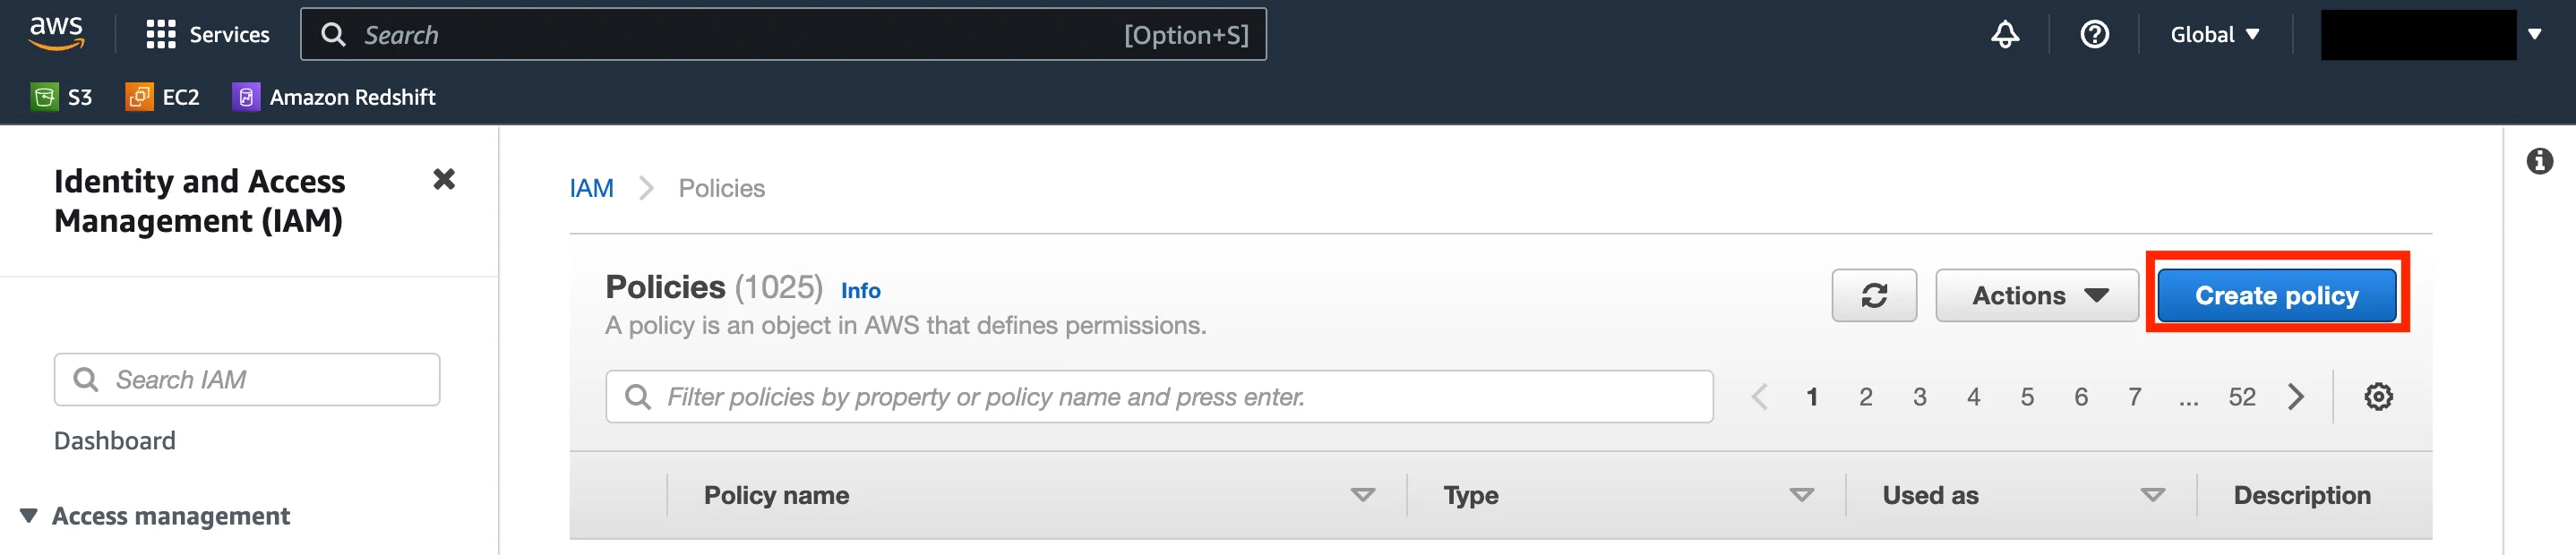
- From the IAM Console, under Access Management, go to Policies. Click on the “Create policy” button.
- On the Create Policy page, switch to the JSON tab and paste the following policy:
<bucket-arn> will change based on your MoEngage Data Center Region:
Just replace the
<bucket-arn> with the one corresponding to your MoEngage Data Center region.
 Click “Next” and optionally, add tags. Then click on “Next: Review”.
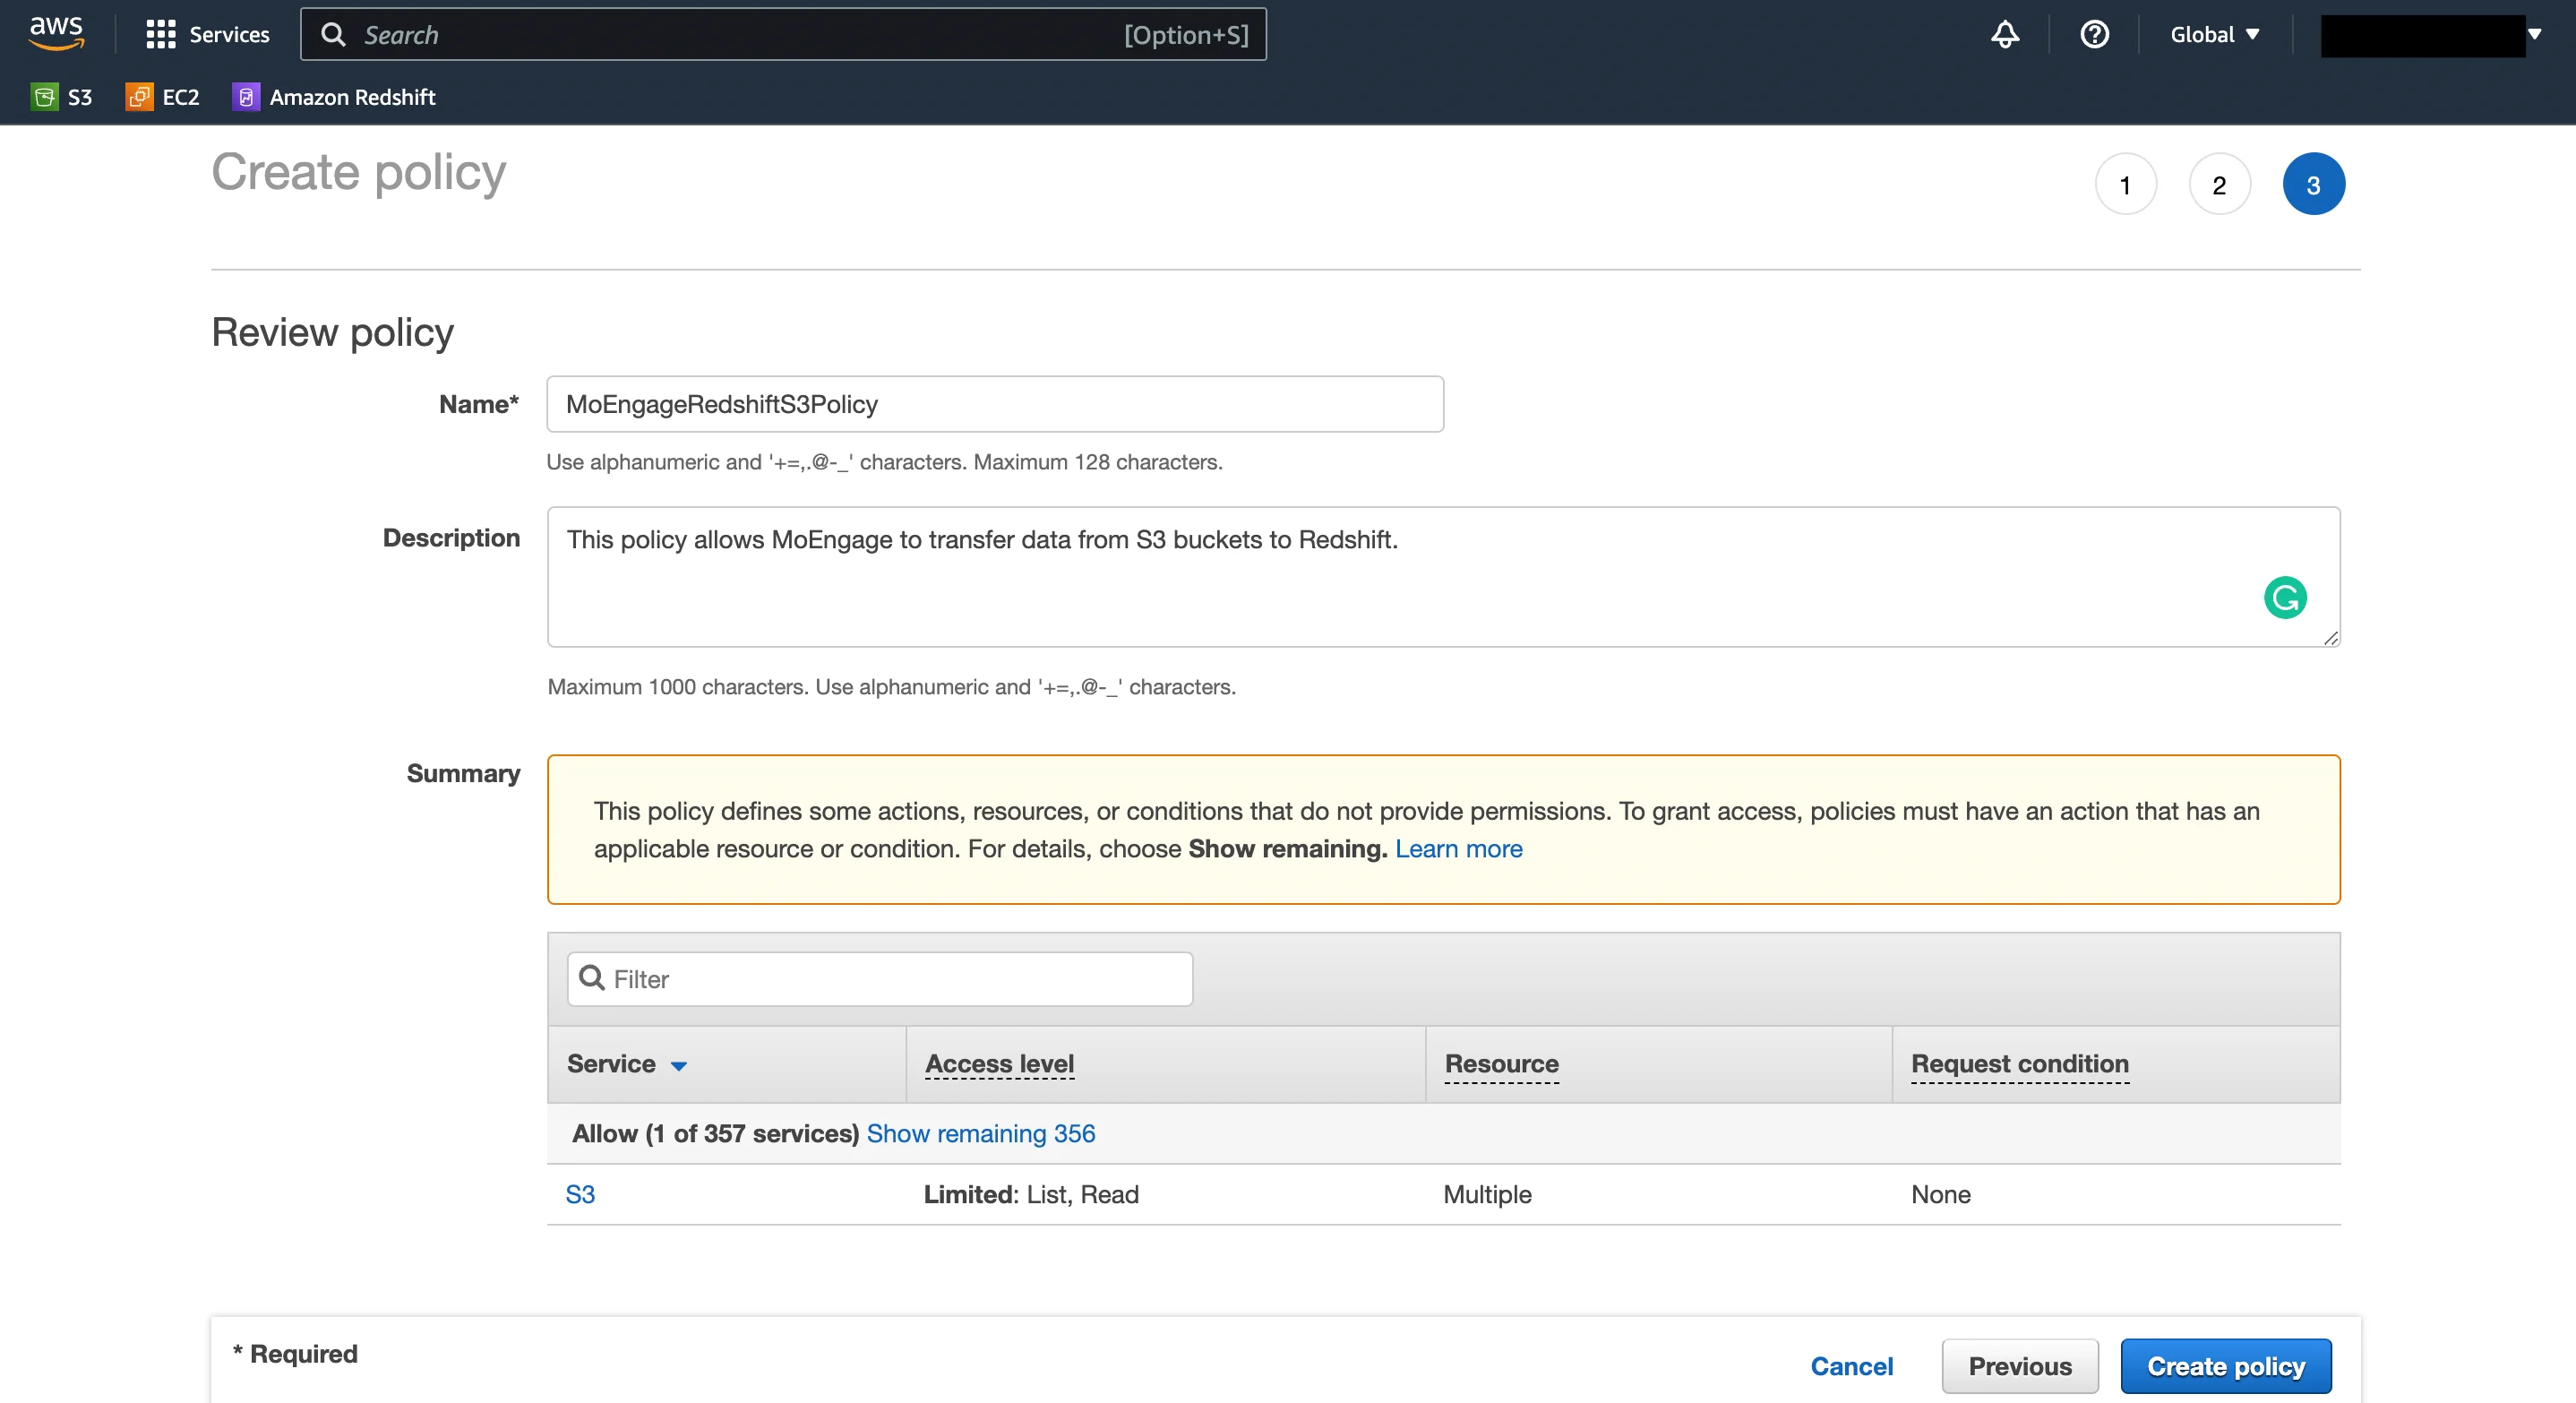
- Give the Policy a name, and an optional description. Click “Create policy” when ready.
Step 5: Create a new Redshift IAM role
This role will allow our servers to write data to your Redshift clusters.- From the IAM Console, under Access Management, go to Roles. Click on the “Create role” button.
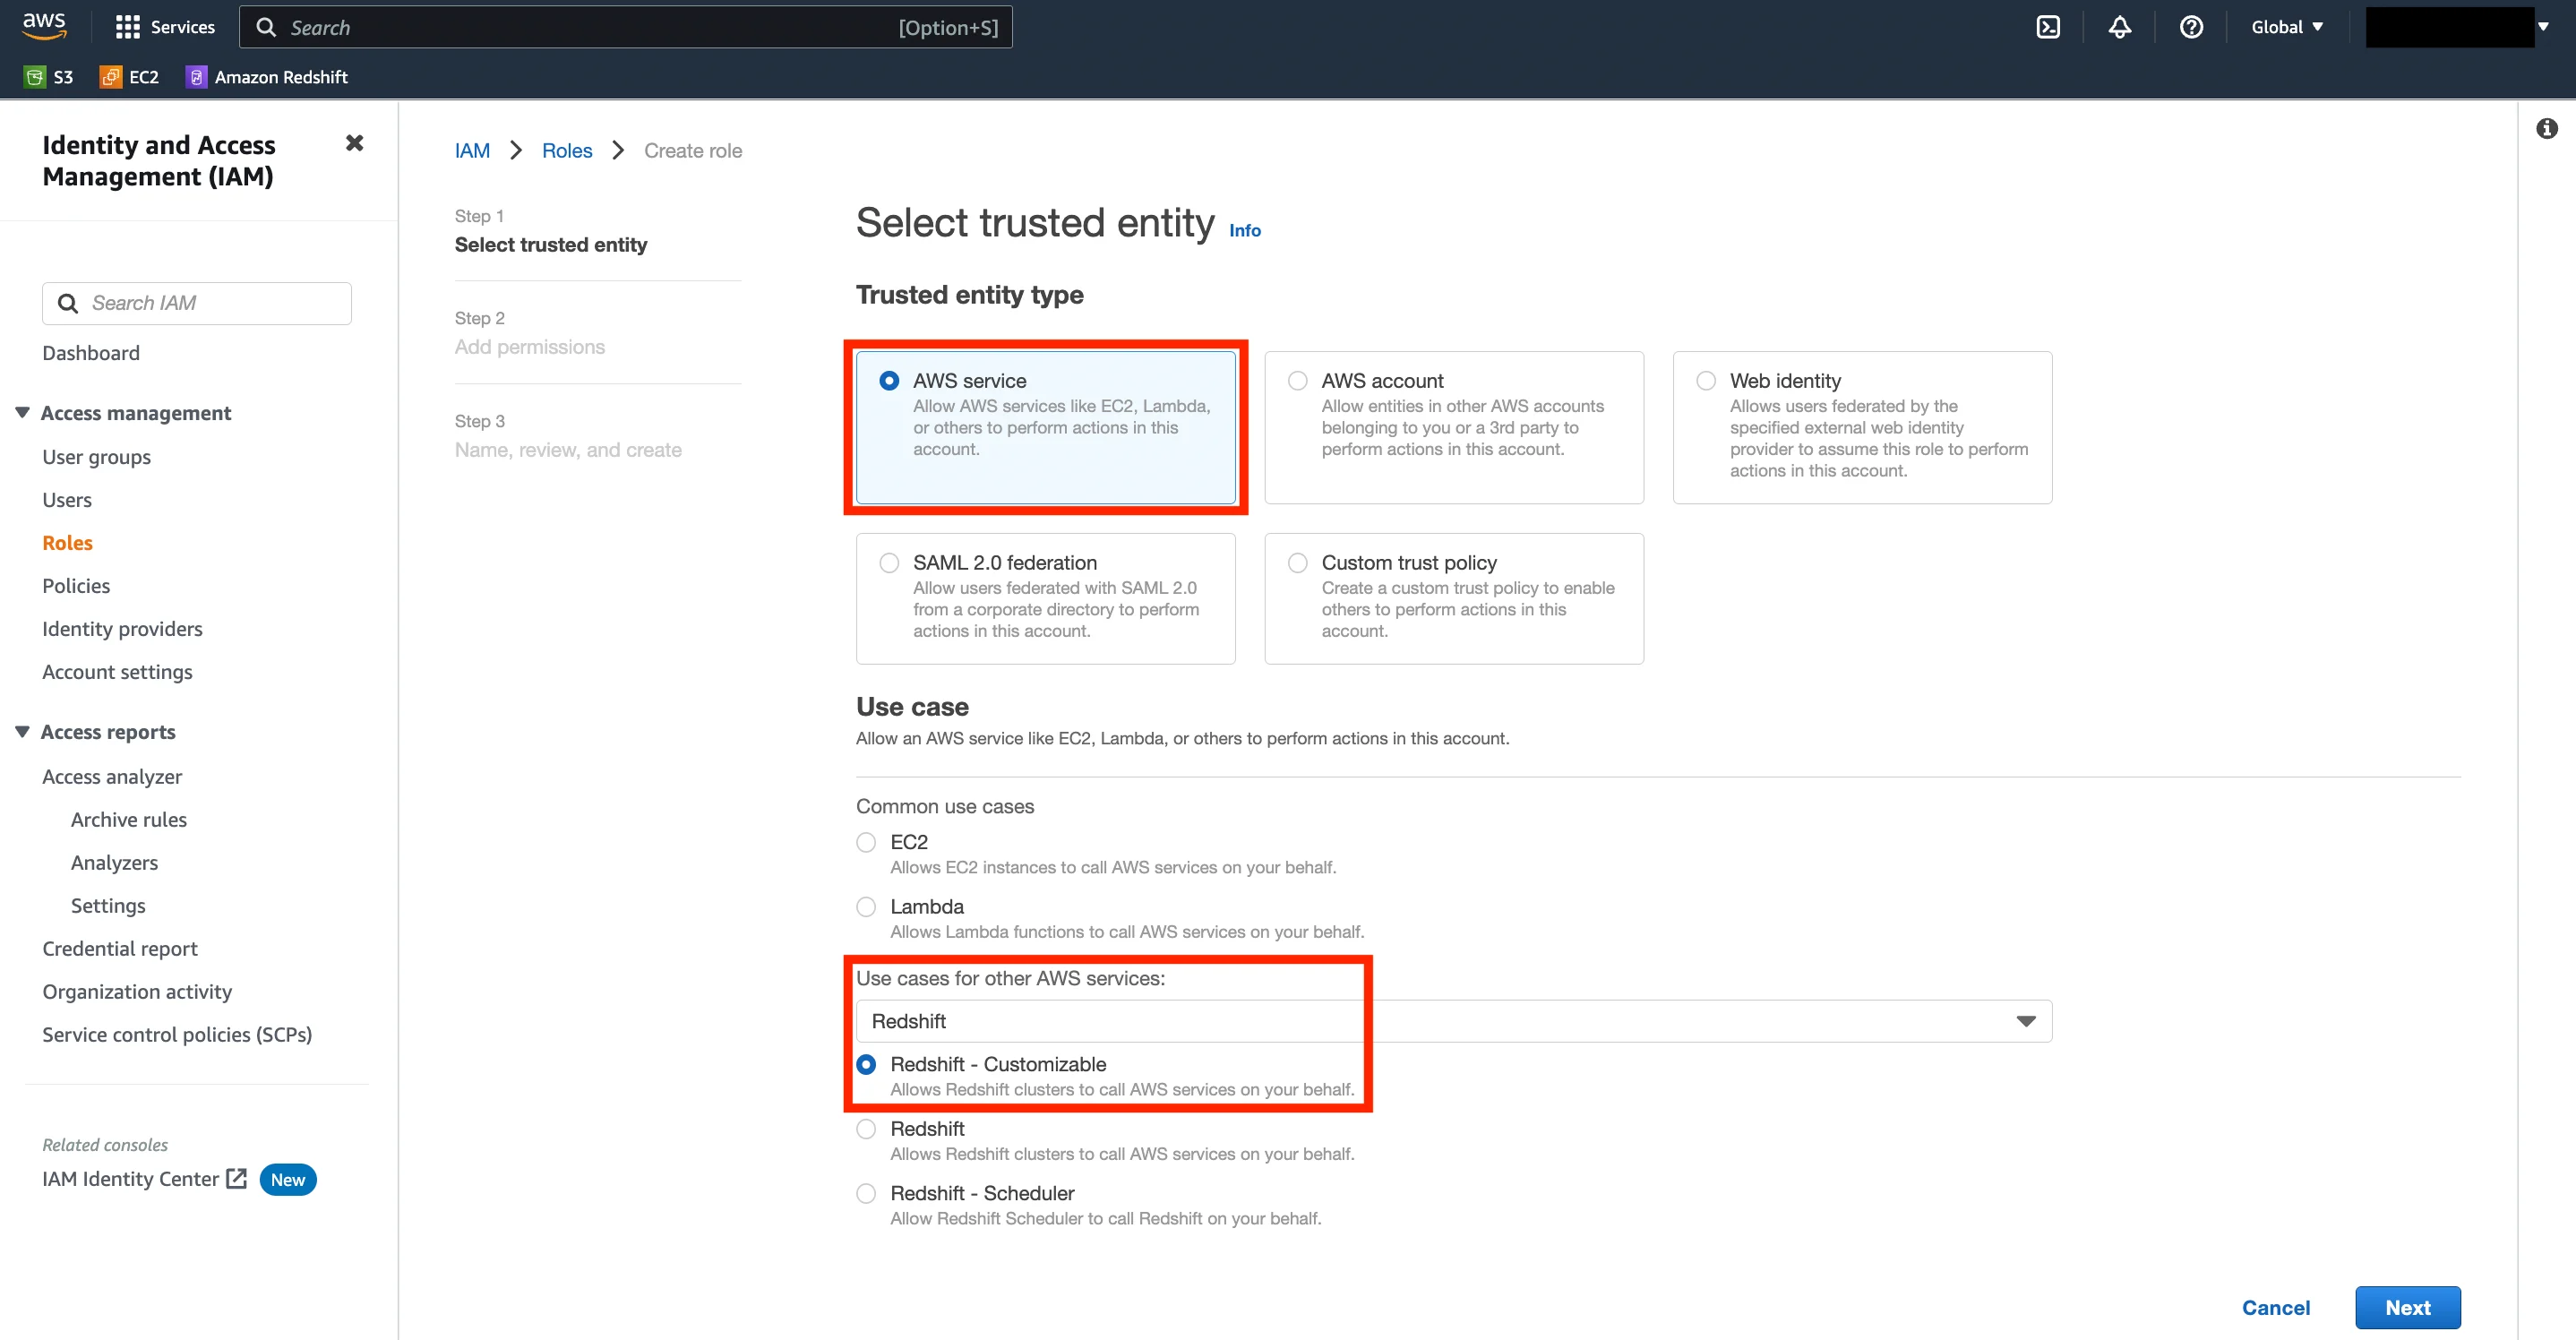
- Choose the Trusted entity type as “AWS service”. Under Use Case, select “Redshift ” from “Use cases for other AWS services”. Under the types of Redshift use cases, select “Redshift - Customizable ”. Click “Next” when ready.
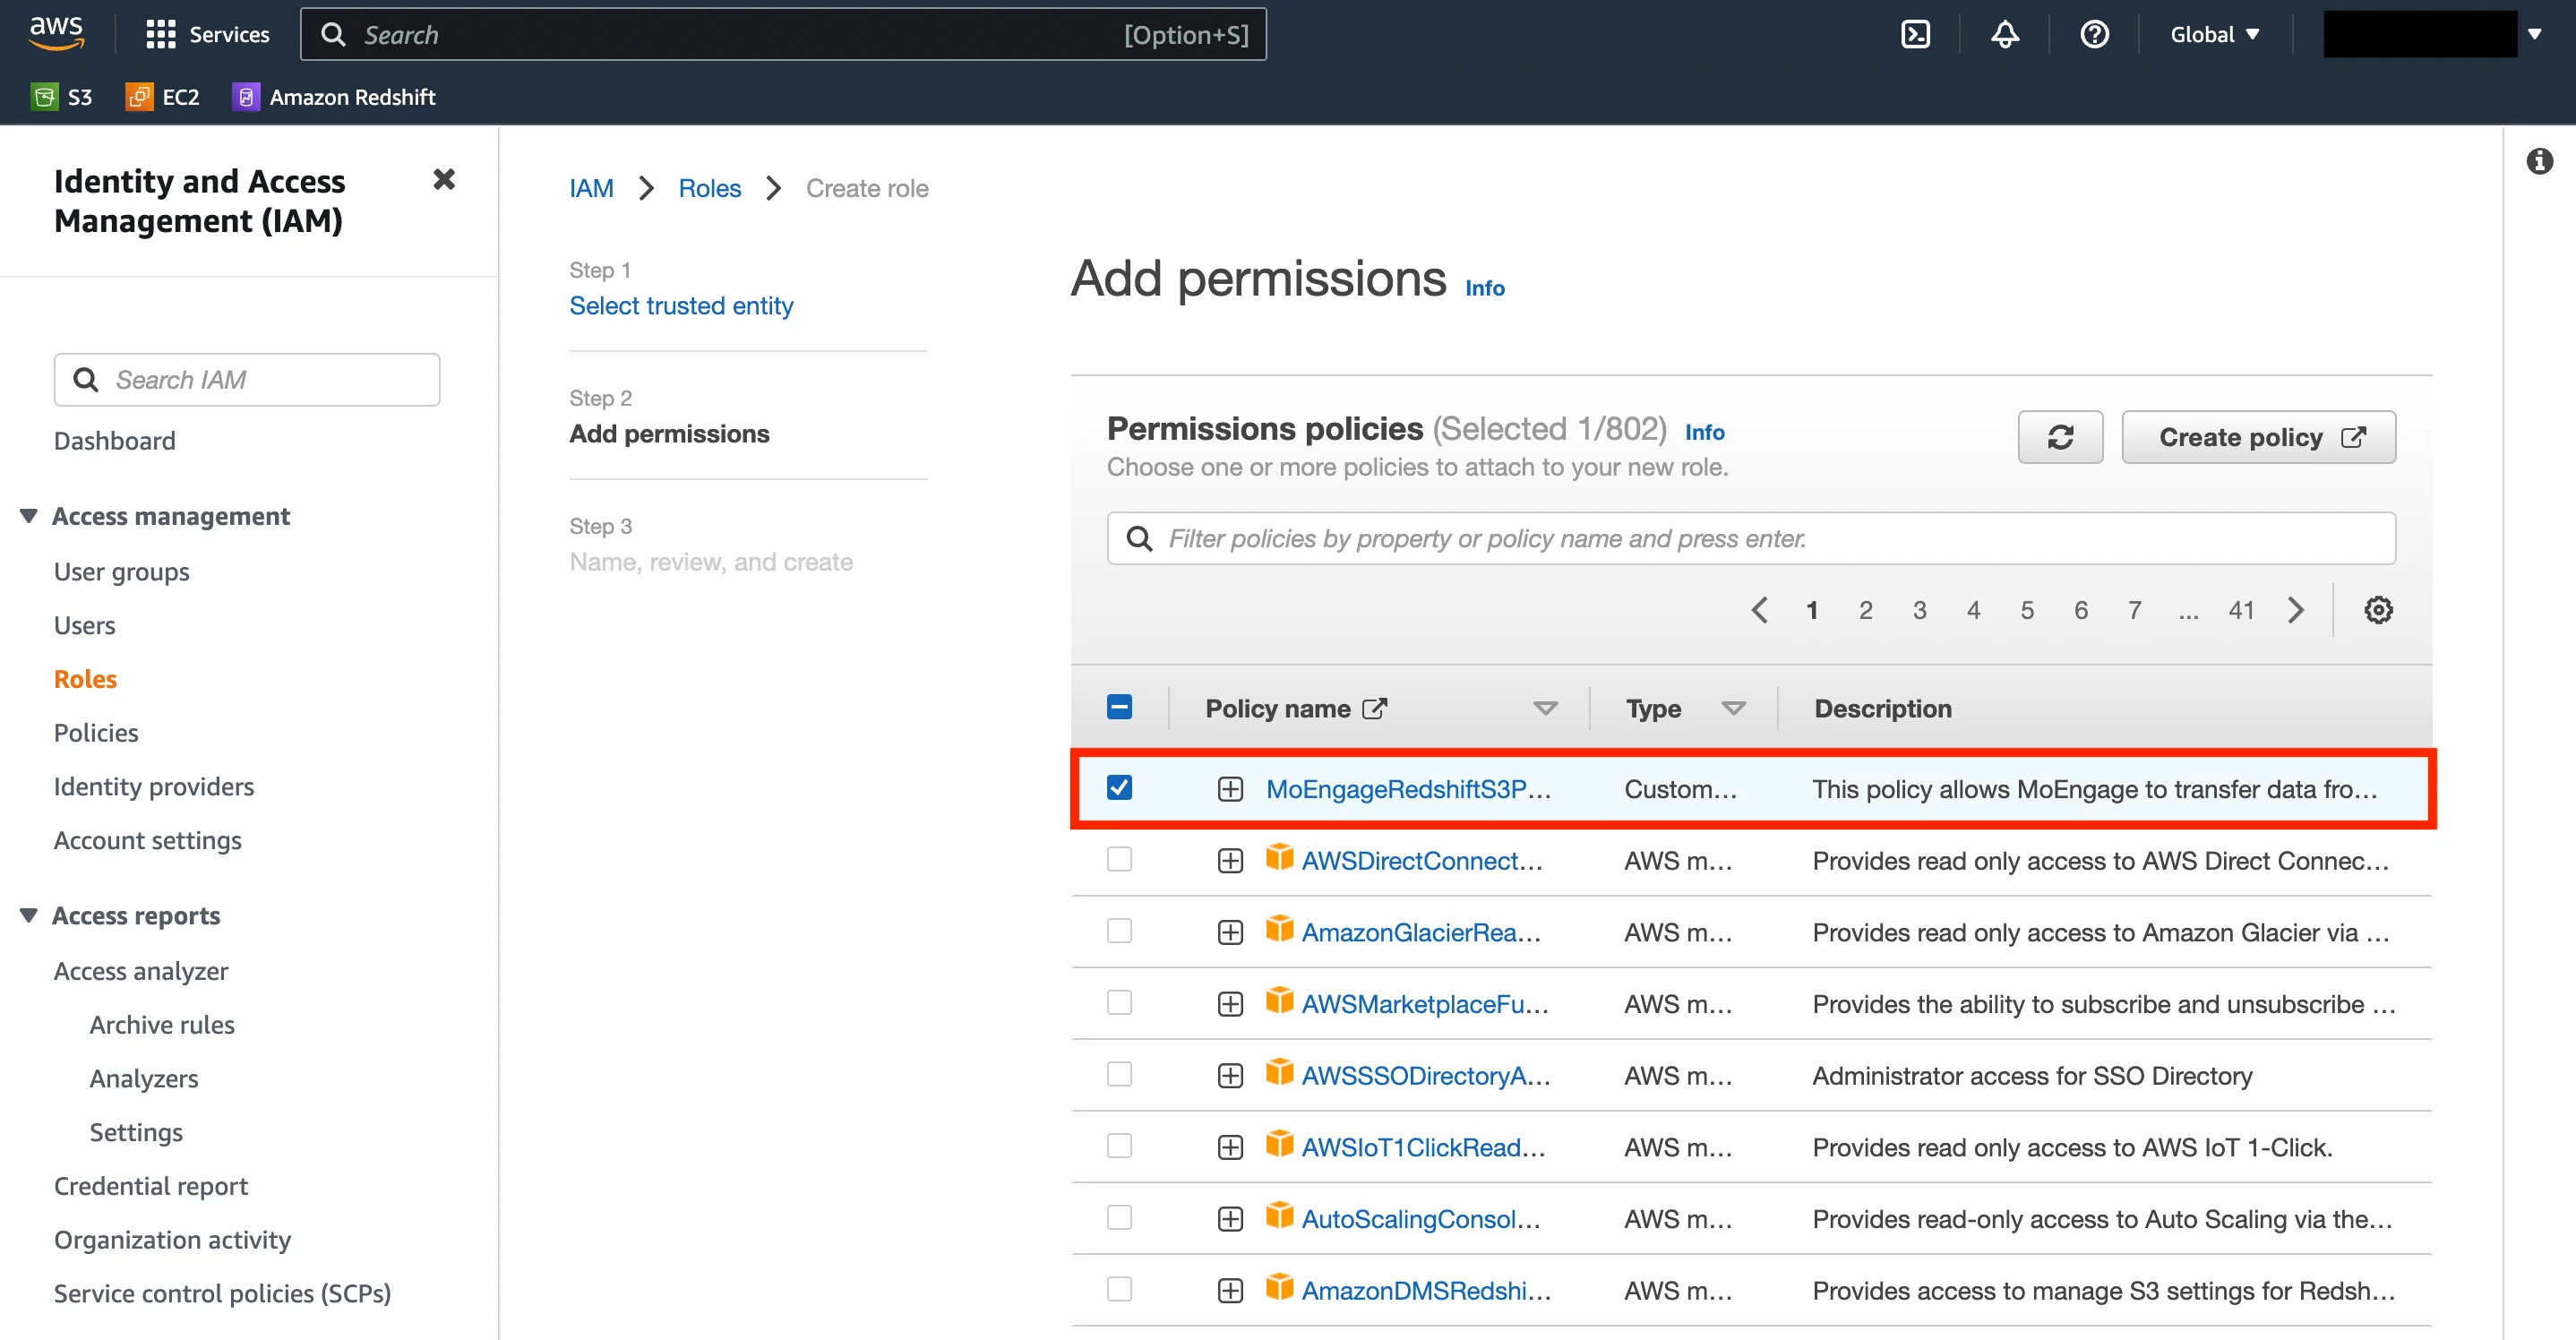
- In the next step, select the policy that you created in Step 4. Click Next when done.
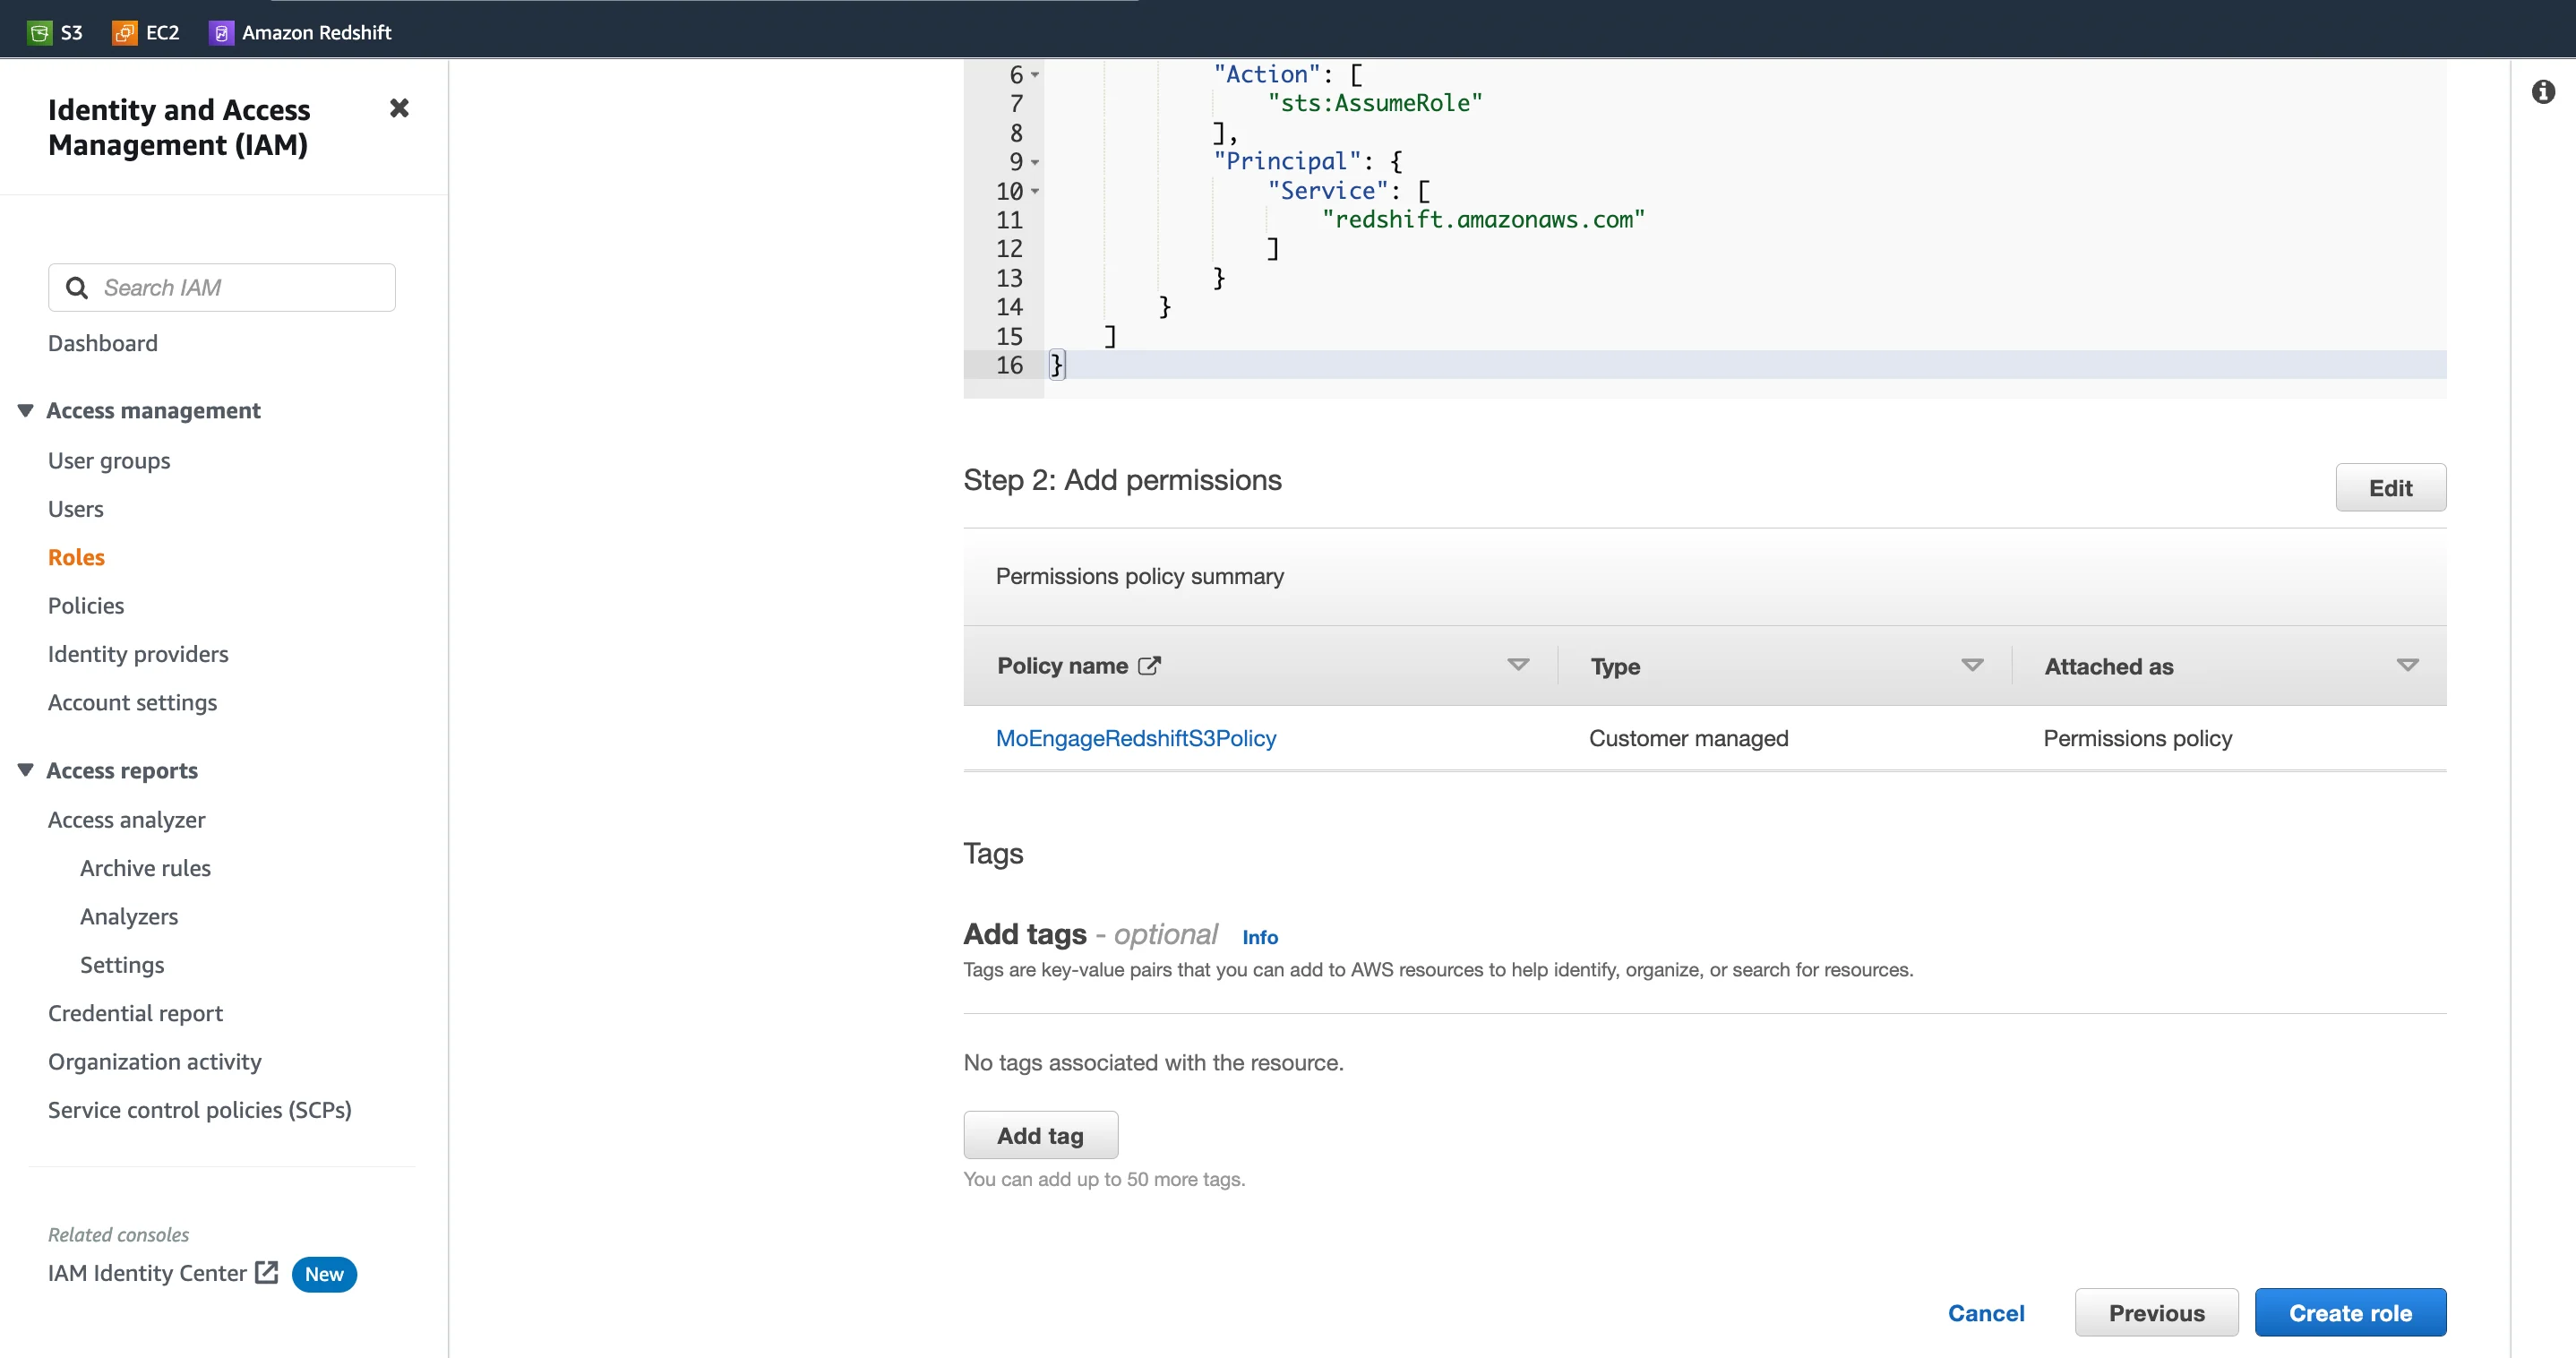
- Give your role a name, and review if you have attached the correct policy that you made earlier. Click on Create Role when ready.
Step 6: Attach this role to your Redshift cluster
From the Redshift Console, open your Redshift cluster.- Under the Properties tab, go to the “Associated IAM roles” section.
- Click on the “Manage IAM roles” button, and then select the “Associate IAM roles” option.
- From the popup modal, select the Role that you just created in Step 5.
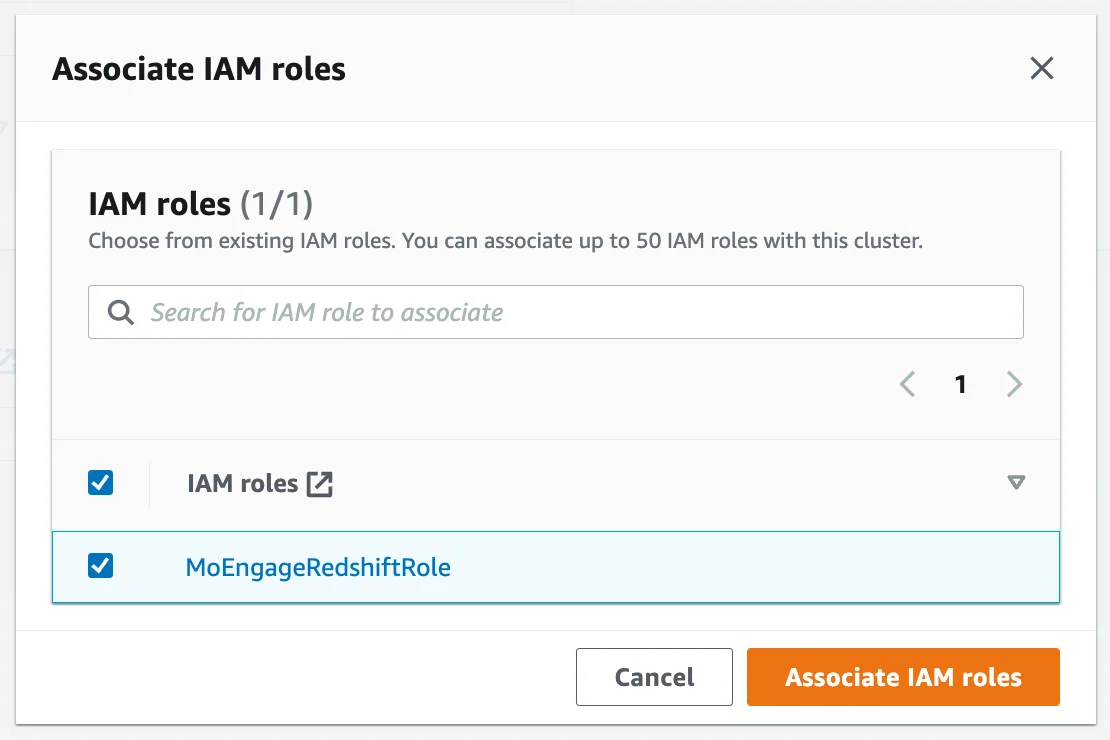
- Click on “Associate IAM roles” to attach this role to your Redshift cluster.