

This is an Early Access feature. To enable it for your account, please contact your MoEngage Customer Success Manager (CSM) or the Support team.
Overview
An API key is a unique identifier that authenticates and authorizes requests to MoEngage API resources. Use the API Key Dashboard to create keys, scope each key to the APIs it needs, and regenerate or archive keys as your integrations change. The multi-API key feature is currently supported for the following API groups:- Segmentation APIs and Inform are available only with Basic Auth.
- AWS STS Auth covers a subset of the groups above. See Scopes Available to AWS STS Auth.
- Creation of new API keys for Push APIs is not currently supported. Push APIs work only with Basic Auth (Legacy) keys migrated to this dashboard.
- Generate a new key while the existing key is still available: With multi-key support, the existing key remains active until the new key becomes functional. This allows you to rotate keys for security purposes without causing downtime. For example, if your team needs time to integrate a new key, the old key continues to work during that period. After the new key is integrated, you can archive the old one.
- Use different keys for different teams: You can create separate keys for different internal teams or external vendors, each scoped to the APIs they need. This provides granular access control and improves security across your organization.
Authentication Types
MoEngage supports the following authentication types for API keys:- Basic Auth: The standard authentication method, which uses an API key and secret. Choose this method for server-to-server integrations that do not need token expiration.
- OAuth 2.0: A token-based method that issues short-lived access tokens. You set the token expiry time, and MoEngage validates each access token automatically. For the full flow, including generating, using, and refreshing tokens, refer to OAuth 2.0 Overview.
- AWS STS Auth: A token-based method for workloads that run on AWS. You allowlist the AWS Security Token Service (STS) assumed-role ARNs that can use the key, and each request proves its AWS identity with a signature from the role’s temporary credentials. MoEngage also issues a
MOE-APPSECRETvalue for the key, which every request sends alongside that signature. Choose this method when your services already assume an IAM role and you want MoEngage to authorize those roles directly. See Add Role ARNs and AWS STS Auth.
Create a Key
- After the multi-API key feature is enabled, the existing API keys in the API dashboard are migrated to your new API key dashboard as legacy keys.
- You can view the legacy key (autogenerated previously when the workspace was created and migrated to this new dashboard) details and continue to use them. However, archiving, editing, and regenerating legacy keys is not supported.
- MoEngage recommends creating and using new keys, as legacy keys will be deprecated in the future.
1
Open the API Keys Page
On the left navigation menu in the MoEngage dashboard, go to Settings > Account > API keys.
2
Start a New Key
Click + Create new key.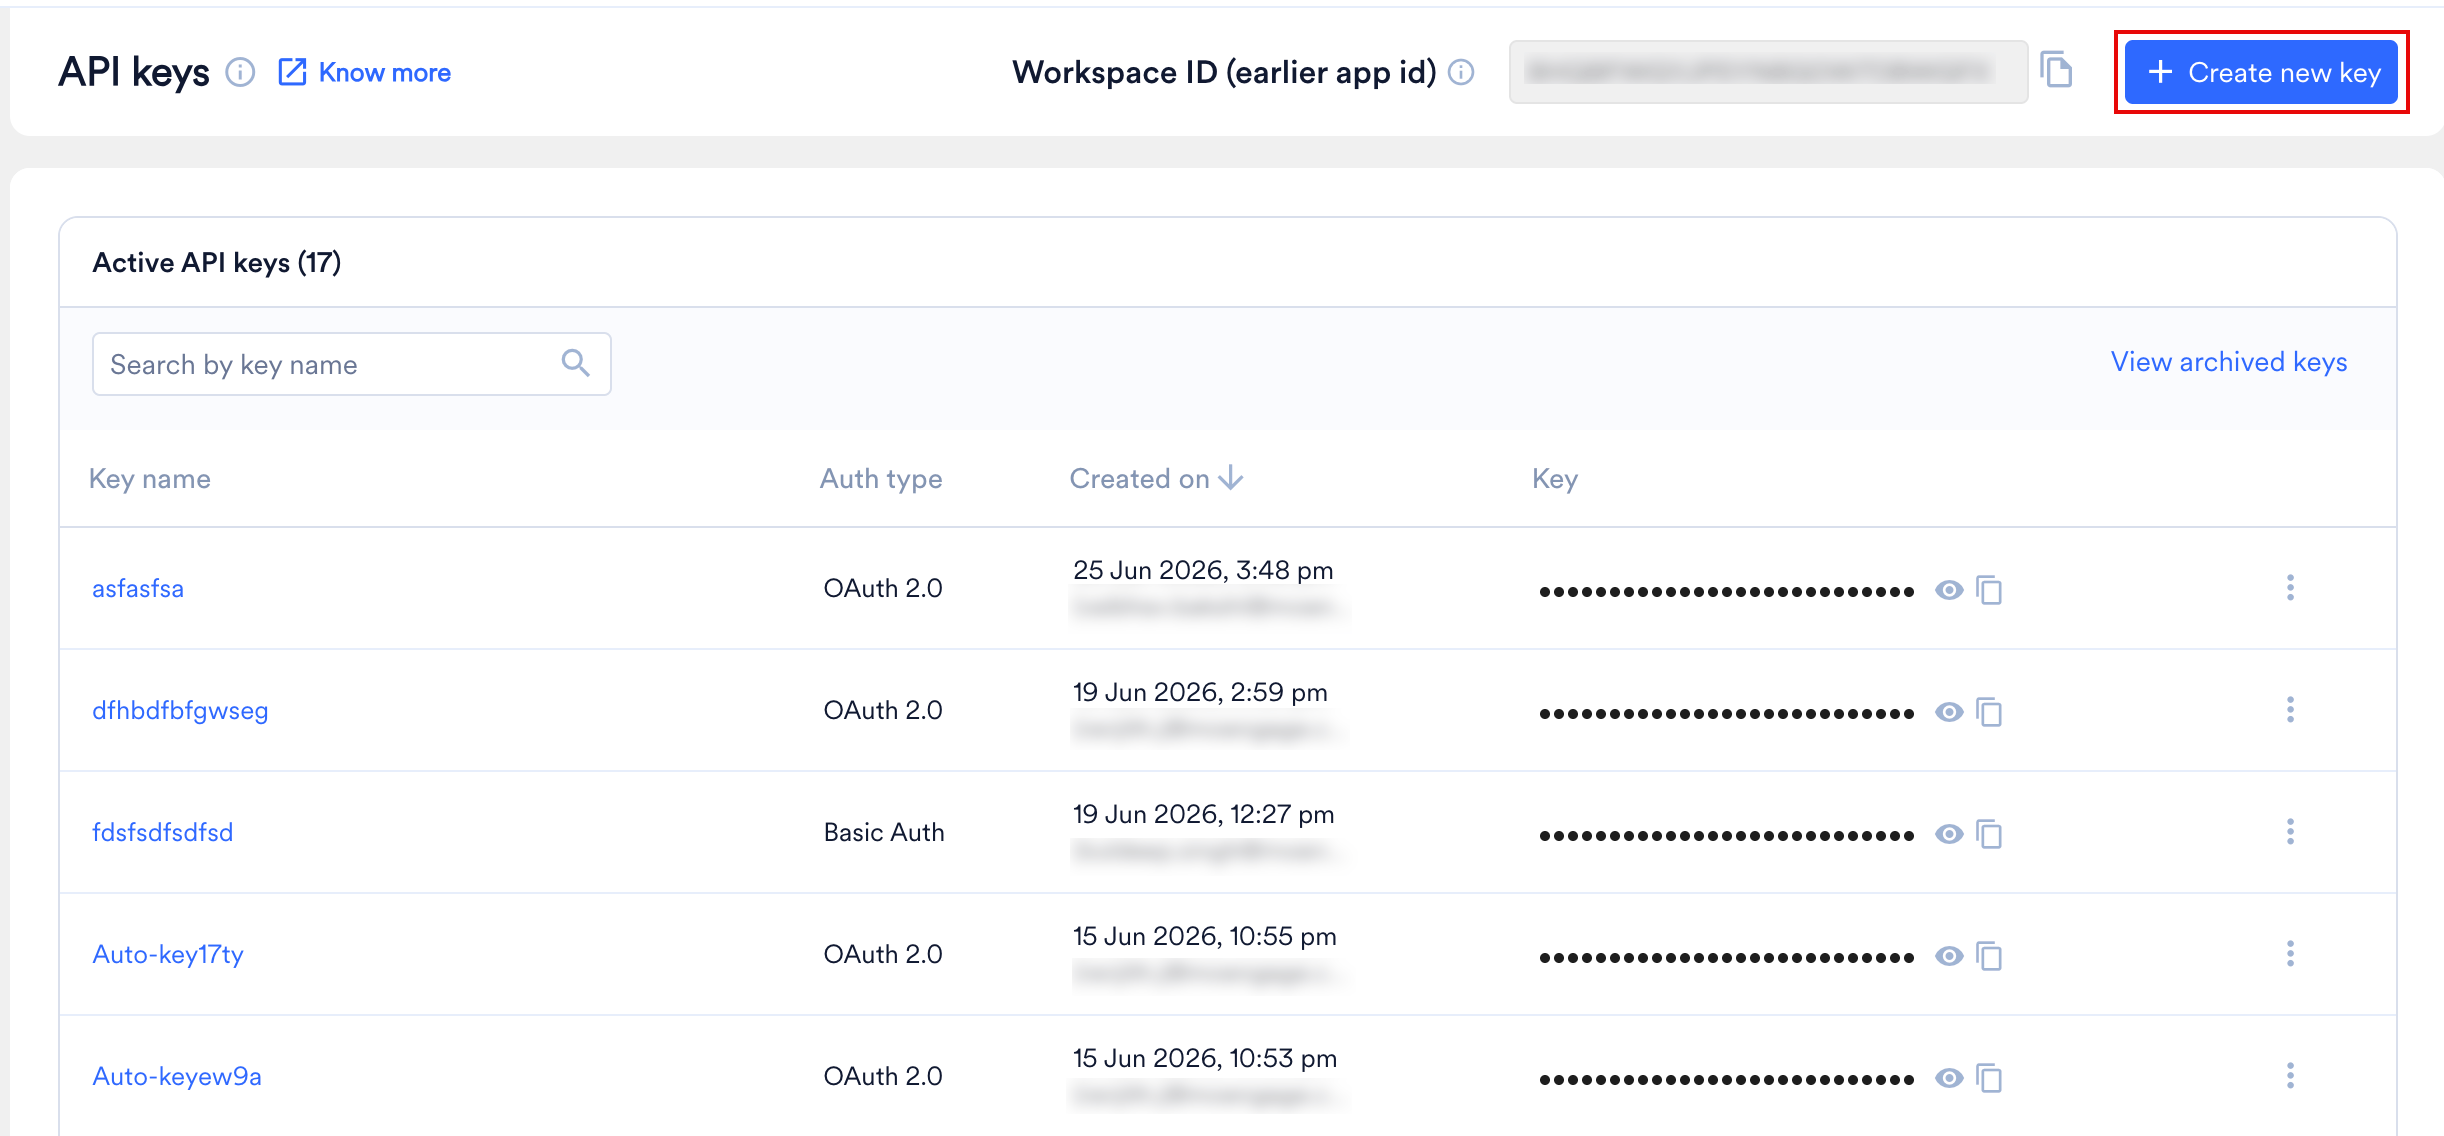
3
Open the Key Details Form
In the Create new key dialog, enter the key details.
4
Name the Key
Enter a name in the Key name box. The key name must not exceed 100 characters and must be unique across your workspace. Archived keys keep their names, so you cannot reuse the name of a key you archived earlier.
5
Choose an Authentication Type
From the Authentication type list, select the method you want to use, then set the options for that method:
- Basic Auth
- OAuth 2.0
- AWS STS Auth
Under Select APIs for access, select the API groups you want to access using this key:
- Data APIs
- Segmentation APIs
- Campaigns
- Inform
- Offerings
- Decision Policy
- Dashboard & Analyze


6
Scope the API Access
Click next to a group to expand it and select individual APIs. Use Select all or De-select all to manage selections across all groups.
7
Save the New Key
Click Create key. The new key appears under Active API keys.
AWS STS Auth
This section applies only to keys that use the AWS STS Auth authentication type. MoEngage authorizes such a key against a list of assumed-role ARNs, and only a caller whose assumed-role ARN appears on the key can use it.This section covers the dashboard configuration for an AWS STS Auth key. For the signing sequence that your application performs, the regional AWS STS hosts, and the headers that each API request carries, refer to AWS STS Auth.
Scopes Available to AWS STS Auth
An AWS STS Auth key reaches a subset of the scopes available to Basic Auth and OAuth 2.0 keys.
No other scope accepts an AWS STS Auth key. To call Campaigns, Segmentation APIs, Inform, Offerings, Decision Policy, or Dashboard & Analyze, create a Basic Auth or OAuth 2.0 key.
Add Role ARNs
You create and manage these roles in your own AWS account. MoEngage does not generate the ARN, so copy it from your AWS account and paste it into the key. For more information, see the AWS Security Token Service API Reference.ARN Format
Enter each ARN in the following format:
For example:
arn:aws:sts::123456789012:assumed-role/MoEngageIngestionRole, is rejected as Invalid format.
Match Several ARNs With a Wildcard
Each session of a role produces a different ARN, so a role that many workloads or team members share can exceed the limit of 10 entries. Place* at the end of the segment you want to broaden.
Two rules apply to every wildcard entry:
- An entry accepts one
*, and only as the final character.arn:aws:sts::123456789012:assumed-role/My*Roleand any entry with two wildcards are invalid. - The role name must contain at least one character before the wildcard, so
arn:aws:sts::123456789012:assumed-role/*is invalid.
ARN Validations
View Active Keys
On the API Keys page, the Active API keys table shows the following columns:
You can search for keys using the search bar. The count of active keys is displayed above the table.
Legacy keys are listed with the auth type Basic Auth (Legacy). You can view and continue to use these keys, but you cannot edit, regenerate, or archive them.
Manage Keys
On the API Keys page, click for a key to see the following options: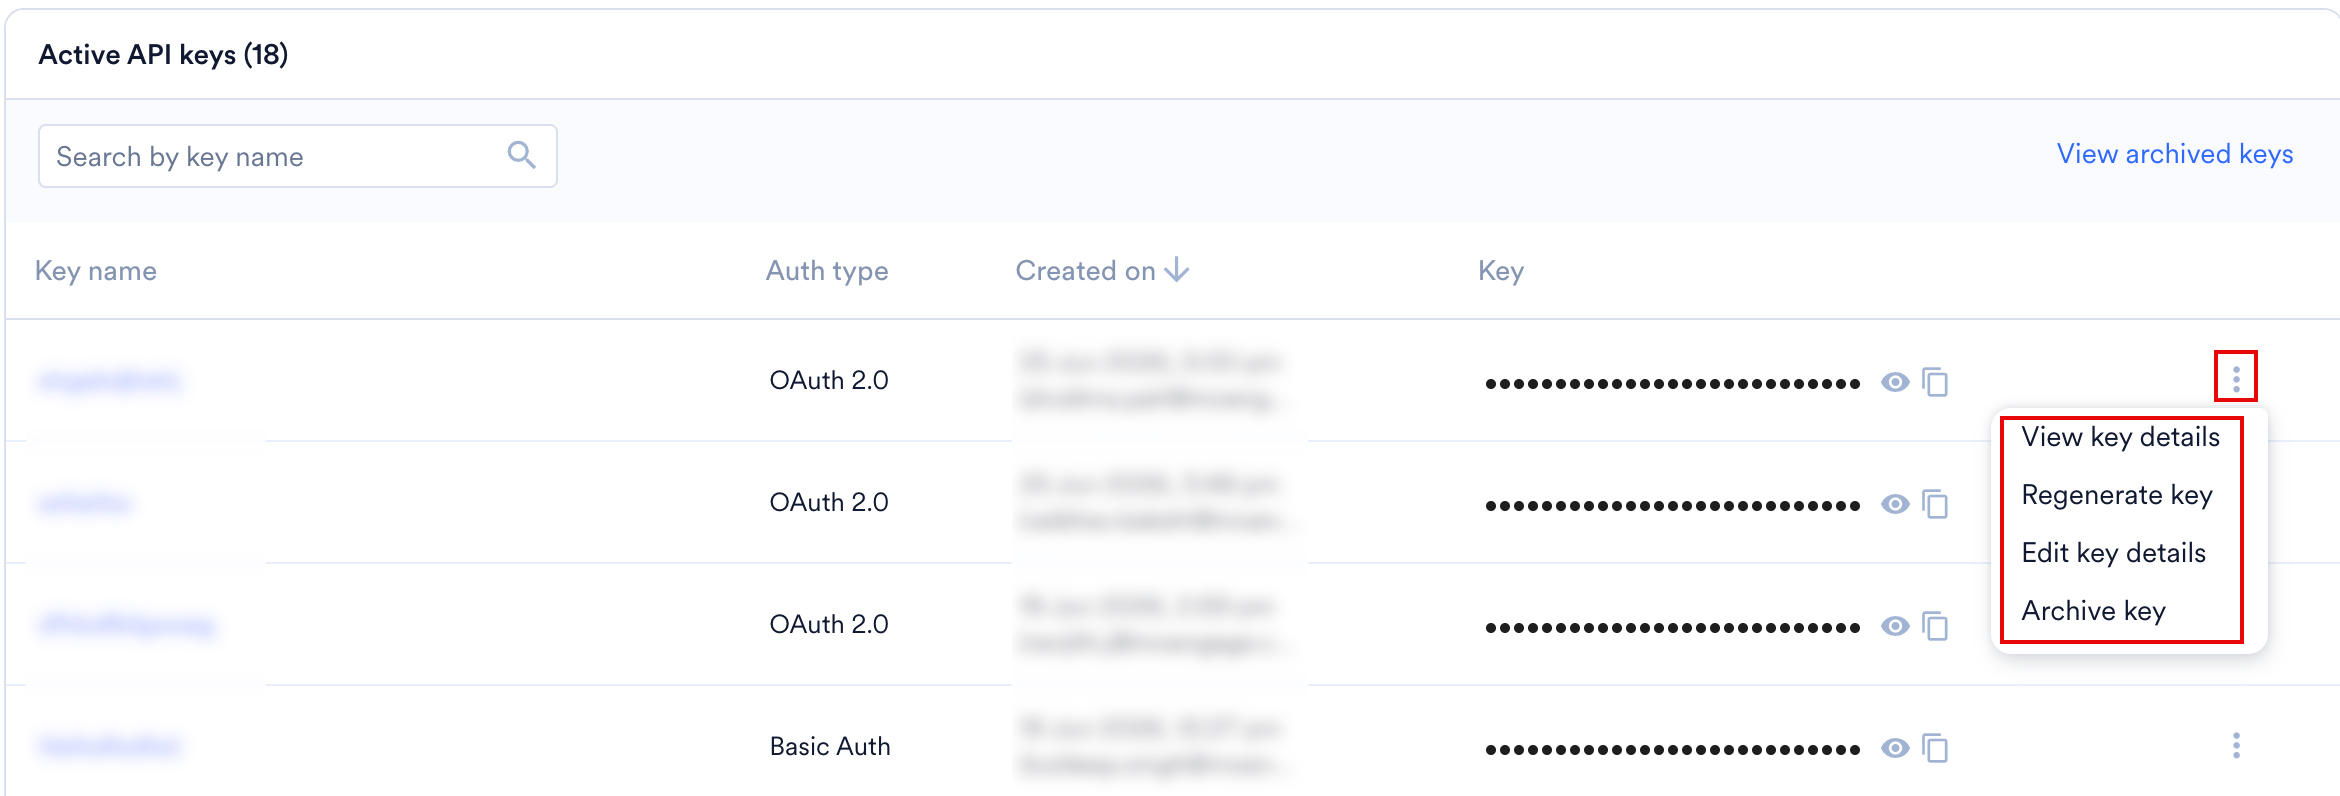
View Key Details
1
Open the Key Actions Menu
On the API Keys page, click for the key you want to view.
2
Open the Details Panel
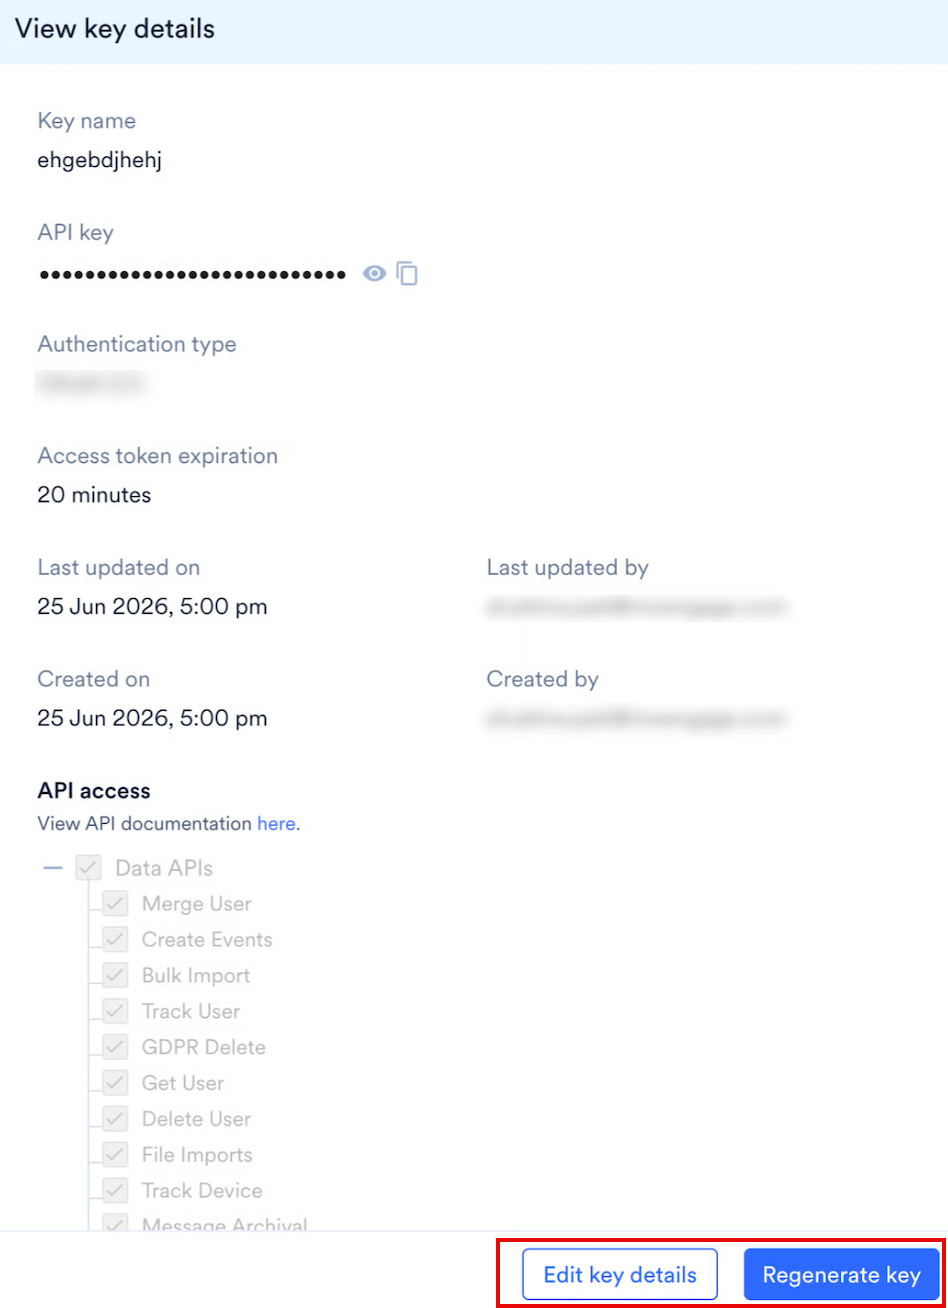
Click View key details. The fields in the details panel depend on the authentication type of the key:
- Basic Auth
- OAuth 2.0
- AWS STS Auth
Edit Key Details
1
Open the Key Actions Menu
On the API Keys page, click for the key you want to edit.
2
Open the Edit Dialog
Click Edit key details.
3
Update the Fields
In the Edit key details dialog, edit the available fields:
- Basic Auth
- OAuth 2.0
- AWS STS Auth
4
Save Your Changes
Click Save. The Save button remains disabled until you make a change.If you change the API access or the ARN list, a confirmation dialog opens with the title Are you sure you want to update “<key name>” Key?. The dialog groups your changes into categories, such as ARN added and ARN removed, and shows only the categories you changed. Click Show more to expand a long list, and hover over an entry to see the complete ARN.
View Archived Keys
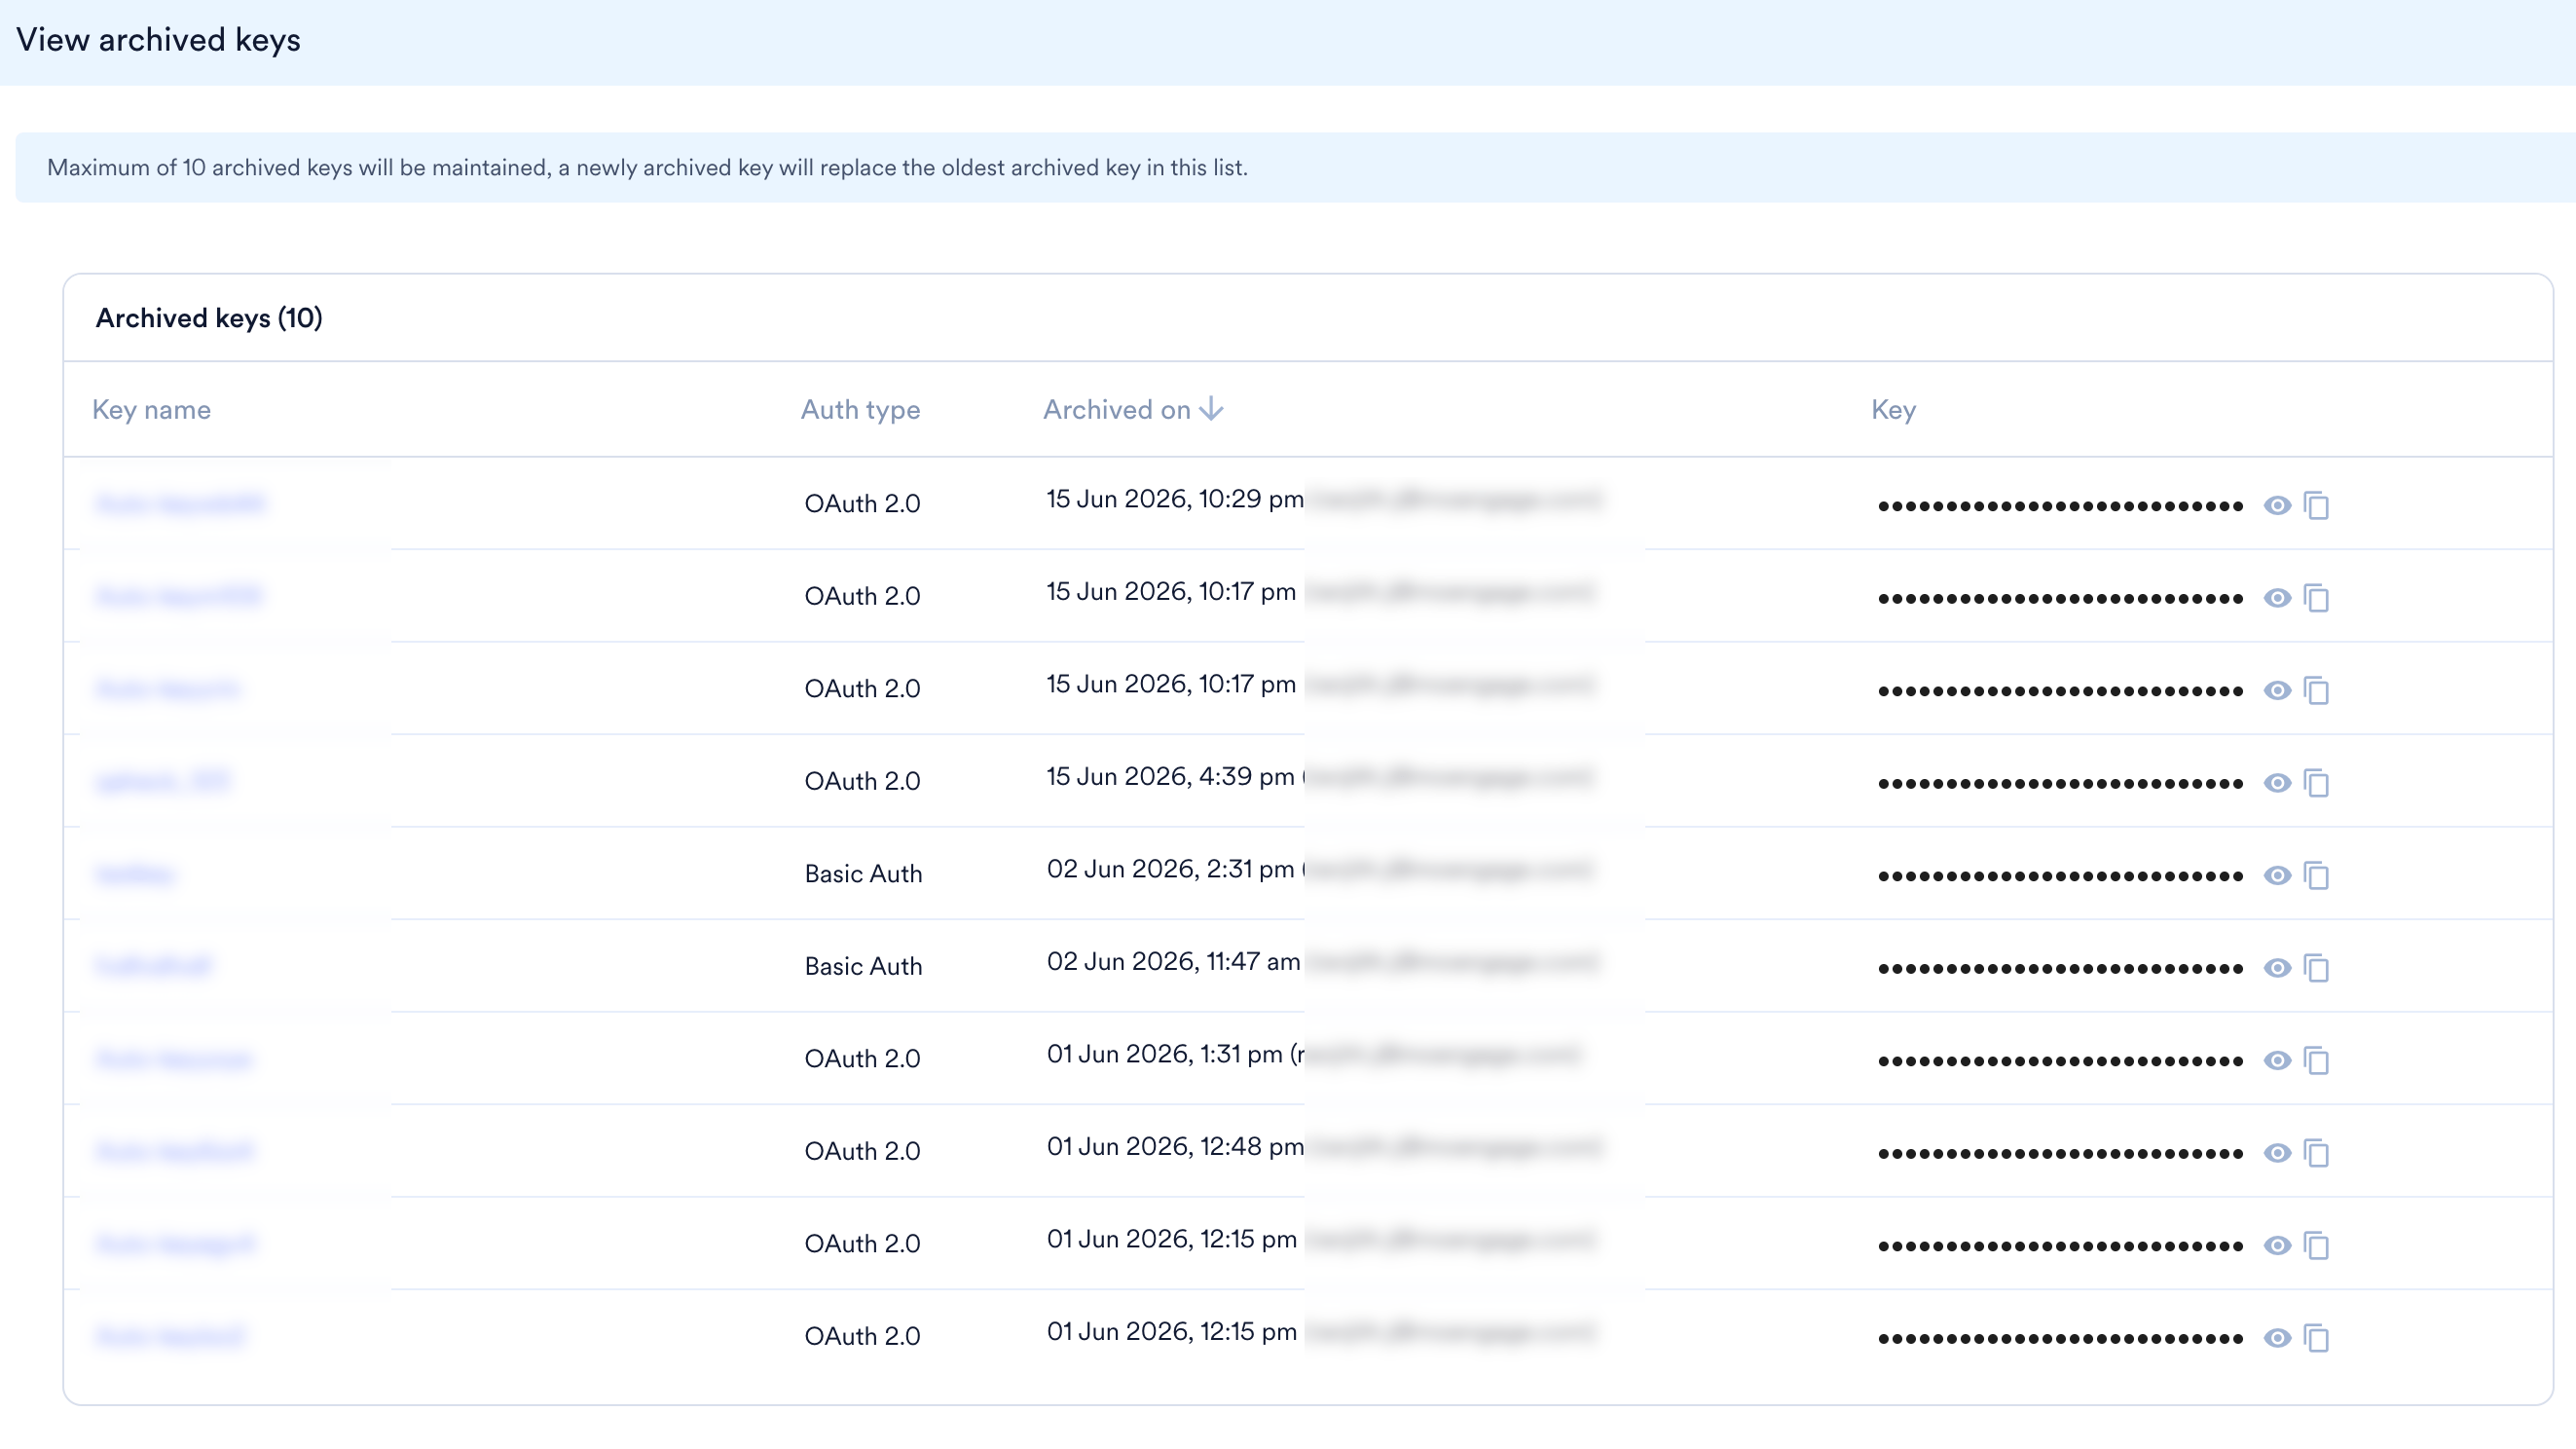
- On the API Keys page, click View archived keys.
- The archived keys list opens with the following columns: Key name, Auth type, Archived on, and Key.
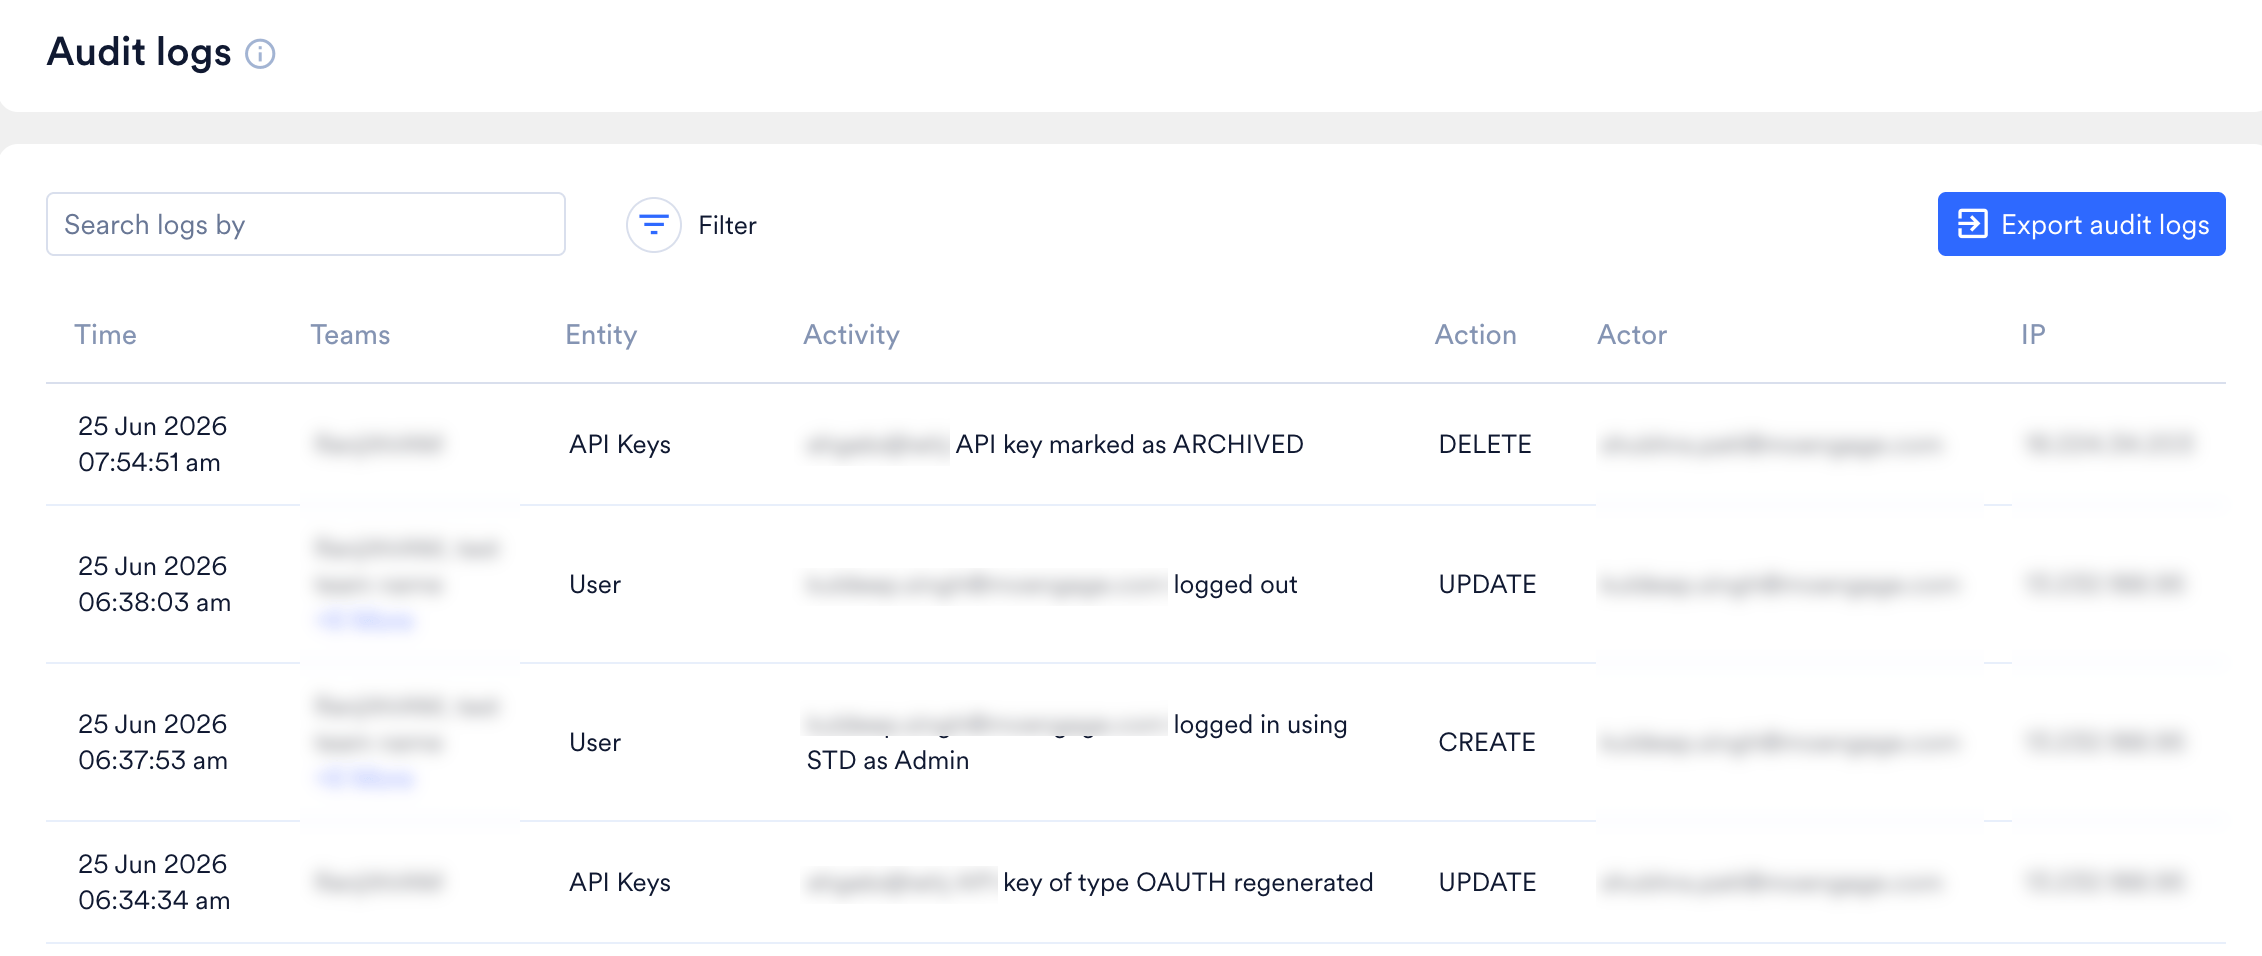
Audit Logs
FAQs
What are legacy keys?
What are legacy keys?
Legacy keys are API keys created automatically when the workspace was created and migrated from the older API keys dashboard to this one. You cannot edit, regenerate, or archive them.
What is access token expiration in OAuth 2.0?
What is access token expiration in OAuth 2.0?
OAuth 2.0 access token expiration is a security feature that limits how long an access token can be used to call protected APIs before it becomes invalid.An access token acts as a temporary digital pass. Instead of sharing your password with every app or service, the authorization server gives you a short-lived token. When that token reaches its expiration time, the API rejects any further requests and returns an
HTTP 401 Unauthorized error.Why does access token expiration matter?
Why does access token expiration matter?
- Better security: If an attacker steals a short-lived token, they have only a brief window to exploit it before it stops working.
- Resource control: Expiration prevents unused or abandoned tokens from filling up the authorization server’s database.
- Standard lifespan: You can set the access token expiration anywhere from 5 to 60 minutes.
How does MoEngage handle expired tokens?
How does MoEngage handle expired tokens?
MoEngage issues a companion refresh token alongside the access token. Your integration exchanges that refresh token for a fresh access token in the background, without sending the API key again. The refresh token expires after 24 hours without a refresh, and after 30 days at most, so refresh at least once a day to keep the token alive. For the refresh request and its error codes, refer to Refresh Access Token.
Where do I find my assumed-role ARN?
Where do I find my assumed-role ARN?
You find it in your own AWS account. Create or identify the role your workload assumes, then copy its assumed-role ARN. MoEngage does not create the role or generate the ARN. For the format MoEngage accepts, see ARN Format.
How many ARNs can one key have?
How many ARNs can one key have?
One key accepts up to 10 ARNs. After the list reaches 10 entries, the dashboard disables + Add value. To cover more sessions of the same role, use a wildcard session name instead of listing each session separately. See Match All Sessions of a Role.
Can I change the authentication type of an existing key?
Can I change the authentication type of an existing key?
No, you cannot change it. You can edit the key name, the expiry time, the ARN list, and the API access, but the authentication type stays as you set it at creation. To switch an integration to a different authentication type, create a new key and archive the old one.