Advantages of SSO
The advantages of using SSO include:- Simplified user experience: SSO eliminates the need for users to remember and manage multiple usernames and passwords for different applications, making the login process much easier and faster.
- Reduced password fatigue: By consolidating credentials, SSO reduces the burden on users to remember and manage numerous passwords, which can lead to security risks and frustration.
- Enhanced security: Centralized authentication with SSO allows for more effective security controls, such as stronger password policies and multi-factor authentication, and simplifies the process of managing user access and permissions.
- Improved productivity: SSO allows users to spend less time on login processes and more time on core work tasks, leading to increased productivity and efficiency.
- Reduced IT costs: SSO streamlines user access management, reducing the workload for IT teams and minimizing the need for password resets and support calls, leading to cost savings.
SSO Configuration
MoEngage supports SSO using Security Assertion Markup Language (SAML) 2.0 and acts as an SSO service provider (SP). SAML is an industry-standard protocol that enables user authentication delegation similar to OAuth 2. Upon login, you are redirected to your internal or external SSO system for authentication and then returned to MoEngage when the response is verified.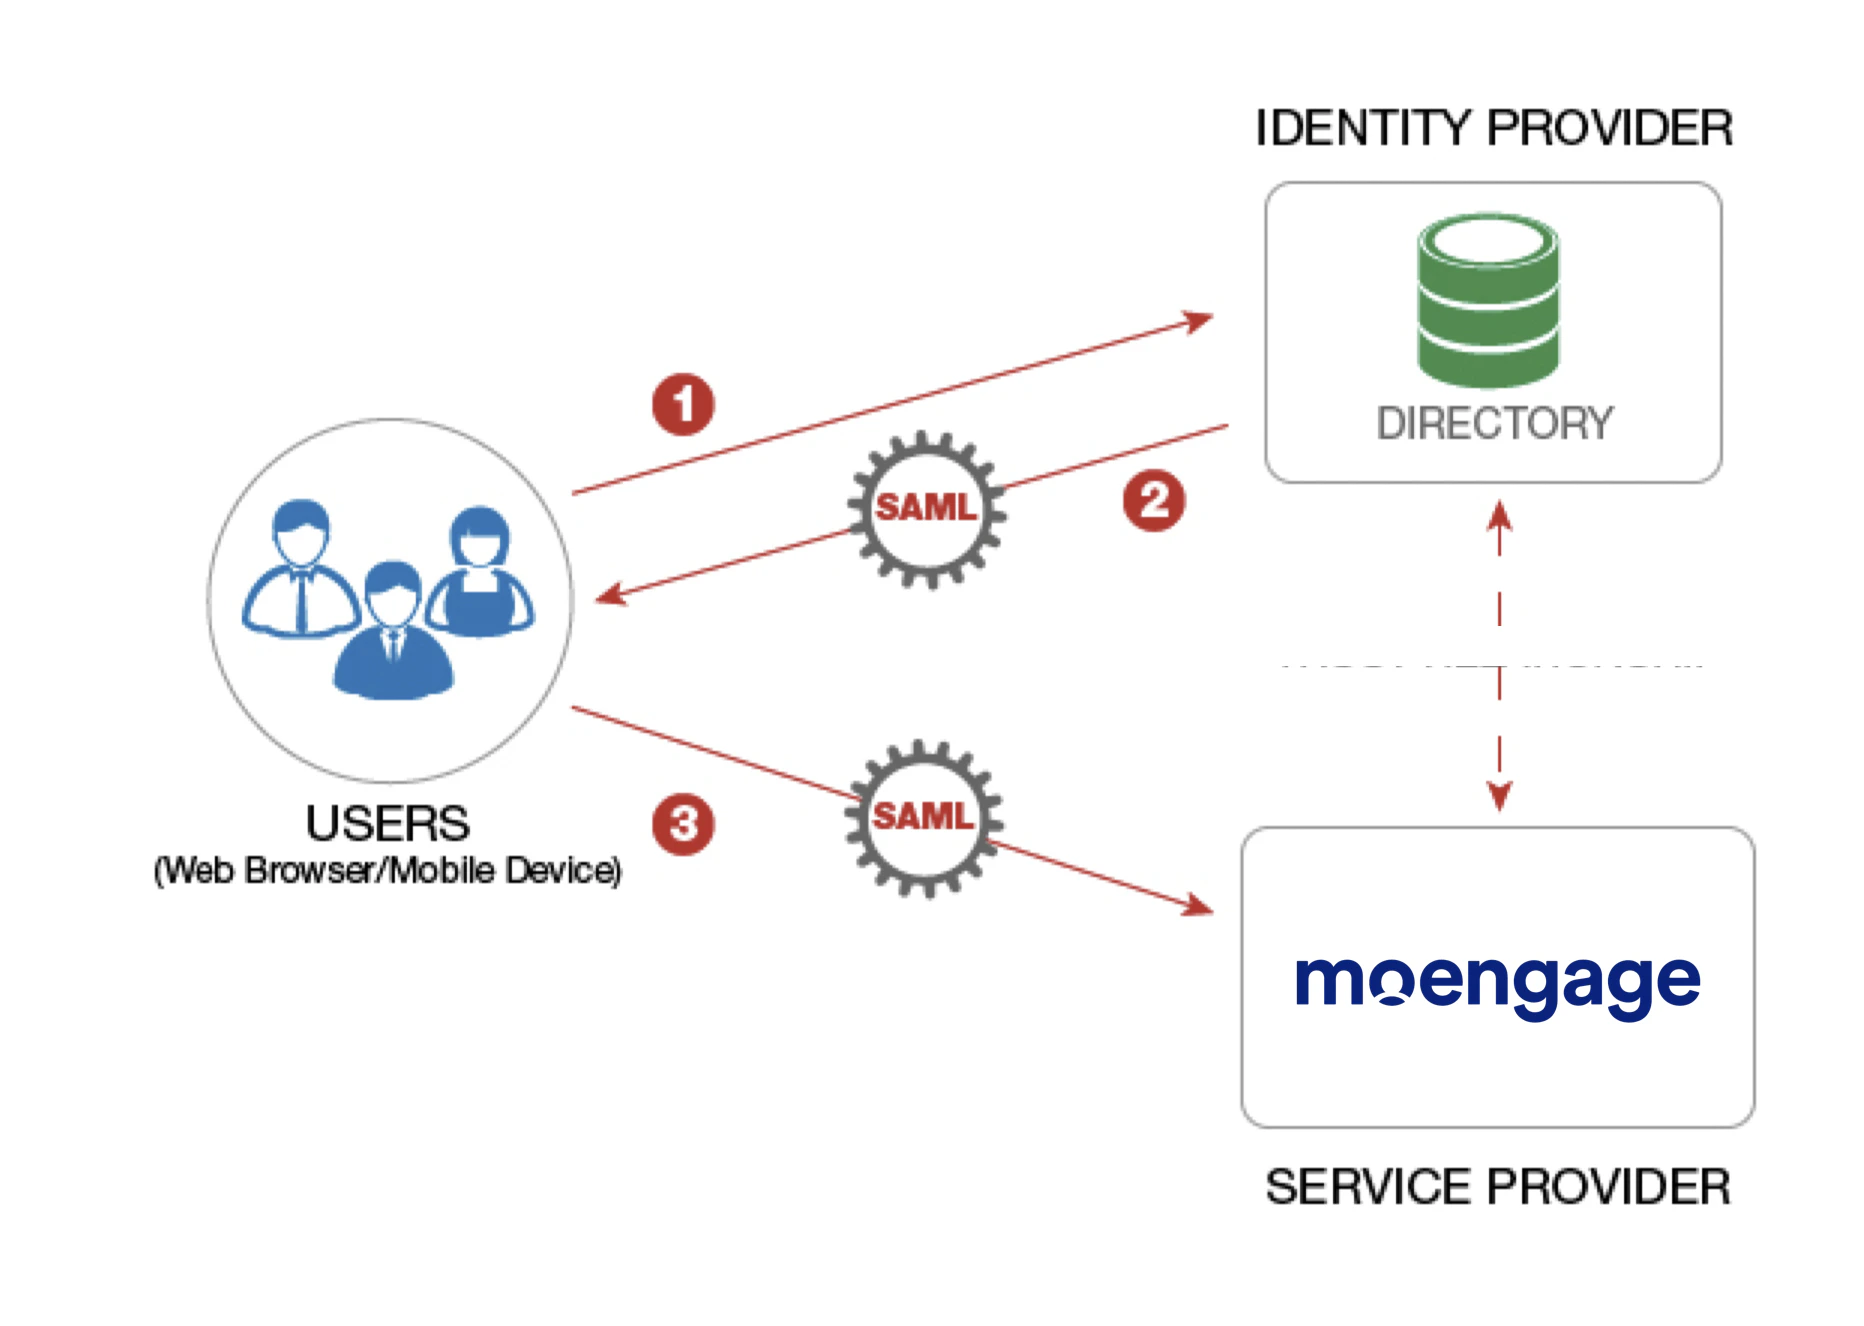
- Contact your organization’s IT team to set up SSO to log in to the MoEngage dashboard.
- Only administrators can enable SSO for a workspace, which allows their teammates to log in securely using the identity provider credentials.
- To configure SSO, you need an Admin role with the Setup & manage permission for the Login Settings component.
Note: The Login Settings is now renamed to Security Settings.
Identity Providers (IdPs)
MoEngage uses Identity Providers (IdPs) to simplify and centralize user login. This allows you to securely access MoEngage services using SSO based on the SAML 2.0 standard. MoEngage supports the following IdPs currently:- Okta
- Onelogin
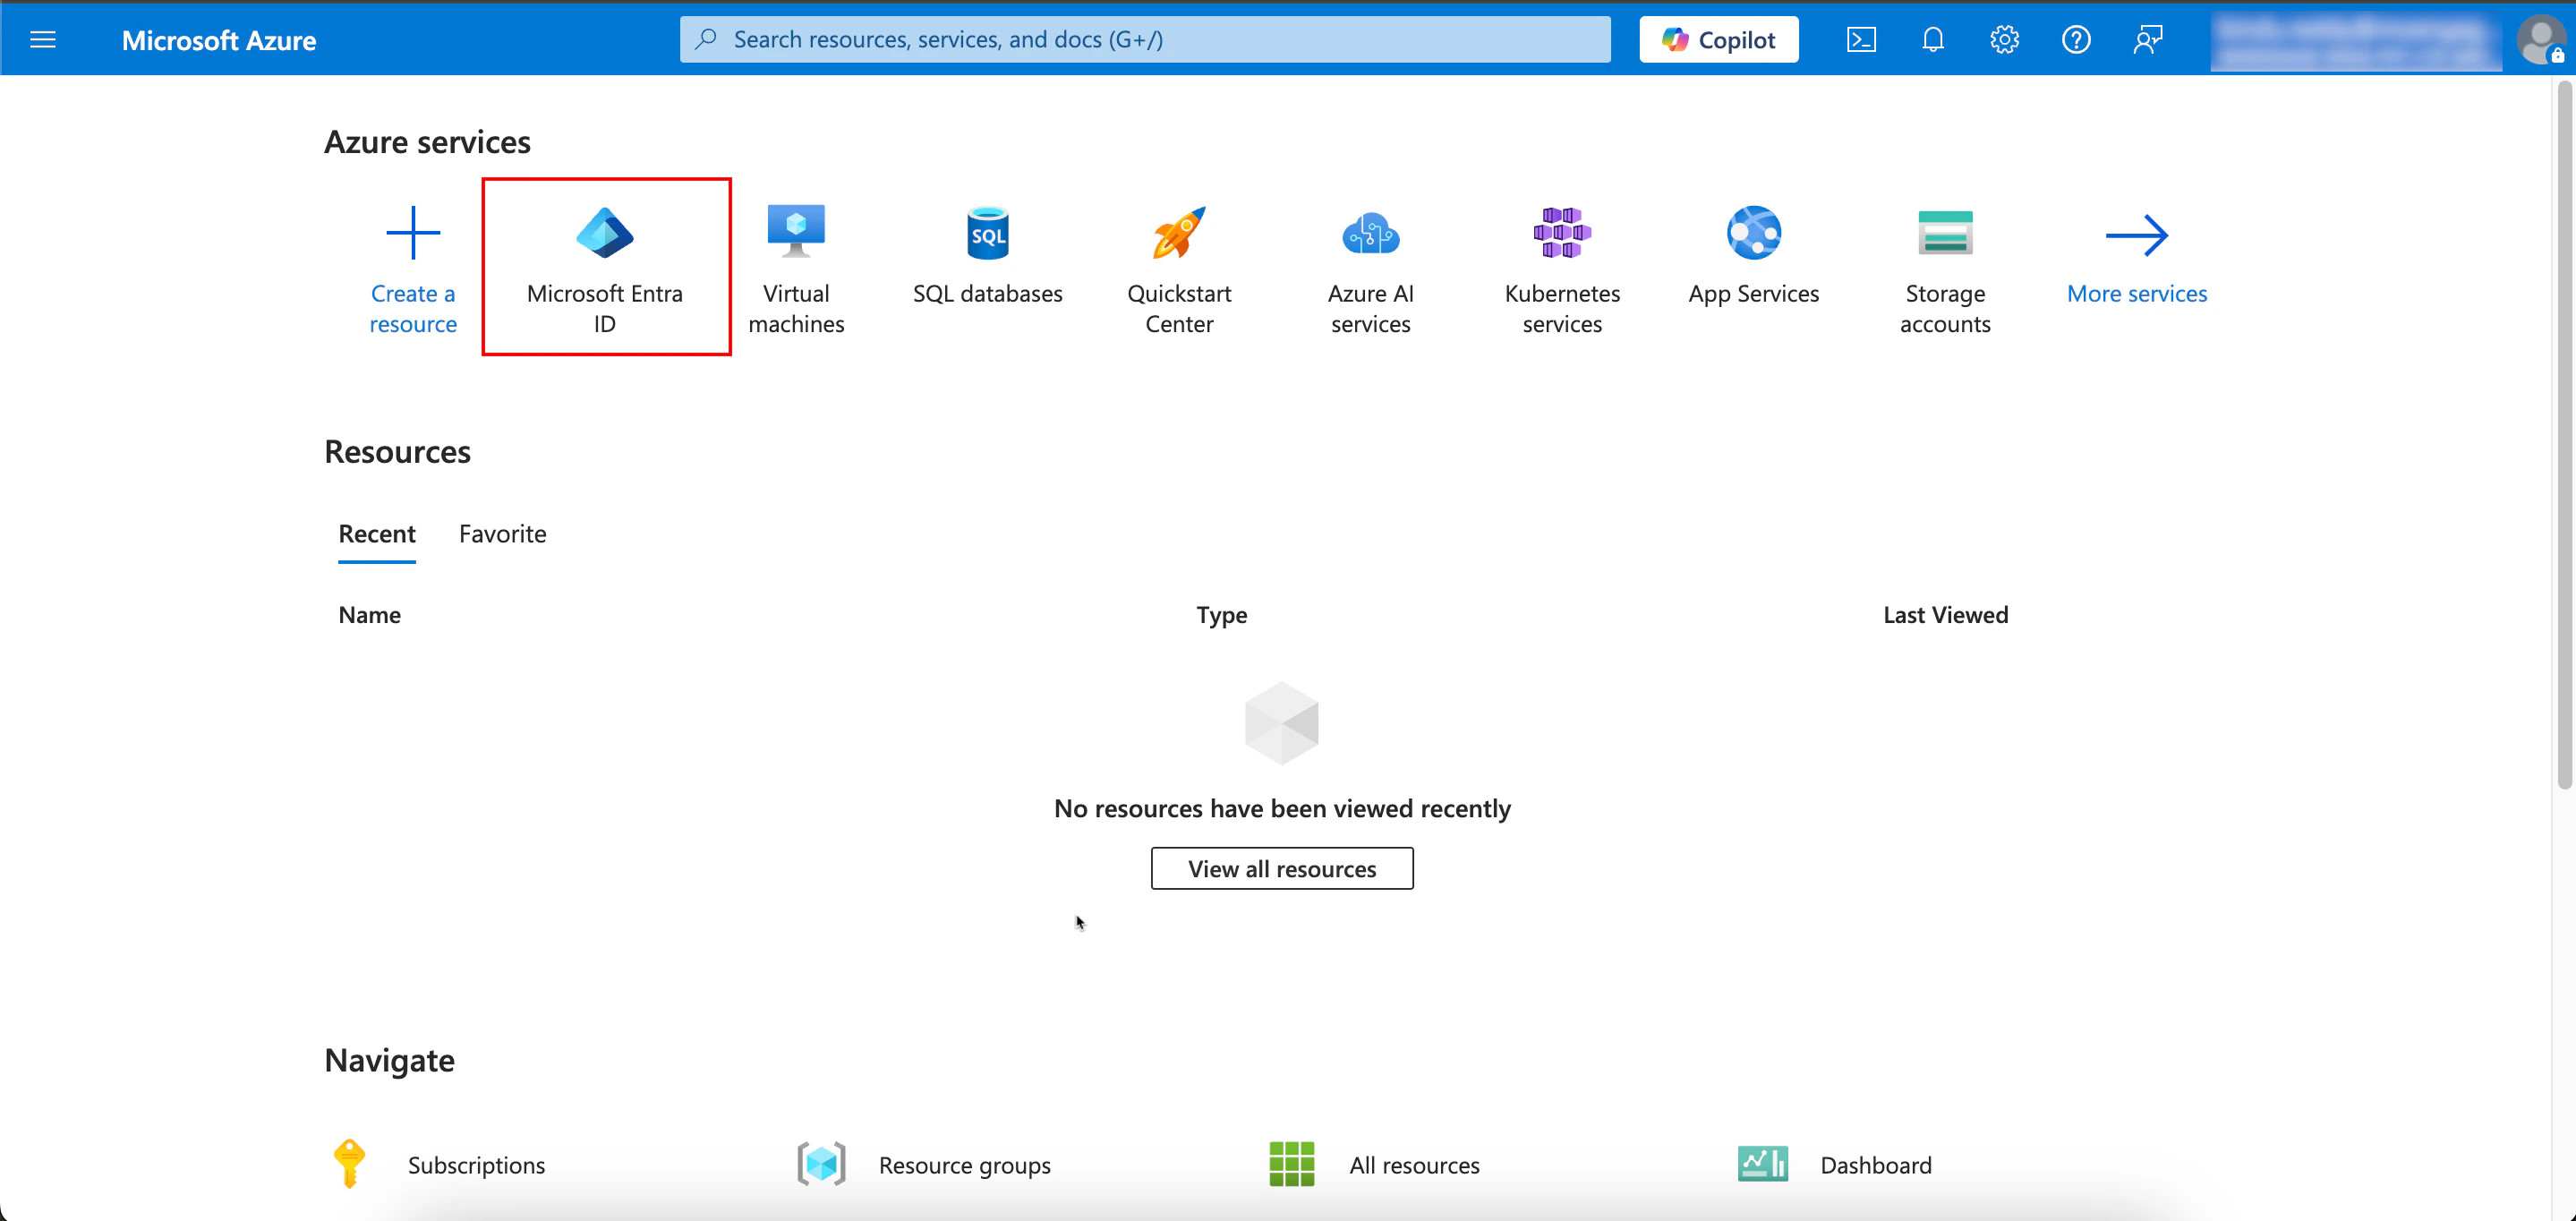
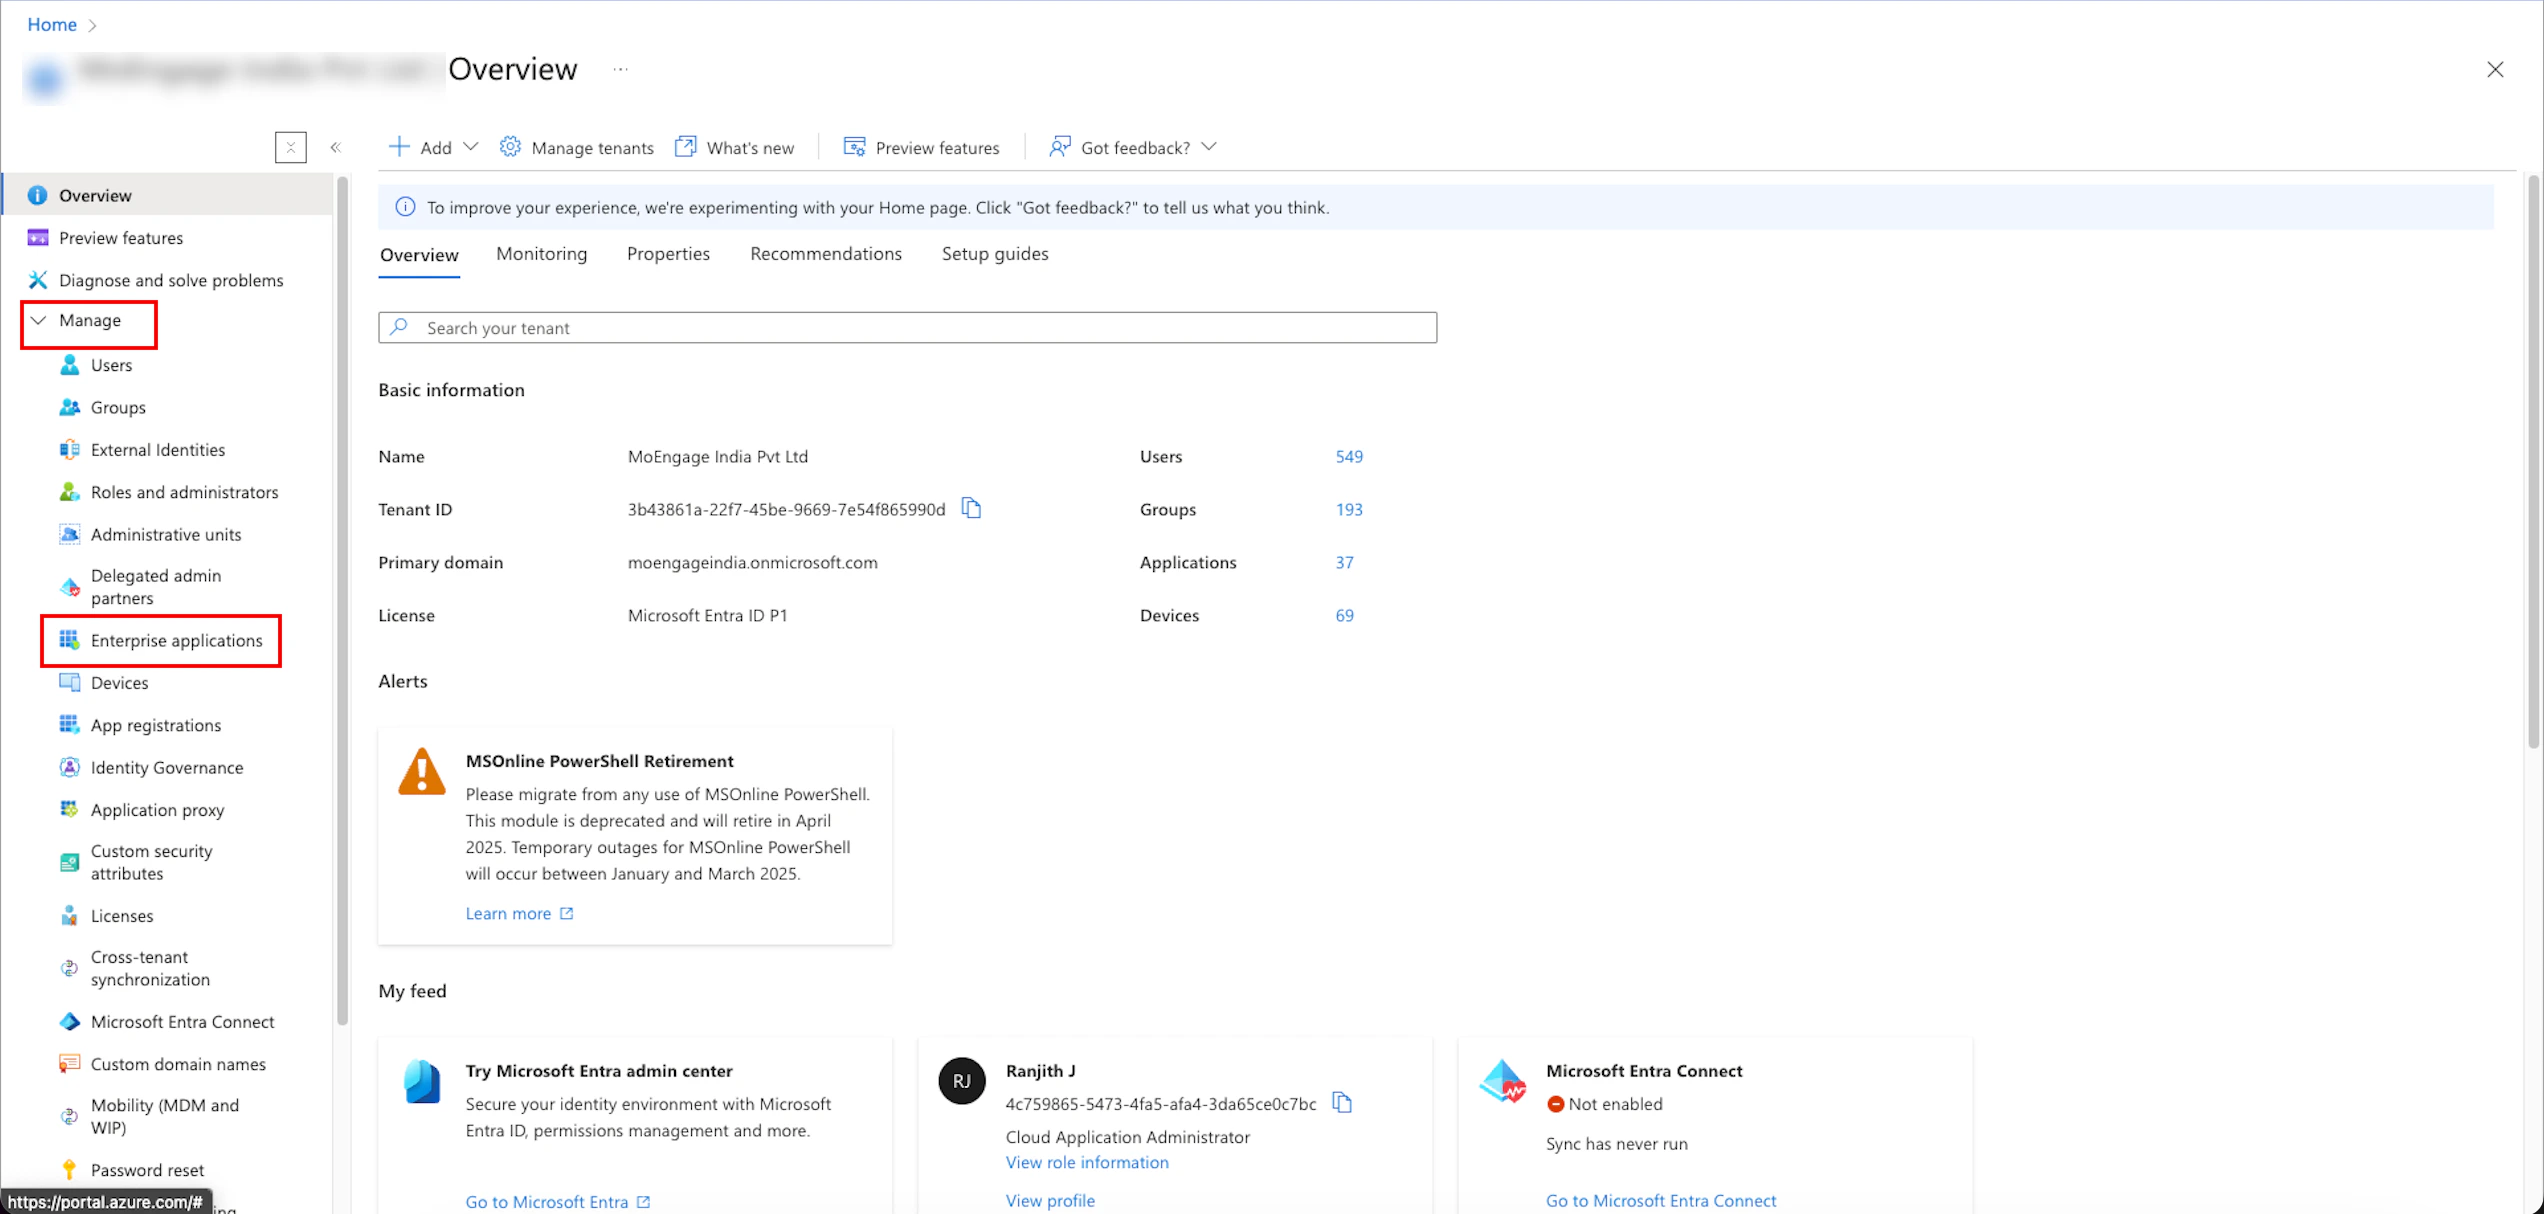
- Azure (Microsoft Entra ID)
- Google Admin
- Other (you can configure other IdPs, provided they are SAML 2.0 compliant)
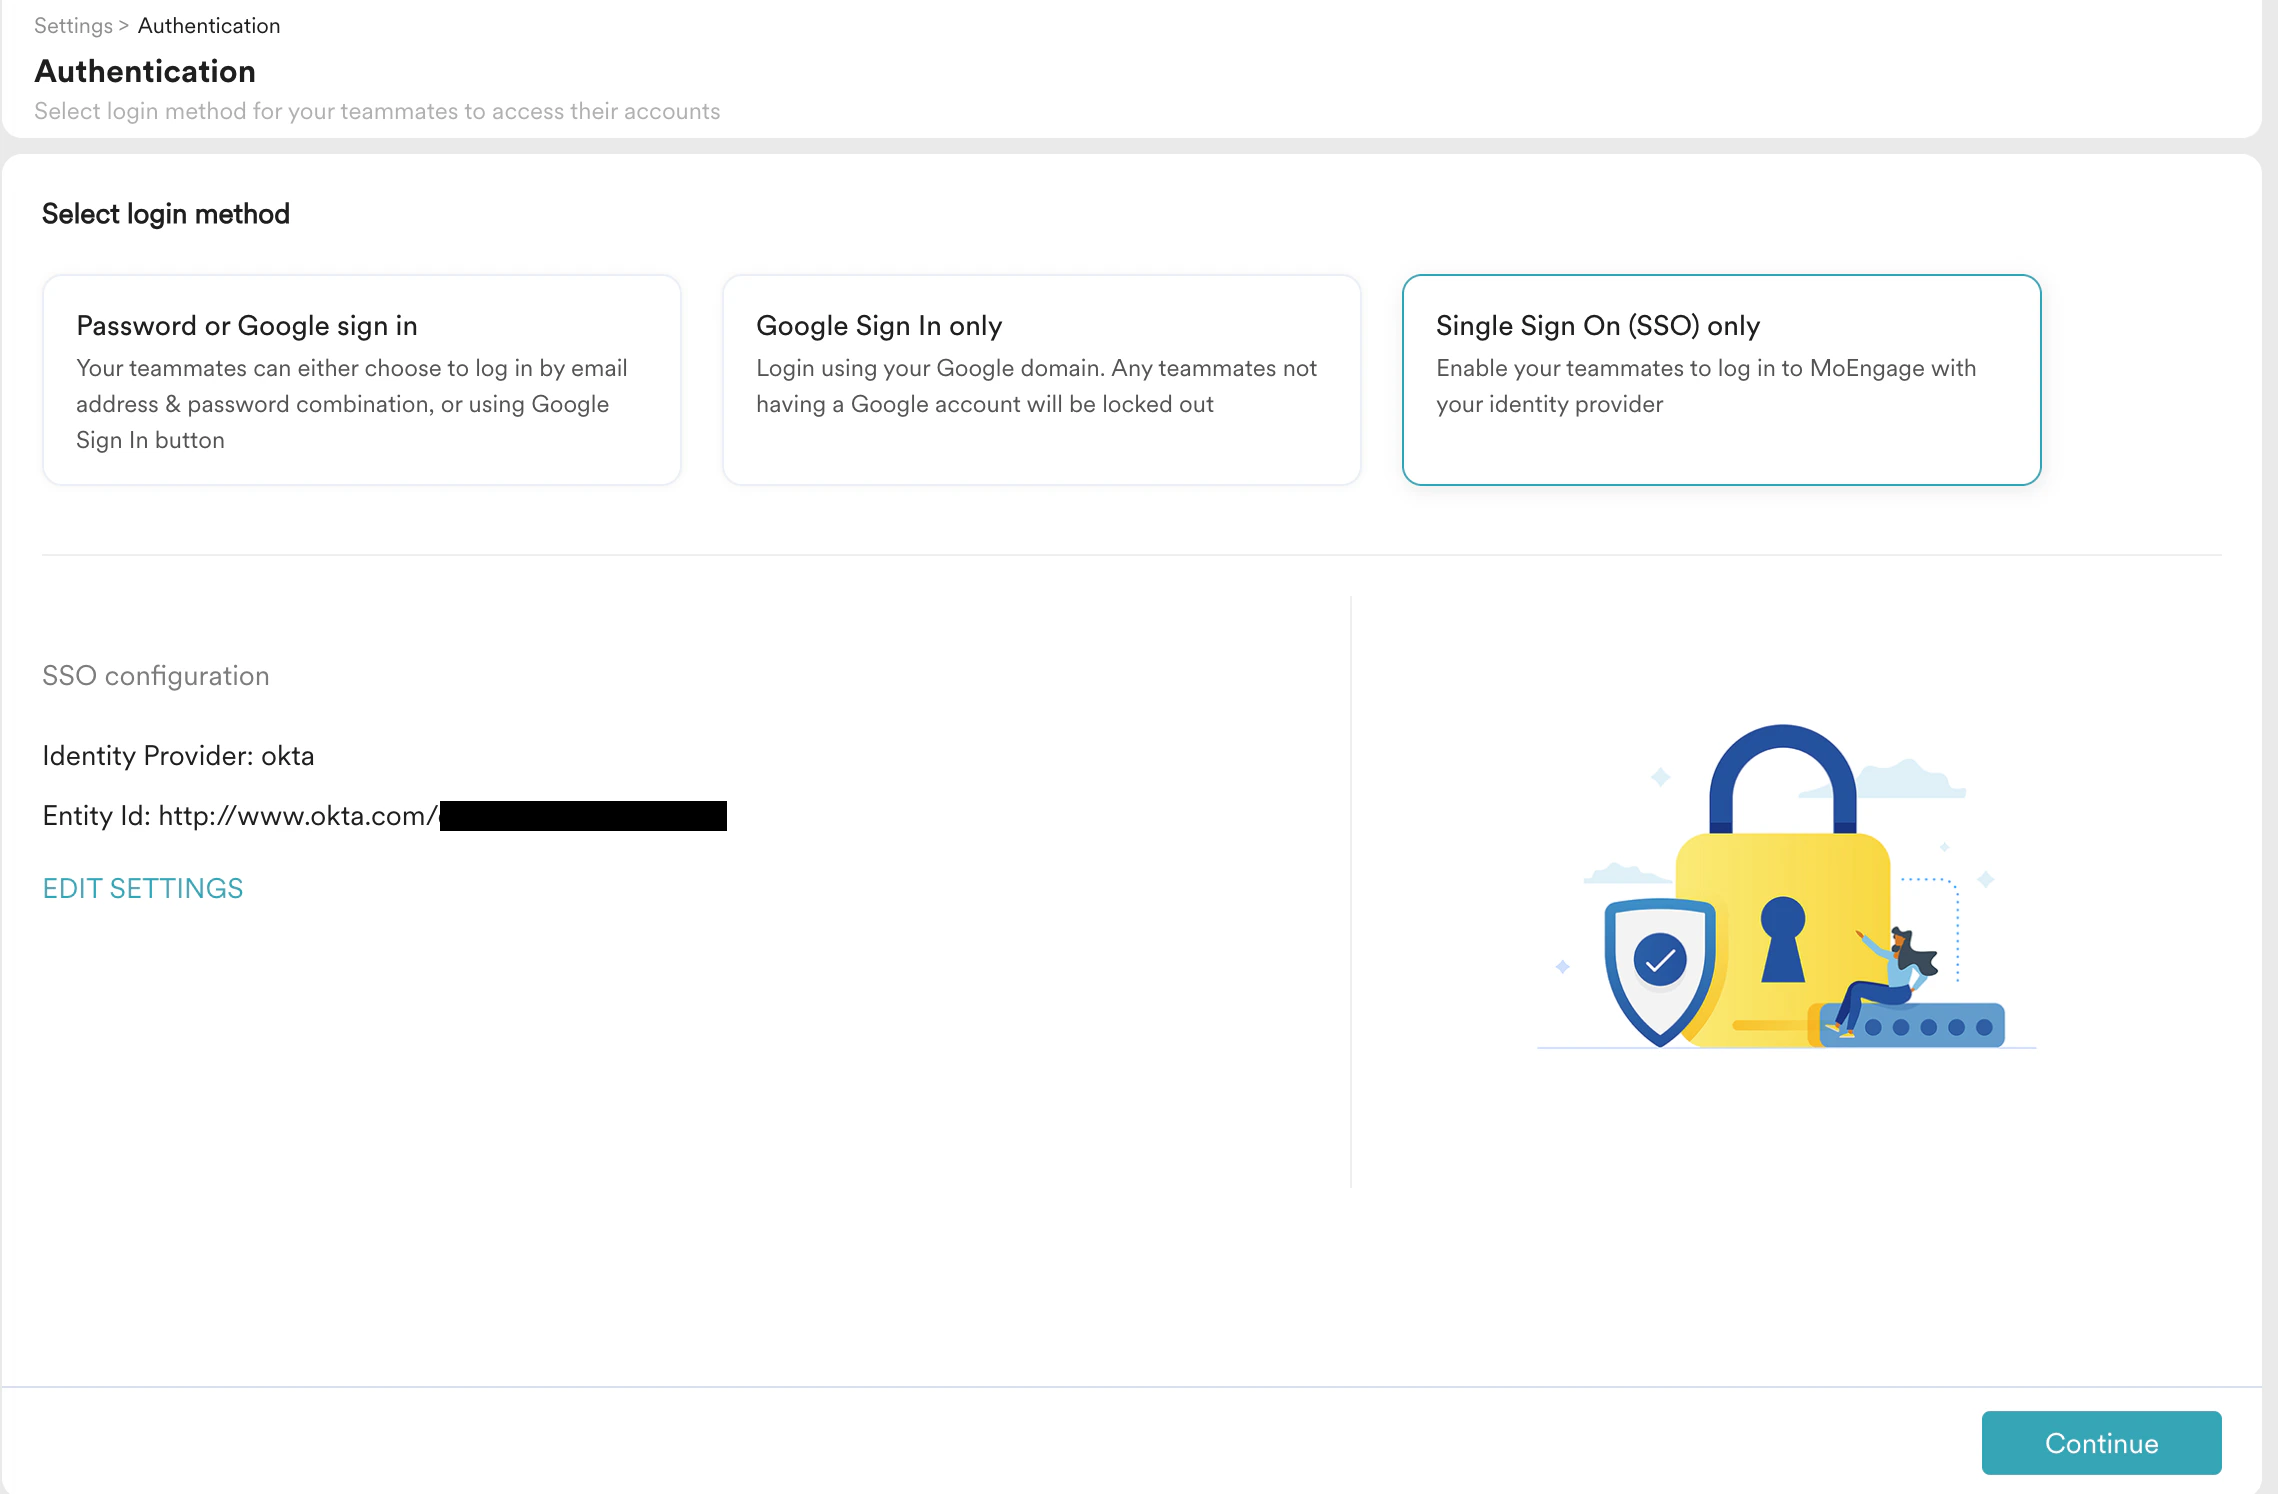
- On the left navigation menu in the MoEngage dashboard, click Settings > Account > Security.
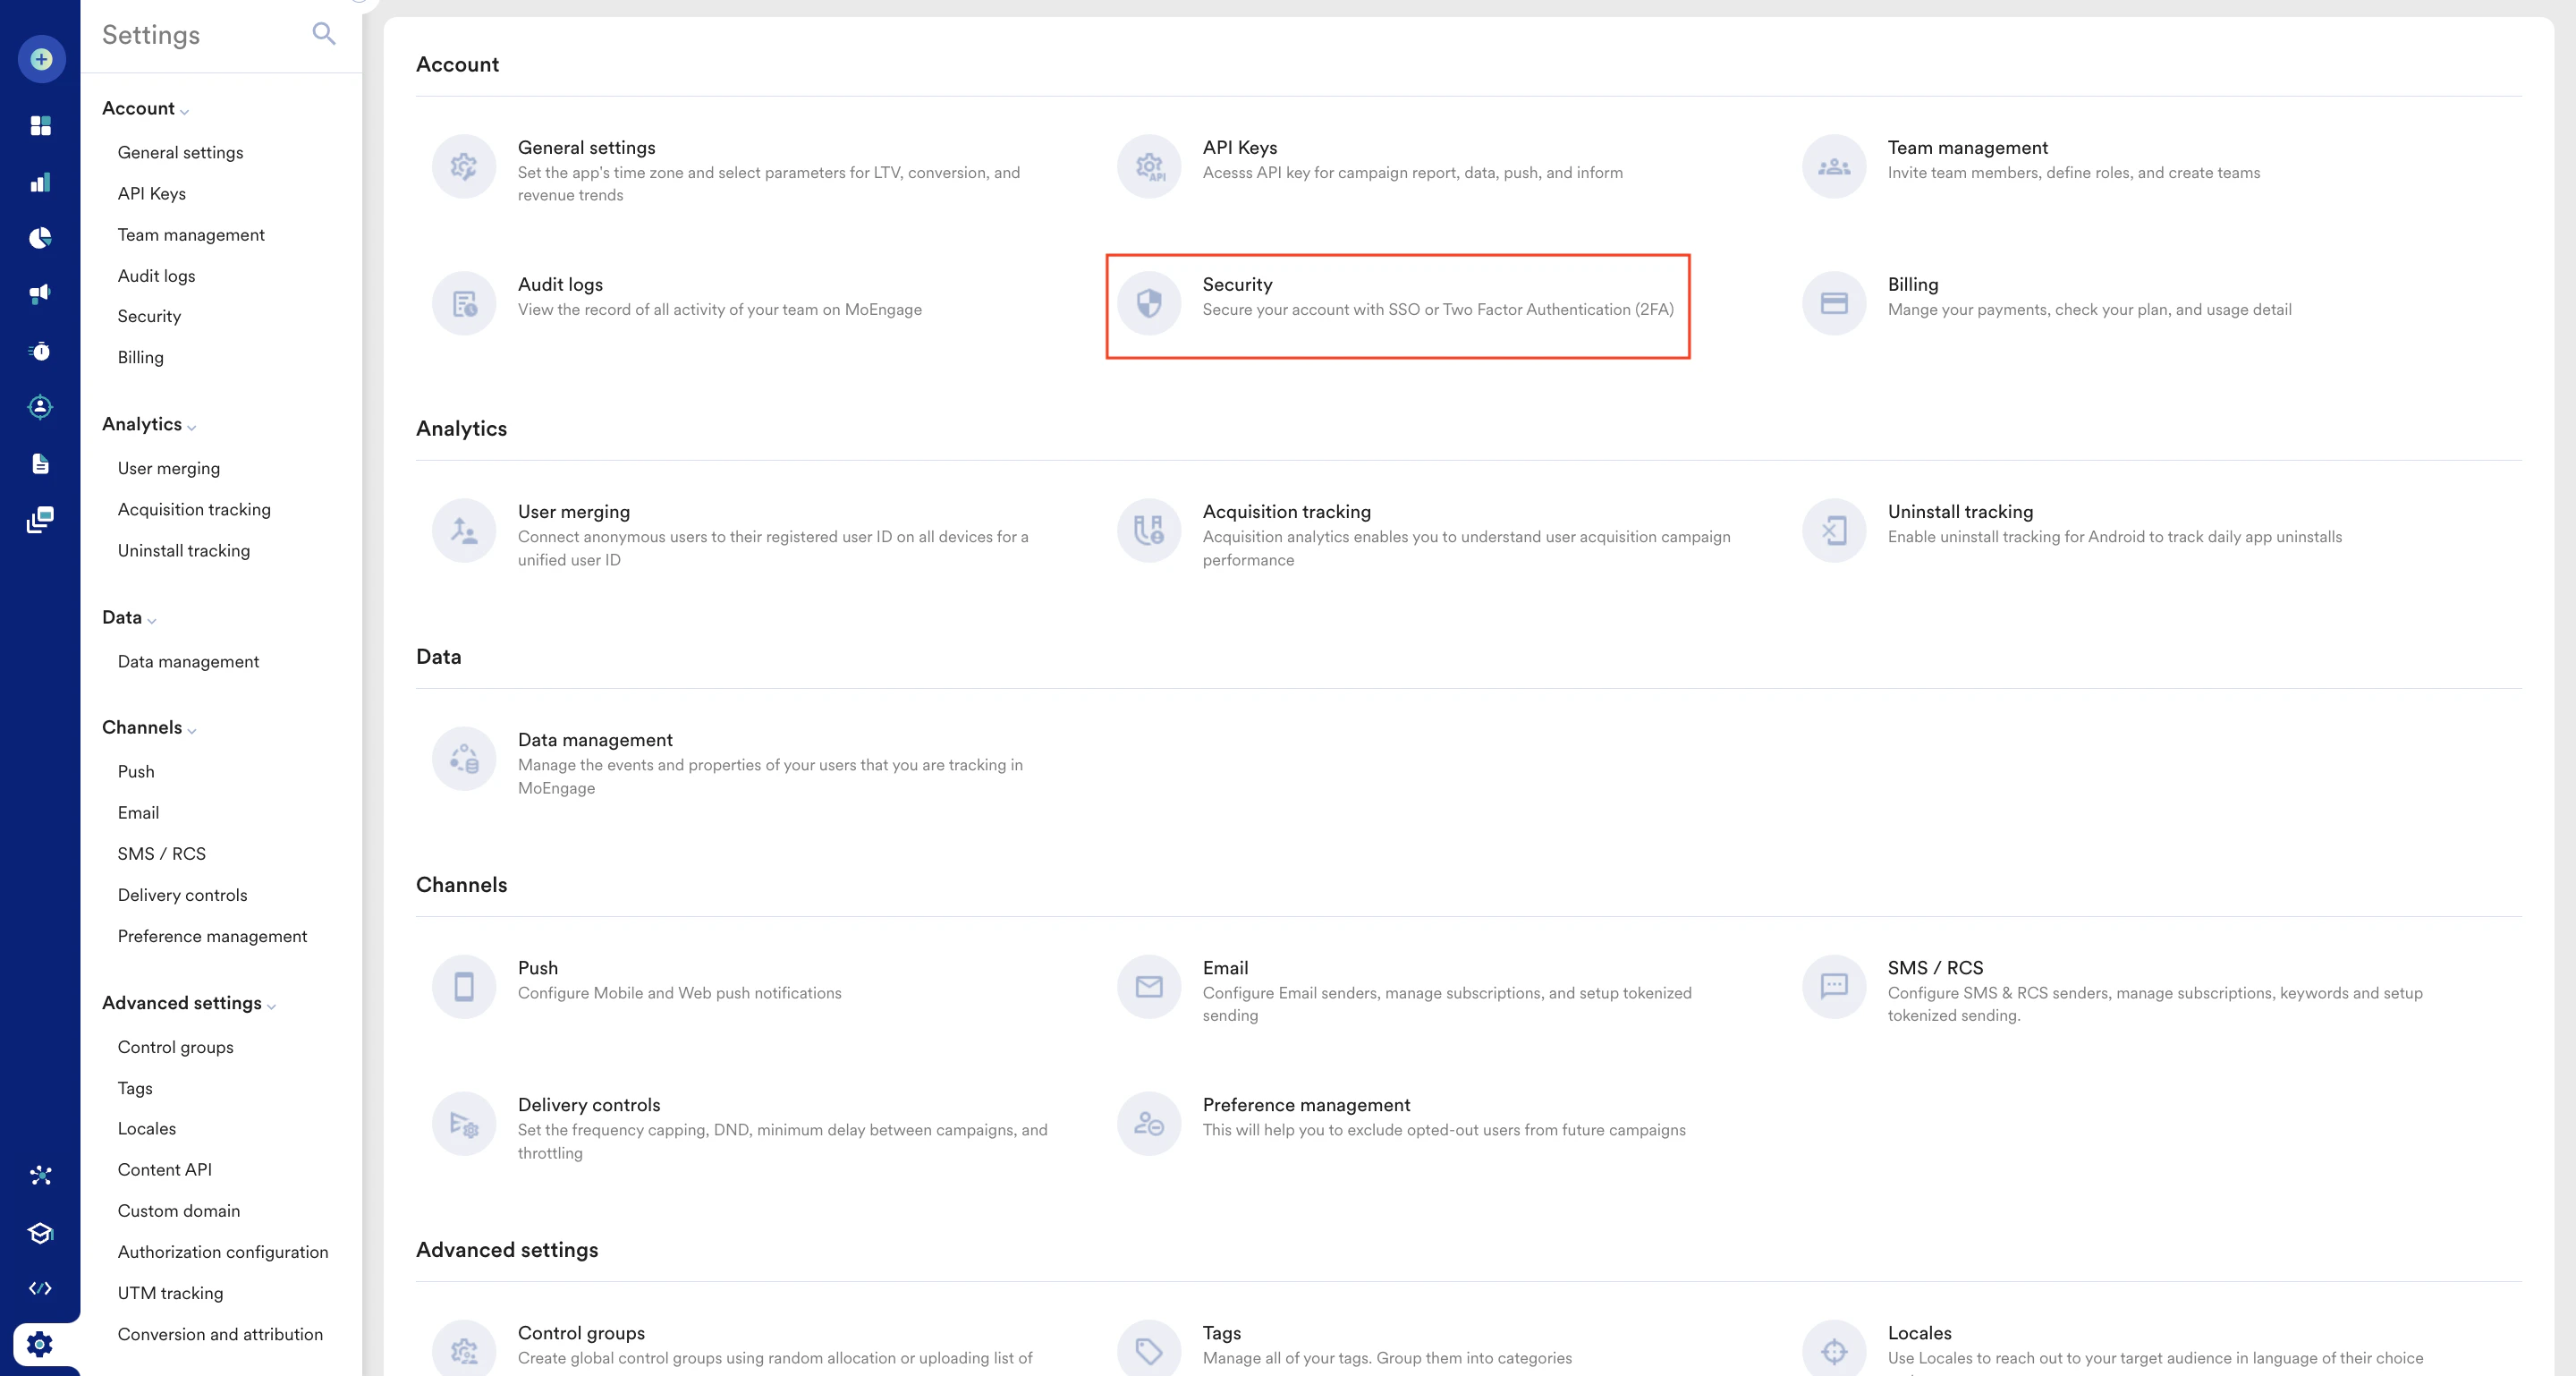
- On the Security page, click the Login tab.
- Click Single Sign On (SSO) only.
- Under Single sign on, click Configure SSO.
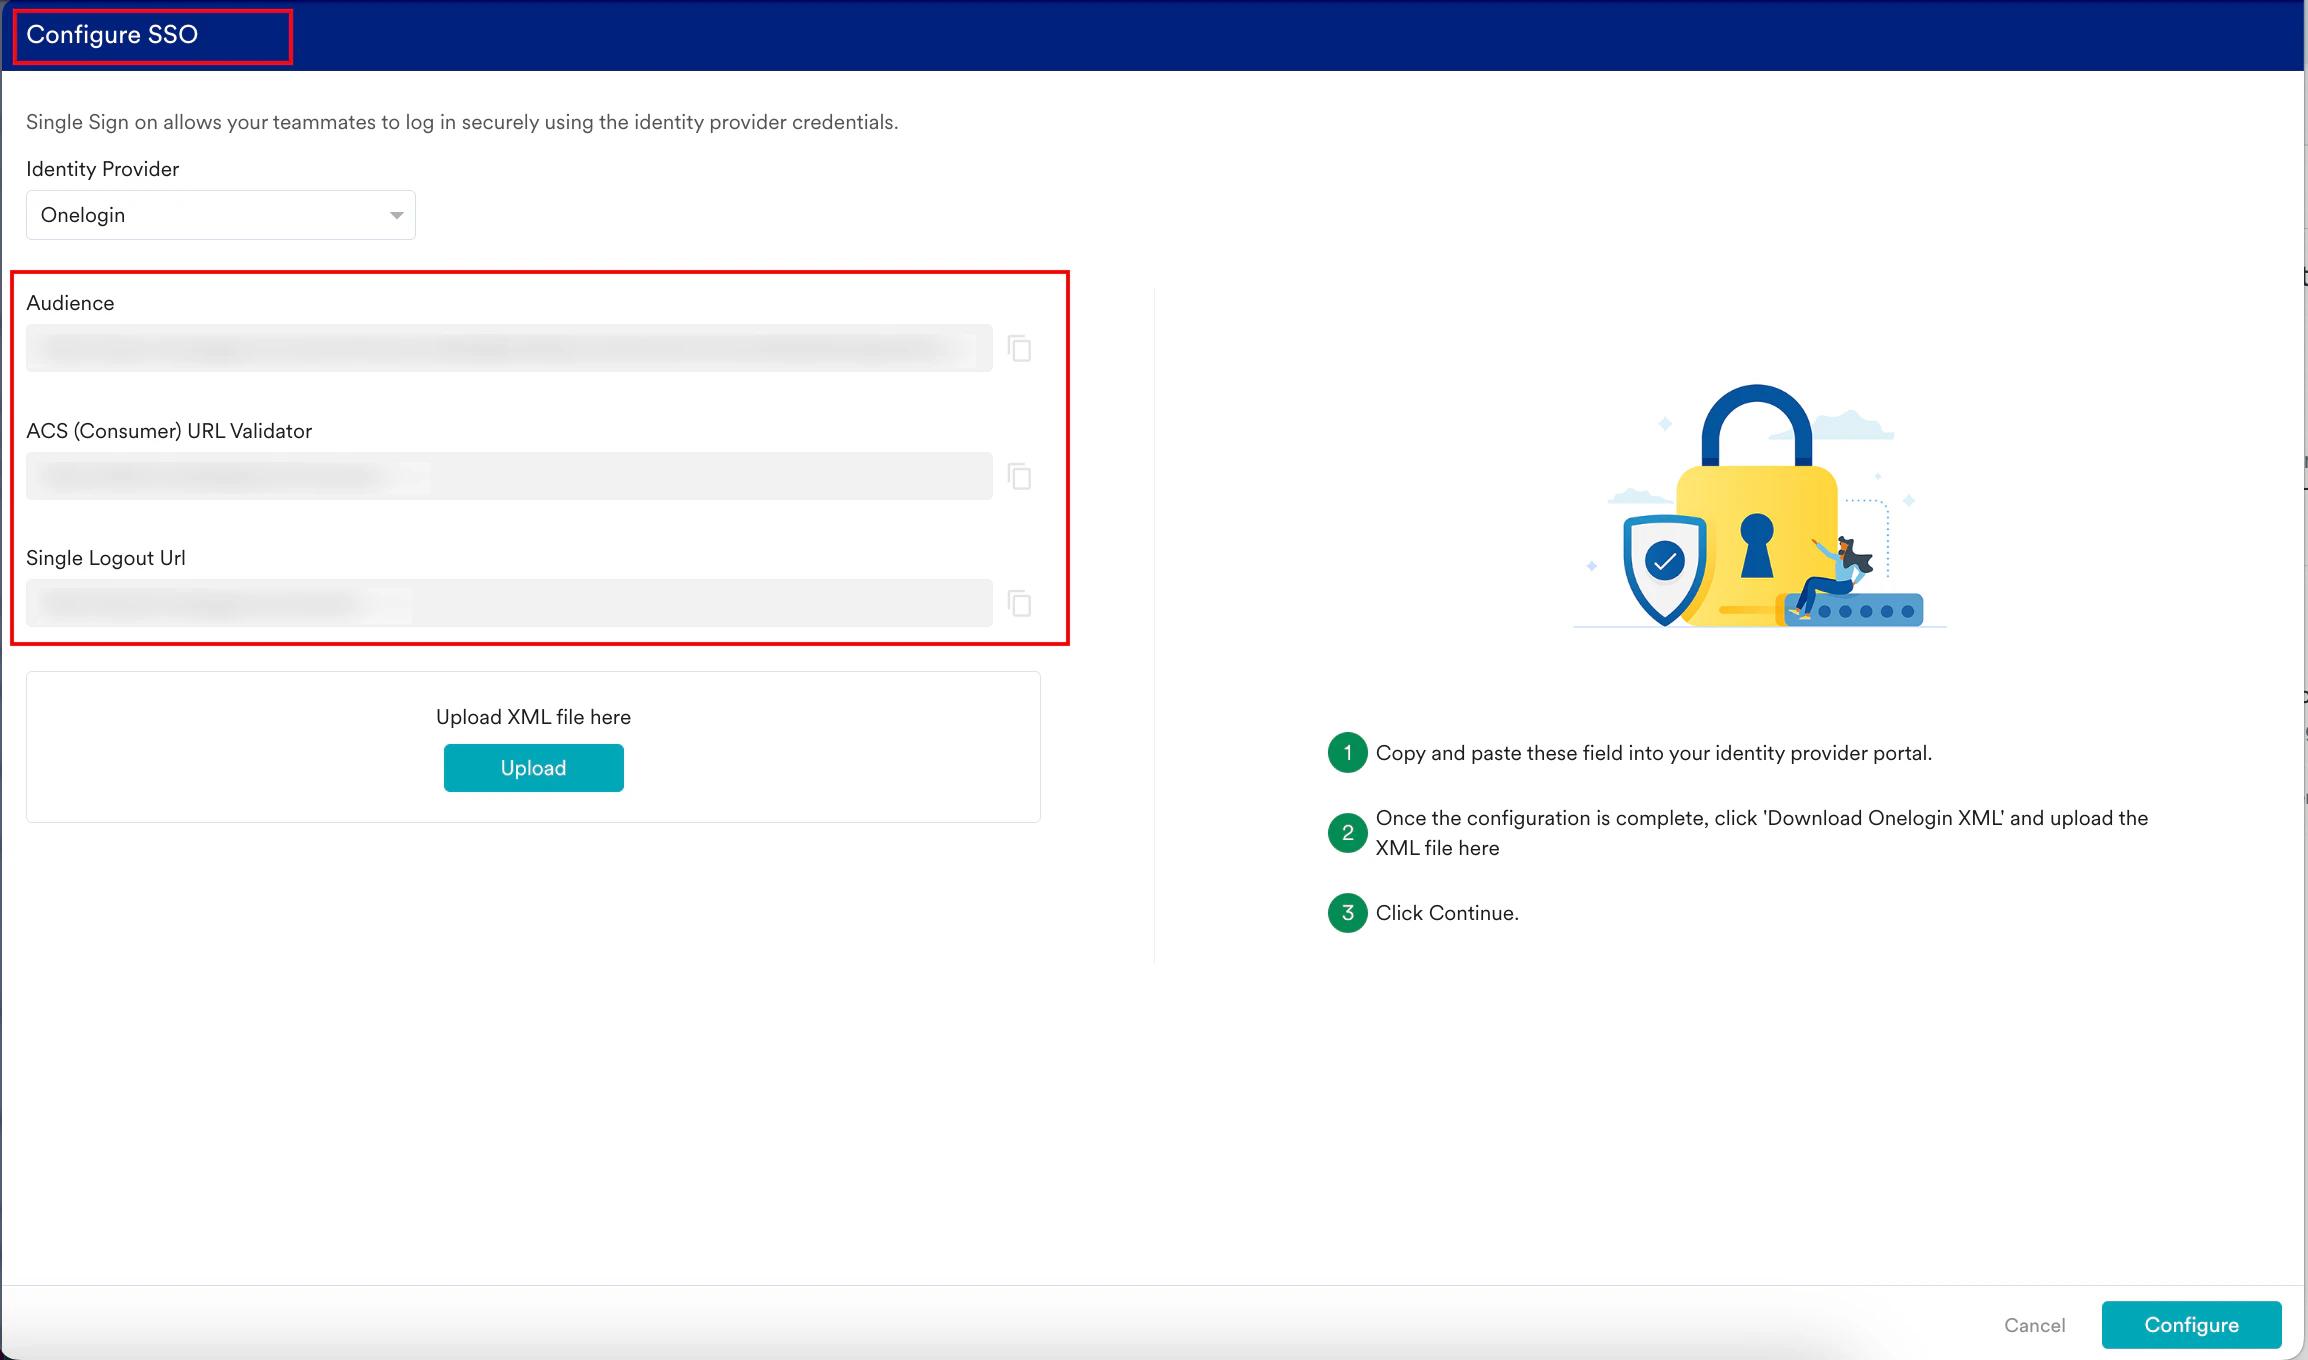
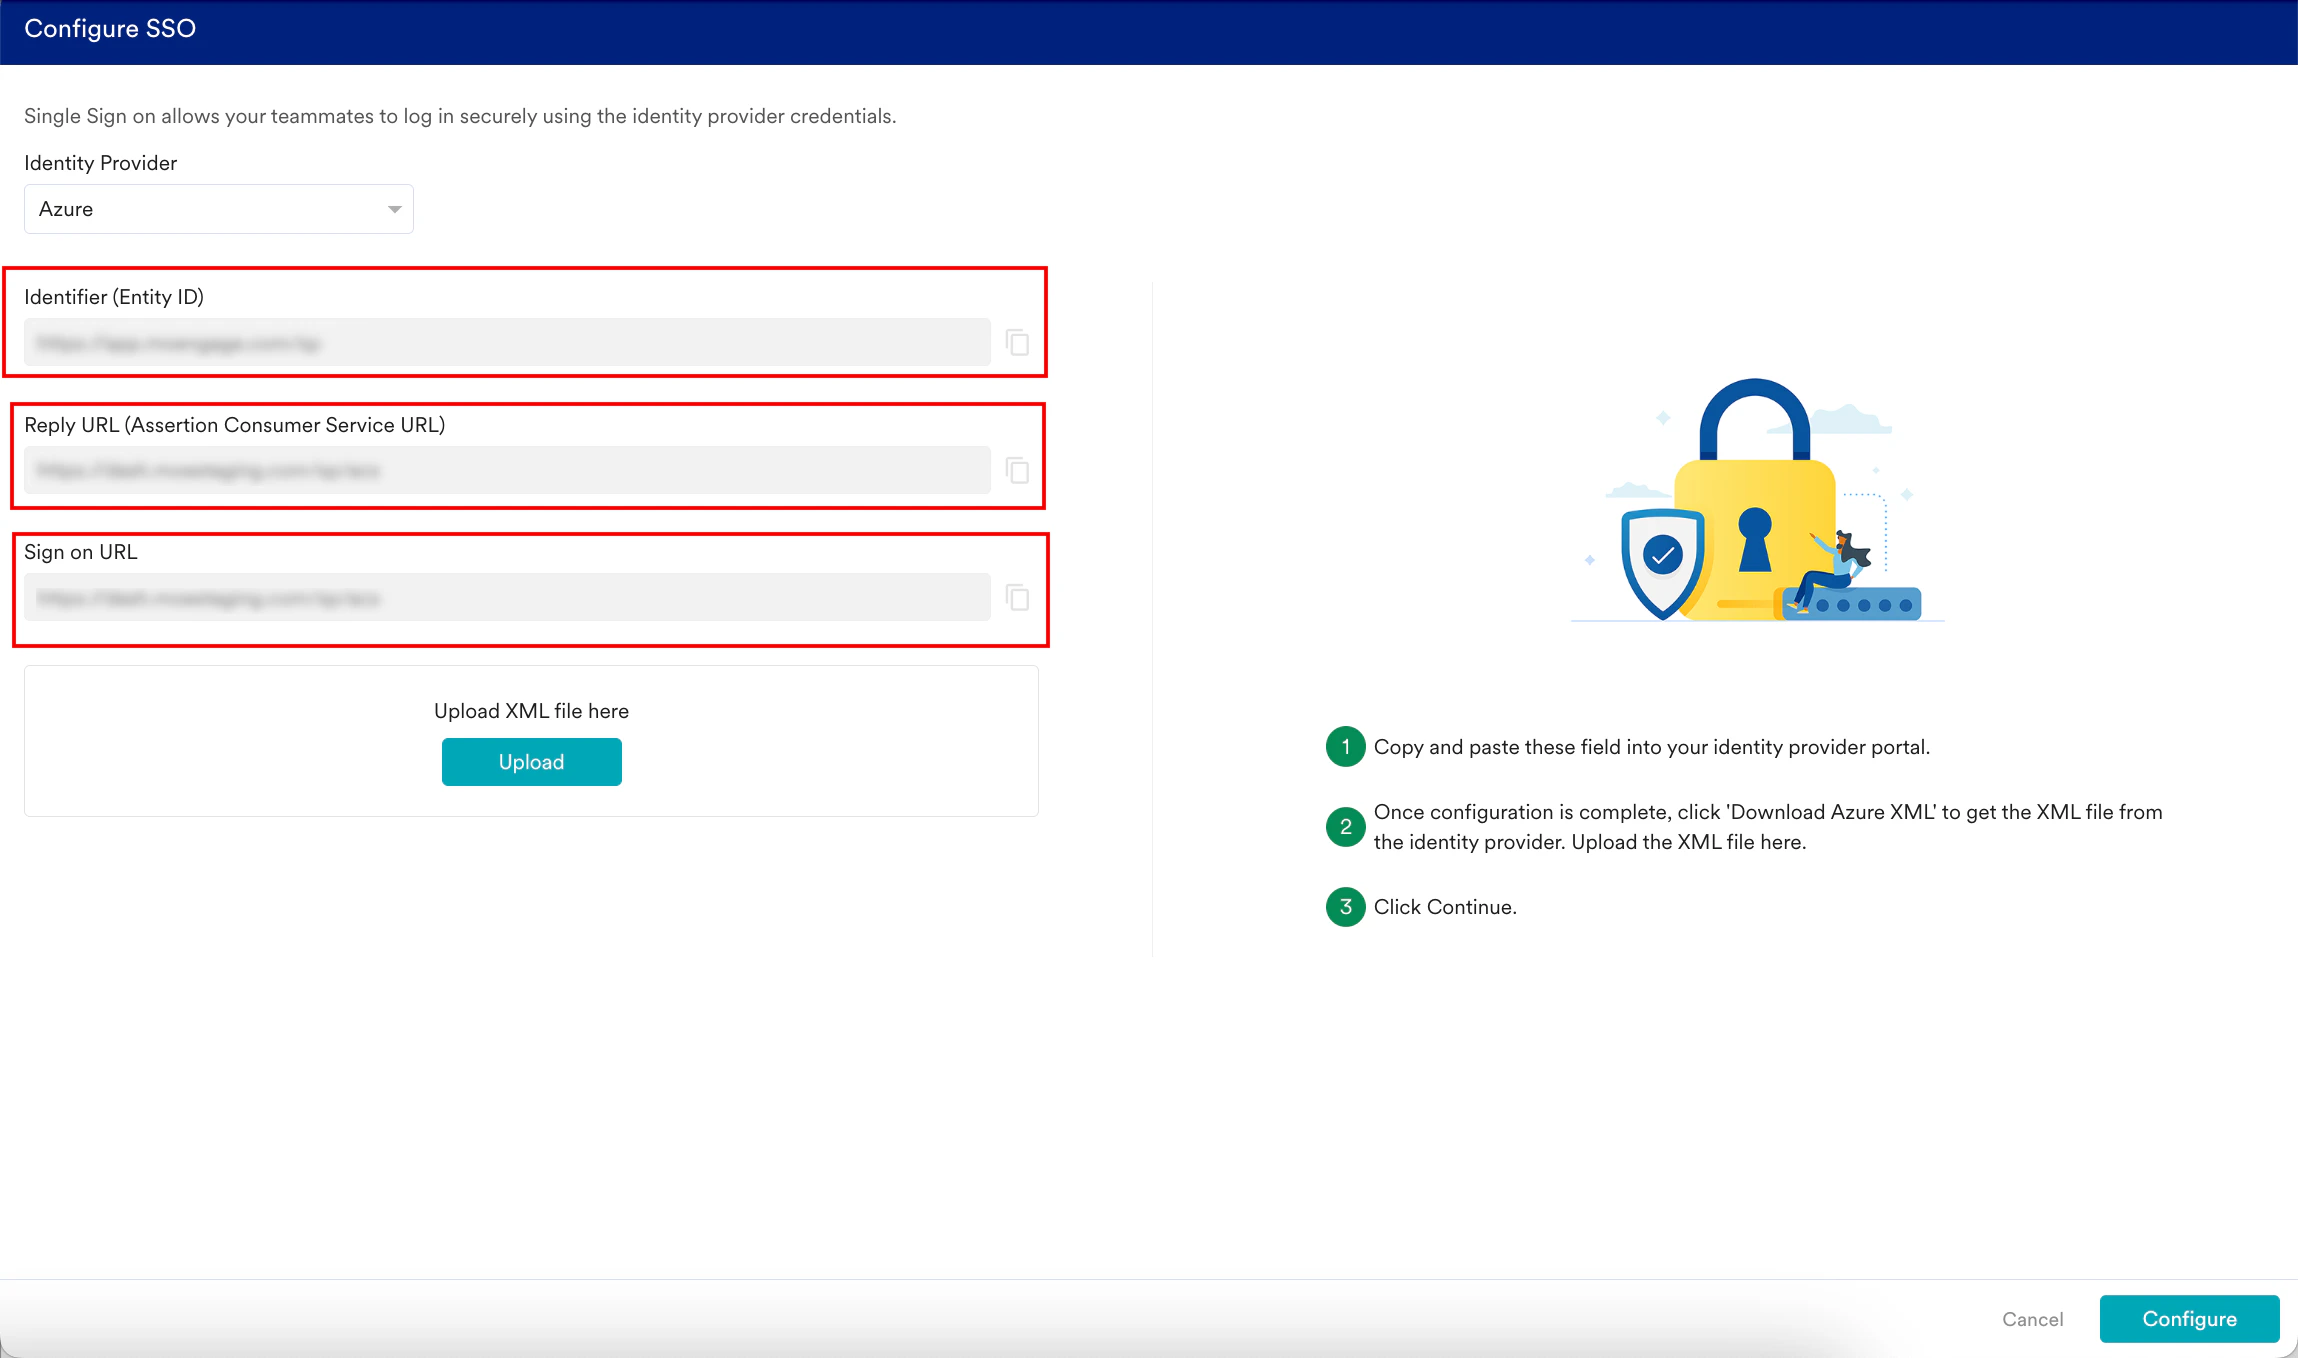
 The Configure SSO dialog box appears.
 - In the Identity Provider list, select your identity provider.
 Now, you must switch to that specific IdP admin console to configure the SSO settings and ensure the SSO integration between MoEngage and the selected IdP functions as intended.
If your preferred identity provider is not available in the Identity Provider list, you can select Other to configure your SSO. This function works with any SAML 2.0-compliant provider.
Now, you must switch to that specific IdP admin console to configure the SSO settings and ensure the SSO integration between MoEngage and the selected IdP functions as intended.
If your preferred identity provider is not available in the Identity Provider list, you can select Other to configure your SSO. This function works with any SAML 2.0-compliant provider.
- Configure Okta SSO
- Configure Onelogin SSO
- Configure Microsoft Azure SSO
- Configure Google Admin SSO
- Configure Other SSO
- Navigate to the Okta Admin Console.
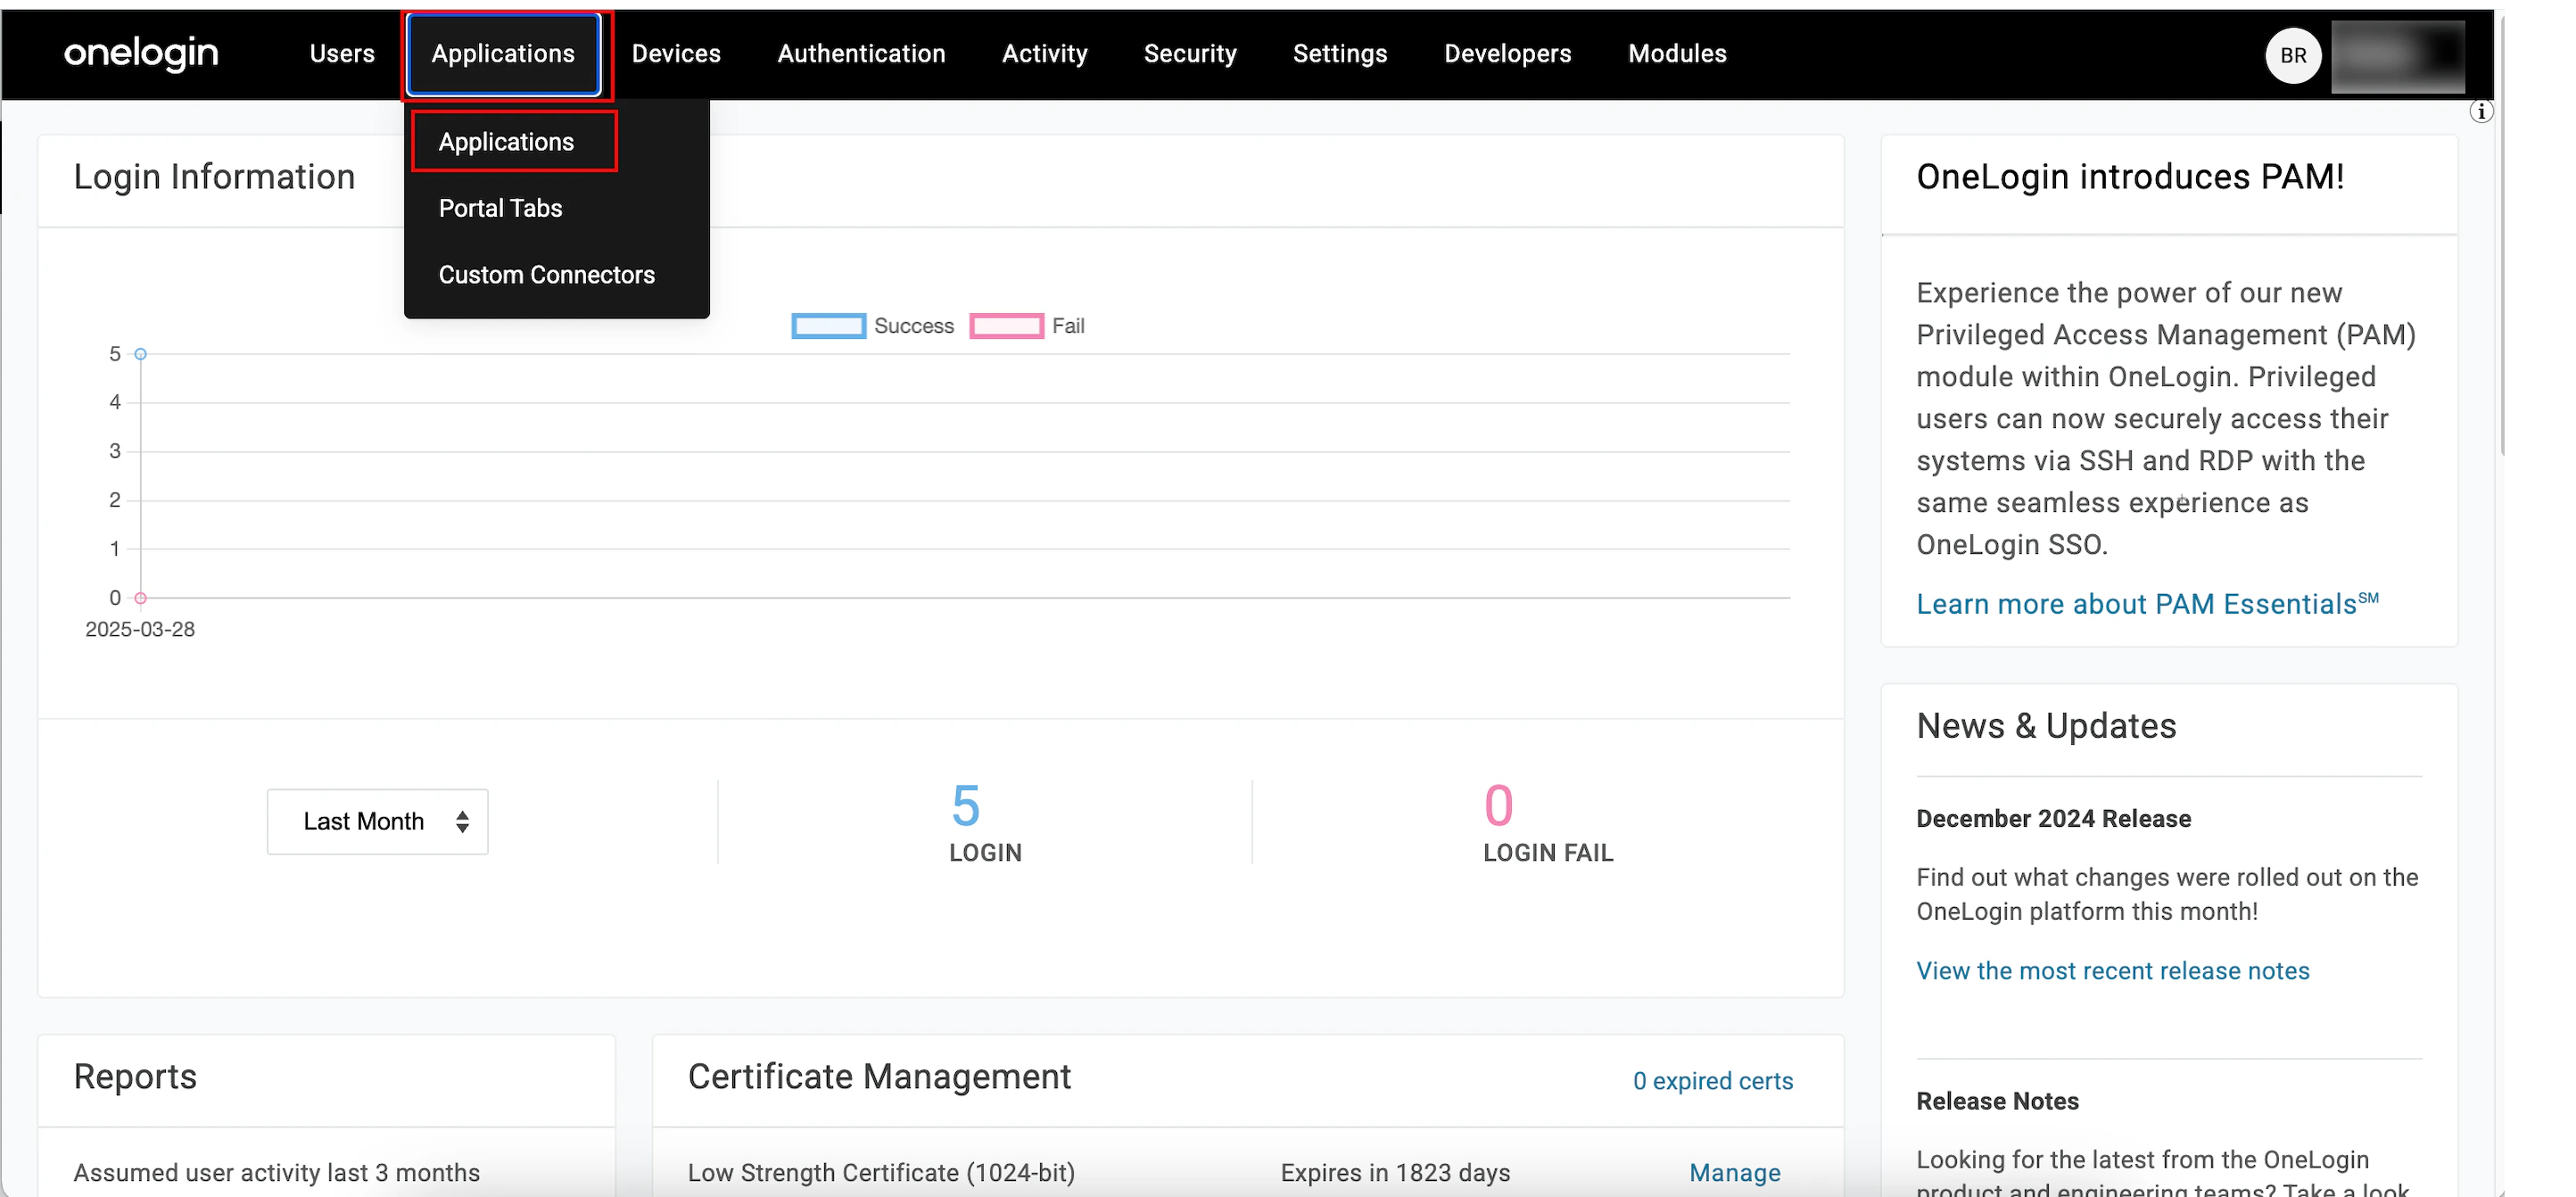
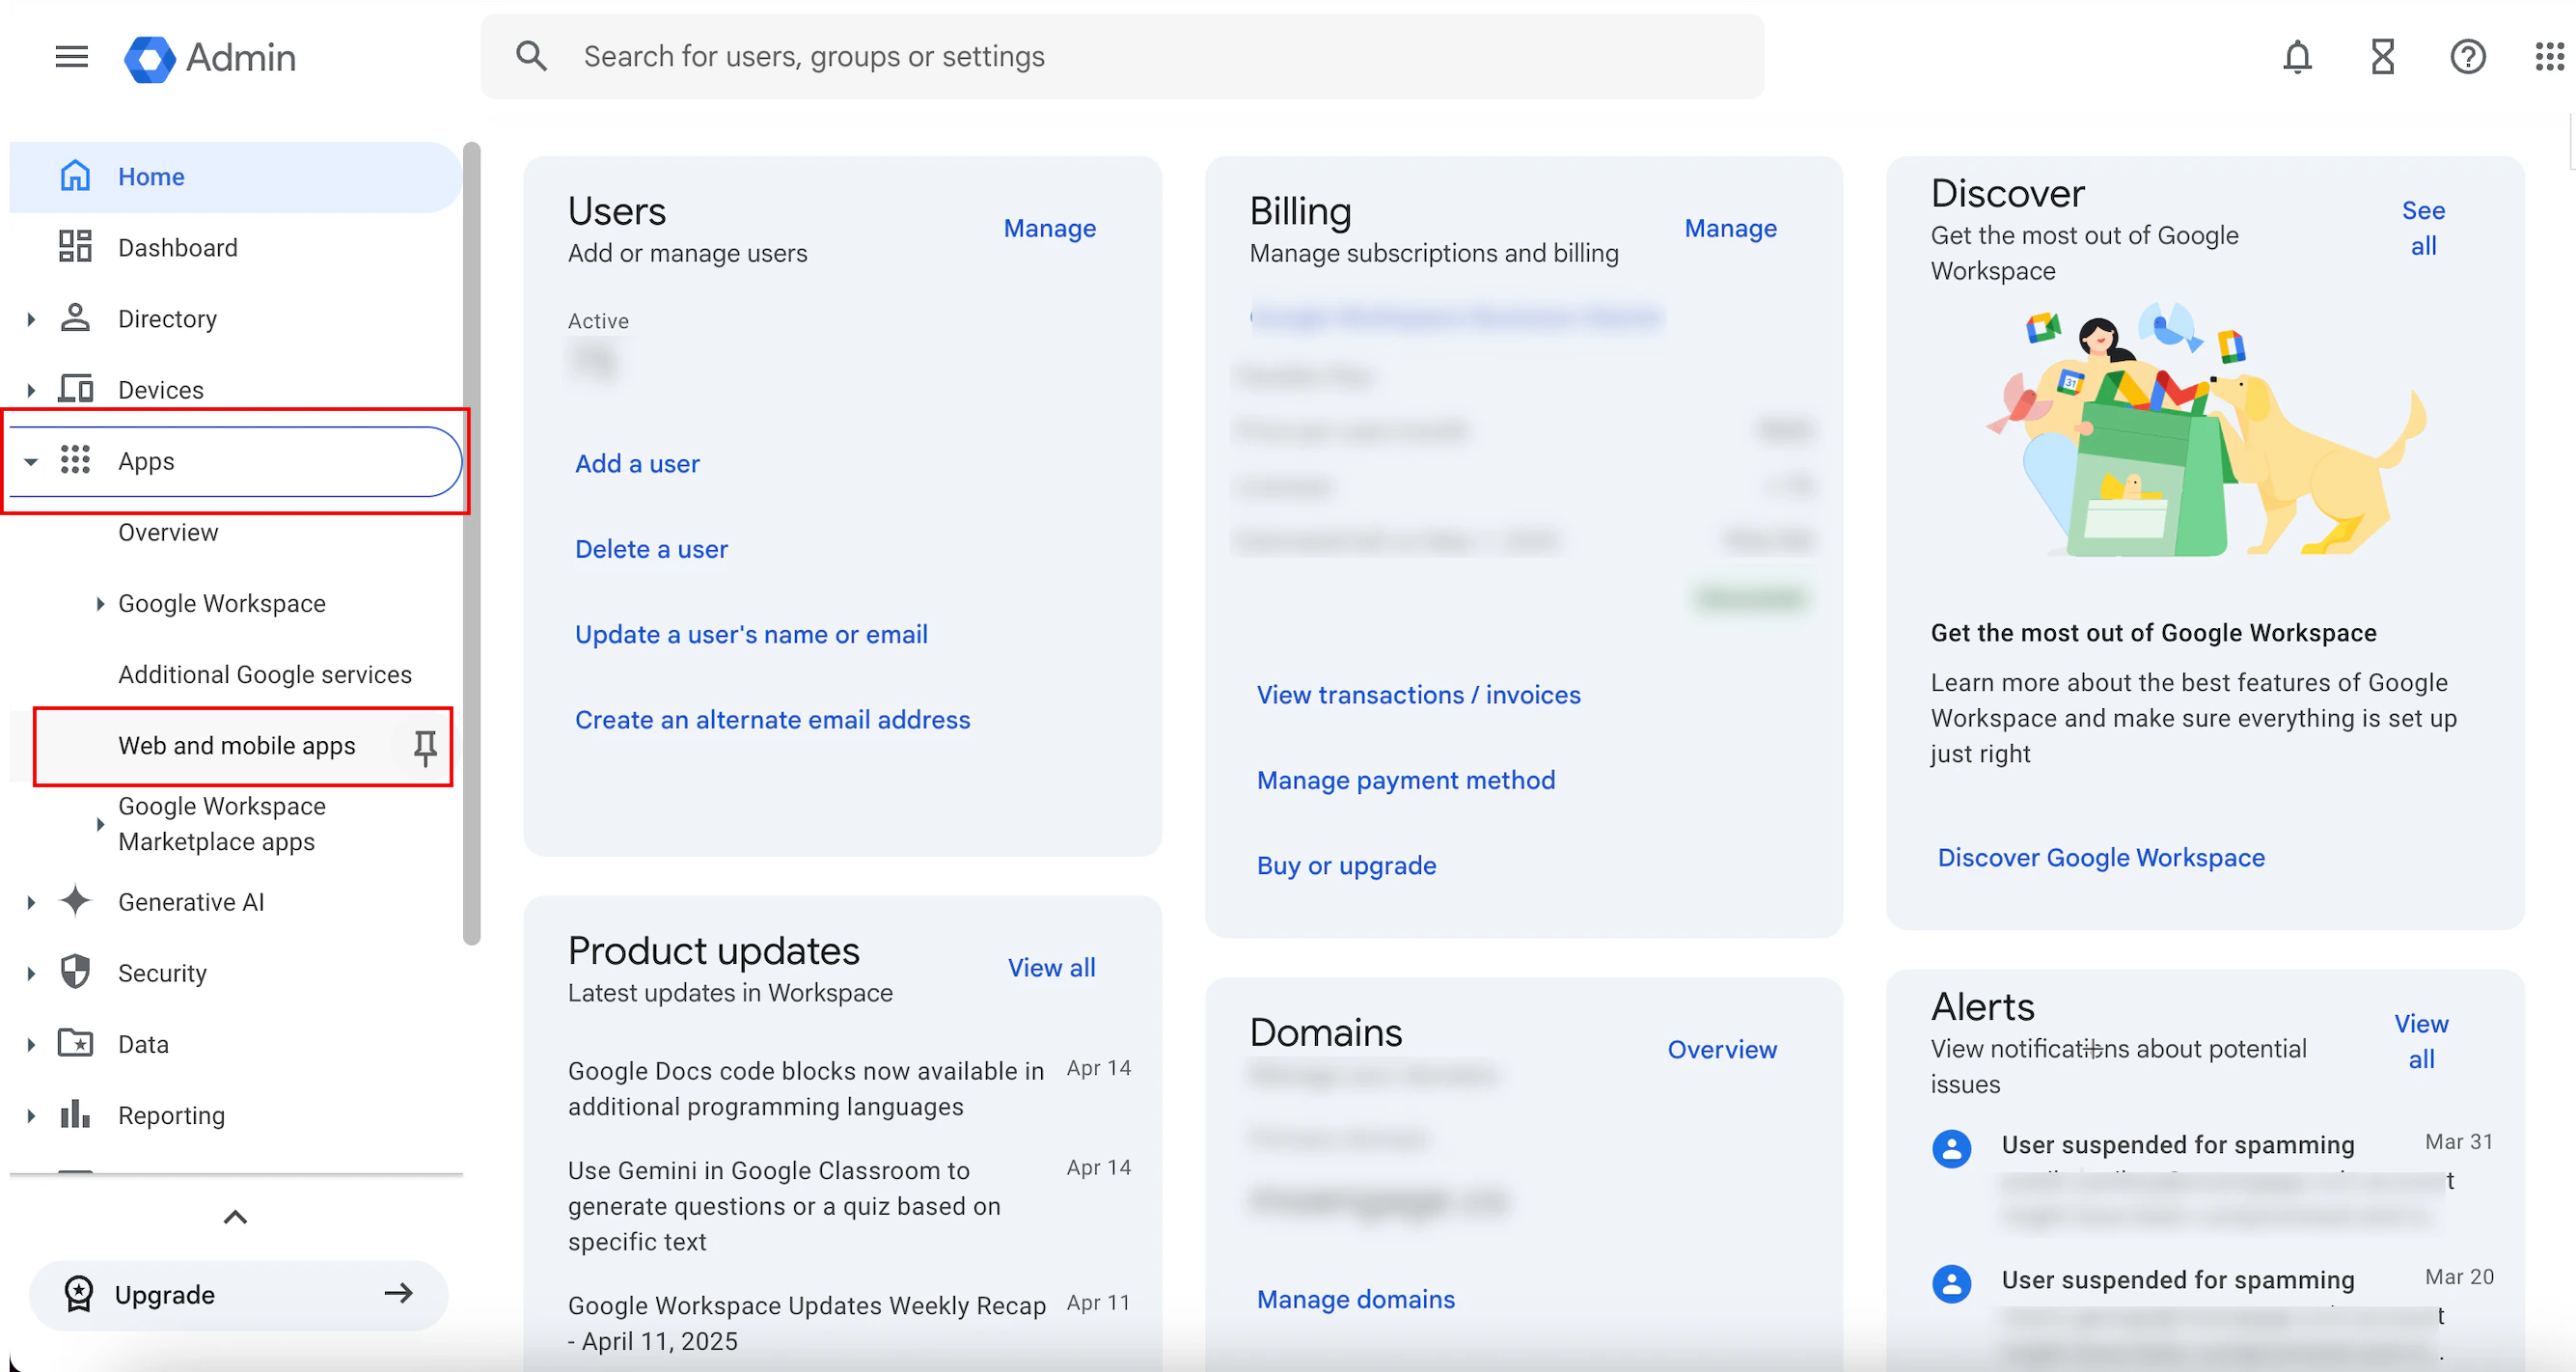
- On the left navigation menu, click Applications > Applications.
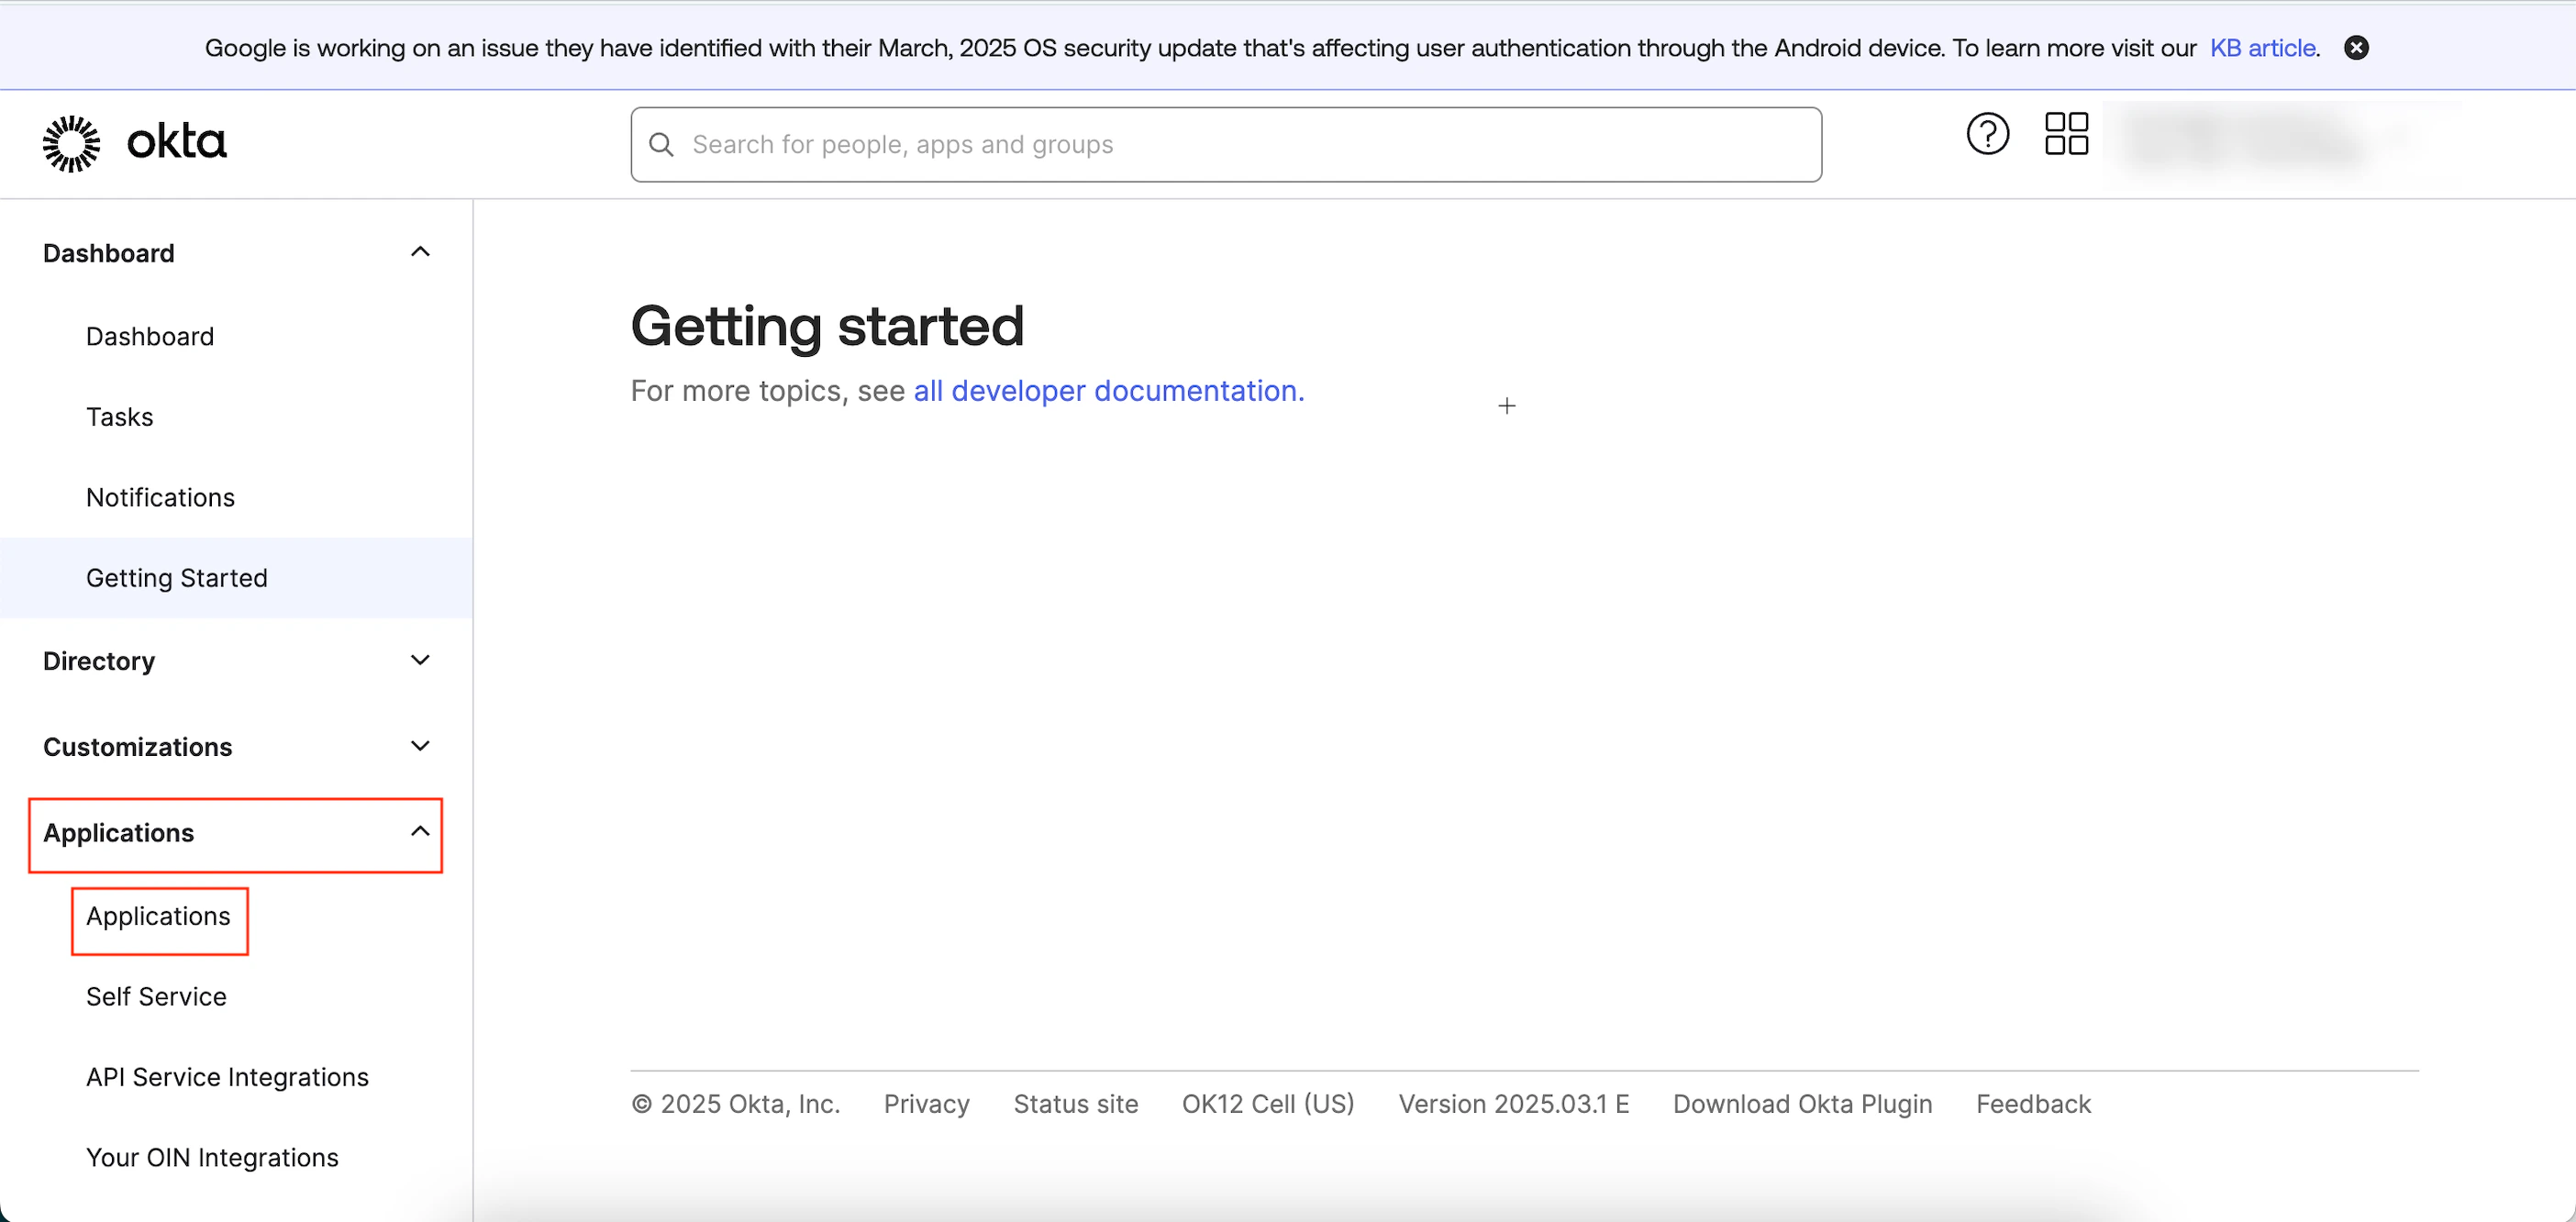
- On the Applications page, click Create App Integration.

The Create a new app integration pop-up window appears. - Click the SAML 2.0 option and then click Next.
 The Create SAML integration page appears. You are taken to the first step, General Settings, to define your app.
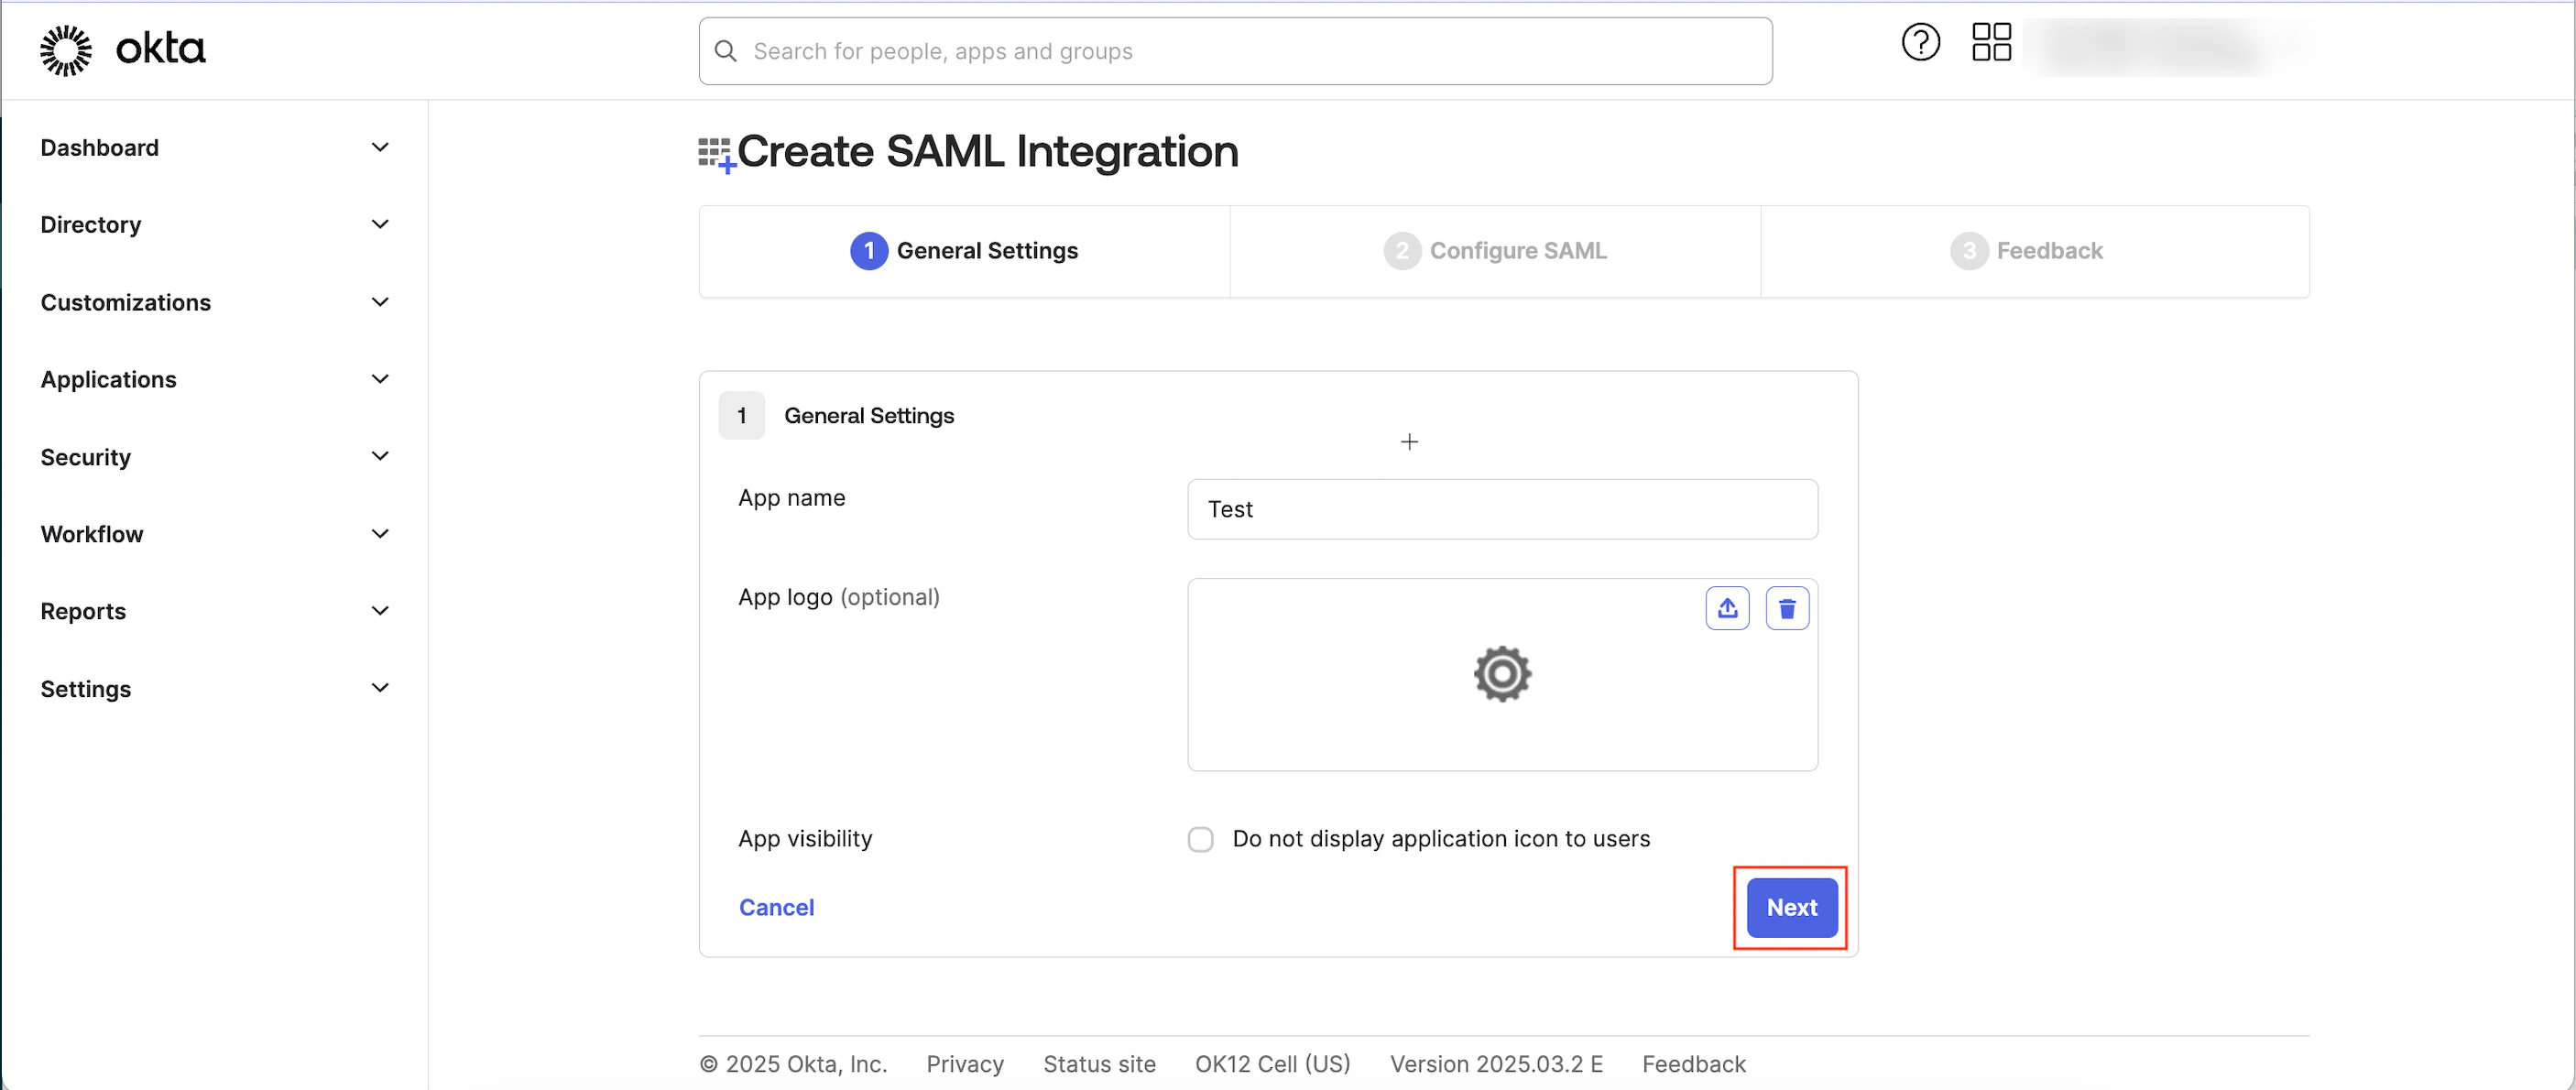
- Enter the following details:
- Click Next. You will move to the second step, Configure SAML, to define the SAML settings.
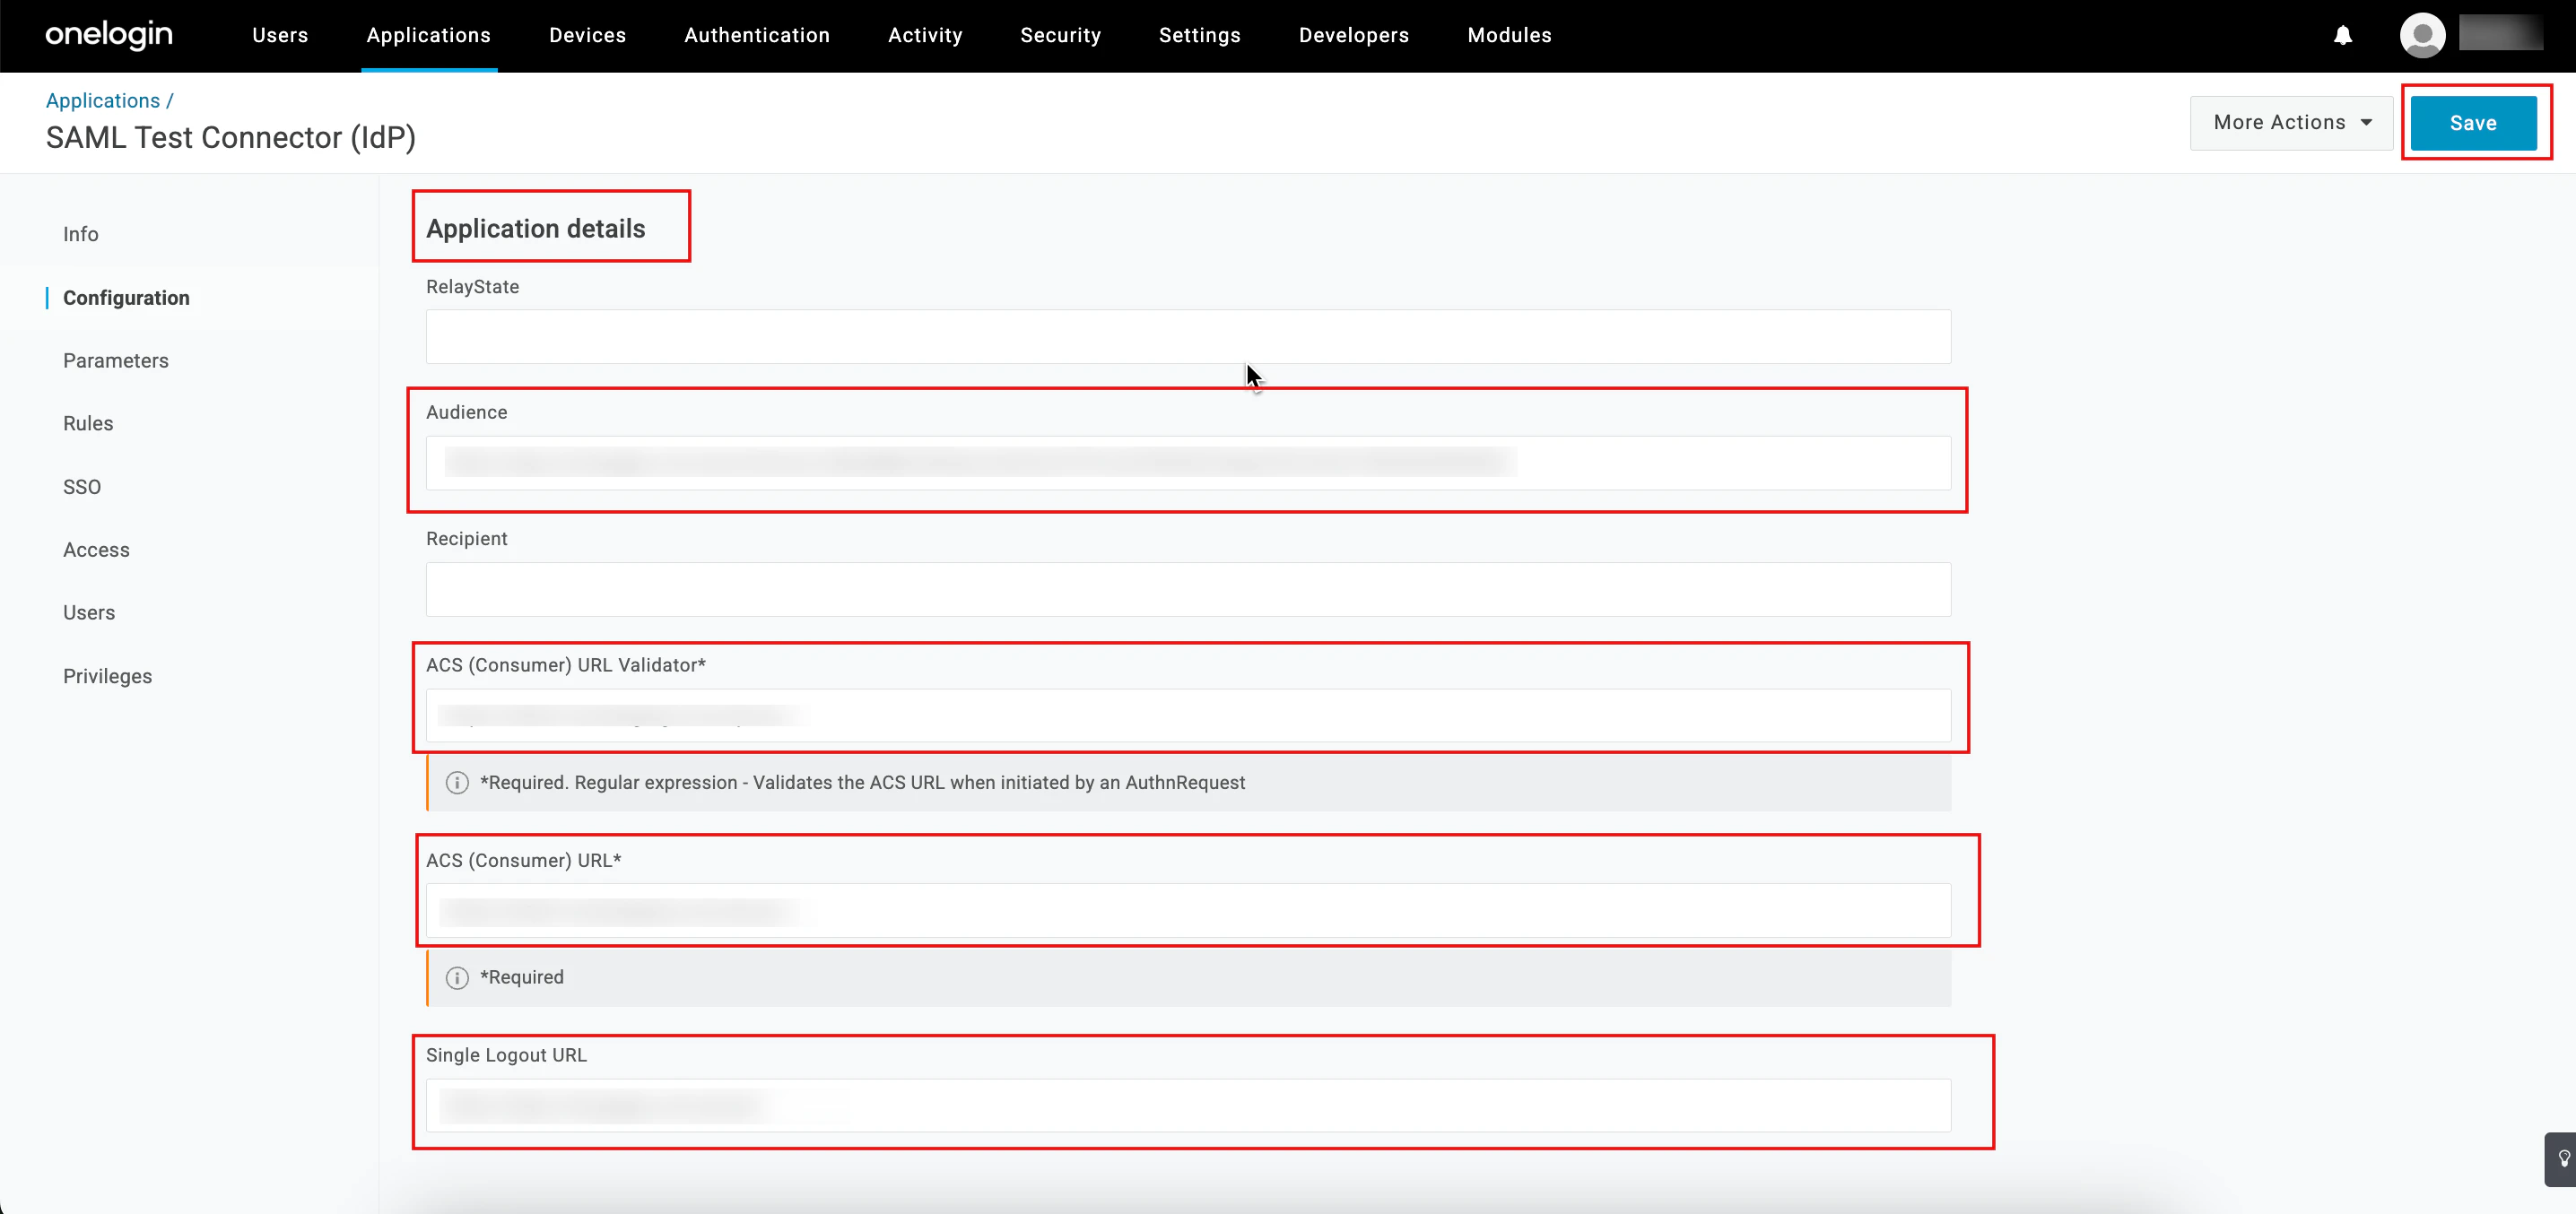
- On the Configure SSO dialog box in the MoEngage dashboard, copy the Single sign-on URL and Audience URI (SP Entity ID).

- Under SAML Settings, enter the following details:
Field Required Description Single Sign-On URL Yes This URL receives the SAML assertion (the authentication response) from Okta to MoEngage. Paste the URL copied from the MoEngage dashboard. Audience URI (SP Entity ID) Yes This URL informs Okta about the specific application (MoEngage) for which the authentication assertion is intended. Paste the URI copied from the MoEngage dashboard.
Note: In this box, you can add multiple entity IDs from different workspaces, separated by commas.Name ID format Yes Select EmailAddress. 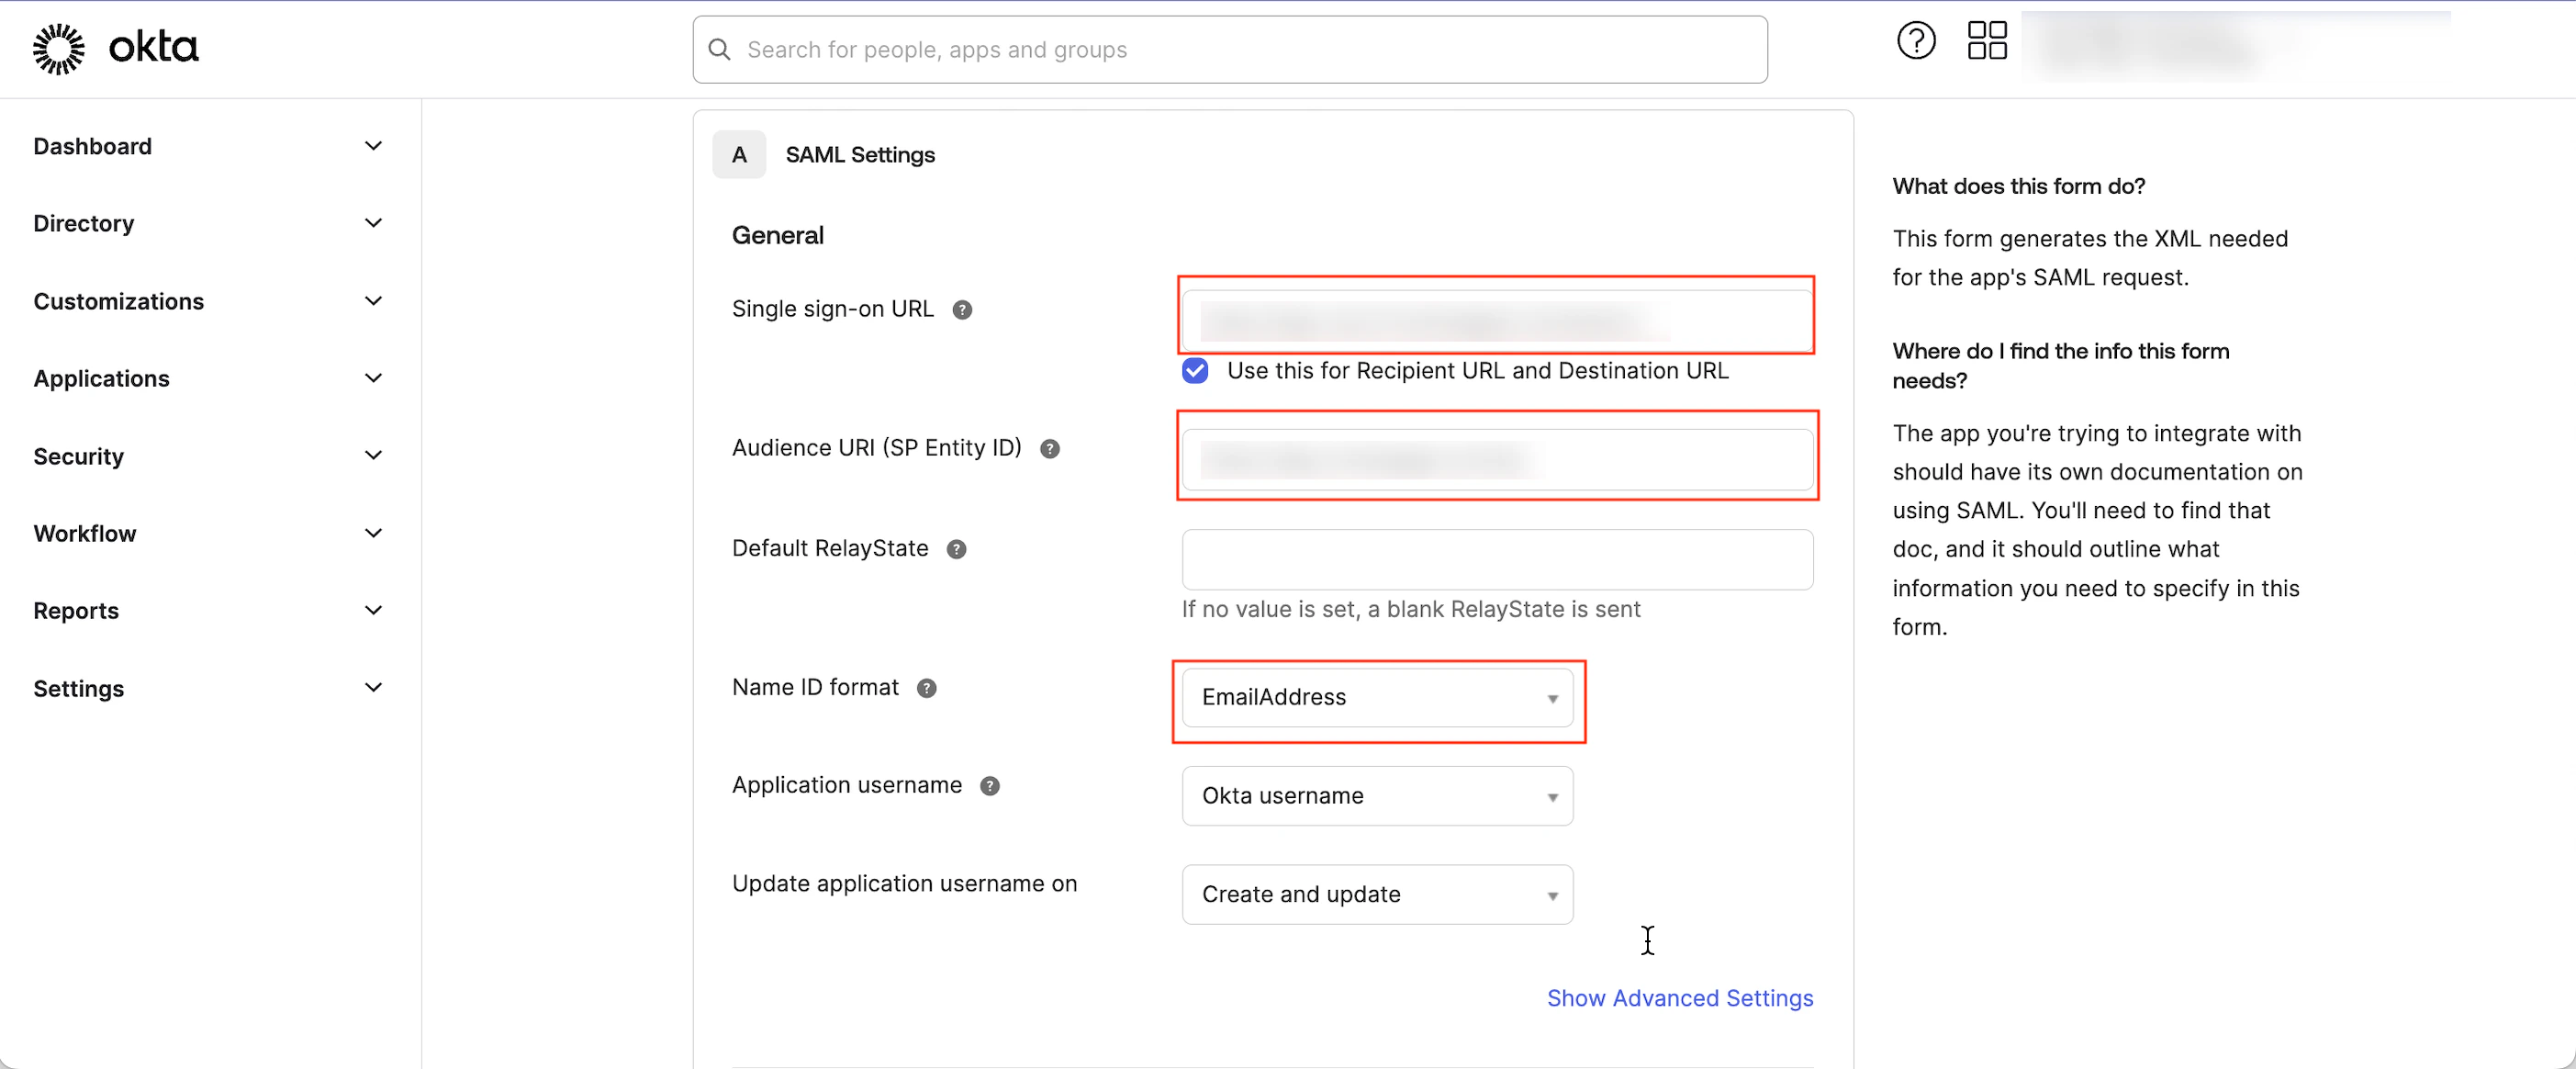
- Scroll to the end of the page and click Next. You are taken to the third step, Feedback.
- Select the This is an internal app that we have created check box adjacent to the App type.
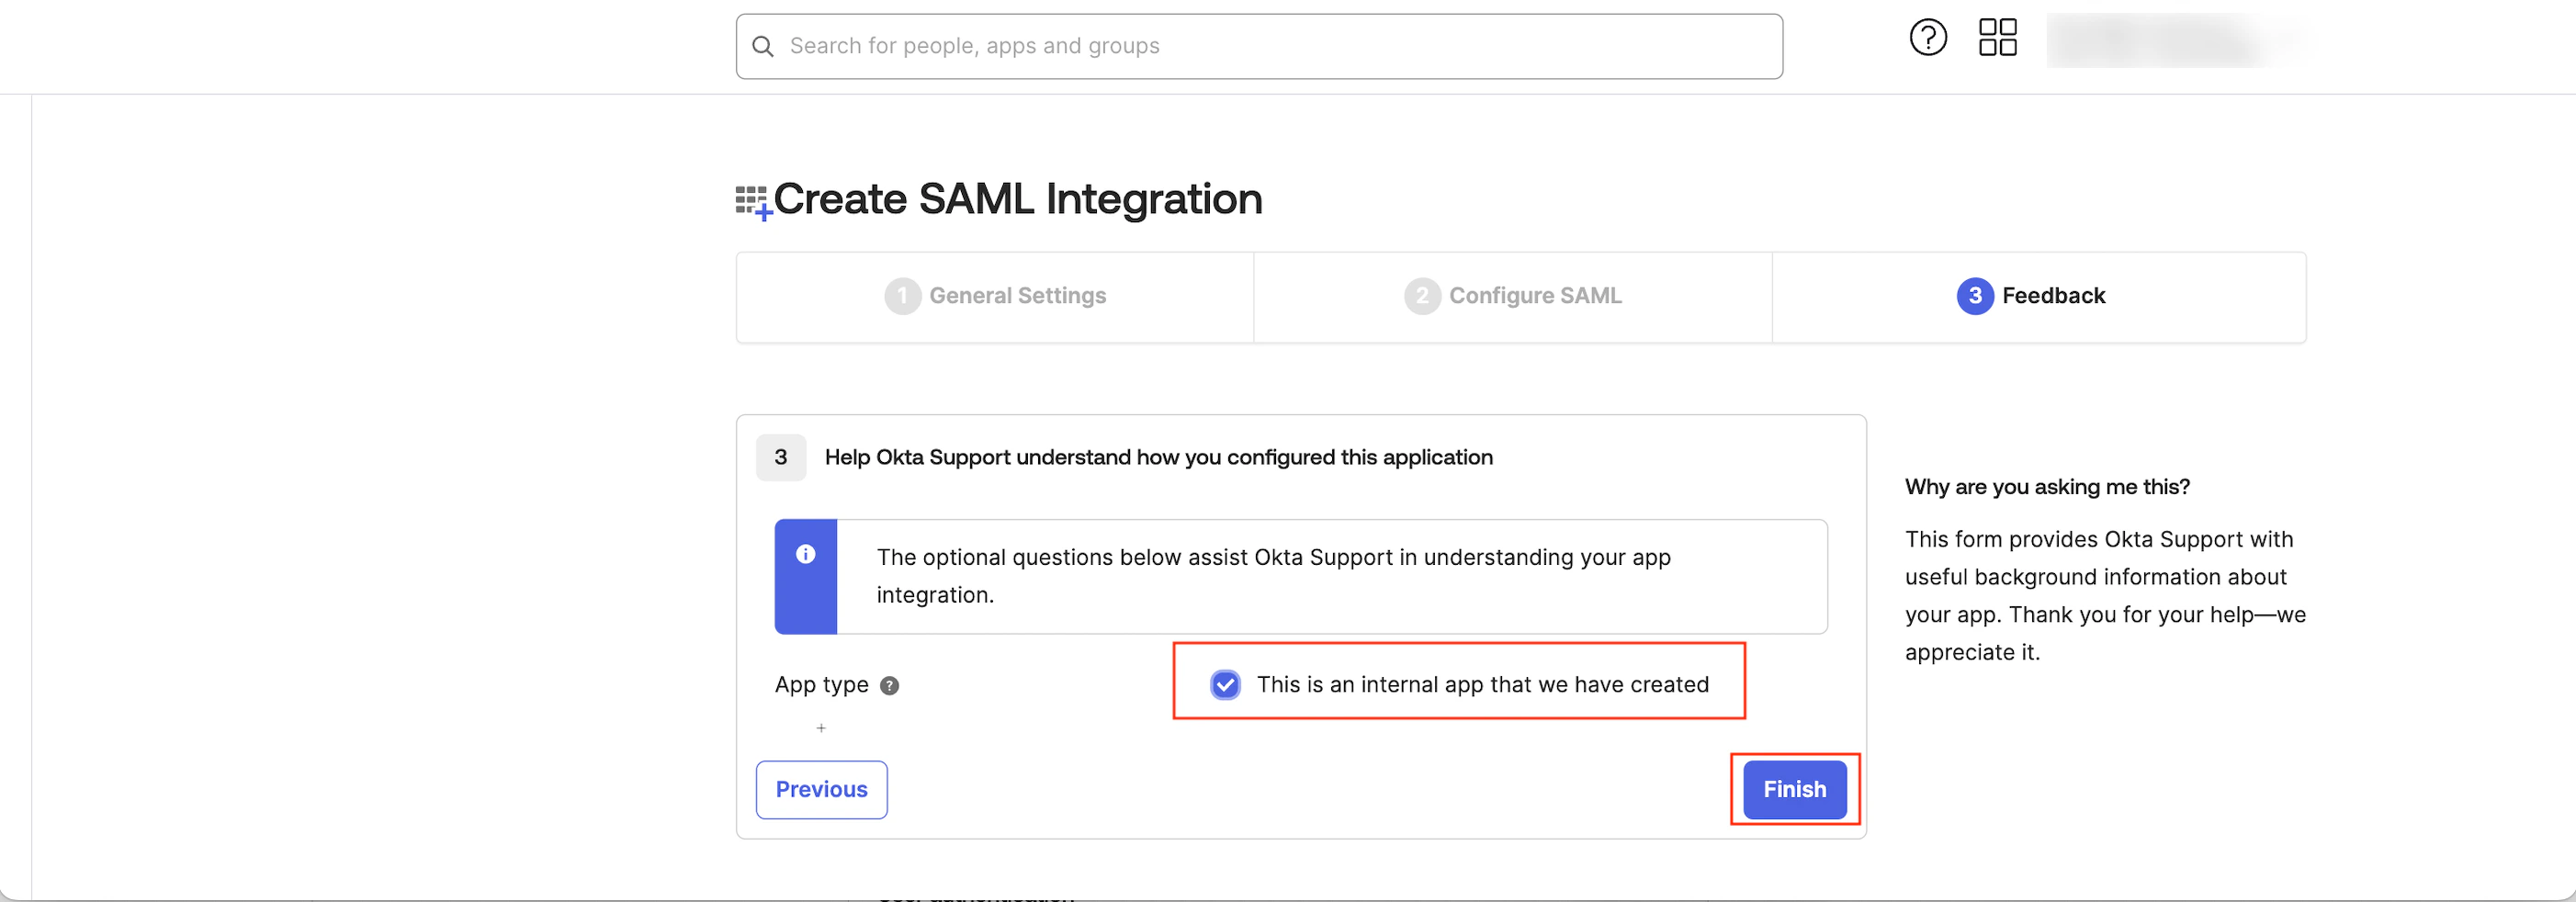
- Click Finish. You must now generate the SAML Signing Certificates to connect your app to Okta.
- By default, you are on the Sign On tab. Scroll to the end of the page, and under SAML Signing Certificates, find the Status marked as Active to download the certificate.
- Click the Actions arrow in the Actions column.
- Click Download certificate.
 The metadata will be downloaded in an XML file.
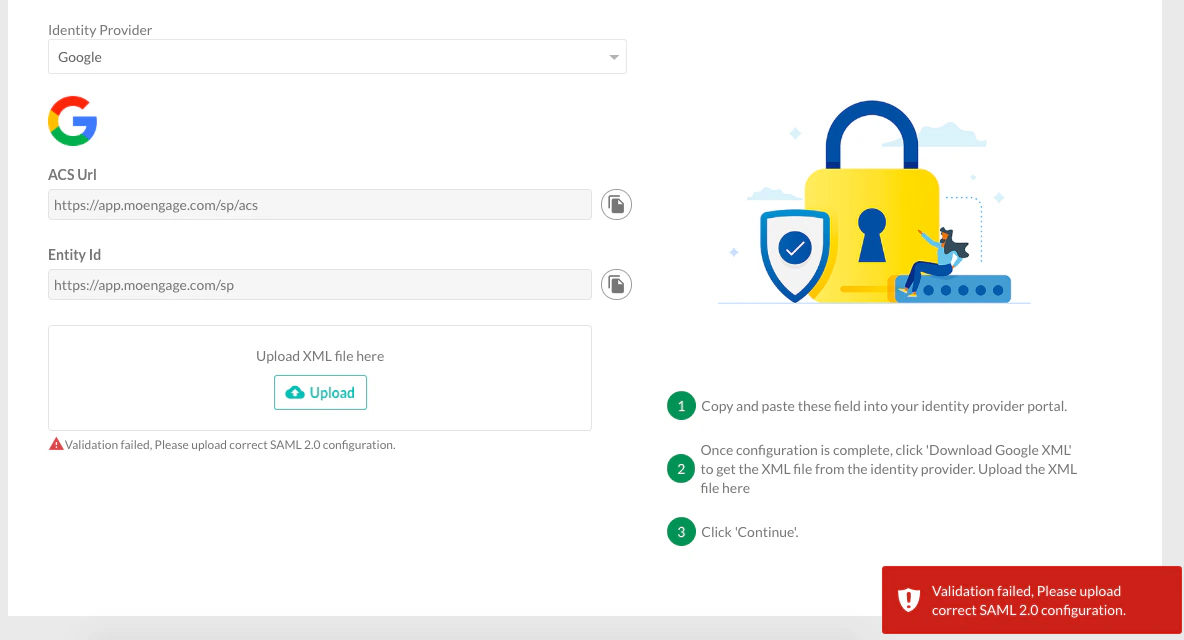
 - Upload the downloaded XML file in the Enter XML Configuration box on the Configure SSO dialog box of the MoEngage dashboard.
- By default, the Update the same config for Test Environment check box is selected. When it is selected, the configuration is applied to both the test and live environments. Clear the check box if you want the configuration to be applied only to the live environment.
- Click Configure.
 The Alert pop-up window will appear, prompting you to review the instructions properly.
 - Select the Send email to the users of this workspace check box to notify all users about your workspace’s Single Sign-On (SSO) enablement.
- Click Done.
 The SSO configuration is now successfully completed. You can see the Okta SSO on the Login tab.
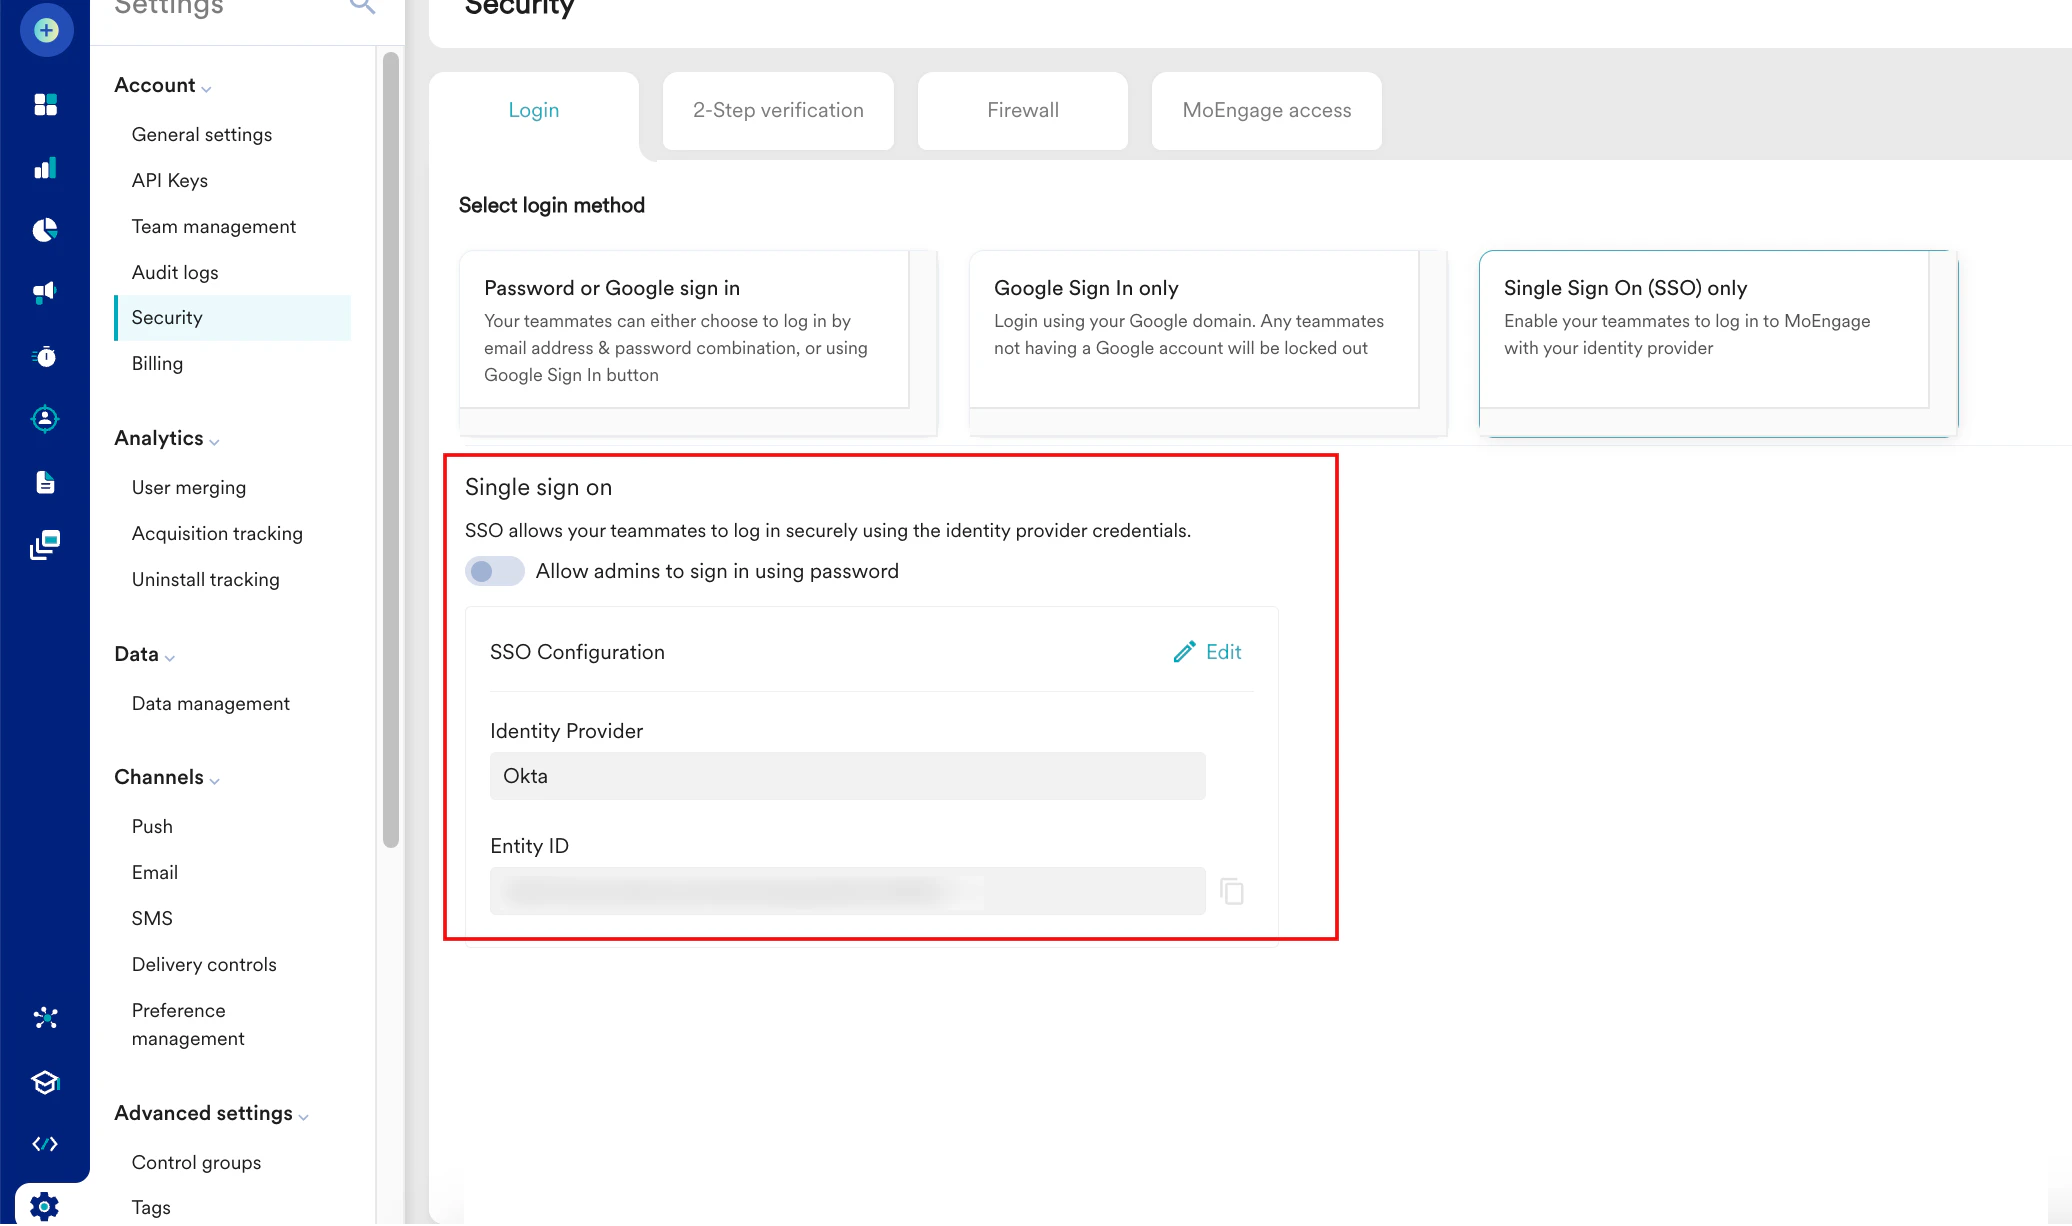
 The Find Applications page appears.
 The Add SAML Test Connector (IdP) page appears.
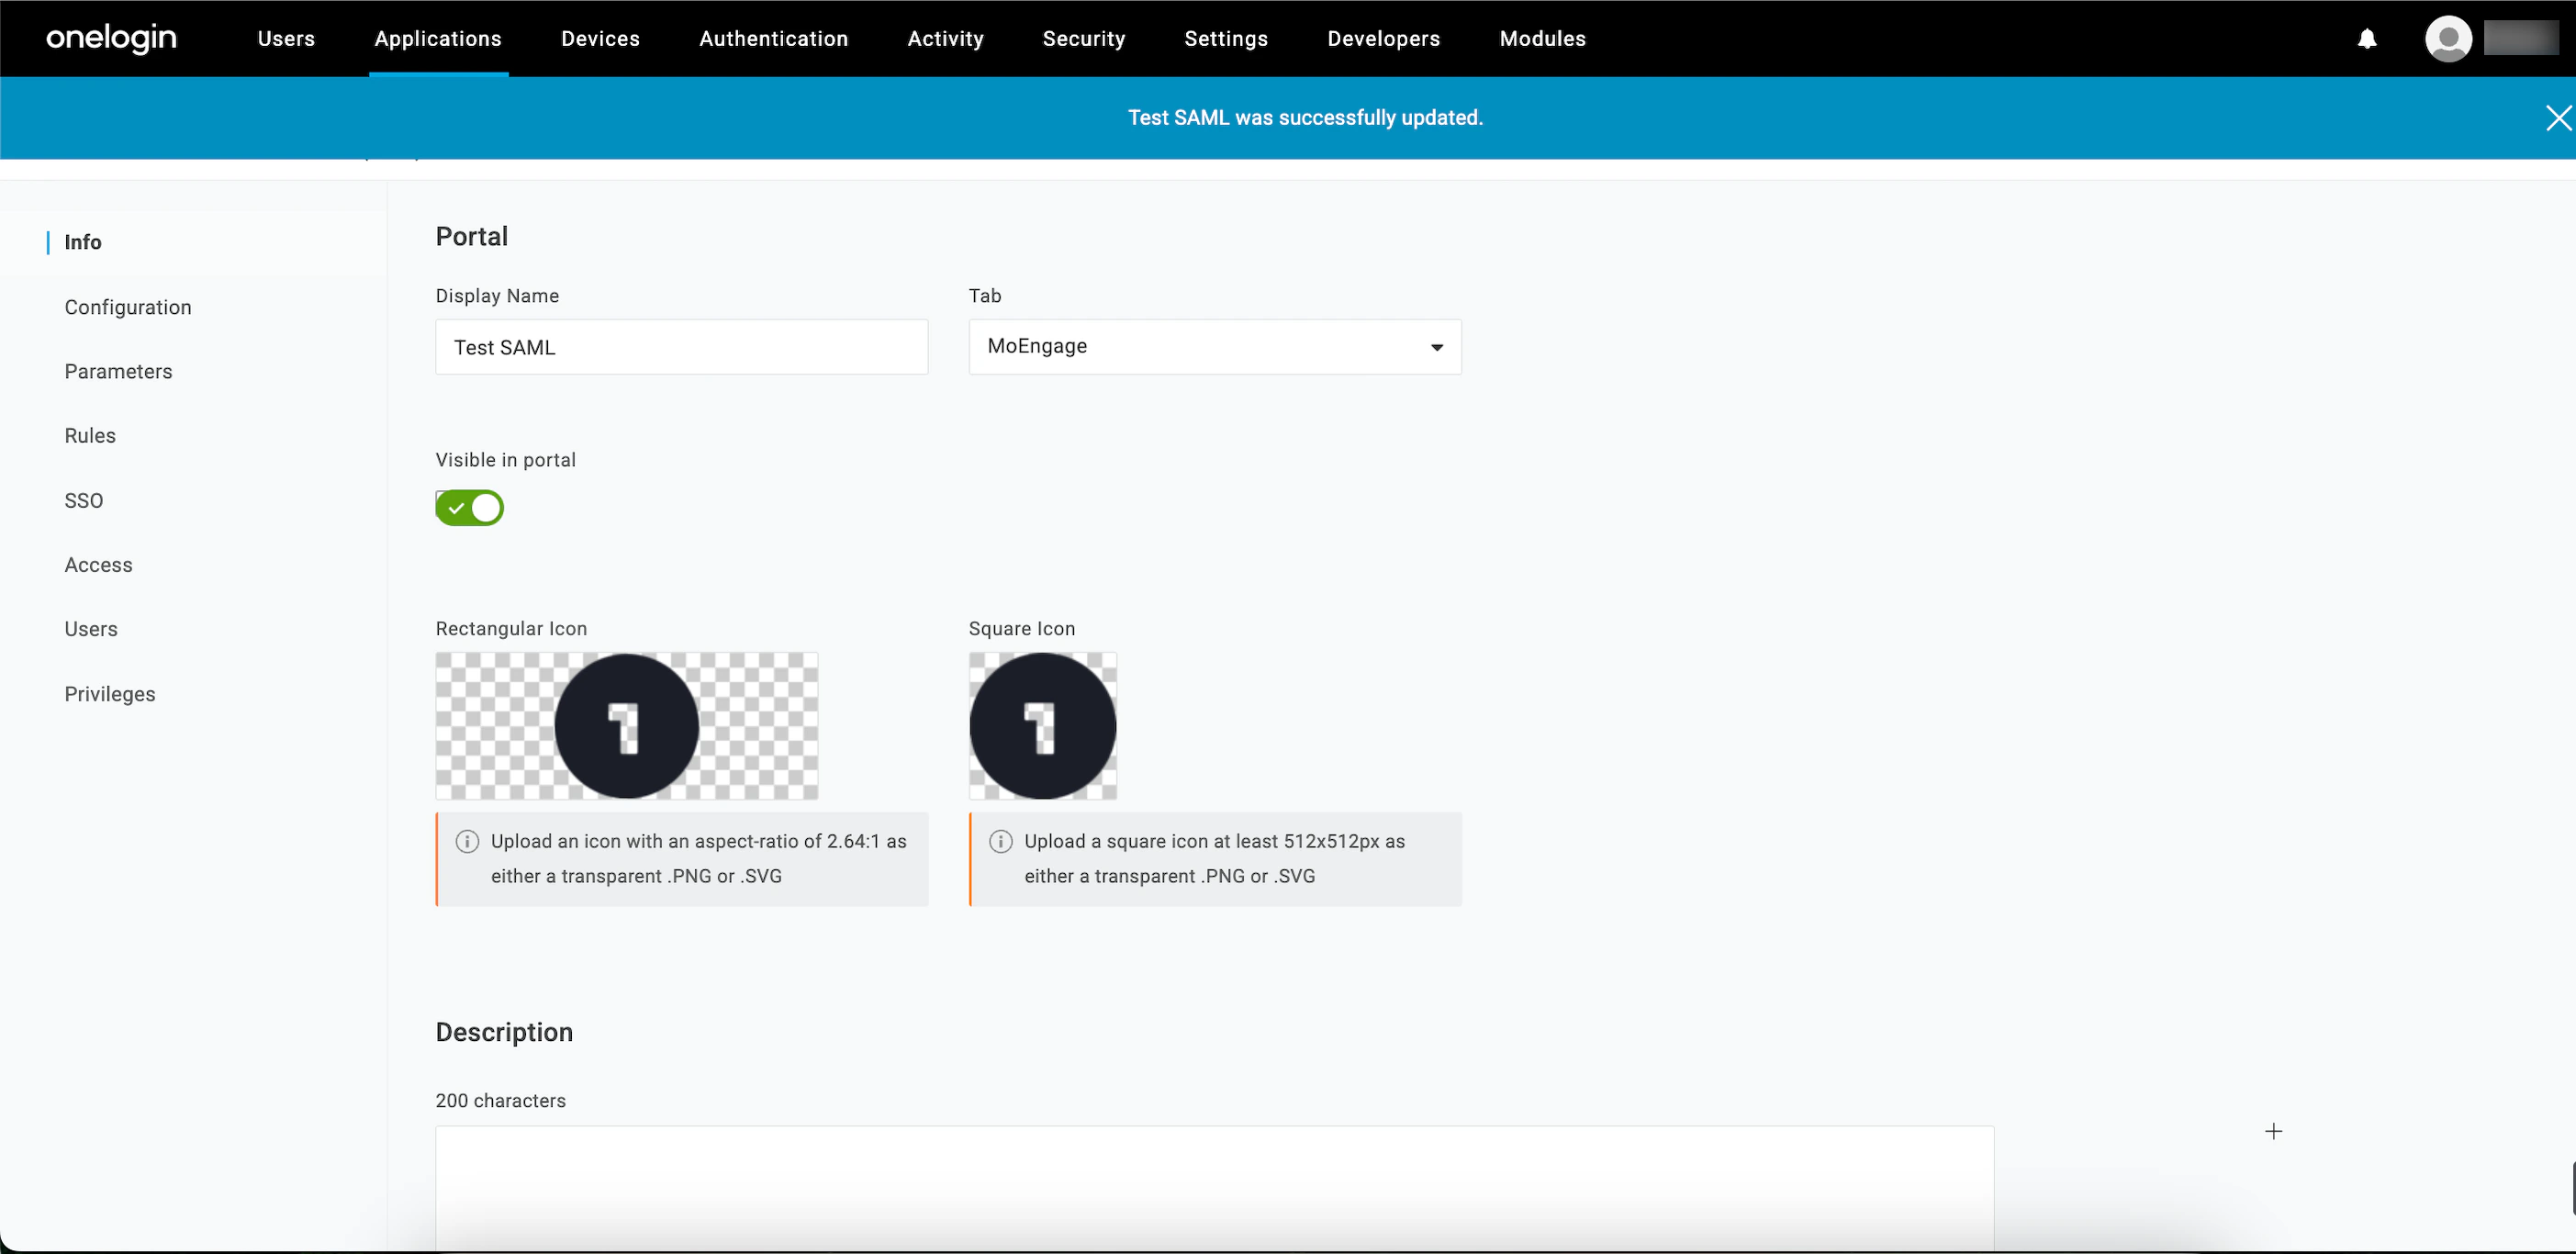
 Your SAML is now successfully added, and the SAML Test Connector (IdP) page appears.
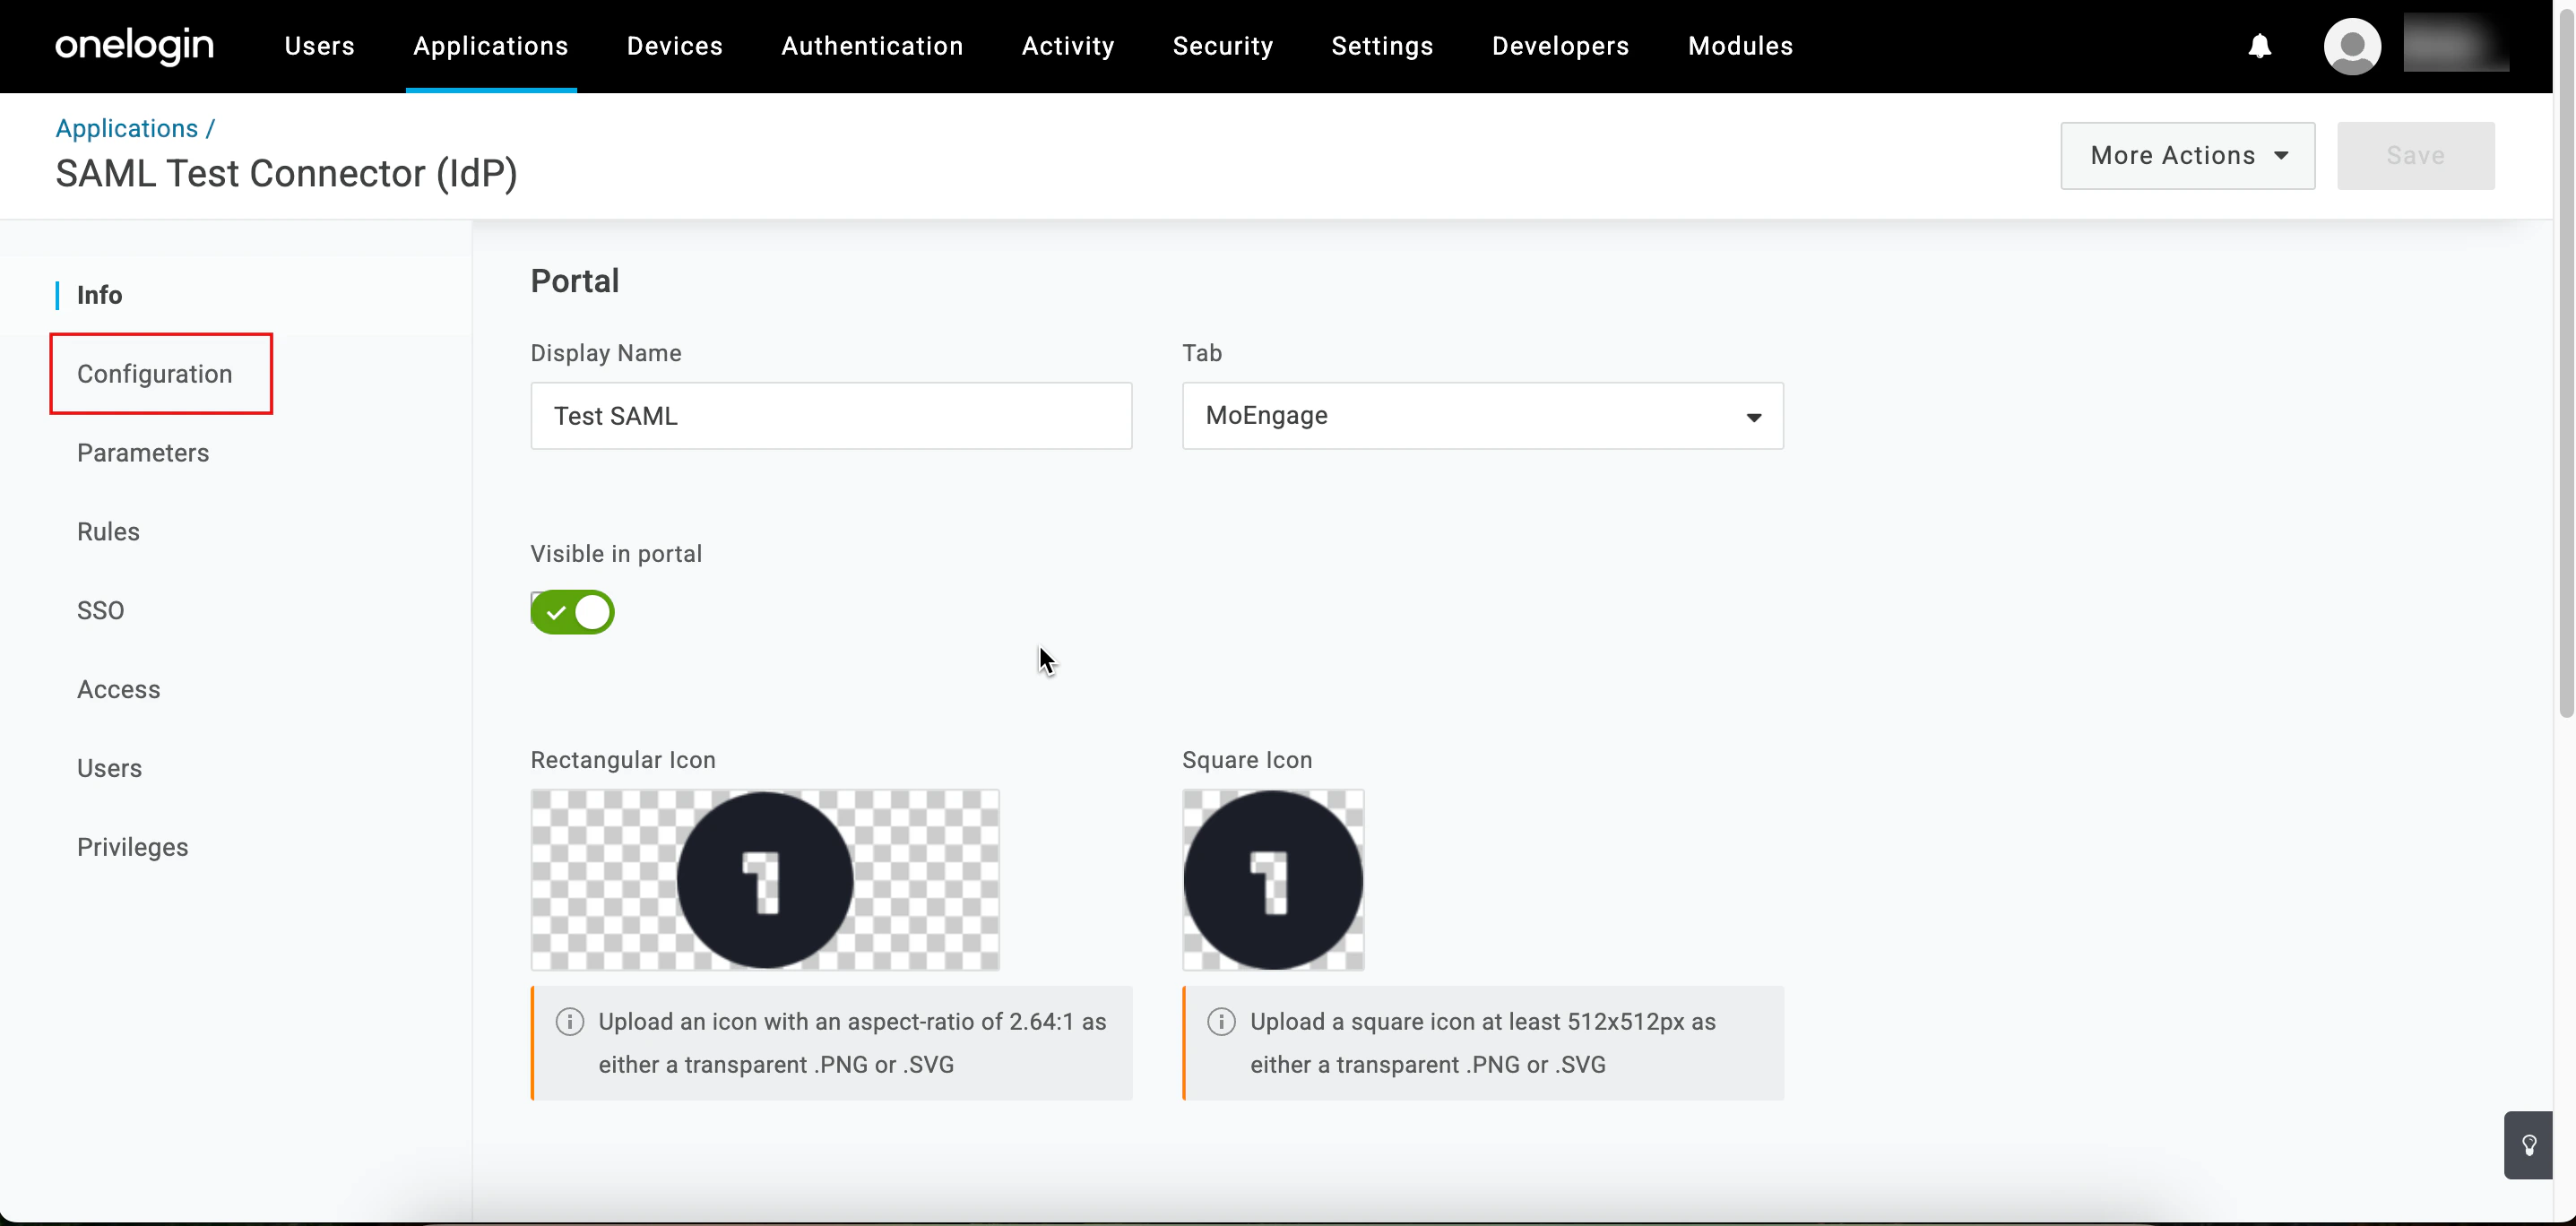
 The Alert pop-up window will appear, prompting you to review the instructions properly.
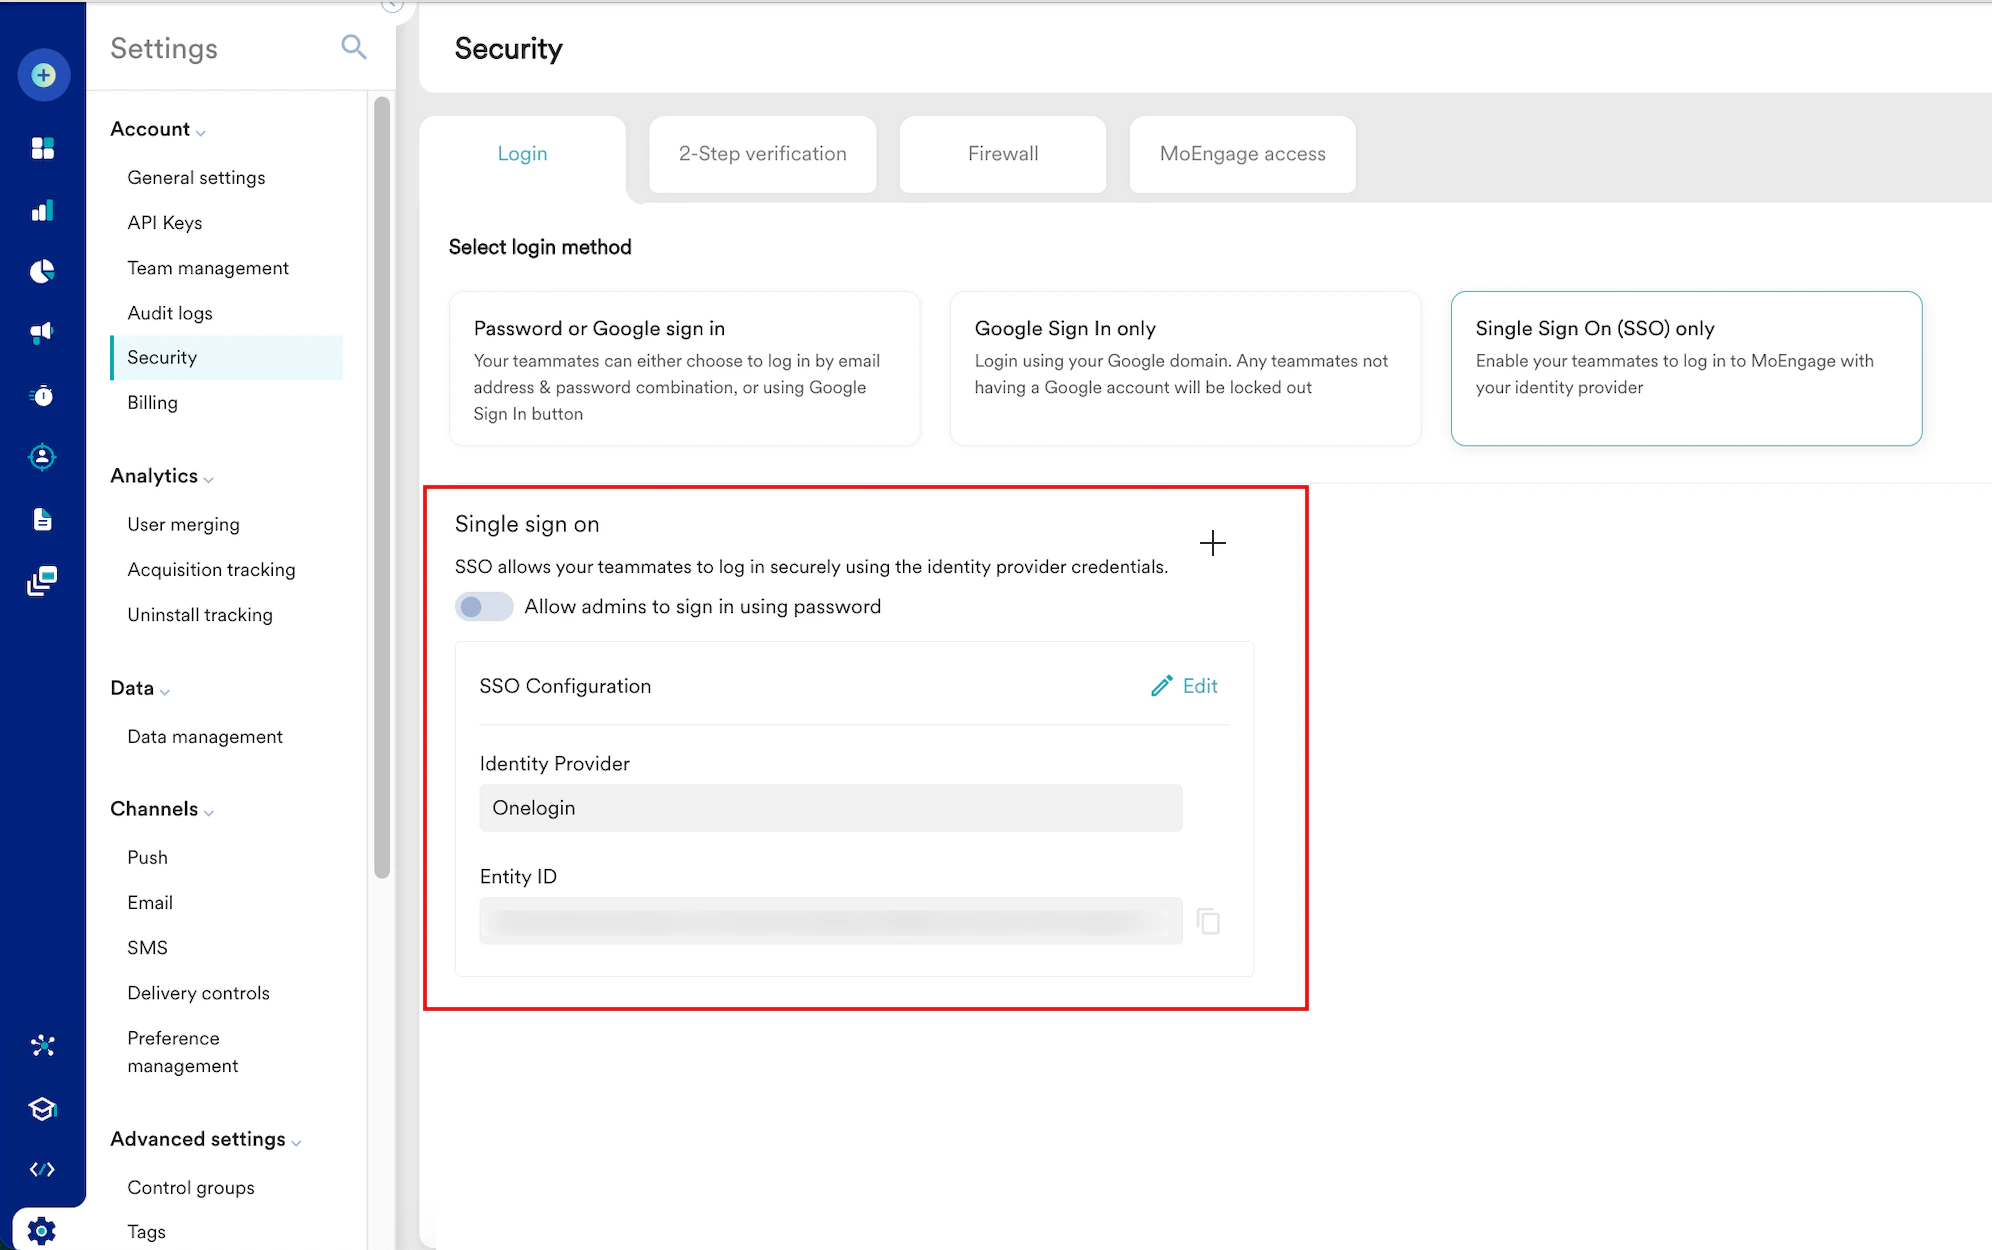
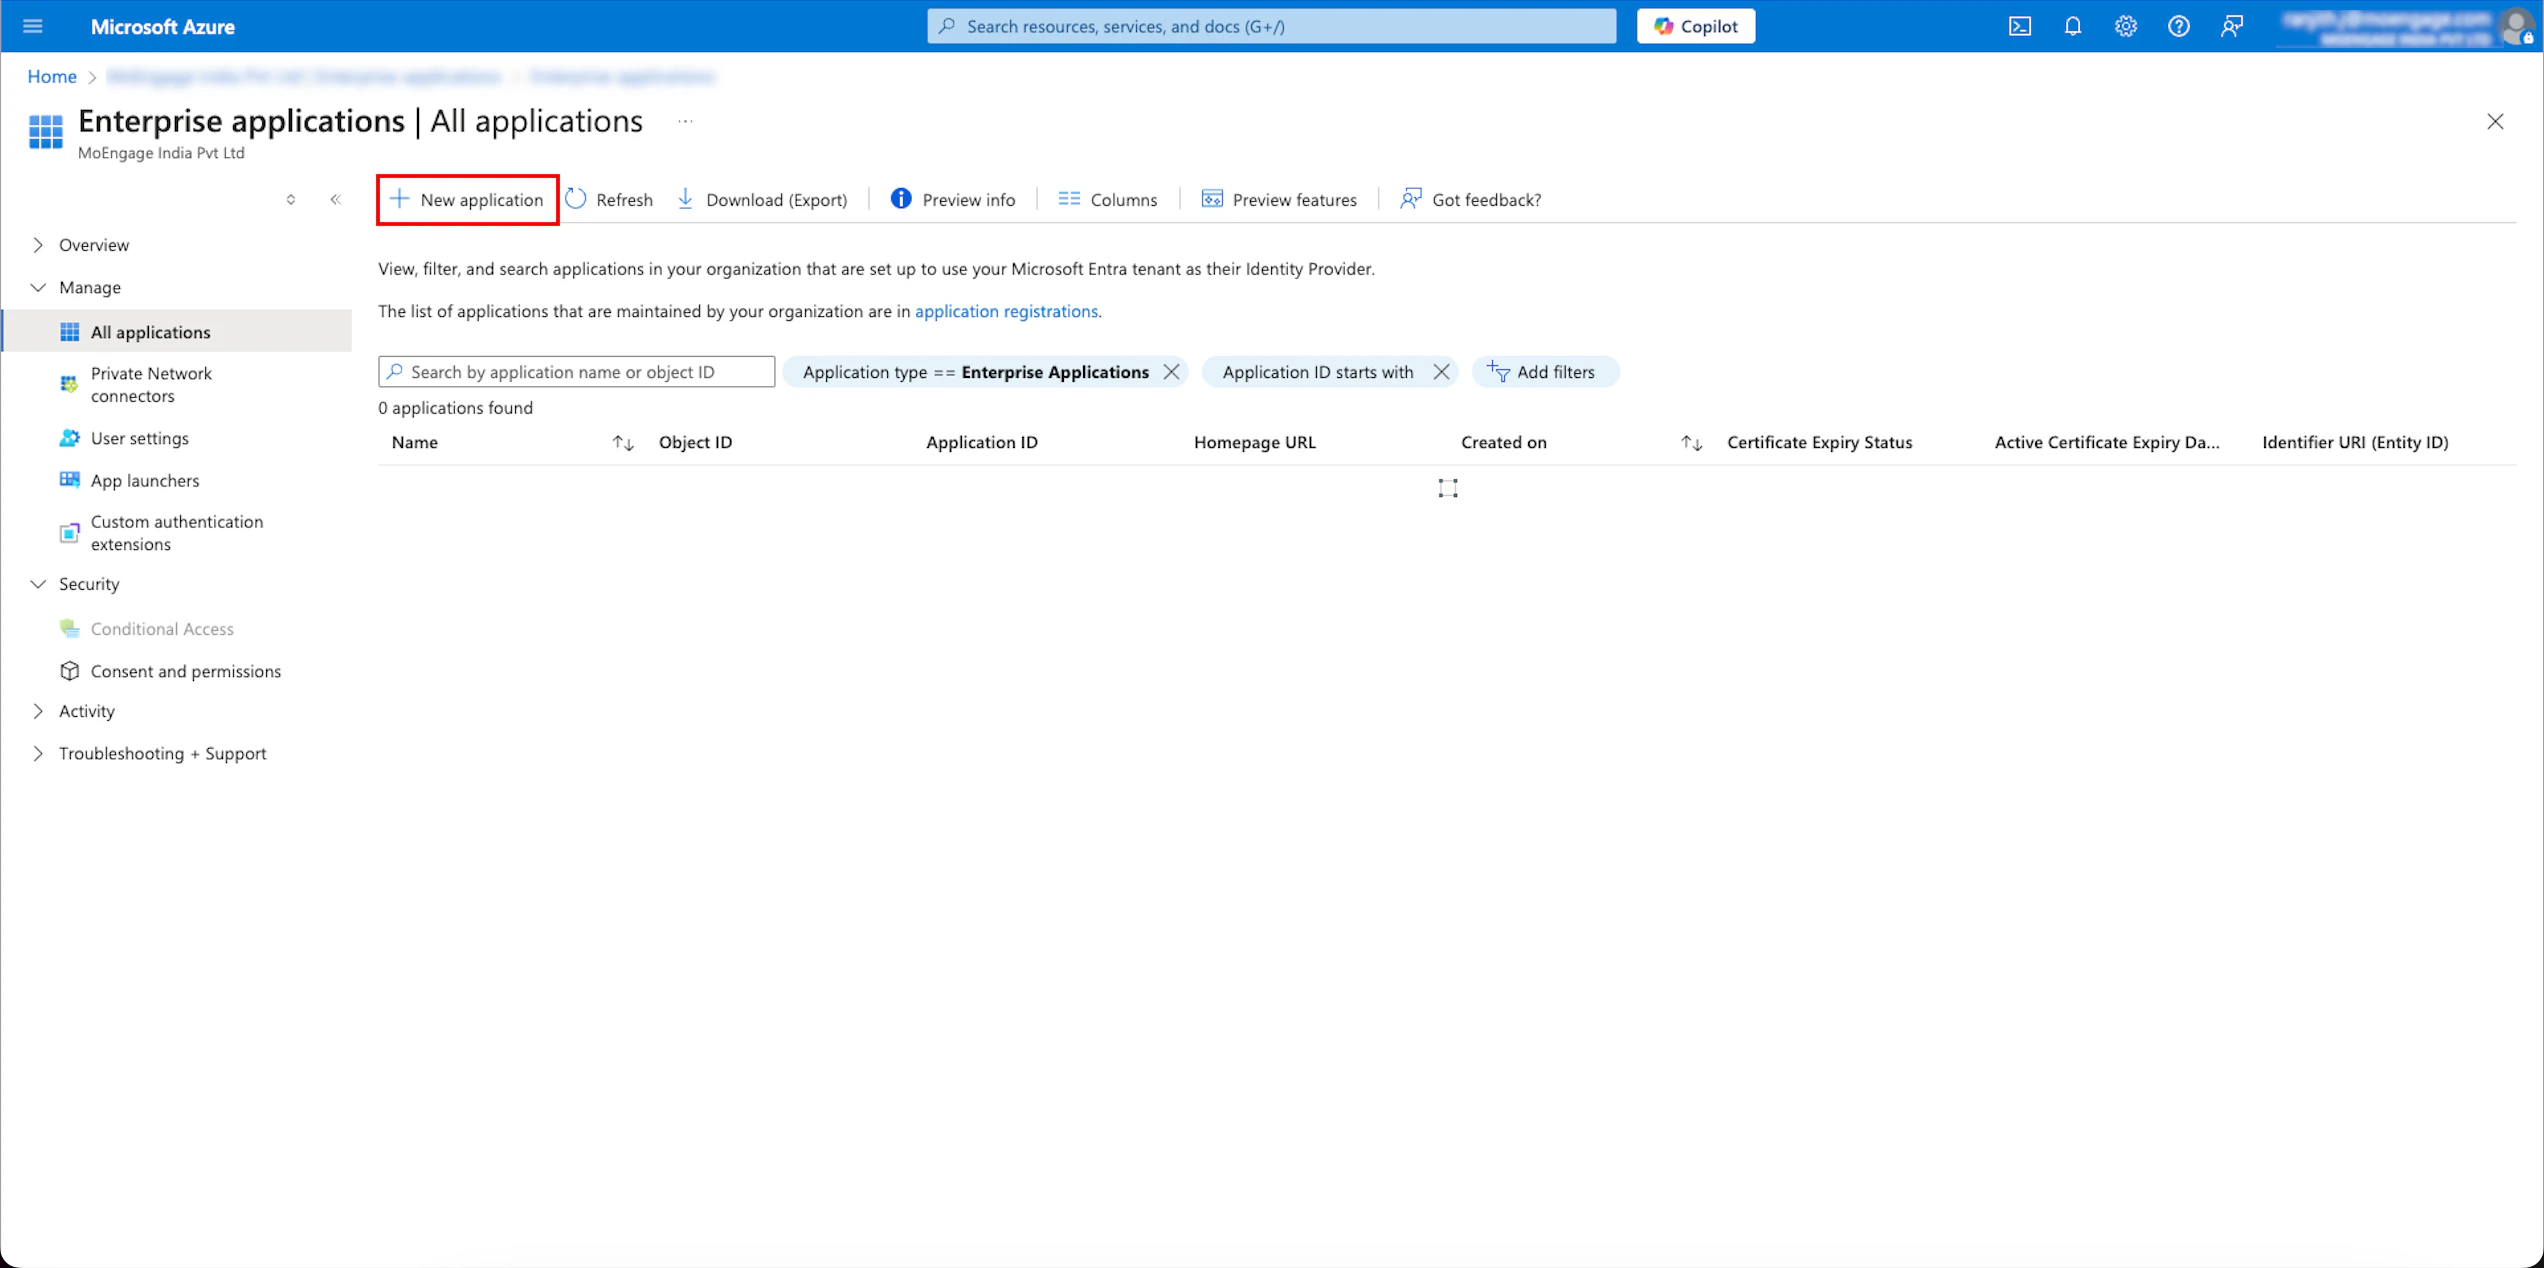
 The created application is listed on the Enterprise applications| All applications page.
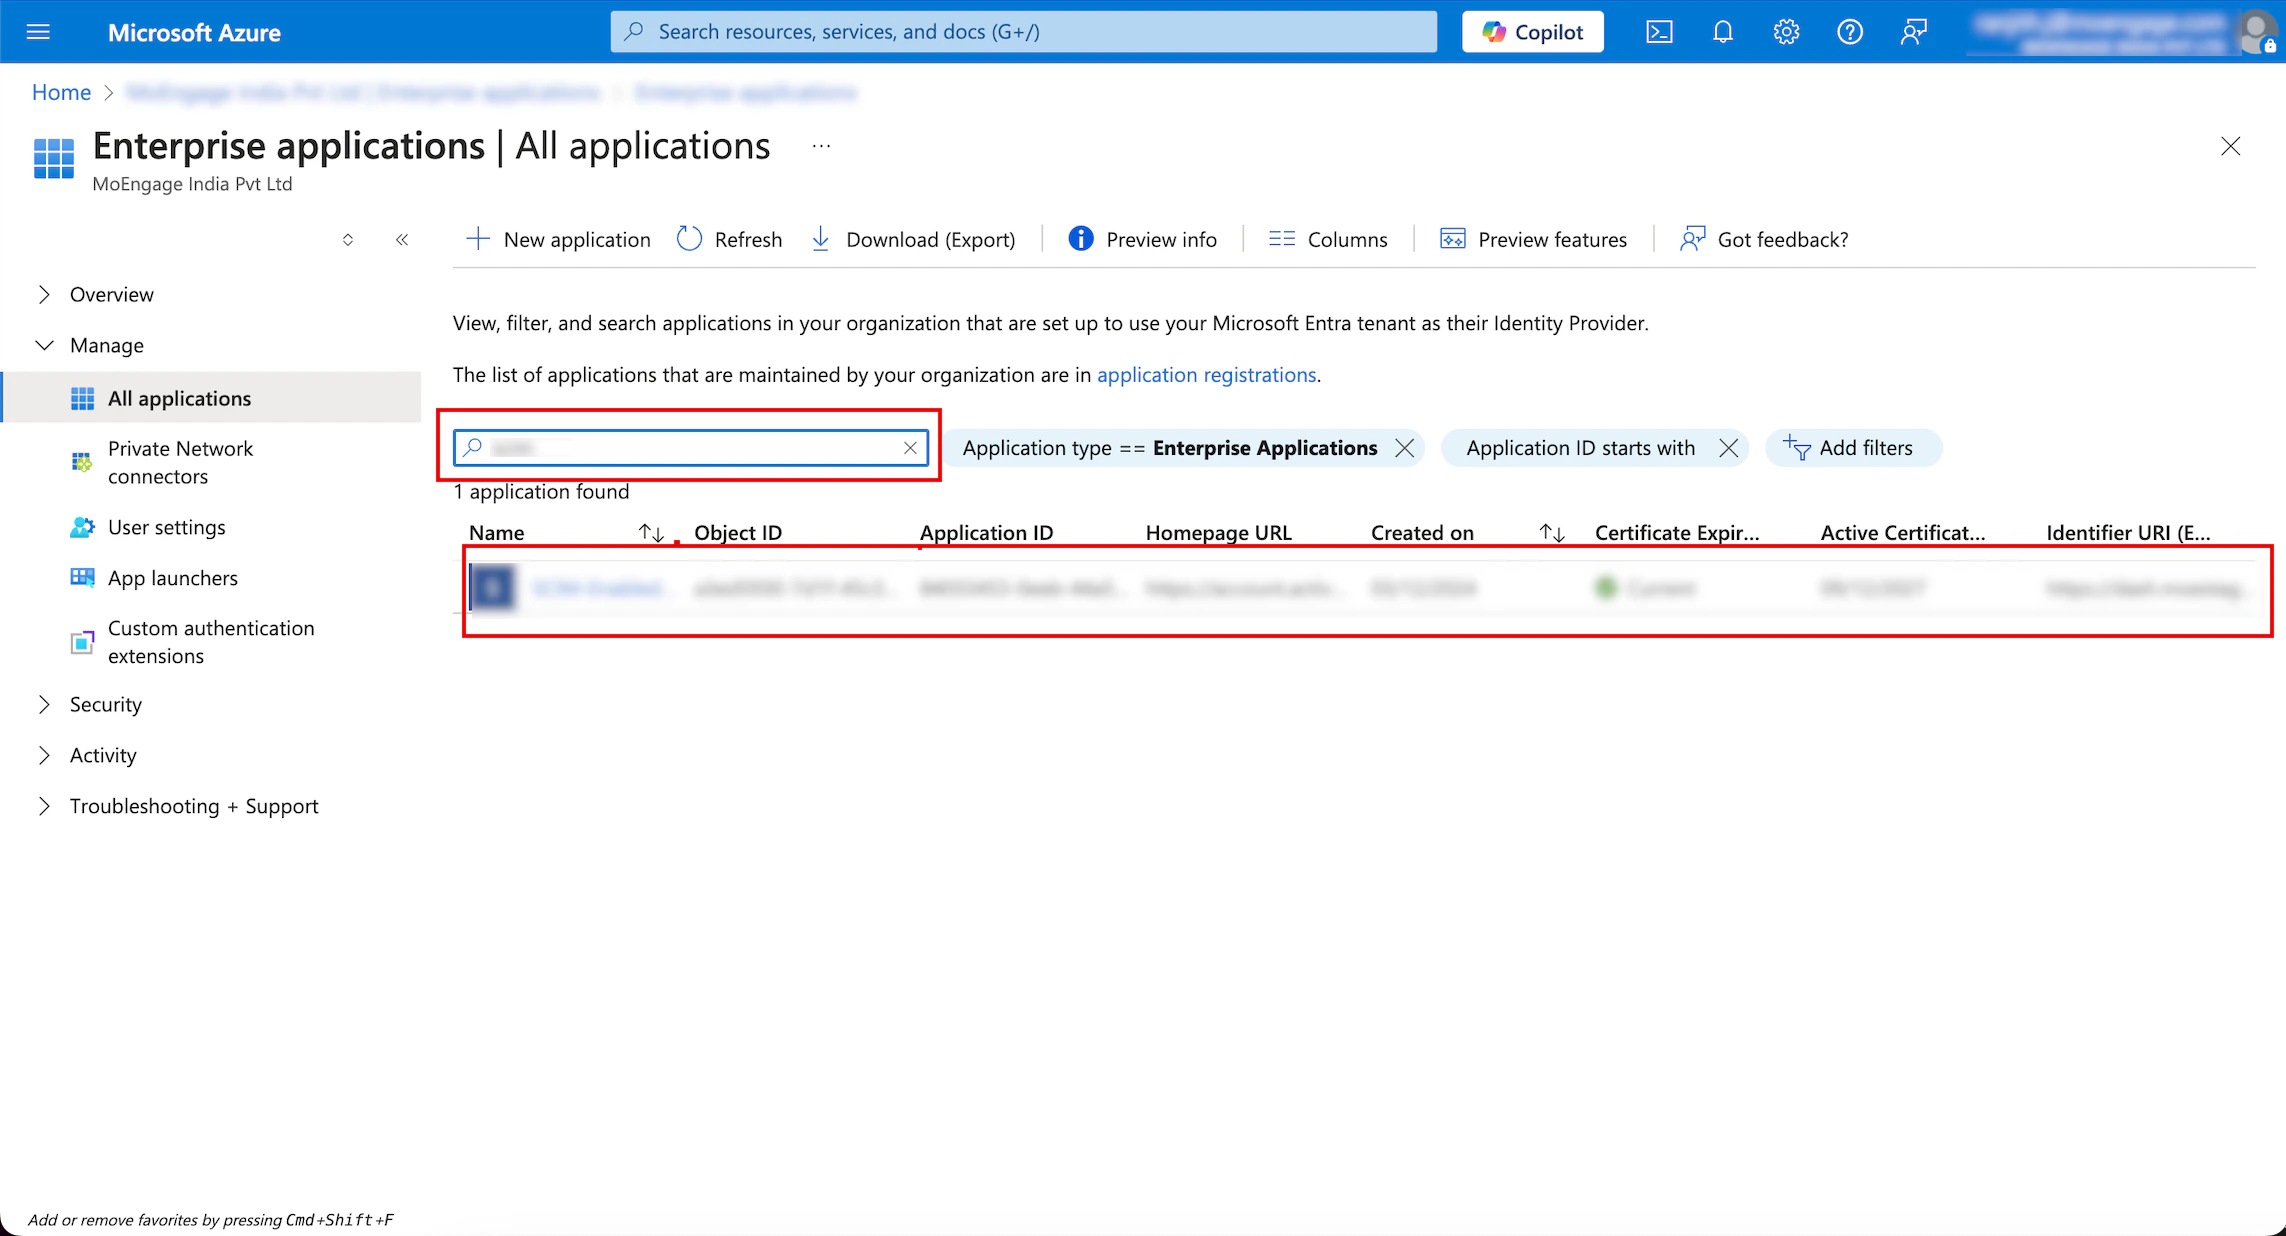
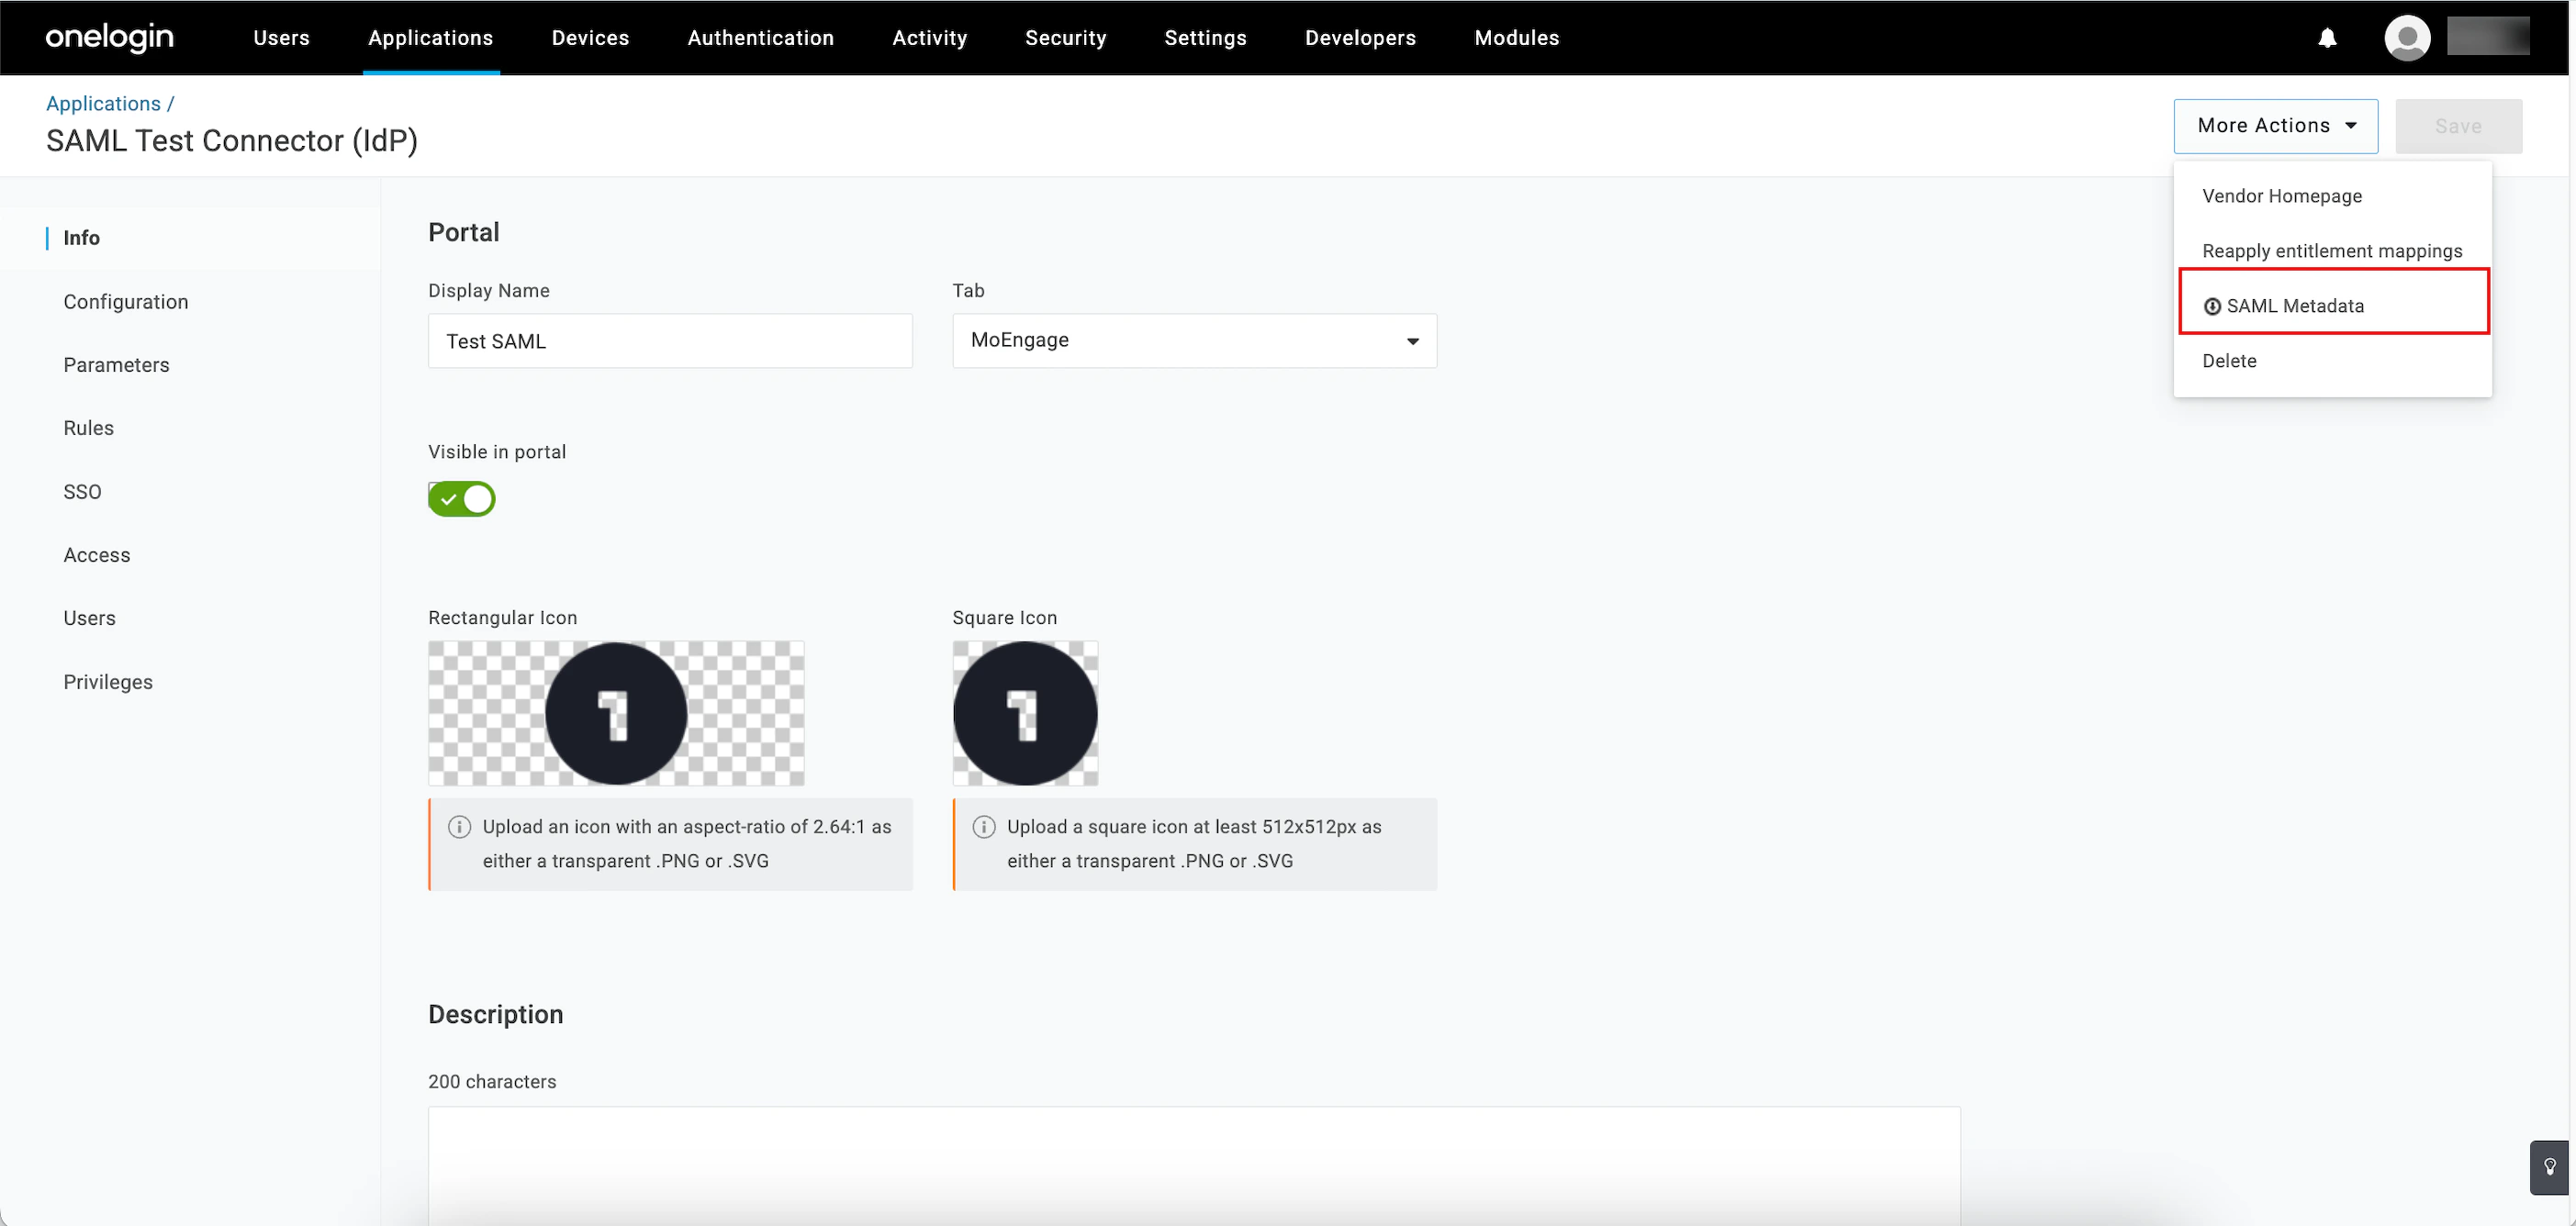
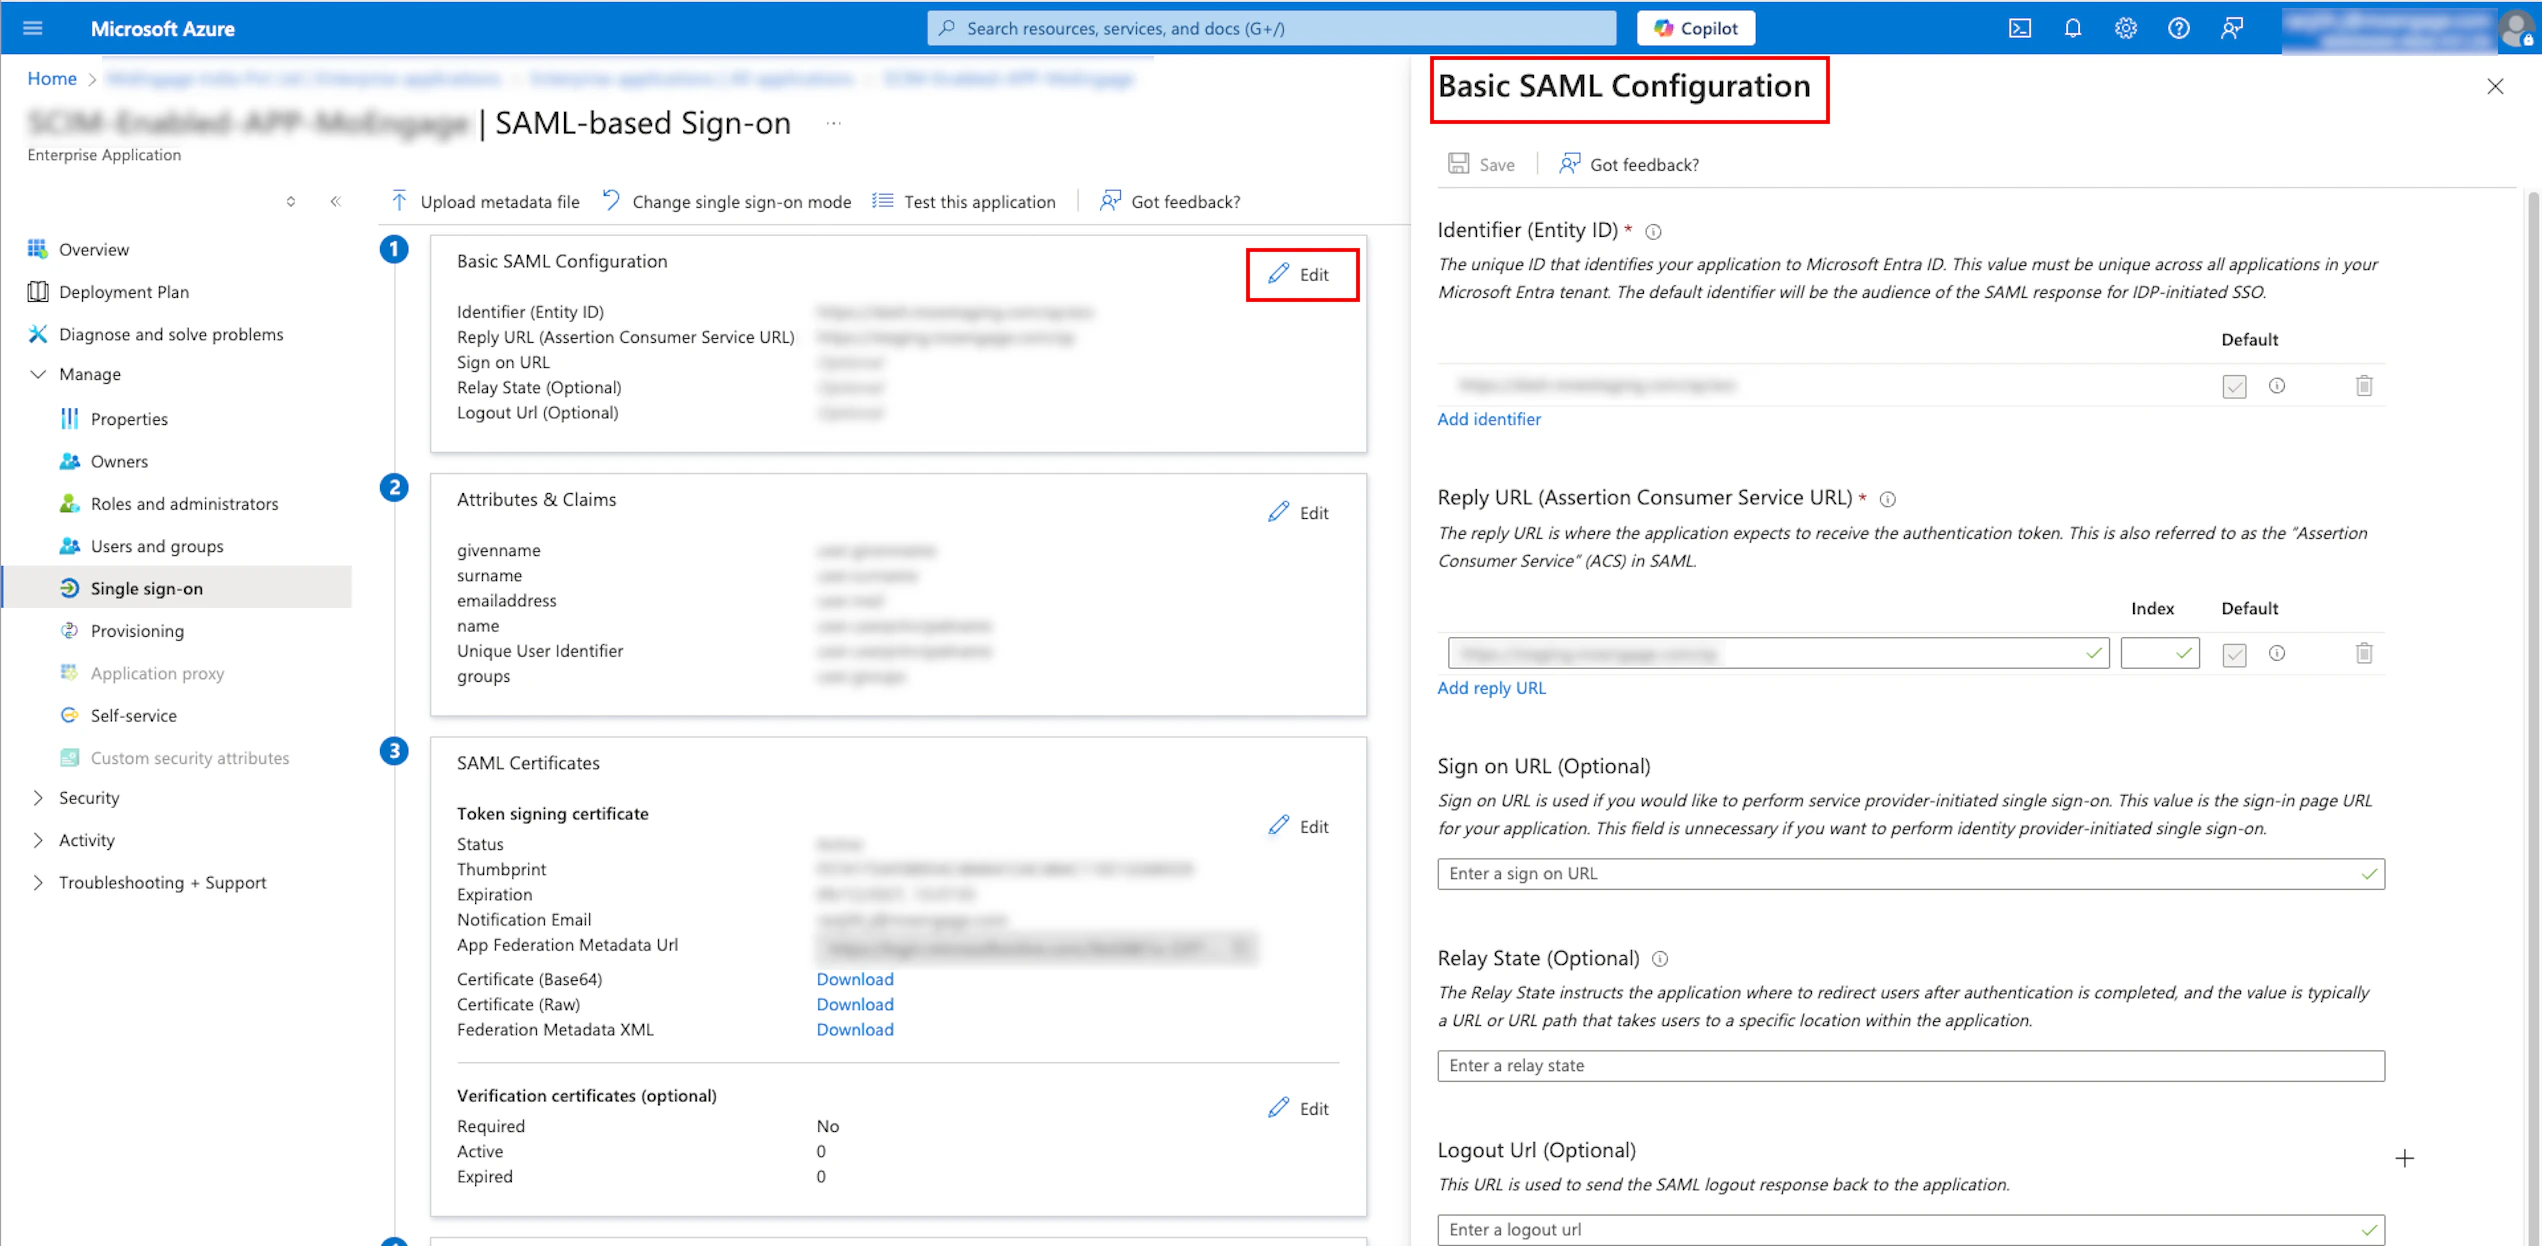
 Now, you must configure SSO for the application you created.
 The SAML-based Sign-On configuration page for your created application appears.
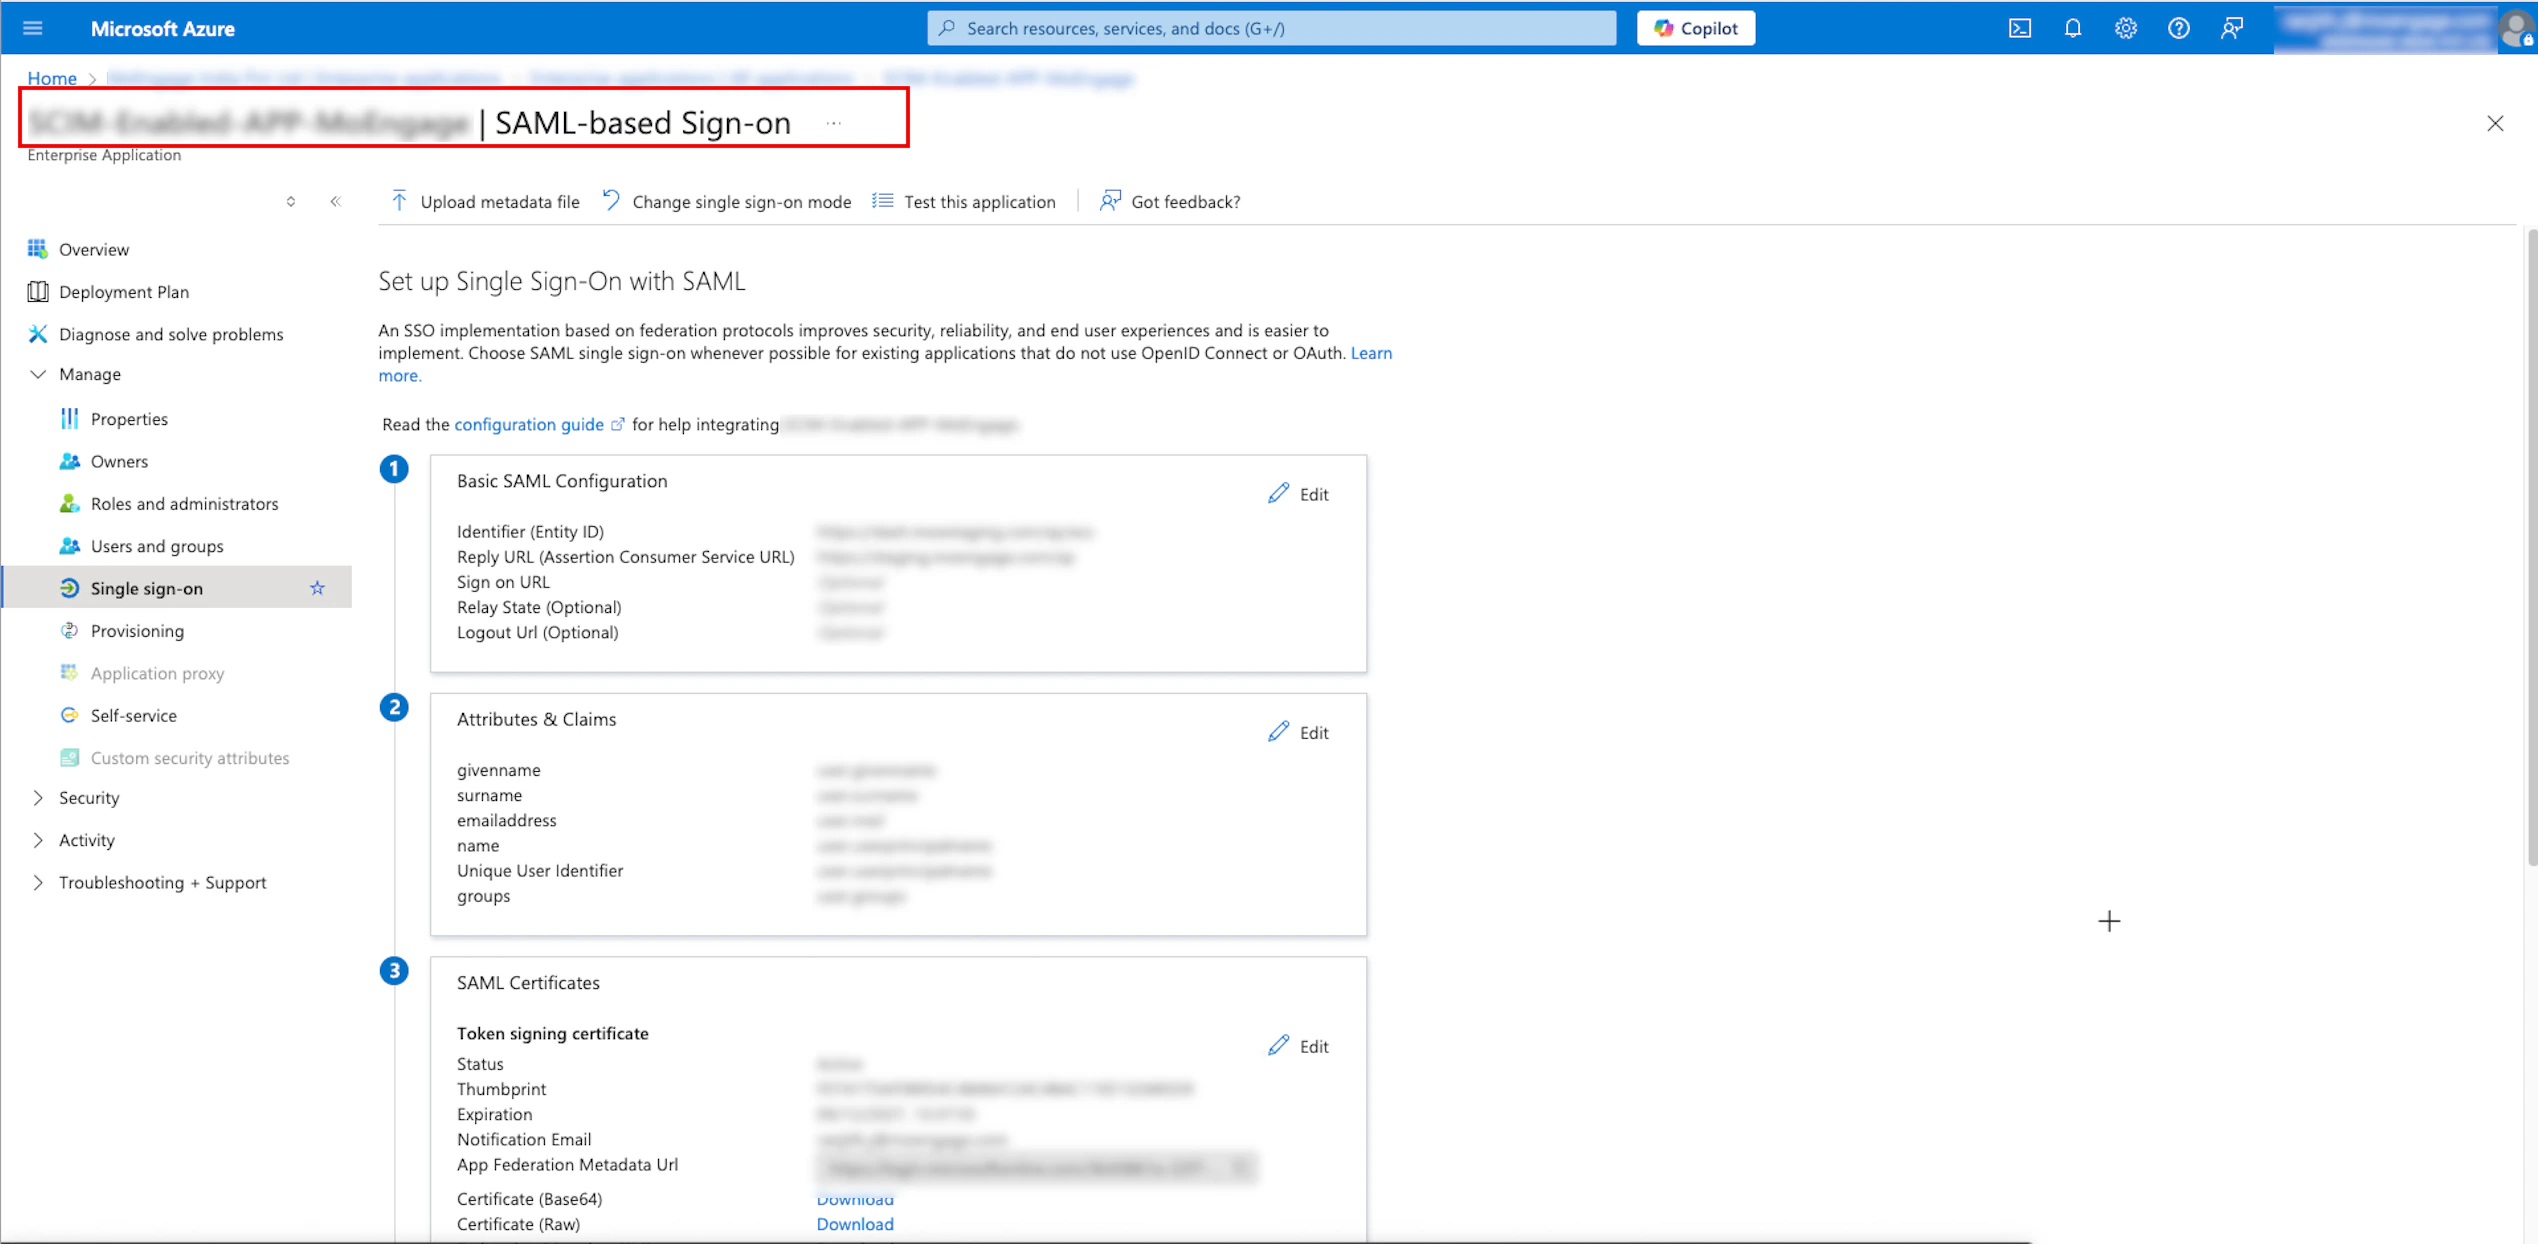

 The metadata will be downloaded in an XML file.
 The Alert pop-up window will appear, prompting you to review the instructions properly.
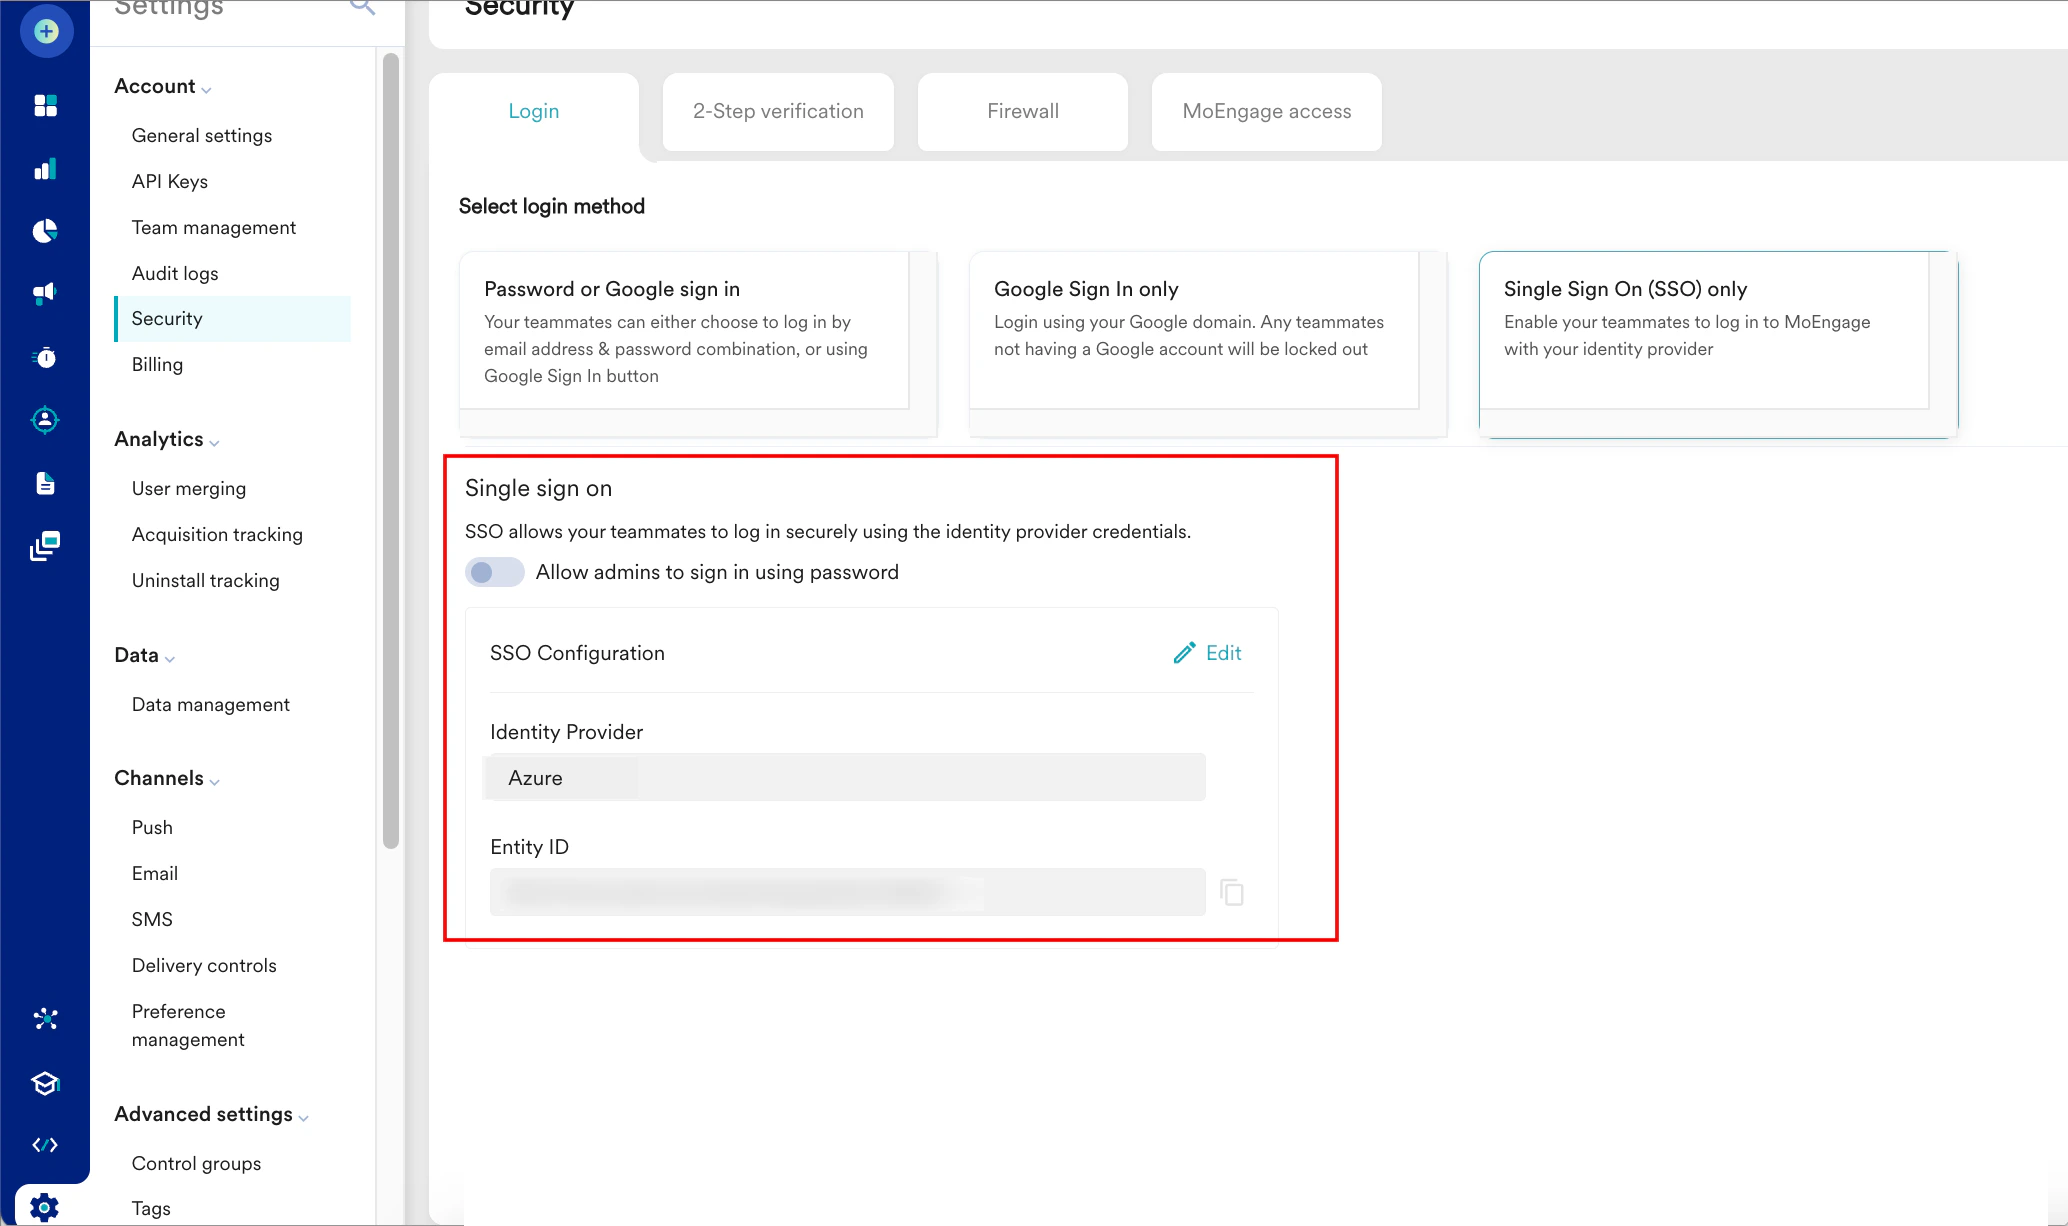
 You are taken to the first step, App details, to define your app.
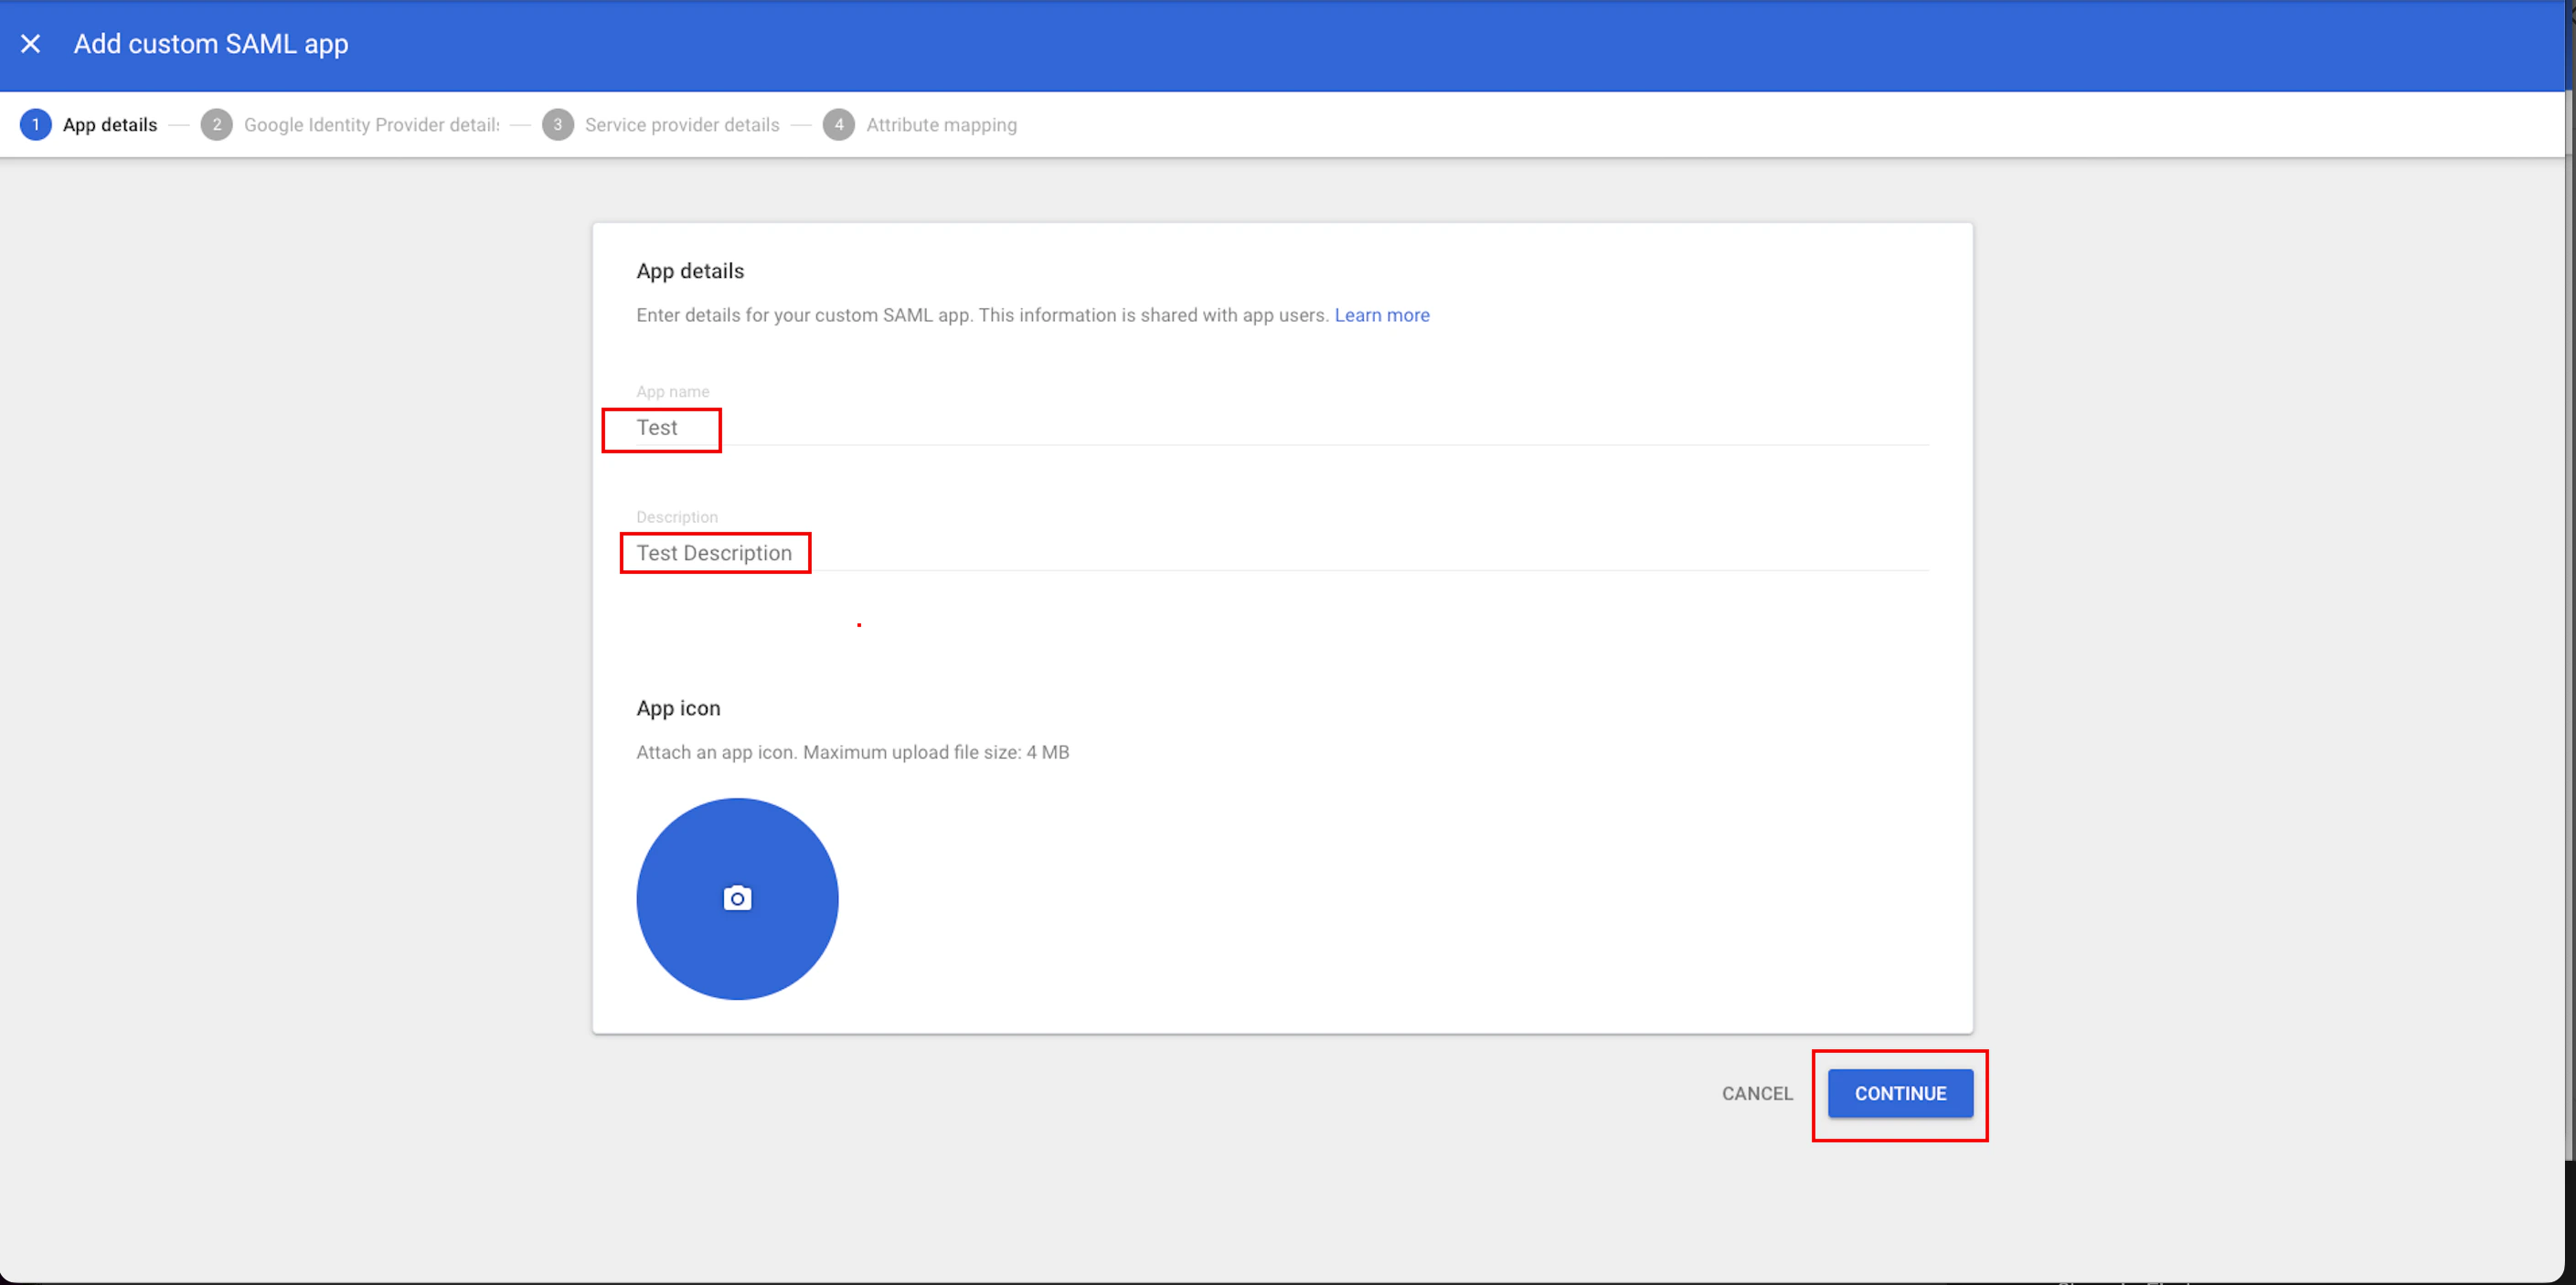
 You are taken to the third step, Service provider details.
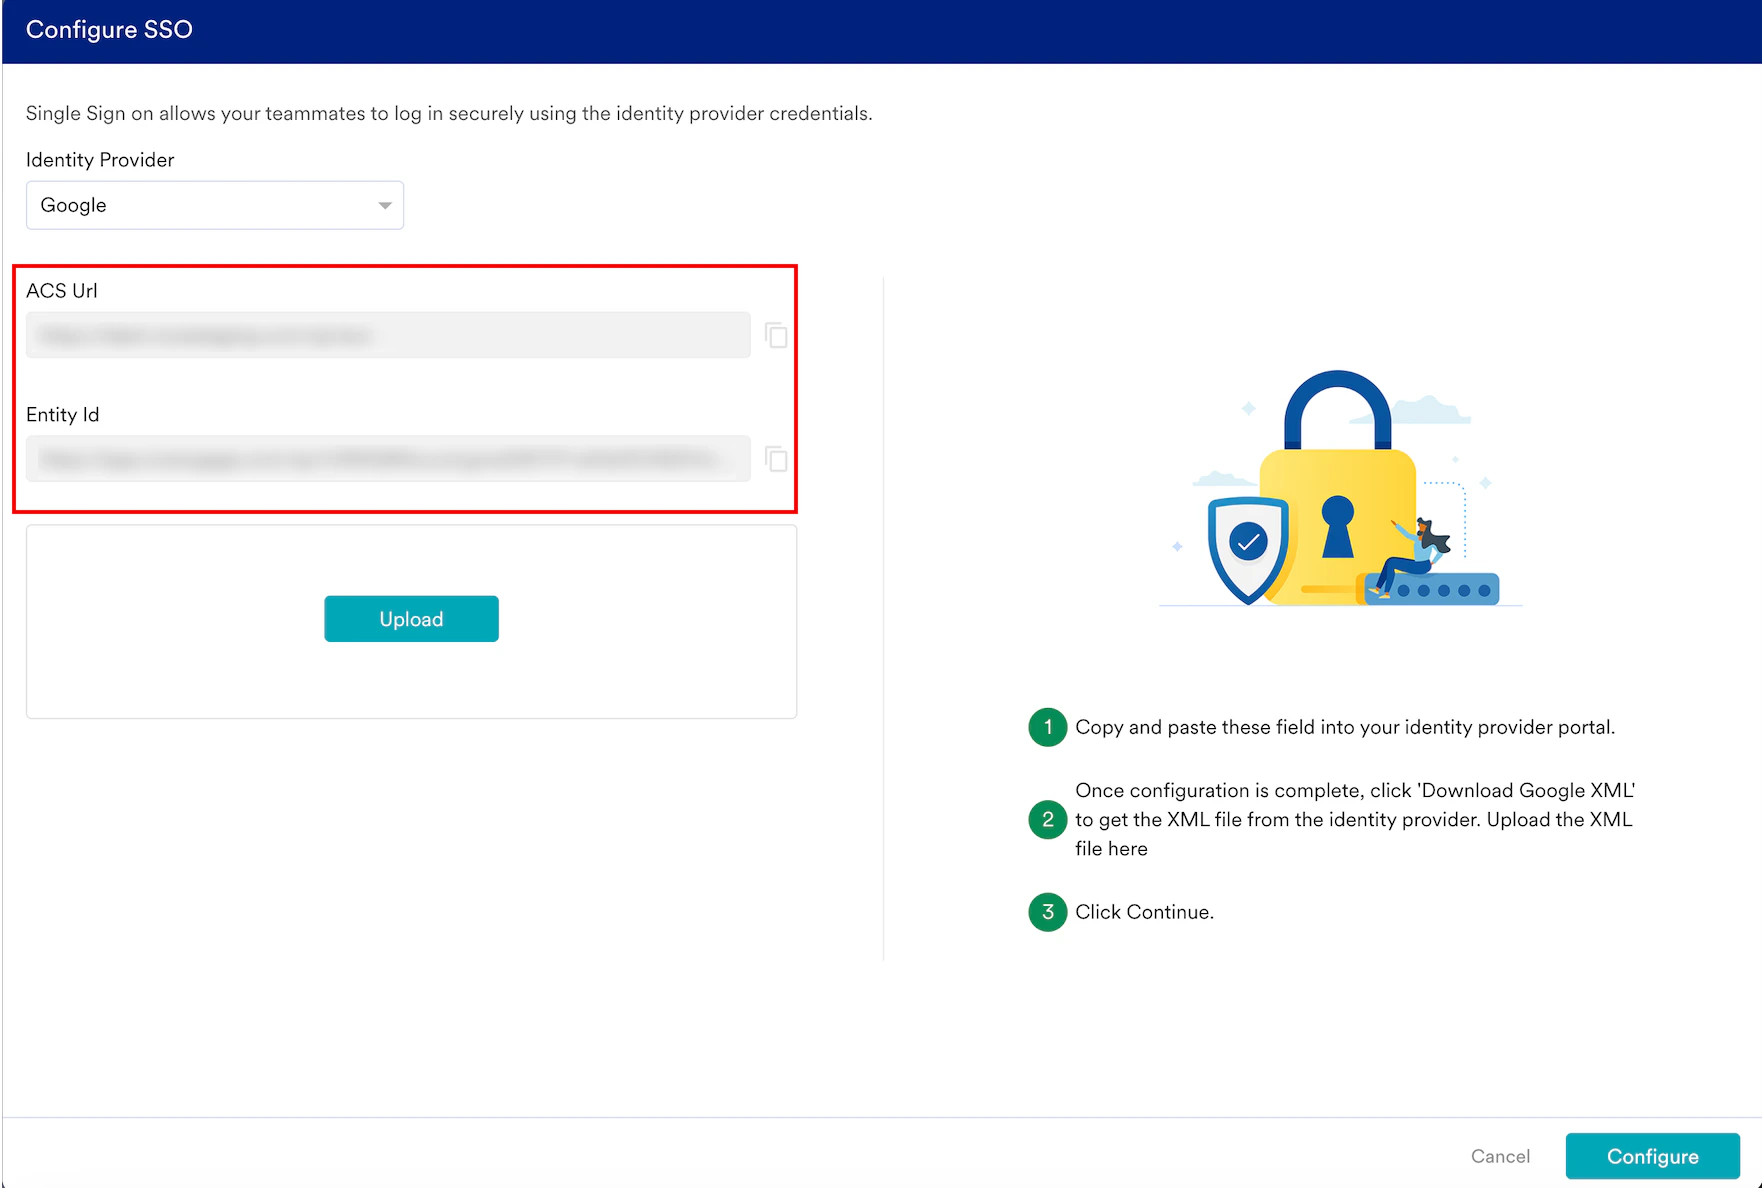
 You are taken to the fourth step, Attribute mapping. Here, you can map optional user attributes (for example, first name, last name, and email address).
 Your SAML settings are updated.
 The Alert pop-up window will appear, prompting you to review the instructions properly.
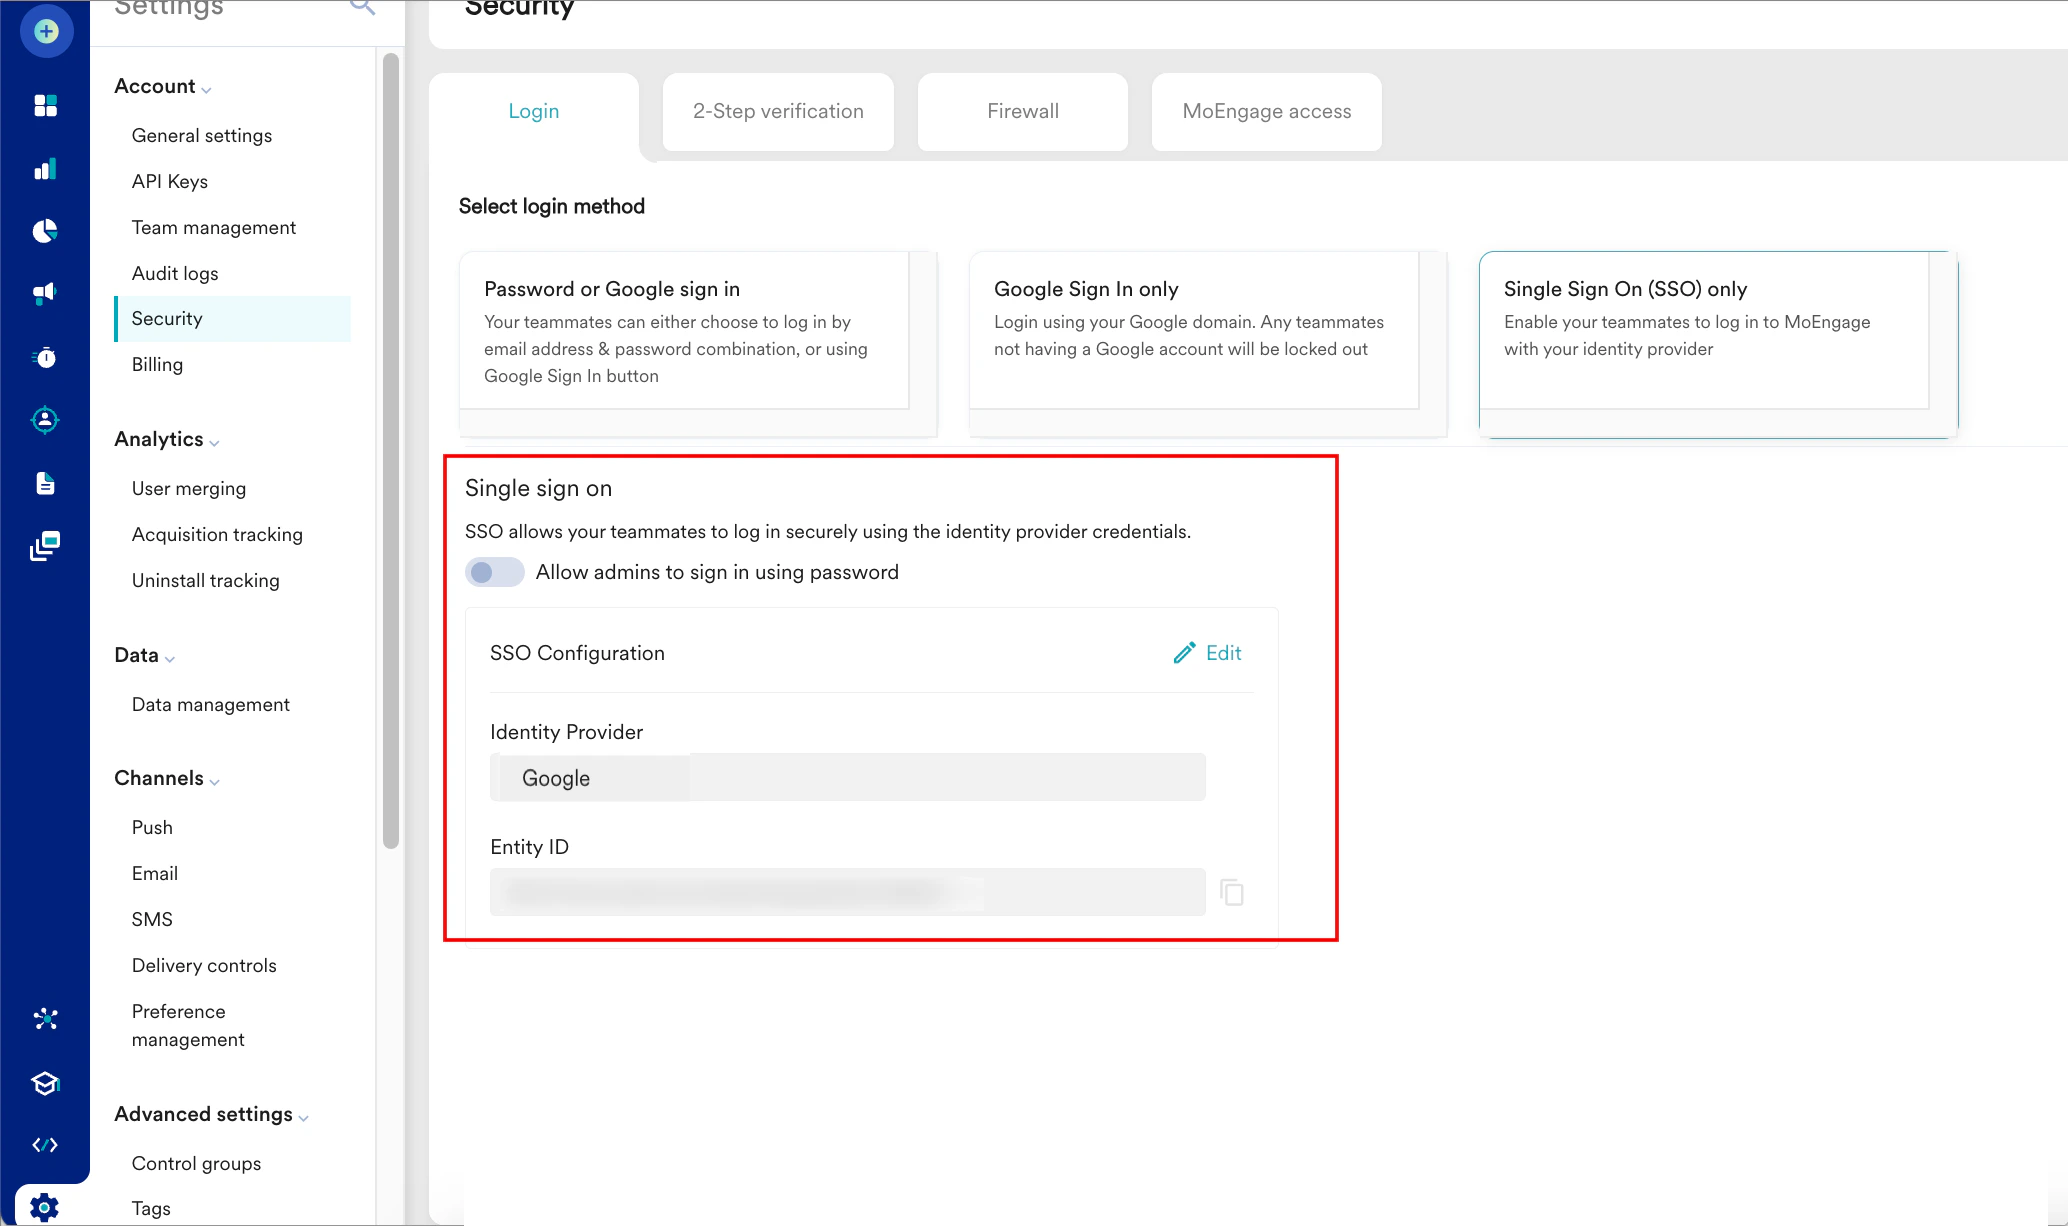
 The Alert pop-up window will appear, prompting you to review the instructions properly.
FAQs
Facing an issue while logging in?
Facing an issue while logging in?

What if the user is not able to log in via SSO?
What if the user is not able to log in via SSO?
Facing an issue while uploading the config file?
Facing an issue while uploading the config file?
Which identity providers are supported by MoEngage?
Which identity providers are supported by MoEngage?
Can different identity providers be used for different workspaces?
Can different identity providers be used for different workspaces?
Which identity provider (in case of multiple IdPs) will the user be redirected to after logging in?
Which identity provider (in case of multiple IdPs) will the user be redirected to after logging in?
Is there a test environment using which SSO implementation can be tested?
Is there a test environment using which SSO implementation can be tested?
What happens if the user exists in the identity provider’s directory but not in MoEngage?
What happens if the user exists in the identity provider’s directory but not in MoEngage?
What happens if the user exists in the identity provider’s directory but does not have access to the SSO workspace linked with MoEngage?
What happens if the user exists in the identity provider’s directory but does not have access to the SSO workspace linked with MoEngage?
Who can enable/disable SSO for a workspace on MoEngage?
Who can enable/disable SSO for a workspace on MoEngage?
What happens if the SSO is not enabled for one of the workspaces or if different identity providers have been used for different workspaces?
What happens if the SSO is not enabled for one of the workspaces or if different identity providers have been used for different workspaces?
What happens if the user wants to seamlessly switch between different workspaces after enabling SSO?
What happens if the user wants to seamlessly switch between different workspaces after enabling SSO?
Can we configure SSO to allow a specific set of users to log in using SSO and others to log in with ID and Password?
Can we configure SSO to allow a specific set of users to log in using SSO and others to log in with ID and Password?
When using Microsoft Azure, what should be the value of the User Principal Name (UPN) attribute?
When using Microsoft Azure, what should be the value of the User Principal Name (UPN) attribute?
What are some of the common issues faced by the users?
What are some of the common issues faced by the users?
Does two-factor authentication remain enabled even after enabling SSO authentication?
Does two-factor authentication remain enabled even after enabling SSO authentication?
Contact Support
Contact Support