

- Target users
- Content
- Schedule and Goals
A Connector campaign calls an API rather than delivering a message, so it has no Personalized preview. To confirm your personalization resolves correctly, deliver a test campaign and check the payload the endpoint receives.
Create Connector Campaigns with Recommendations
To create a Connector campaign with recommendations, perform the following steps:-
On the sidebar menu in MoEngage, hover over the Engage menu item

- Click + New Campaign.
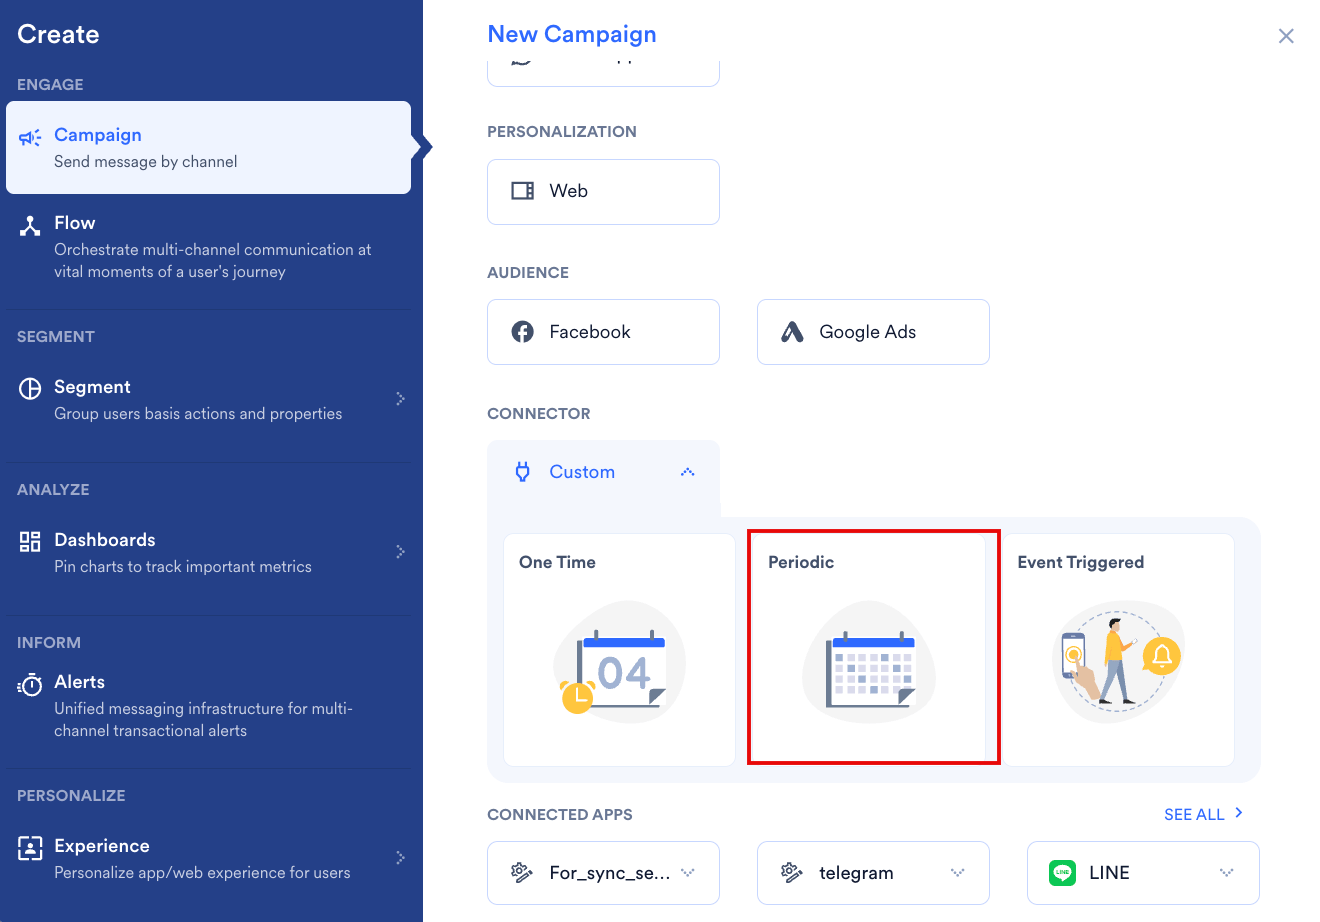
- On the New Campaign dialog box, under CONNECTOR, click Custom.
-
Click Periodic campaign. You can also select One Time. For more information about delivery types, refer to Delivery Types.
- Enter the basic campaign details, define the audience in step 1 ‘Target users’, and click Next.
-
In step 2, on the Content tab, configure the request:
- Select the Method, such as POST.
- In the Webhook URL box, enter the endpoint to call.
- Add any URL Parameters and Headers as key-value pairs.
- Turn on Enable authorization settings if your endpoint requires credentials.
- Select the Body type — Form, JSON, or Raw.
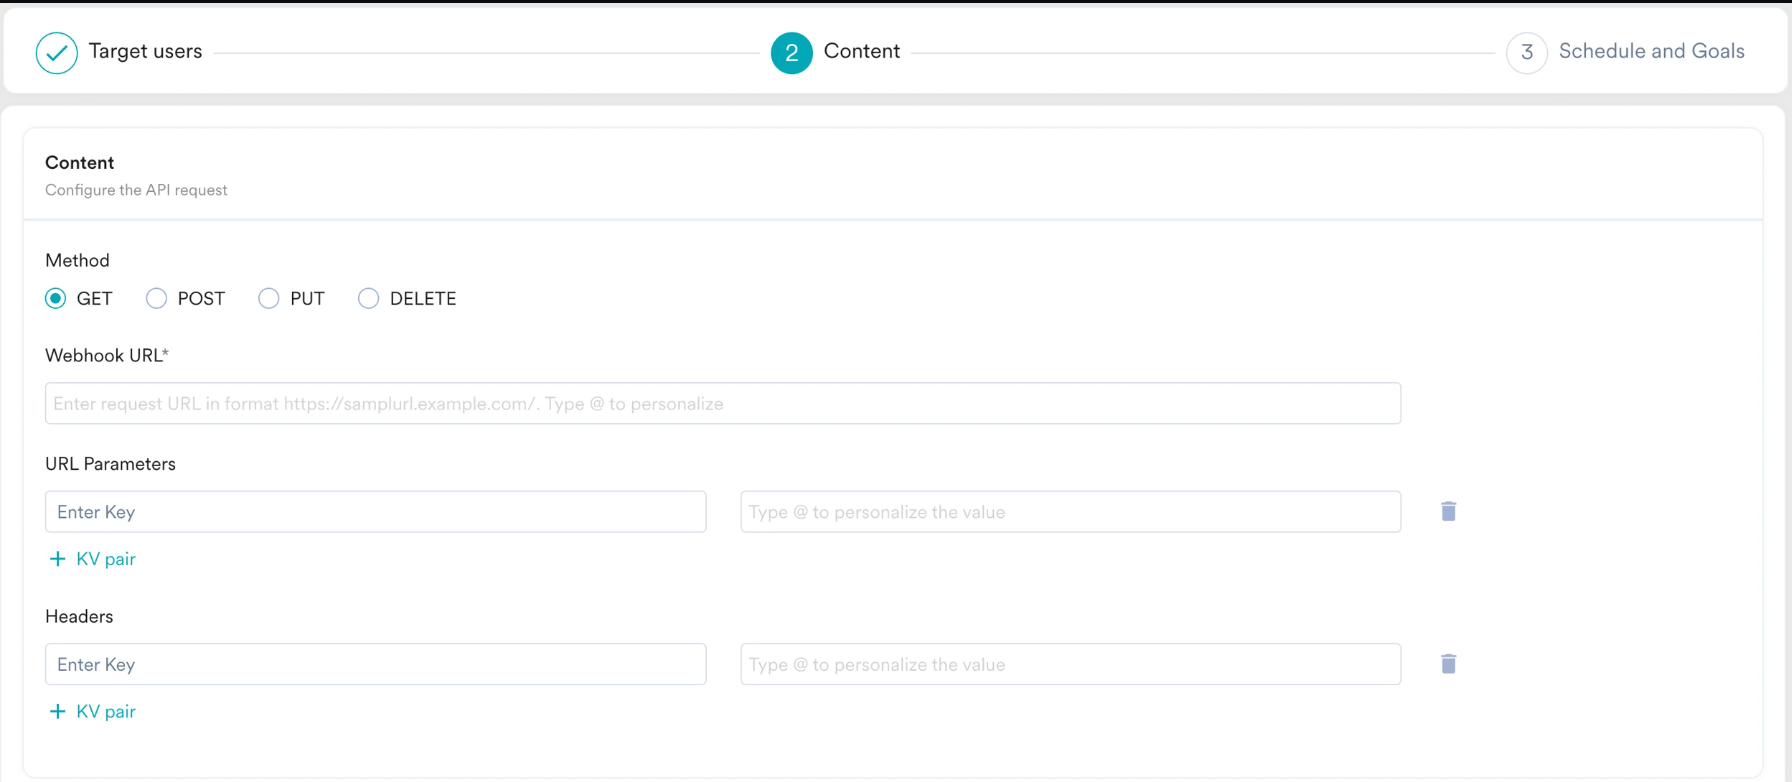
- Type @ where you want the recommendation to appear. The Connector Personalization window opens. You can personalize the Webhook URL, the values under URL Parameters and Headers, and the request body.
- On the Data personalization tab, search for your recommendation and click it under Product sets.
-
Under Choose Fallback, select what happens when personalization fails for a user:
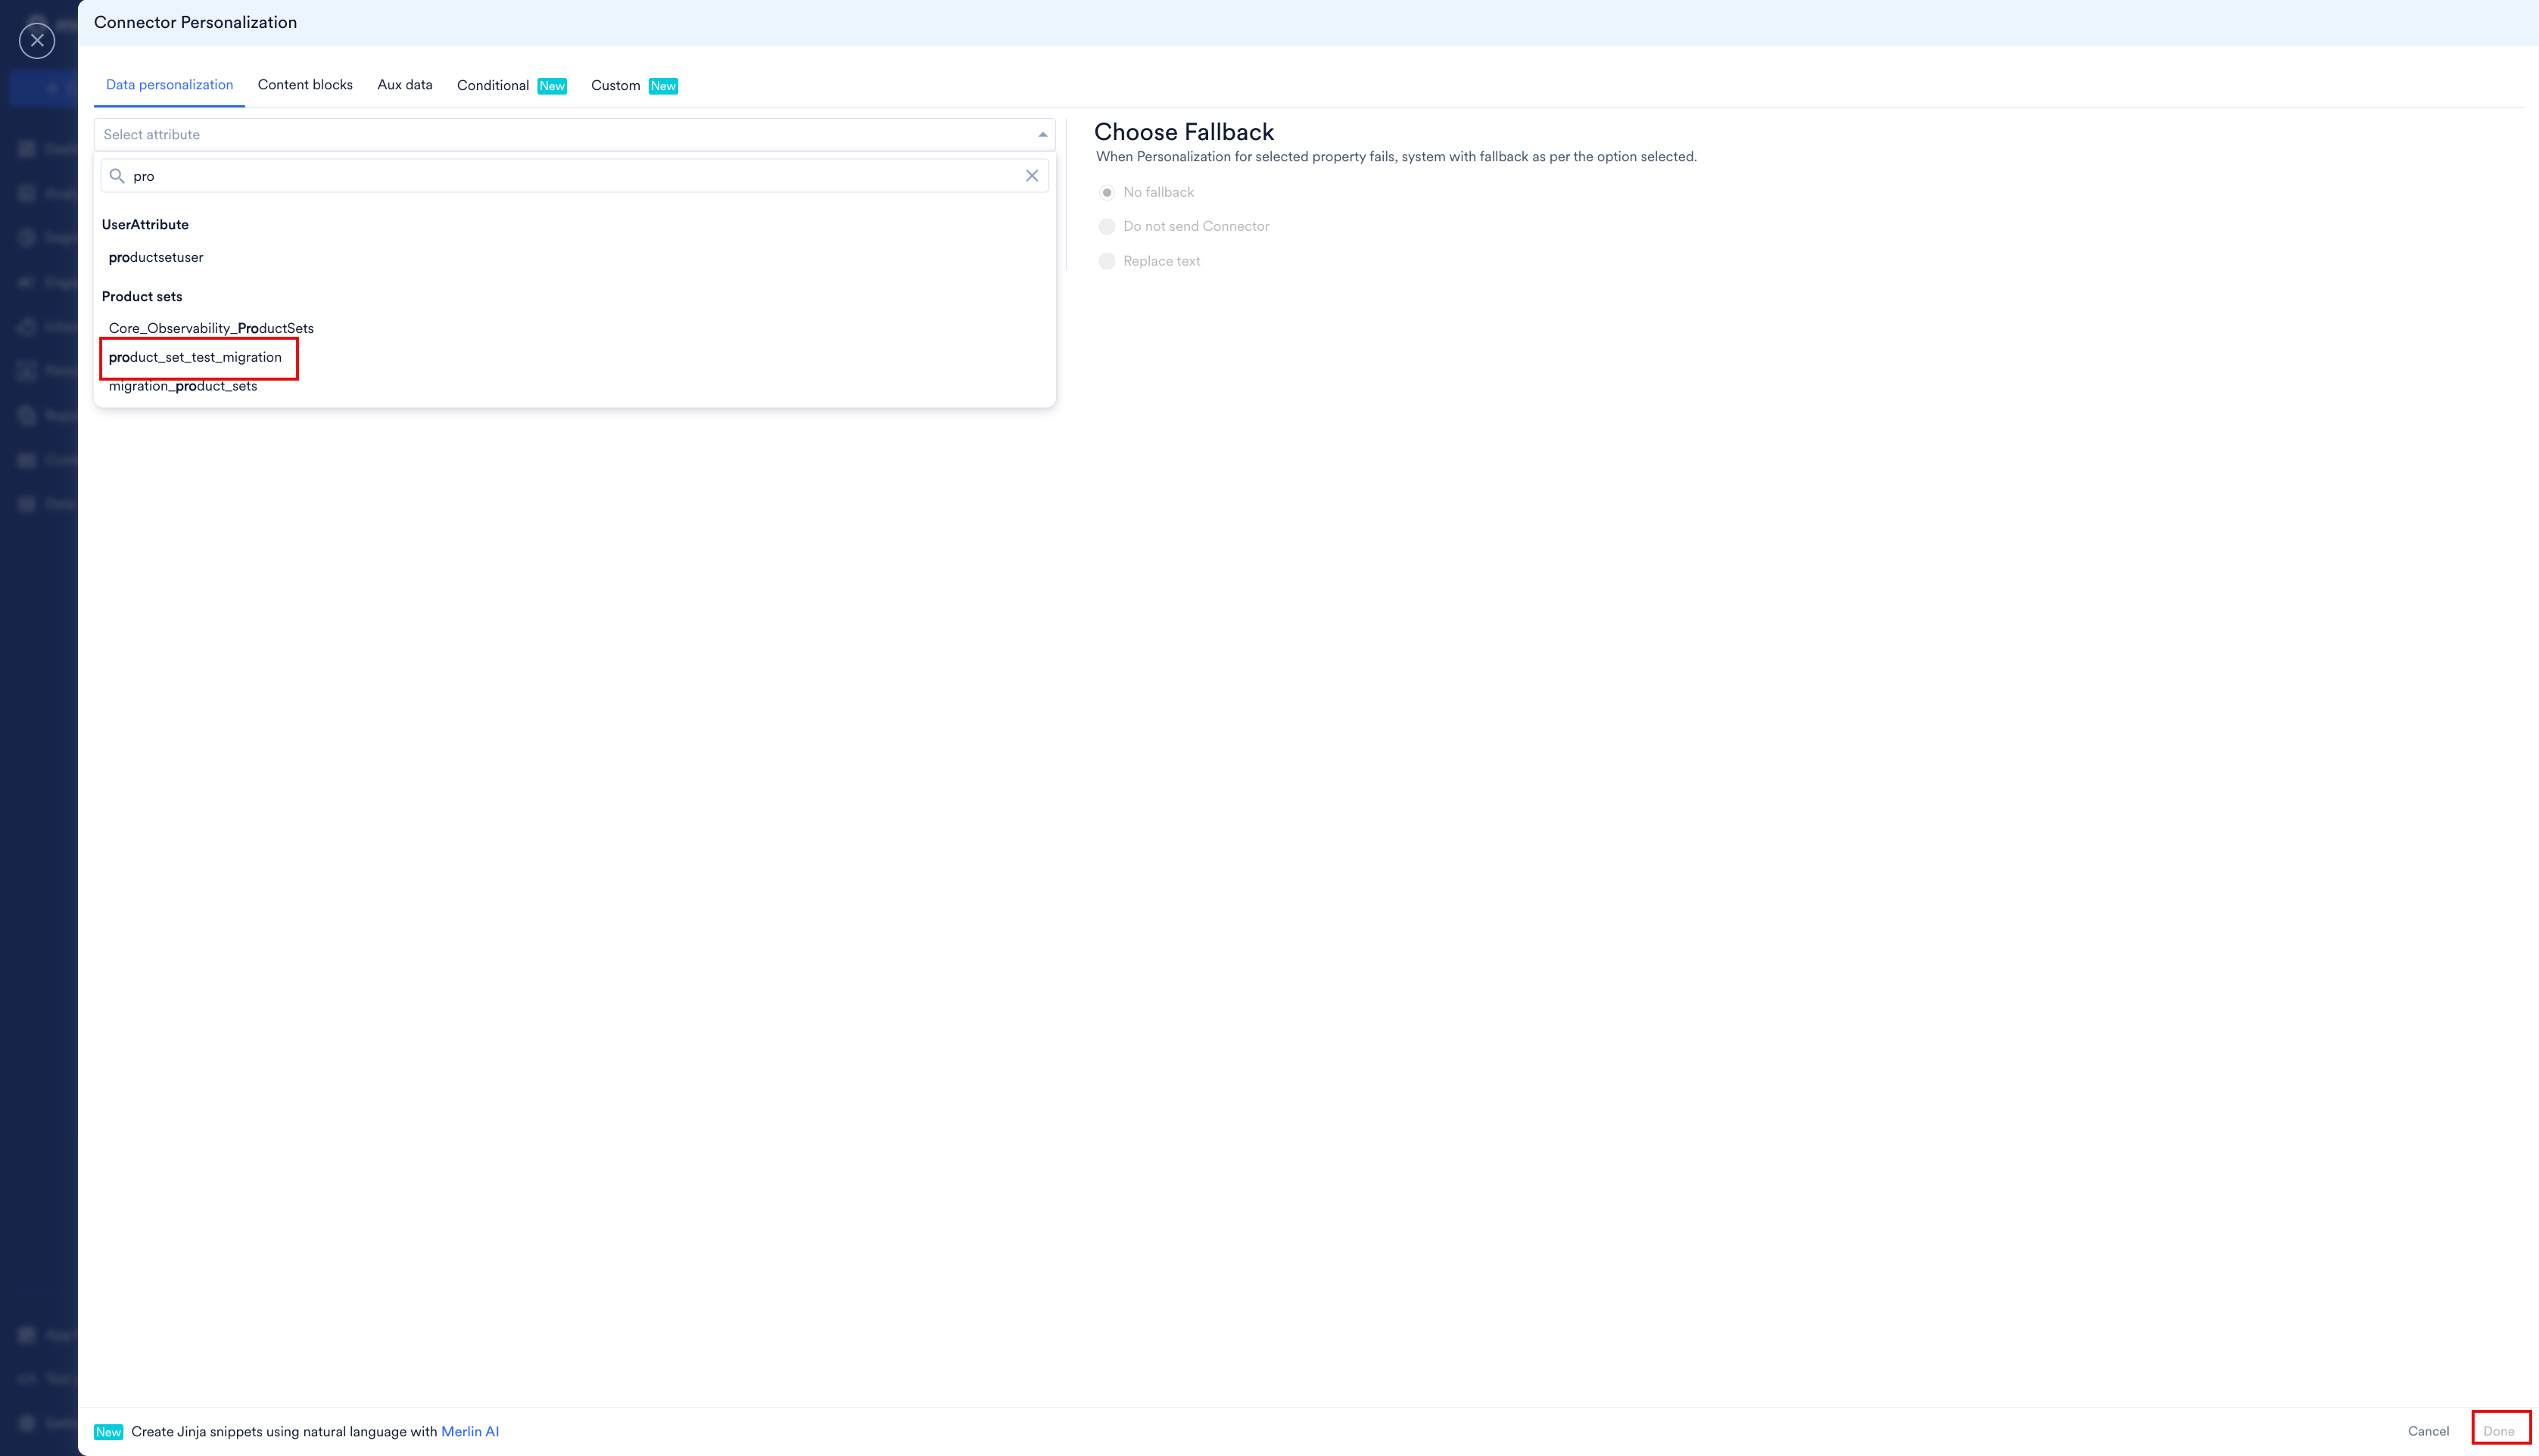
- Click Done.
- Modify the inserted Jinja code to fetch the items you need, as described in the following section.
- Deliver a test campaign and check the payload received at your endpoint.
- Click Next at the bottom to move to ‘Schedule and Goals’, which is step 3 of campaign setup.
- Set up the appropriate settings in Schedule and Goals and publish the campaign.
Fetch a Single Recommended Item
Adding a product set on its own inserts every item in the set. To send one product instead, loop through the product set. The following example uses a product set namedProductSet with a recommendation named Recommendations.
To fetch the title of the first recommended item:
MOE_NOT_SEND stops the request from going out when the product set is empty for a user, so your endpoint does not receive a payload with a missing product.
A product set contains a list of items, each with attributes such as name, title, id, and image link. To fetch an attribute inside the loop, type @ and select the property from the personalization window.