

- Target users
- Content
- Schedule and Goals
Create In-App Campaigns with Recommendations
To create an in-app campaign with recommendations, perform the following steps:-
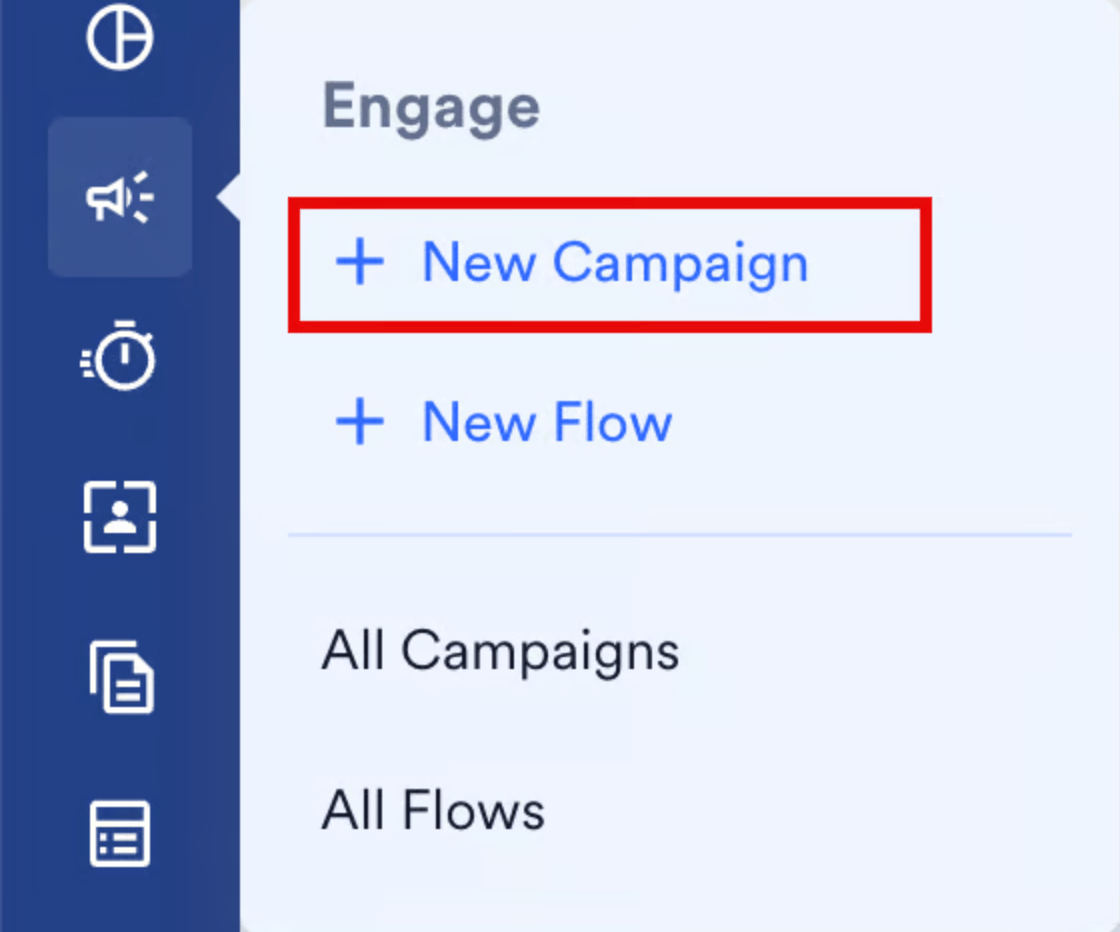
On the sidebar menu in MoEngage, hover over the Engage menu item

-
Click + New Campaign.
-
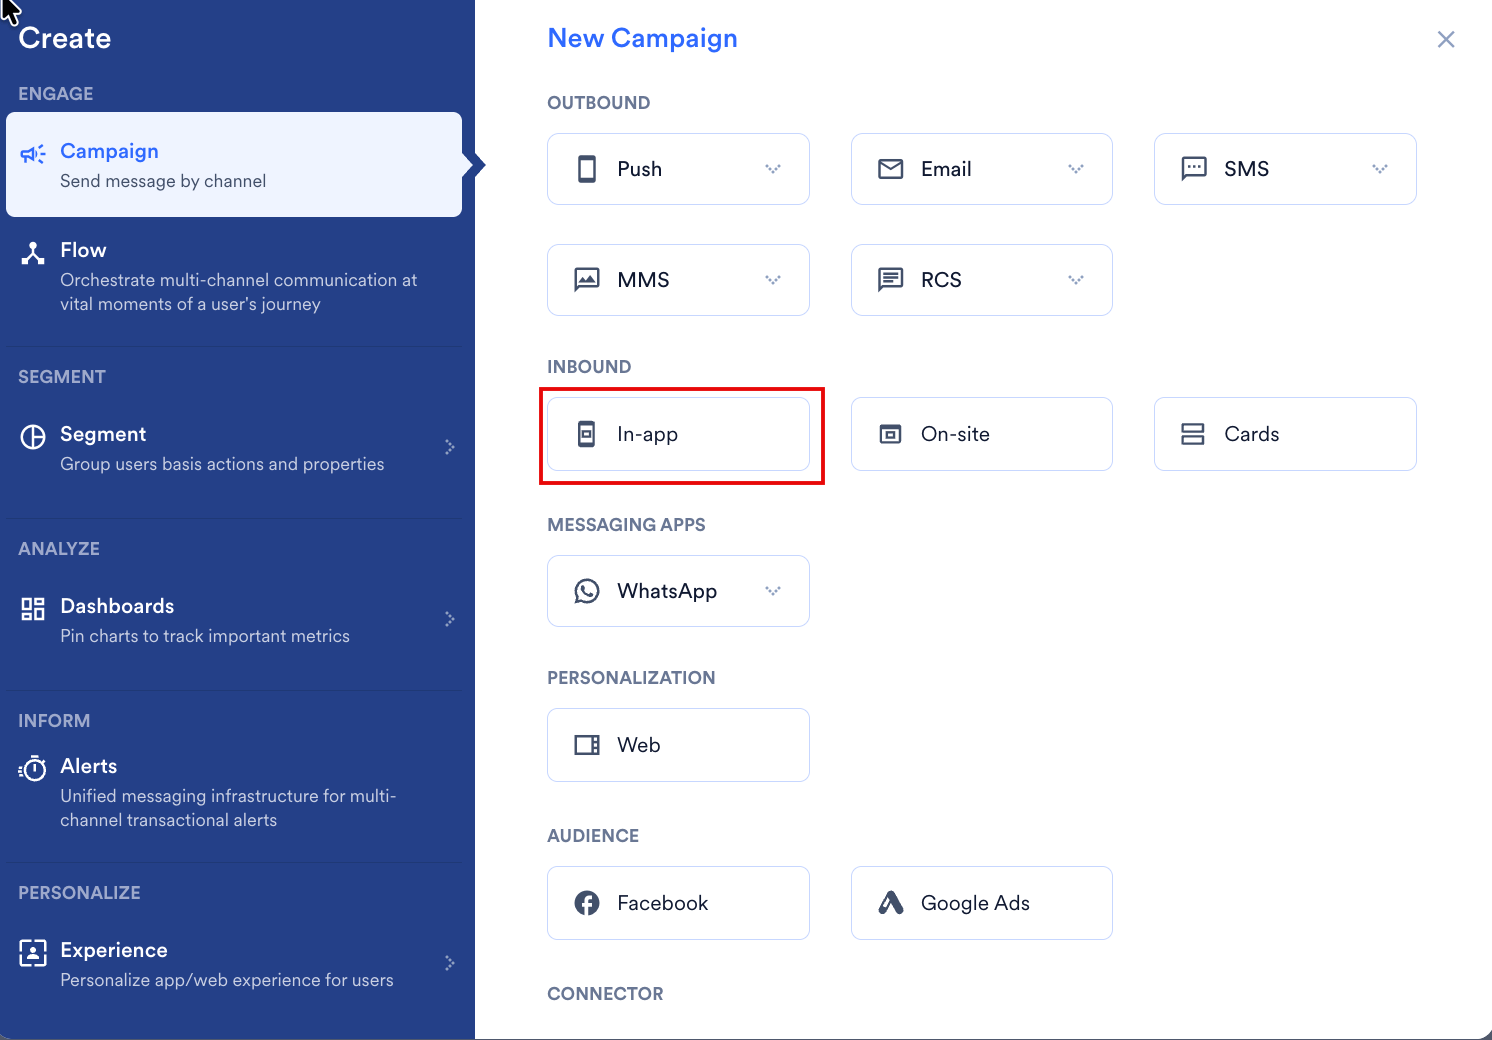
On the New Campaign dialog box, under INBOUND, click In-app.
- Enter the basic campaign details, define the audience in step 1 ‘Target users’, and click Next.
-
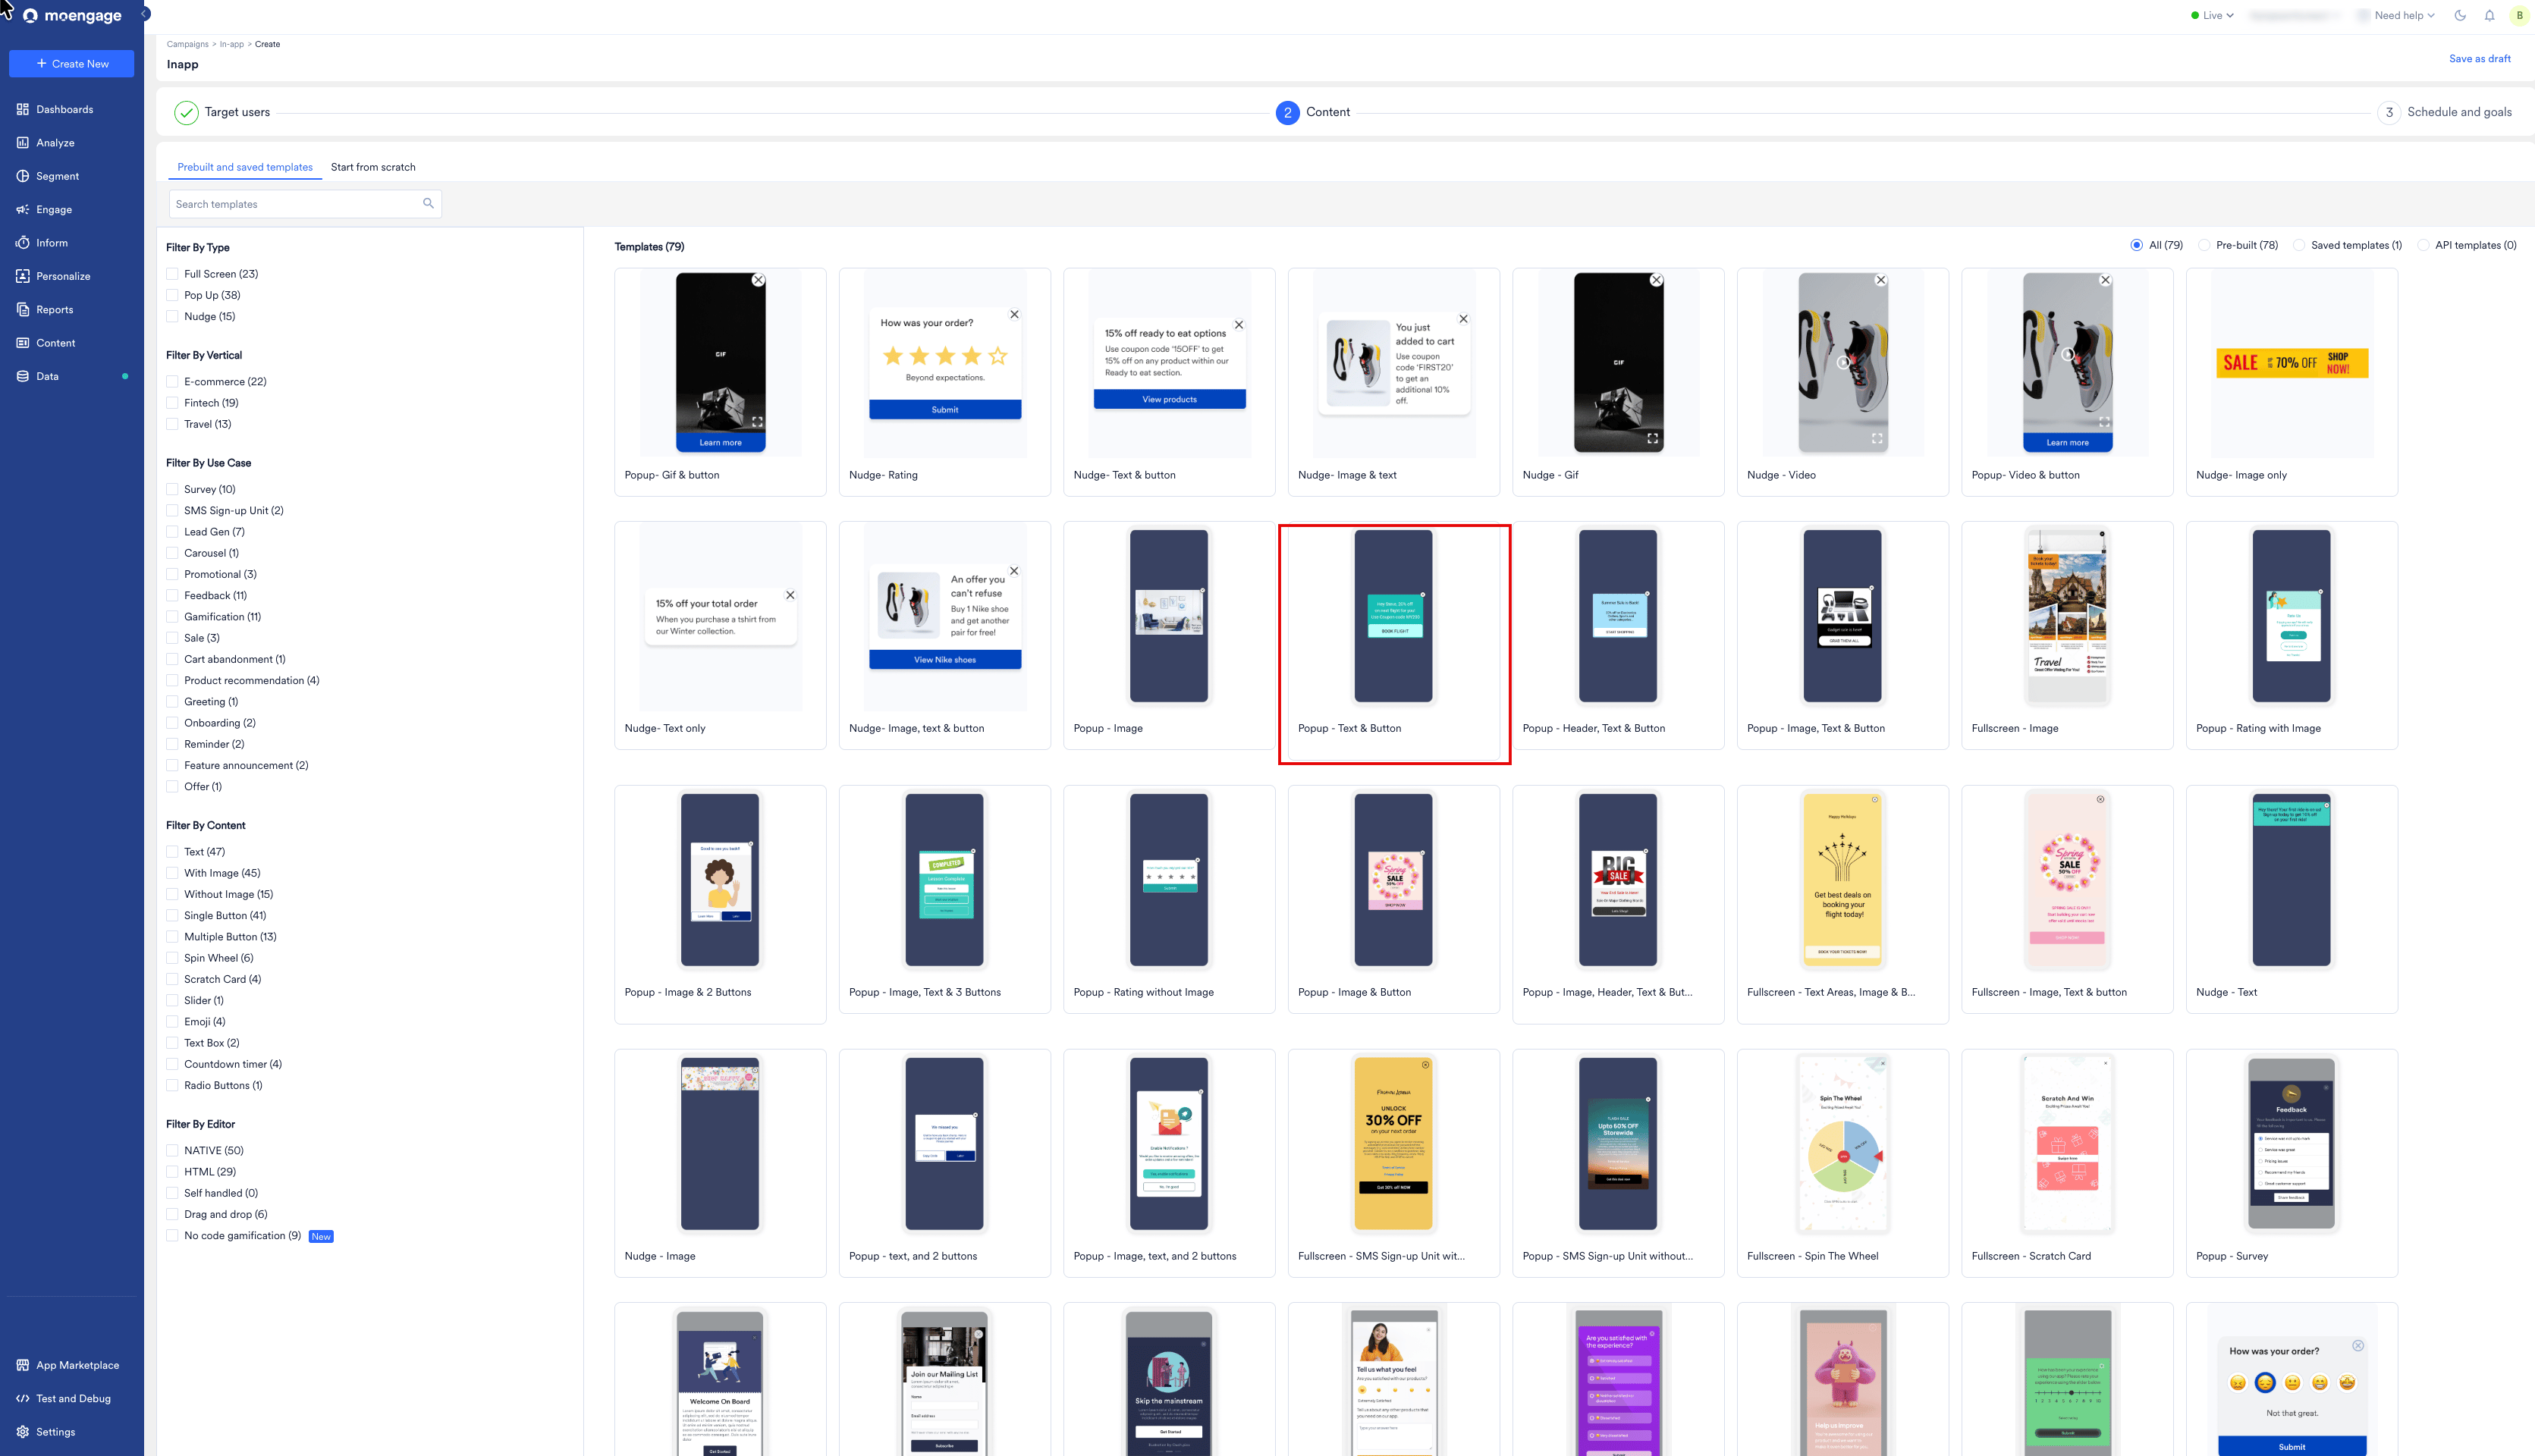
In step 2, on the Content tab, select a template under Prebuilt and saved templates, or click Start from scratch. To narrow the list, use the filters on the left, such as Product recommendation under Filter By Use Case.
-
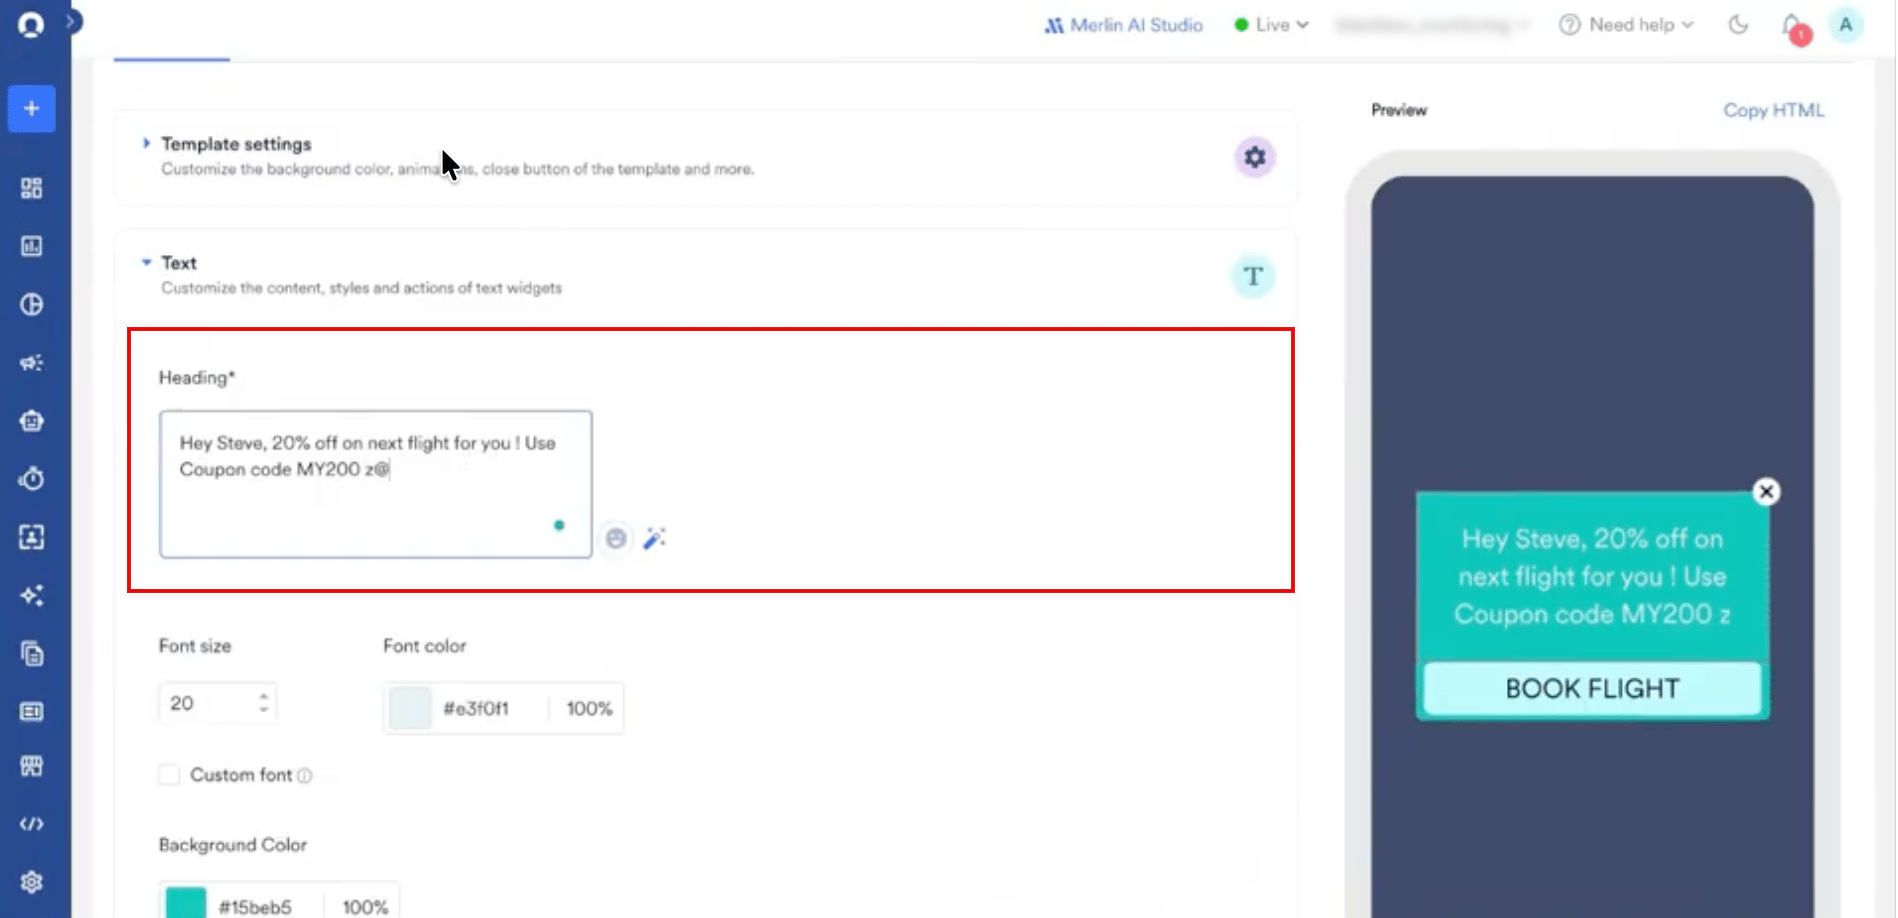
In the Text section of the template editor, click the field you want to personalize, such as Heading, and type @ where the recommendation should appear. The In-App Personalization window opens.
- On the Data personalization tab, search for your recommendation and click it under Product sets.
-
Under Choose Fallback, select what happens when personalization fails for a user:
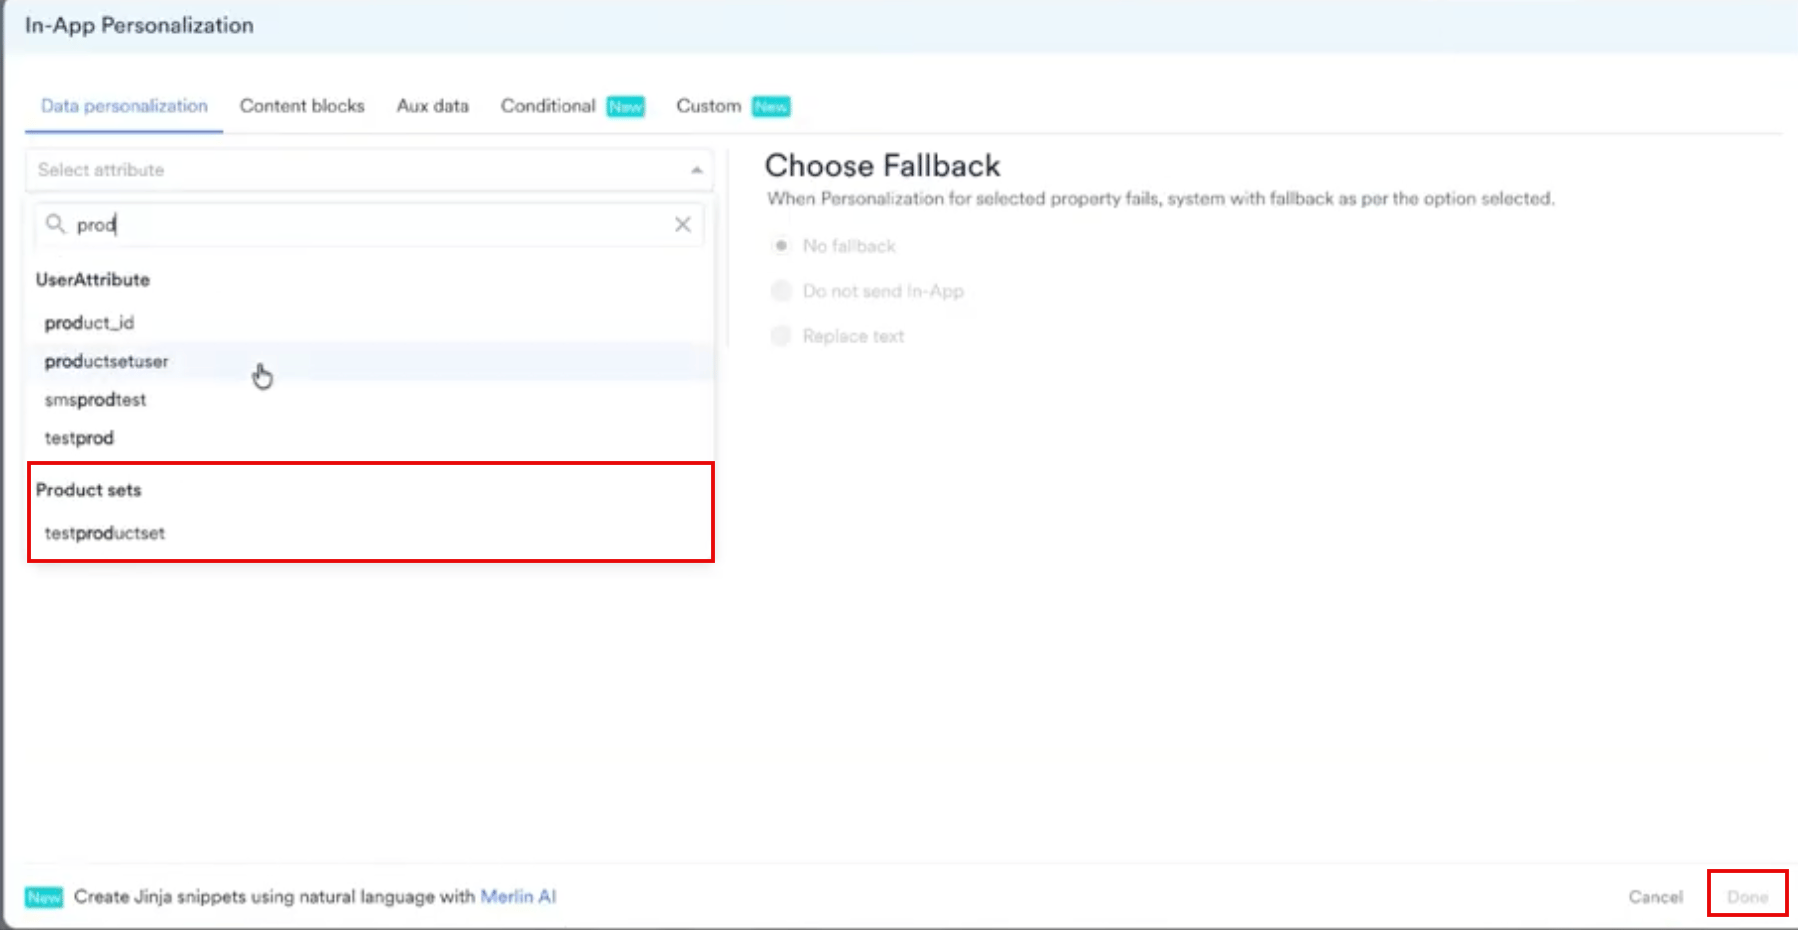
- Click Done.
- Modify the inserted Jinja code to fetch a single item, as described in the following section.
- Click Next at the bottom to move to ‘Schedule and Goals’, which is step 3 of campaign setup.
- Set up the appropriate settings in Schedule and Goals and publish the campaign.
Fetch a Single Recommended Item
Adding a product set on its own inserts every item in the set. To show one product instead, loop through the product set. The following example uses a product set namedProductSet with a recommendation named Recommendations.
To fetch the title of the first recommended item:
MOE_NOT_SEND stops the message from going out when the product set is empty for a user, so no one receives a message with a missing product. To use a different fallback, replace MOE_NOT_SEND with the text you want to show, or leave it empty to show nothing.
A product set contains a list of items, each with attributes such as title, description, id, link, and image link. The attributes available to you come from the catalog that the recommendation uses, so open that catalog to see which ones exist. To fetch an attribute inside the loop, type @ and select the property from the personalization window.
The Jinja code you build for an in-app campaign works unchanged in Cards and On-Site Messaging, because these channels read product sets the same way.
Add UTM Parameters
Add UTM parameters so that traffic from the recommendation is attributed to the campaign that drove it. A parameter value can be personalized in the same way as message content, so one campaign can report per variation or per segment.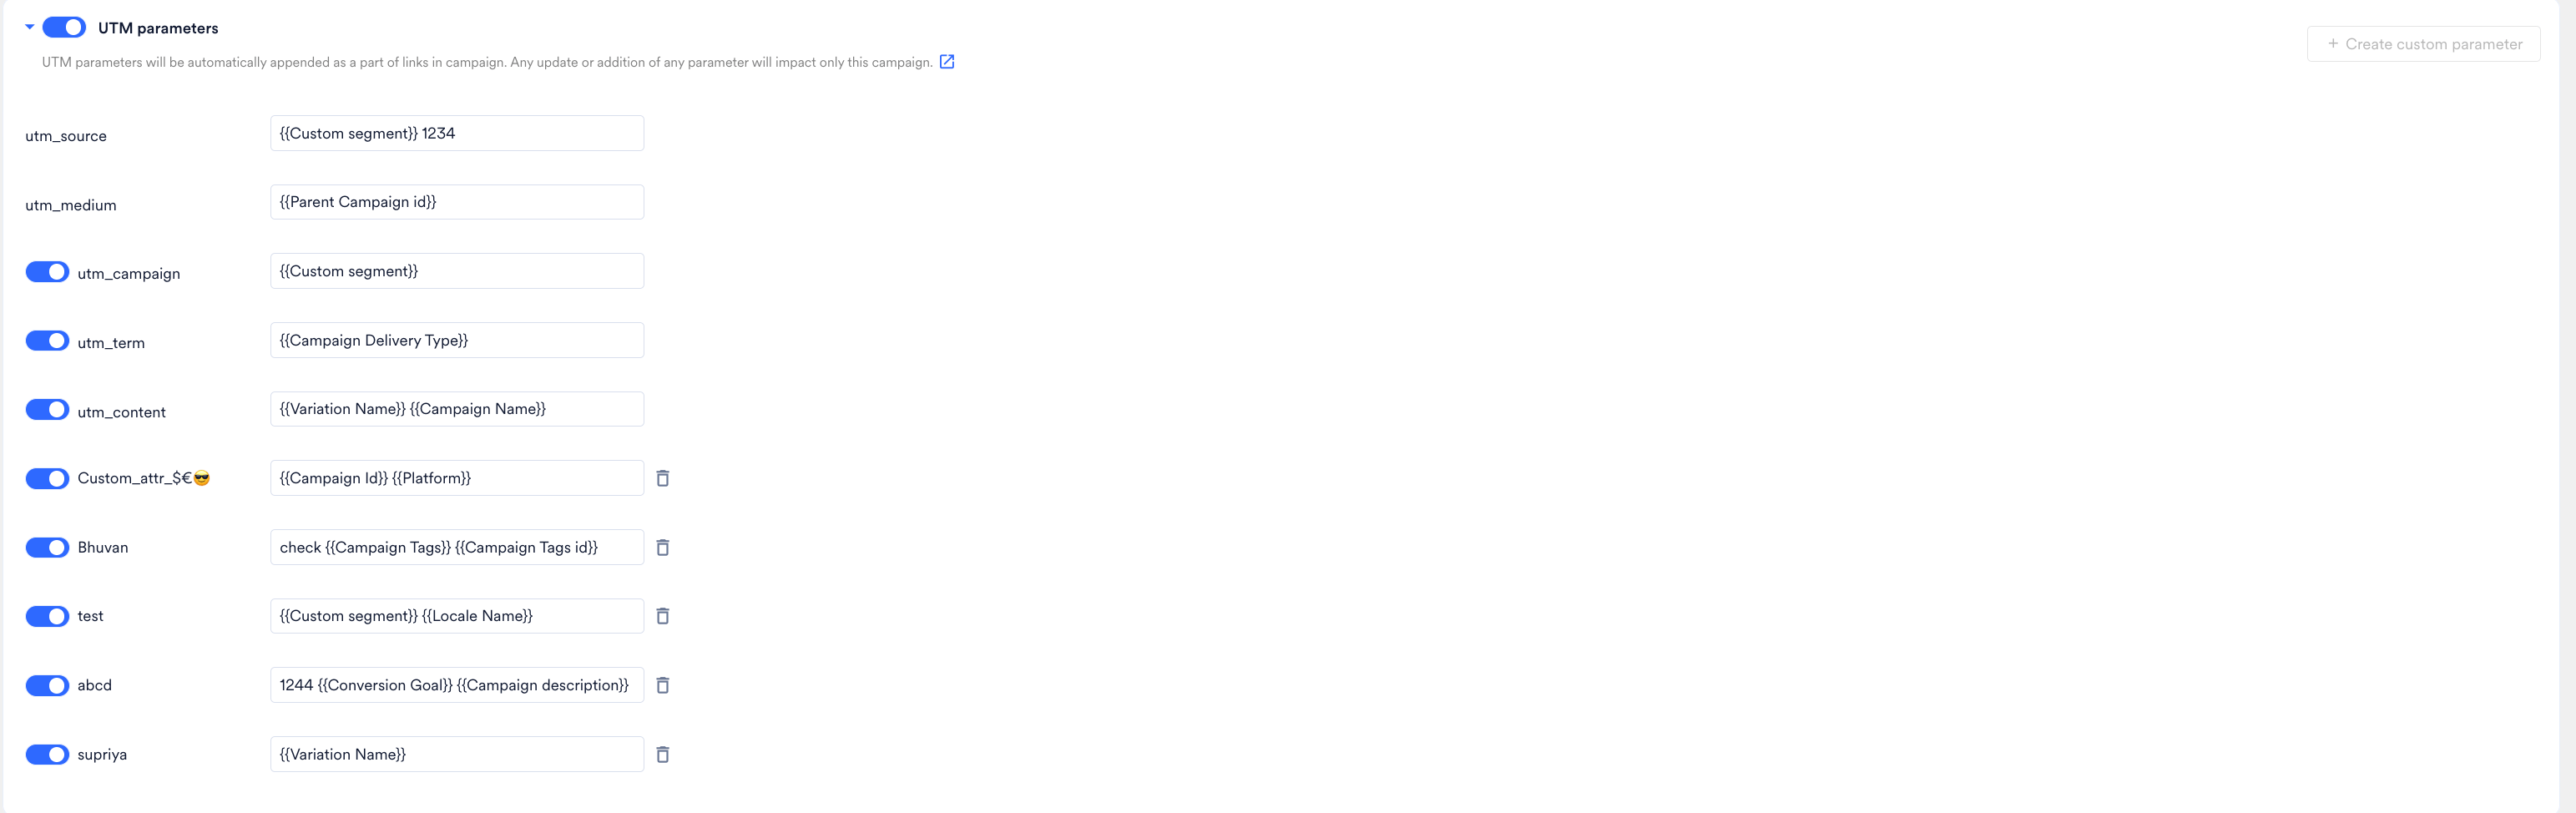
Preview the In-App Message
Use Preview in-app to see the message on your own device before you publish.
The preview shows the message itself. To test the campaign trigger conditions, publish the campaign for a test user.